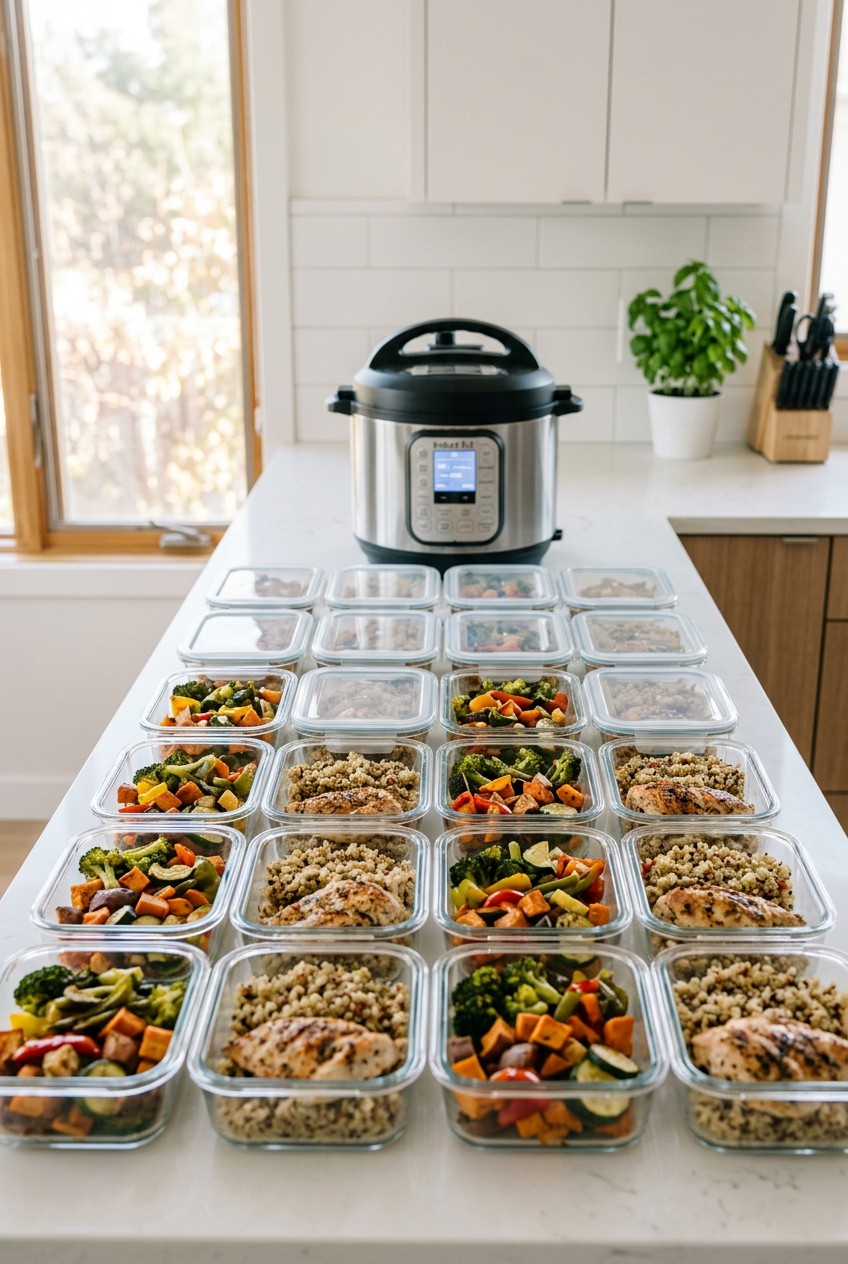
What’s Inside
- Master the 1-Cup Liquid Rule (and Exceptions)
- Prevent Burn Errors with Proper Deglazing
- Utilize Pot-in-Pot Cooking for Simultaneous Dishes
- Batch Cook Grains with Precision for Instant Pot Meal Prep
- Prep Freezer Dump Meals for Busy Weeks
- Avoid Overfilling to Ensure Safety and Proper Cooking
- Strategic Release Methods Natural vs Quick
- Pre-Cook Proteins for Quick Assembly
- Optimize Hard-Boiled Eggs with the Method
- Clean Your Sealing Ring Regularly for Better Instant Pot Meal Prep
I stared at a puddle of brown, crusty liquid seeping across my kitchen counter last Tuesday. My first attempt at Instant Pot meal prep ended with a screaming error code and a ruined $15 chuck roast from Whole Foods. I cried a little. Honestly, Instant Pot meal prep isn’t foolproof right out of the box. I messed this up for months before figuring it out. I’d dump random ingredients into the pot, hit a button, and pray. The results were usually mushy vegetables or dry, stringy chicken. Skip the fat-free stuff. It tastes like wet cardboard. I’m Esperanza Eliza, and I’ve ruined enough Sunday afternoons to know what works. Let’s fix your prep routine.
1. Master the 1-Cup Liquid Rule (and Exceptions)

I buy Trader Joe’s Organic Free Range Chicken Broth for $2.99 per 32-ounce carton. I used to think I could just throw dry chicken breasts in the pot and press a button. I was wrong. The machine needs exactly 1 cup (240ml) of thin liquid to build pressure. Skip it, and you’ll get a loud beeping sound and a scorched mess. Last Tuesday at Whole Foods, I bought $15 worth of gorgeous organic chicken thighs. I dumped them in without broth and ruined them. They turned into tough hockey pucks that smelled like burnt hair. You can’t skip the liquid. Water works, but broth adds flavor. I’ve learned to measure it perfectly. A standard glass measuring cup is your best friend here. Pour that 1 cup of liquid right over the bottom of the stainless steel insert. If you’re using a thick sauce like barbecue or teriyaki, that doesn’t count as your thin liquid. Thick sauces sit on the bottom and scorch into a sticky tar. You still need that 1 cup of water or broth underneath. This is the most critical step. Once I figured this out, my meals finally tasted good. The steam needs that thin liquid to circulate. Without it, the pressure won’t build, the metal pin won’t drop, and you’re left ordering a greasy pizza at eight o’clock at night. I recommend the Instant Pot Duo Crisp plus Air Fryer. It costs around $230 for the 6-quart model. It combines pressure cooking with air frying. You get crispy finishes on dishes like chicken wings right after pressure cooking. It saves counter space by replacing a separate appliance.
2. Prevent Burn Errors with Proper Deglazing

Most people get this wrong. You sauté onions and garlic in the pot, which smells amazing. Then you throw in your raw meat and broth, seal the lid, and walk away. Ten minutes later, the burn error flashes. I did this last month. I was making a beef stew and didn’t scrape the bottom. The tiny caramelized bits of onion stuck to the stainless steel and burned. To fix this, you need a good tool. I swear by the OXO Good Grips Silicone Spatula. It costs $11.99 at Target, and it’s stiff enough to scrape without scratching the metal. After you sauté your ingredients, pour in 1/2 cup of your thin liquid. I use cold water or broth. As soon as the cold liquid hits the hot metal, it sizzles. Take your spatula and scrape every brown bit off the bottom. Those bits are packed with flavor, but they’re the reason your machine throws a tantrum. If the bottom isn’t smooth before you lock the lid, you’re asking for trouble. I’ve found that pre-heating your pot for faster pressure build-up helps too. Turn on the sauté function with the liquid while you finish chopping. It shaves minutes off the cooking time.
3. Utilize Pot-in-Pot Cooking for Simultaneous Dishes

This changed my entire Sunday afternoon. I used to cook my chicken, wash the pot, and then cook my rice. It took hours. Then I discovered the pot-in-pot method. You place a heat-safe dish on a metal trivet above your protein. I bought a 3-quart Instant Pot Stainless Steel Inner Pot for $24.99 on Amazon. It fits inside my 6-quart model. I put 2 pounds of diced chicken and 1 cup of green salsa in the bottom. Then I place the tall trivet over the chicken. I set my 3-quart bowl on the trivet, filled with 1 cup of white rice and 1 cup of cold water. You’re cooking your main dish and side at the same time. The hot steam from the salsa chicken cooks the rice. Make sure you use a bowl that fits loosely. If the bowl touches the sides, the steam can’t circulate. I tried using a Pyrex bowl once, and it blocked the steam. The chicken was raw, and the rice was crunchy. Stick to the stainless steel insert. It has optimal heat transfer and the perfect height to prevent spillage. This method saves me forty-five minutes every week. You might also like: 15 Brilliant Salmon Dinner Ideas for Any Style

8 Pack 36oz Large Glass Meal Prep Containers with lids
If you want something that just works, 8 Pack 36oz Large Glass Meal Prep Containers with lids is a safe bet (866 reviews, 4.5 stars).
4. Batch Cook Grains with Precision for Instant Pot Meal Prep

I eat a lot of rice. I buy 25-pound bags of Costco Kirkland Signature Jasmine Rice for $18.99. For a long time, I treated all grains the same. I’d punch in fifteen minutes and hope for the best. My white rice always came out like gummy paste. My brown rice was hard enough to chip a tooth. You can’t guess the times. For consistent results, cook white rice for 6 minutes at high pressure. Cook brown rice for 22 minutes at high pressure. Never pressure cook them together. I tried mixing them once. It was a disaster. The white rice dissolved while the brown rice stayed raw. After your rice finishes, cool it down fast. I spread my batch-cooked rice on a wide metal baking sheet. You need to cool it to 41 degrees Fahrenheit within two hours for food safety. Warm rice in a deep plastic container breeds bacteria fast. Once cool, I store it vacuum-sealed for seven days. If you’re into tech, check out the Instant Pot Smart WiFi model. It costs around $150 to $200. You can control it from an app. I start my rice while I’m sitting in traffic. You might also like: 20 Beautiful High Protein Meal Prep Ideas That Are Totally Worth It
5. Prep Freezer Dump Meals for Busy Weeks

I rely on freezer dump meals when my schedule gets chaotic. You assemble raw ingredients in a bag, freeze them flat, and dump them into the pressure cooker. I buy Ziploc Gallon Freezer Bags for $5.49 at Kroger. I’ll chop onions, bell peppers, and raw chicken, and toss them in the bag with taco seasoning. When I’m exhausted on Wednesday, I peel the frozen block out of the plastic and drop it in the pot. Remember to add your 1 cup of liquid at the time of cooking, not before freezing. If you freeze the broth inside the bag, you end up with a bulky block of ice that takes forever to thaw. I learned this when I tried to thaw a frozen block of chicken soup. Also, don’t freeze dairy. Avoid milk, sour cream, or cream cheese in your freezer meals. I tried freezing a creamy chili made with Philadelphia Cream Cheese, which costs $3.98 at Walmart. When I cooked it, the dairy curdled. It looked like yellow slime. Always add dairy after the pressure cooking cycle finishes. Stir it in until it melts. You might also like: 20 Cozy High Protein Lunch Ideas for Any Style
6. Avoid Overfilling to Ensure Safety and Proper Cooking

You won’t believe the mess I made last year. I decided to meal prep a huge batch of oatmeal. I bought two bags of Bob’s Red Mill Rolled Oats for $7.49 each at Sprouts. I poured both bags into the pot, filled it to the brim, and locked the lid. When the cycle finished, I flipped the valve. A geyser of boiling oat glue shot into the air. It coated my ceiling, cabinets, and face. I spent three hours scrubbing dried oatmeal off my walls. Never fill your pot more than two-thirds full. For foods that expand, like beans, rice, pasta, or oats, fill it only halfway. These foods foam violently under pressure. If the pot is too full, that foam gets pushed into the steam release valve. It causes safety hazards and clogs the metal parts. I draw a mental line halfway up the insert and refuse to cross it. If I need to cook more, I run two separate batches. It’s not worth a kitchen explosion. Respect the fill lines.

Skroam 10 Pack Glass Meal Prep Containers
Skroam 10 Pack Glass Meal Prep Containers punches above its price — 56 buyers rated it 4.5 stars. I would buy it again.
7. Strategic Release Methods Natural vs Quick

How you let the steam out matters. I used to flip the black valve to quick release the second the timer beeped. I thought I was saving time. I was ruining expensive meat. I bought a Great Value Chuck Roast for $14.88 at Walmart. I cooked it for an hour, then forced the steam out. The sudden drop in pressure caused the liquid inside the meat to boil and expand. It tore the muscle fibers apart. The roast was tough and chewy. Use Natural Pressure Release for heavy meats, beans, and thick stews. Leave the pot alone for fifteen to twenty minutes after it finishes. The pressure drops slowly, and the meat stays tender. Reserve Quick Pressure Release for delicate things like fresh vegetables. If you let broccoli sit in a pressurized pot for twenty extra minutes, it turns into gray, sulfur-smelling mush. Blast that steam out to stop the cooking. I set a timer on my phone. If I’m cooking chicken breasts, I wait ten minutes. If I’m steaming carrots, I flip that valve the second it beeps.
8. Pre-Cook Proteins for Quick Assembly

I hate cooking meat every night. It’s exhausting. Instead, I batch cook proteins on Sunday. I buy Whole Foods 365 Everyday Value Boneless Skinless Chicken Breasts for $6.99 per pound. I drop two to three pounds of raw chicken into the pot with 1 cup of broth. I set it for 12 minutes at high pressure. When it’s done, the chicken is soft and falling apart. Here is my favorite trick. I don’t use two forks to shred the meat. I plug in my electric hand mixer and push the beaters into the hot pot. I turn it on low, and it shreds three pounds in ten seconds. The chicken absorbs the savory liquid, making it juicy. I portion this into five glass containers. During the week, I’ll toss one portion with barbecue sauce for sandwiches. I’ll throw another into a salad. If you’re a serious meal prepper, look at the Instant Pot Pro Crisp, which runs around $230 to $250. It offers five programmable presets. It has a heavy-duty design that handles these massive weekly batches without breaking a sweat.
9. Optimize Hard-Boiled Eggs with the Method

Peeling hard-boiled eggs used to make me want to scream. I’d stand over the sink, picking tiny shards of shell off the white. Half the egg would rip away, leaving a mangled mess. Then I discovered the 5-5-5 method. I buy Target Good & Gather Large Brown Eggs for $3.19 a dozen. I place the trivet in the pot and pour in 1 cup of cold water. I stack a dozen eggs on the rack. I set the machine to high pressure for 5 minutes. When it beeps, I let it sit for 5 minutes of natural release. Then I quickly vent the steam and plunge the eggs into a bowl of ice water for 5 minutes. The temperature shock causes the egg white to shrink away from the membrane. When you crack the shell, it slips off in two clean pieces. The yolks are yellow with no ugly green rings. I prep a dozen every Sunday. I eat them plain or chop them up for egg salad. It’s foolproof.

M MCIRCO 10-Pack,30 Oz Glass Meal Prep Containers 2
A dependable everyday pick — M MCIRCO 10-Pack pulls in 23 ratings at 4.5 stars. Not flashy, just solid.
10. Clean Your Sealing Ring Regularly for Better Instant Pot Meal Prep

We need to talk about the smell of that rubber ring. The clear silicone sealing ring inside the lid absorbs every odor it touches. A common mistake is neglecting this ring. I didn’t wash mine for the first three months. One Friday, I made a vanilla cheesecake. I spent hours mixing the batter. When I took a bite, I gagged. The cheesecake tasted like the spicy beef chili I cooked three days prior. The silicone ring had locked in the chili spices and steamed them into my dessert. You have to clean it after every use with dish soap and let it air dry. For persistent odors, I use Heinz White Vinegar, which costs $4.29 at Kroger. I pour 2 cups of vinegar into the pot and run the steam setting for 2 minutes with the ring locked in place. The hot vinegar vapor strips the garlic oils out of the silicone. Even with cleaning, the silicone degrades. You need to replace the ring every 12 to 18 months. I buy a two-pack on Amazon for $12.99. I keep one for sweet dishes and one for savory.
I’ve learned these lessons the hard way so you don’t have to. I swear by these methods; they save me hours of frustration every week. If you follow the liquid rules, respect the safety fill lines, and keep your equipment clean, your food will taste amazing. I’d love to hear how your next Sunday prep goes. Pin this guide so you have all the times and measurements saved. You’ve got this.
Frequently Asked Questions
Why do I keep getting a burn error during instant pot meal prep?
Burn errors usually happen when there isn’t enough thin liquid or when food is stuck to the bottom. Always use at least 1 cup of broth or water, and aggressively deglaze the pot with a silicone spatula after sautéing.
Can I cook white and brown rice together?
No, you can’t mix them. White rice takes 6 minutes at high pressure, while brown rice takes 22 minutes. If you cook them together, the white rice turns to mush while the brown rice stays raw.
Is it safe to freeze dairy in dump meals?
I strongly advise against it. Freezing dairy like sour cream or cream cheese causes the fats to separate. When you pressure cook it, the dairy curdles and ruins the texture. Add fresh dairy after cooking.
How full can I fill the pot safely?
Never fill it more than two-thirds full for regular meals. If you’re cooking foods that expand like rice, beans, or oats, only fill it halfway to prevent foam from clogging the steam release valve.
