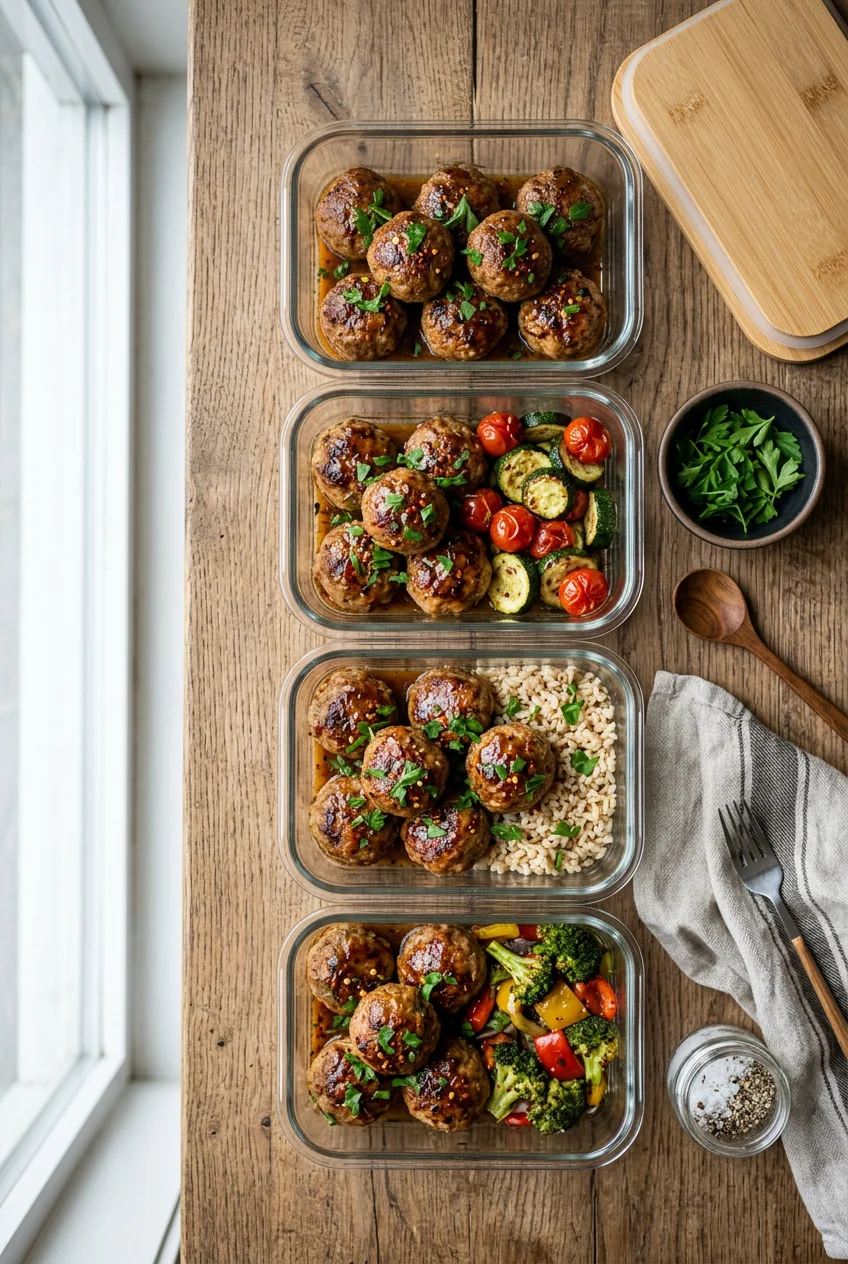
What’s Inside
- Optimize Your Meat Choice for Flavor and Budget
- Master the Binder Ratio with a Panade Technique
- Stop Overmixing the Raw Meatball Mixture
- Season Smartly and Always Fry a Taste-Test Patty
- Portion Evenly with a Dedicated Cookie Scoop
- Air Fry or Sous Vide for Superior Texture
- Incorporate Unexpected Moisture Boosters
- Flash Freeze and Store Properly to Avoid Mush
Last Tuesday at Trader Joe’s, I dropped my plastic container of meal prep meatballs directly onto the kitchen floor. The lid popped off, and three rock-hard turkey spheres bounced across the linoleum like actual golf balls. I’m not exaggerating. They made a hollow, heavy thudding sound against the tile. Making meal prep meatballs shouldn’t result in edible hockey pucks, but I spent two full years getting the texture completely wrong. I’d mix the ground meat until it turned into a dense, sticky paste, bake them until they shriveled into dry little pebbles, and then I’d wonder why I hated eating them by Thursday.
I’ve ruined so many batches trying to save fifty cents a pound on ultra-lean meat. It’s frustrating to spend your entire Sunday afternoon cooking, only to end up with lunches you dread eating. Let’s fix that. I finally learned how to make them juicy, tender, and actually enjoyable to reheat after four days in the fridge. The techniques aren’t complicated, but they require a few specific tools and a total change in how you handle the raw ingredients. I learned that the hard way. Here are the exact methods I use now.
1. Optimize Your Meat Choice for Flavor and Budget

Skip the fat-free stuff. It tastes like wet cardboard. I tried making 99% lean turkey meatballs for months, and they were impossibly dry. For juicy, flavorful results, you absolutely need fat. Chef Jasper J. Mirabile Jr. says he never uses lean meat, and he’s right. Always go for an 80/20 lean-to-fat ratio if you want them to taste good on day four.
When I shop at Costco, I grab the Kirkland Signature 90/10 ground beef. It usually runs between $3.29 and $3.99 per pound depending on the week. It’s a solid middle ground if 80/20 feels too heavy, but I always mix it with a little olive oil to compensate for the lower fat percentage. If you’re on a budget and prefer poultry, head to Aldi. Their Kirkwood 85/15 ground turkey is about $2.93 per pound. It has just enough dark meat and fat to keep the texture soft during the reheat.
I remember buying a cheap, ultra-lean generic brand at Walmart once because it was on clearance. The meat felt weirdly sticky and smelled faintly metallic. I tried to mask it with heavy seasoning, but the resulting meatballs were so dense and chewy I fed them to my dog. You’re building the foundation of your lunch here. Fat equals moisture. When you reheat these in the microwave at your office kitchen, that fat content is the only thing preventing them from turning into chalk. You can see the difference when you pull them out of the oven. An 80/20 meatball glistens and yields slightly when you press it with a fork. A 99% lean meatball just cracks down the middle.
2. Master the Binder Ratio with a Panade Technique

Most people just dump dry breadcrumbs directly into their mixing bowl. I did this until a cooking class at Sur La Table taught me otherwise. The secret to preventing shrinkage and keeping the inside fluffy is a panade. That’s just a fancy culinary word for soaking your breadcrumbs in milk before mixing them into the meat. Trust me on this.
You need about 1/4 cup of whole milk and 1/2 cup of finely crumbled breadcrumbs per pound of ground meat. Let it sit in a small bowl for five to ten minutes until it forms a thick, paste-like binder. It should look a bit like wet oatmeal. This stops the meatballs from shrinking into tiny, tough marbles in the hot oven. You also need 1 to 2 large eggs per pound for structural support. If you’re gluten-free, don’t just skip the binder.
I use Bob’s Red Mill Super-Fine Almond Flour. A 16 oz bag costs about $9.49 at Sprouts. It absorbs the milk differently than wheat breadcrumbs, so add the milk slowly until it feels right. I tried using whole rolled oats once without grinding them first. The texture was awful. Every bite had weird, chewy oat pieces that distracted from the savory flavor, and they fell apart in the marinara sauce. The panade method changed how my meal prep holds up throughout the week. The moisture stays locked inside the meat instead of weeping out onto the baking sheet and burning into a black crust. When you bite into a meatball made with a proper panade, it melts in your mouth instead of fighting back. You might also like: 15 Stunning Healthy Dinner Ideas to Steal Right Now
3. Stop Overmixing the Raw Meatball Mixture

This is the golden rule of ground meat. A common mistake is overworking the mixture. I used to toss all my ingredients into my KitchenAid stand mixer with the paddle attachment because I hated getting my hands dirty. Big mistake. The mechanical mixing turned the ground beef into a tough, emulsified sausage paste. You might also like: 8 Vegetarian Meal Prep for Every Budget
When I baked them, they came out incredibly dense, rubbery, and unappetizing. You have to use your hands, and you have to be quick. Mix the ingredients gently with your fingers until they’re just combined, not a second longer. Never use a food processor for this. I keep a bottle of Chosen Foods Avocado Oil ($12.99 for 500ml at Kroger) right next to my prep station. You might also like: 20 Clever Quick Lunch Ideas You Haven’t Thought Of
Before I start rolling, I rub a few drops of the oil onto my palms. This prevents the cold meat mixture from sticking to my skin and making a huge mess. Wetting your hands with cold water works too, but the oil adds a nice little sear to the outside when they hit the hot pan. Last month, I let my six-year-old niece help me mix a batch of turkey meatballs. She squeezed the meat heavily through her fingers for ten minutes like it was Play-Doh. They were ruined. The proteins bind together tightly when you compress them repeatedly. Keep your fingers loose, like you’re lightly tossing a salad, and stop the second you don’t see any dry breadcrumbs left in the bowl.

Etekcity Food Kitchen Scale
Etekcity Food Kitchen Scale punches above its price — 1,736 buyers rated it 4.5 stars. I would buy it again.
4. Season Smartly and Always Fry a Taste-Test Patty

There’s nothing worse than cooking four pounds of meat only to realize you forgot the salt. I’ve done it. I stood in my kitchen on a Sunday afternoon, staring at sixty completely bland meatballs, feeling defeated. Now, I always cook a tiny test patty.
Just scoop about 1 teaspoon of the raw mixture and fry it in a small skillet. Taste it. Adjust your salt, pepper, and herbs before you roll the entire batch. Classic Italian flavors require garlic powder, onion powder, dried oregano, and fresh parsley. But I add a pinch of fresh nutmeg or ground cloves. It adds a warm, aromatic depth that makes them taste like they came from an expensive restaurant. To save time during massive prep sessions, I use Spice World Minced Garlic. A 32 oz jar is around $6.48 at Walmart.
I know fresh garlic is technically better, but when you’re prepping for the whole week, peeling and chopping six cloves of sticky garlic is annoying. I also buy pre-chopped onions from the produce section. They cost about $3.99 a tub, but they save my eyes from watering and keep me on schedule. Make sure you mix the dry spices directly into your panade paste before adding it to the meat. If you sprinkle dry spices directly onto the ground beef, you’ll inevitably end up with concentrated, horrible pockets of pure salt and bitter oregano in random bites. Blending the spices into the wet binder ensures the flavor is perfectly distributed throughout every single meatball.
5. Portion Evenly with a Dedicated Cookie Scoop

You can’t just pinch off pieces of meat and hope for the best. I tried eyeballing the sizes for years. My baking sheets would have massive, golf-ball-sized chunks right next to tiny, grape-sized pieces. The small ones would burn and dry out into cinders, while the large ones remained pink and raw in the center.
Uneven cooking will ruin your meal prep meatballs. You need a dedicated portioning tool. I use the OXO Good Grips Medium Cookie Scoop. It holds exactly 1.5 tablespoons of mixture and costs about $16.99 at Target. This specific size is perfect. They’re large enough to feel substantial on a plate but small enough to cook quickly and evenly. Using the scoop also keeps your hands cleaner since you’re just dropping uniform mounds onto the parchment paper before doing a quick, final roll to smooth the edges.
I bought a cheap, generic metal scoop off Amazon once for five dollars. The internal sweep mechanism snapped on the very first batch of cold, dense beef. It was frustrating to have my tool break five minutes into meal prep. Spend the extra ten dollars on the OXO one. It has a soft, spring-loaded grip that doesn’t hurt your hand after scooping fifty portions. Consistent sizing means consistent cooking times. I bake mine at 400 degrees, and because they are all exactly 1.5 tablespoons, I know they’ll reach a safe internal temperature of 165°F in exactly eighteen minutes. No guessing, no cutting them open to check the middle.
6. Air Fry or Sous Vide for Superior Texture

Baking is fine, but your air fryer or the sous vide method yields much better textures. Air frying is fast and perfect for smaller batches. I preheat my Ninja Max XL Air Fryer ($129.99 at Target) to 380°F. I drop in the 1-inch meatballs for 10 to 14 minutes, shaking the basket halfway through.
The rapidly circulating hot air creates a crispy, deeply browned exterior without needing a pan full of splattering oil. Just don’t overcrowd the basket, or they’ll steam in their own juices instead of roasting. If you have the time, sous vide produces unparalleled juiciness. You vacuum seal the raw meatballs and cook them gently in a precise water bath. Beef needs 140-145°F for 3 hours, while turkey needs 150°F. I use a Vesta Precision vacuum sealer, which runs about $65.00.
The absolute crucial trick here is to flash-freeze the formed meatballs for exactly one hour before vacuum sealing them. If you seal them while the meat is soft, the vacuum pressure crushes them into flat, weird discs. I learned that the hard way. I pulled out a bag of what looked like squished, pale hamburgers. Once they finish in the water bath, give them a quick, screaming-hot sear in a cast-iron skillet. The inside stays incredibly tender because literally zero moisture escapes the plastic bag during the cooking process.

Rubbermaid Brilliance Tritan Plastic Food Storage
A dependable everyday pick — Rubbermaid Brilliance Tritan Plastic Food Storage Containers BPA Free pulls in 583 ratings at 4.5 stars. Not flashy, just solid.
7. Incorporate Unexpected Moisture Boosters

If you’re using leaner meats and want extra insurance against them drying out, add dairy. Beyond traditional binders, I started adding cottage cheese directly into my raw mixture. I use Good Culture Whole Milk Cottage Cheese. A 16 oz tub is $4.99 at Whole Foods.
The curds melt into the meat as it cooks, creating tiny pockets of moisture and adding a protein boost. It sounds weird, but you can’t taste the cheese at all once they’re cooked. For turkey meatballs, I use 1/4 cup of plain Greek yogurt per pound of meat. Fage Total 5% Greek Yogurt ($6.49 for 32 oz at Kroger) acts as an excellent binding agent. I tried using a watery, fat-free yogurt once, and it just made the meat mixture slimy and slightly sour. Stick to the full-fat versions for the best texture.
I made a batch for a friend who is lactose intolerant, so I tried substituting unsweetened almond milk yogurt. The texture failed. The meatballs fell apart in the frying pan and turned into a crumbly, unappetizing hash. Dairy fat is structural here. These moisture boosters are especially important if you follow the 333 Meal Prep Method trending for 2026. This method focuses on prepping 3 proteins, 3 carbs, and 3 vegetables for the week to mix and match. Having a highly moisturized protein means it pairs beautifully with any dry carb, like brown rice or quinoa, without needing heavy sauces.
8. Flash Freeze and Store Properly to Avoid Mush

Proper storage dictates whether your food actually tastes good on Thursday. Whether raw or cooked, flash freezing is crucial. I arrange them in a single layer on a parchment-lined Nordic Ware Half Sheet pan. You can grab a two-pack for about $25.99 at Costco.
I freeze them bare for two to four hours until they are rock solid. Then, I transfer them to heavy-duty Ziploc Freezer Bags ($6.89 for a box at Target), squeezing out as much air as possible. If you skip the flash-freezing step and just dump them soft into a bag, they freeze into one massive, unusable iceberg of meat. I did that my first year of prepping and had to violently chisel them apart with a butter knife. Store your cooked meatballs separately from your sauce, especially if it’s a cream-based sauce. Cream sauces separate and become weirdly grainy when thawed.
When you’re ready to eat, don’t over-simmer them in tomato sauce. If they are already pre-browned, simmer them for only 10 minutes until they reach 165°F. If you leave them boiling in marinara for an hour, the acid breaks down the meat, and they become mushy and gross. I prefer keeping them dry in glass Pyrex containers ($29.99 for a set) and adding my sauce right before microwaving. They last perfectly for 2 to 3 months in the freezer this way, smelling just as fresh as the day I rolled them.
I genuinely hope these tips save you from the dry, dense meal prep disasters I used to force myself to eat. Taking the extra five minutes to make a proper panade or use a dedicated cookie scoop changes the texture of your food. I prep a double batch of these every other Sunday, and it makes my busy weeknights so much less stressful. If you found this breakdown helpful, save this post or pin it to your favorite meal prep board on Pinterest so you can reference the exact measurements later. Let me know if you try the cottage cheese trick. I was skeptical at first, but it fixed my dry turkey issue. Happy prepping!
Frequently Asked Questions
How long do meal prep meatballs last in the fridge?
Cooked meal prep meatballs last 3 to 4 days in the fridge when stored in an airtight container. For longer storage, freeze them for up to 3 months.
Can I freeze meal prep meatballs raw?
Yes. Flash freeze the raw meatballs on a parchment-lined baking sheet for a few hours until solid, then transfer them to a heavy-duty freezer bag to prevent sticking.
Why are my meal prep meatballs tough?
Tough meatballs are usually the result of overmixing the meat or skipping the binder. Mix gently with your hands just until combined, and always use a milk-soaked breadcrumb panade.
What is the best meat for meal prep meatballs?
An 80/20 ground beef or an 85/15 ground turkey is ideal. The higher fat content ensures the meatballs remain moist and tender after several days in the fridge.
