What’s Inside
- Batch Cook Components For Your Weekly Lunch Meal Prep
- Upgrade Your Storage Containers Immediately
- Master The 50/25/25 Rule For Balanced Portions
- Respect The Danger Zone With Perishables
- Layer Your Salads Correctly To Prevent Sogginess
- Use Smart Appliances And Tools
- Don’t Fear Smart Convenience Foods
- Layer Flavors And Repurpose Leftovers
Last Tuesday at Whole Foods, I found myself staring blankly at a fourteen-dollar sad desk salad with wilted brown lettuce and rubbery chicken. I realized my weekly lunch meal prep routine had completely fallen apart. I’m writing this because I wasted fifty bucks on takeout last week just to avoid eating the soggy wraps I made on Sunday. Getting your weekly lunch meal prep right takes a little trial and error. I tried this wrong for months before figuring it out. I used to make five identical portions of chicken and broccoli on Sunday afternoon. By Wednesday, the broccoli smelled like old gym socks, and the chicken tasted like dry cardboard. I threw half of it in the trash.
You don’t need to spend six hours in the kitchen to feed your family. You just need a specific plan. Before you even chop an onion, dedicate ten to fifteen minutes to planning. Choose two or three lunch options for the week that you genuinely enjoy and that reheat well. This prevents decision fatigue and ensures you have a clear grocery list when you hit the store. Most people get this wrong and just buy random vegetables, hoping a meal will magically assemble itself. Let’s walk through the exact steps, products, and measurements I use to keep my family fed without losing my mind. Learned that the hard way.
1. Batch Cook Components For Your Weekly Lunch Meal Prep

Instead of prepping five identical full meals, I focus on cooking larger quantities of individual components. I buy a bulk pack of chicken breasts at Costco for around $14.99 and prepare one and a half to two pounds of grilled chicken at once. This cooked chicken lasts three to four days in the fridge. While the chicken cooks, I make four to five cups of cooked quinoa, which holds up perfectly for four to five days without getting mushy.
I bought into the “prep whole meals” trend a few years ago and hated it. I’d pack five identical containers of rice, beans, and chicken. By Thursday, the texture was completely ruined, and I couldn’t stomach the thought of eating it again. Batching components is the only way I survive the week now. You can take that plain quinoa and toss it with black beans and salsa on Tuesday, then mix it with roasted sweet potatoes and feta cheese on Wednesday. It keeps your palate engaged.
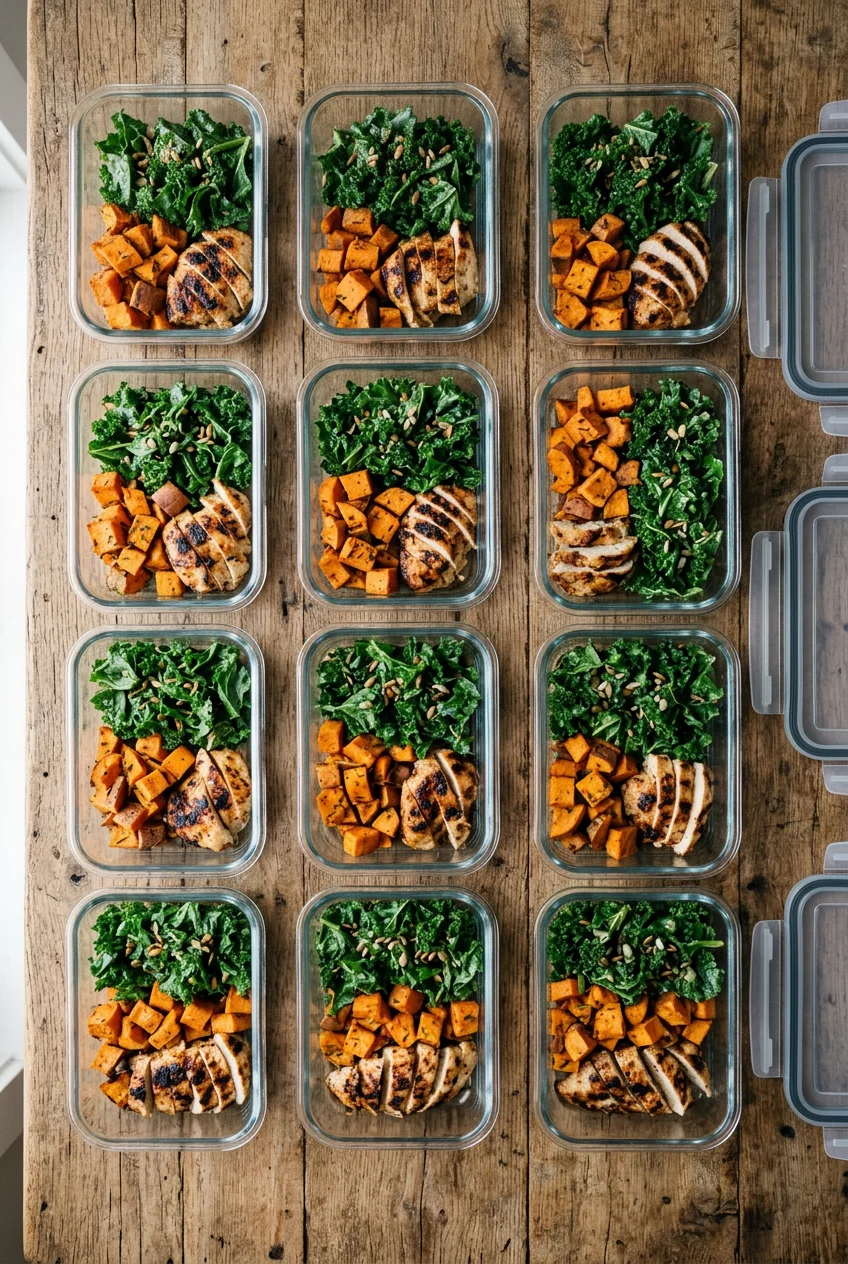
When I roast vegetables, I use a massive sheet pan. I chop two heads of broccoli and three large sweet potatoes, toss them in two tablespoons of olive oil, and roast them at 400 degrees for twenty-five minutes. The caramel-butter smell of roasted sweet potatoes fills the whole house. Having these distinct components sitting in separate containers in the fridge means my husband can build a high-protein bowl, and I can build a lighter salad using the exact same base ingredients. It completely eliminates the complaints about eating the same thing every single day.
2. Upgrade Your Storage Containers Immediately

Listen, skip the cheap plastic containers. They stain, they hold onto the smell of old garlic permanently, and the lids warp in the dishwasher. I used a cheap plastic tub for tomato soup last year. The lid popped off in my leather tote bag on the way to work, ruining a $60 bag and leaving my car smelling like oregano for a month. I threw all my plastic away that afternoon.
For home use and reheating, opt for glass containers with airtight, snap-lock lids. I use the OXO Smart Seal Glass Container Sets. A set of four costs around $39. I bought this specific set because the silicone gasket actually removes easily for washing, which stops mold from growing in the lid crevices. They are incredibly durable. I’ve dropped one on my kitchen tile, and it didn’t even chip. They resist stains and odors, and you can put them directly in the microwave or oven (without the lid). Trust me on this.
If you prefer Pyrex, the Pyrex Ultimate 10-Piece Set runs about $45 to $55 and works just as well, though the lids feel slightly less secure to me than the OXO ones. For portability, especially when I’m packing lunches for my kids, heavy glass isn’t practical. In those cases, lighter BPA-free plastic options like the Bentgo 10-piece set are excellent. You can grab them at Target for around $13. The compartments in the Bentgo boxes keep the wet fruit away from the dry crackers, which is the only way my youngest won’t throw a fit at the lunch table.
3. Master The 50/25/25 Rule For Balanced Portions


Dietitians recommend structuring your lunch portions with 50 percent fruits and vegetables, 25 percent lean protein, and 25 percent grains or starchy vegetables. This ensures a satisfying and nutrient-dense meal. I used to ignore this completely. I’d pack a massive bowl of heavy pasta with maybe three pieces of spinach mixed in. I’d eat it at my desk at noon, and by 2 PM, I was practically falling asleep on my keyboard from the carb crash.
For on-the-fly portion control without dragging a digital food scale to the office breakroom, use your hands as a guide. A palm-sized serving is approximately three to four ounces for protein. A fist-sized portion is about half a cup to one cup cooked for carbohydrates like rice or pasta. Two cupped hands equal about two cups raw for vegetables. Finally, a thumb-tip is roughly one tablespoon for healthy fats like olive oil or peanut butter. You might also like: 15 Inspiring Chicken Meal Prep Ideas You Haven’t Thought Of
I started using this hand-portioning method at a crowded office lunch table last year. Nobody noticed what I was doing, but it kept me from overeating the massive catering trays of rice my boss ordered. When I pack my OXO glass containers at home, I literally hold my fist over the container to gauge the quinoa, then drop in two cupped handfuls of the roasted broccoli. It takes two seconds. It’s so much faster than measuring cups, and it guarantees I’m getting enough fiber to actually stay full until dinner. If you aren’t prioritizing the vegetable half of the container, you’re going to end up snacking on stale office donuts by mid-afternoon. You might also like: 15 Lovely Kids School Lunch Ideas That Changed Everything

buluker 4 Pack Bento Lunch Box Set 3 Compartment Food
buluker 4 Pack Bento Lunch Box Set 3 Compartment Food Storage Containe punches above its price — 23 buyers rated it 4.5 stars. I would buy it again.
4. Respect The Danger Zone With Perishables

A common mistake is preparing too many meals that spoil quickly. Cooked chicken, for instance, should be consumed within three to four days when refrigerated. The FDA advises keeping food out of the danger zone (40 to 140 degrees Fahrenheit) for no longer than two hours to prevent bacterial growth. I learned this the hard way. I once left a container of grilled tilapia on the counter for three hours while distracted by a phone call. I ate it the next day and got so sick I missed my best friend’s baby shower. You might also like: 15 Stunning Easy Lunch Ideas You Need to See
Now, I practice “First In, First Out” (FIFO) in my fridge. This means ensuring you eat older prepped meals first. I push the freshest containers to the back of the shelf and pull the older ones to the front. To make this work, you have to label everything clearly. I buy a two-pack of Sharpie Extreme markers for $5.49 and a roll of basic masking tape for $3.99 at Target. I write the meal name and the preparation date on every single lid.
If I make a batch of shredded chicken in the slow cooker on Sunday afternoon, the tape says “Shredded Chicken – Sunday 10/12.” If it’s Thursday morning and that chicken is still in the fridge, I know it’s time to either eat it immediately or throw it out. Don’t rely on your memory. You won’t remember if you cooked that pork tenderloin on Sunday or Tuesday when you’re rushing out the door at 7 AM. Labeling takes ten seconds and prevents food waste and potential food poisoning.
5. Layer Your Salads Correctly To Prevent Sogginess


For fresh, crisp salads, you have to use wide-mouth Mason jars. I buy the Ball 32-ounce wide-mouth jars in a 12-pack for $14.99 at Walmart. The narrow-mouth jars are impossible to eat out of, and you’ll end up spilling dressing all over your lap trying to dig the lettuce out. The secret to a jar salad is the layering order. If you get this wrong, your lunch is ruined.
Start with your dressing at the very bottom. I usually pour in exactly two tablespoons of vinaigrette. Next, add hard, non-absorbent vegetables or grains. I use chickpeas, bell peppers, or whole cherry tomatoes. These act as a barricade. Then, add softer vegetables like diced cucumbers or shredded carrots. Finally, pack the leafy greens tightly at the very top. This keeps the greens completely dry and fresh until you’re ready to shake it up and eat.
I tried making these without the layering rules once. I put sliced cucumbers directly against the spinach, and I poured the dressing right over the top. By lunchtime the next day, the spinach had turned into a dark green, sneeze-inducing mush. It was completely inedible. Also, prioritize hearty vegetables over delicate ones for longevity. Broccoli, carrots, and bell peppers maintain their crunchy texture for three to four days. Delicate items like sliced cucumbers or halved tomatoes become watery and mushy very quickly. If you want cucumbers, leave them whole or pack them in a separate tiny container.
6. Use Smart Appliances And Tools

You can’t do all the cooking manually if you want to maintain this habit. Use kitchen gadgets like an Instant Pot or a slow cooker. I bought the Instant Pot Duo 7-in-1 for $99.95, and it completely changed my Sunday routine. I use it to cook brown rice perfectly every time. The ratio is one cup of rice to one cup of water, set for fifteen minutes on high pressure. While the machine handles the grains, my hands are free to chop vegetables at the island.
Before I got the Instant Pot, I tried cooking brown rice on the stove. My toddler dropped a glass of water in the living room, I turned around to clean it up, and the water boiled out of the pot. The rice burned to the bottom of my favorite stainless steel pan, filling the kitchen with acrid black smoke. The automated shut-off on smart appliances is a lifesaver when you have a chaotic household.
Looking ahead to 2026, AI-driven apps are increasingly popular for personalized meal planning. These tools generate weekly menus based on your dietary needs, preferences, budget, and the ingredients you already have in your pantry. They create precise grocery lists and even sync with local stores like Kroger or Sprouts for pickup. I’ve started testing one of these apps, and it told me to use up the half-empty jar of tahini in my fridge by making a lemon-tahini dressing. It saved me from buying another $6 bottle of dressing I didn’t need.

Bento Box Adult Lunch Box – 4 Pack, 5
If you want something that just works, Bento Box Adult Lunch Box – 4 Pack is a safe bet (24 reviews, 4.5 stars).
7. Don’t Fear Smart Convenience Foods

While fresh produce is great, chopping everything from scratch is exhausting. I tried doing a “100 percent from scratch” prep week last January. I spent four hours peeling and cubing butternut squash with a dull knife. My hands were stained orange, my back ached, and I quit meal prepping entirely for a month. No exaggeration. Now, I lean heavily on smart convenience foods to save my sanity.
Pre-cut vegetables, frozen fruits, and low-sodium canned goods are massive time-savers. Frozen vegetables are often picked at peak ripeness and flash-frozen, making them just as nutrient-dense as fresh ones. I buy a massive bag of Kirkland Signature Stir Fry Vegetable Blend at Costco for about $11.99. I dump half the bag onto a sheet pan, toss it with avocado oil, and roast it. It drastically cuts down on my chopping time. I also grab the pre-cut butternut squash at Trader Joe’s for $3.99 per 12-ounce bag. The four dollars is absolutely worth saving thirty minutes of manual labor.
For portioning out snacks to go alongside these meals, invest in reusable silicone bags. I use Stasher bags. A four-pack ranges from $30 to $45. If you want a cheaper option, Ideatech sells a 20-pack for $20 to $30. I use them for portioning out raw almonds, sliced apples, or freezing smoothie packs. They are thick, freezer-safe, and stop me from burning through boxes of single-use plastic sandwich bags every month. The seal on the Stasher bags is incredibly tight, so my apple slices don’t dry out in the fridge.
8. Layer Flavors And Repurpose Leftovers

To avoid meal prep burnout, you have to focus on flavor. Plain chicken and steamed broccoli will make you miserable by Wednesday. I prep a variety of sauces, dressings, or spice blends separately. A batch of homemade peanut sauce or a simple lemon-herb vinaigrette can transform a basic protein and veggie combo into a completely different meal. This keeps your palate engaged throughout the week.
If I don’t have time to make dressing from scratch, I buy Primal Kitchen dressings. They run about $7.49 for an 8-ounce bottle at Sprouts or Kroger. The avocado oil base tastes much better than the cheap soybean oil stuff. Skip the fat-free stuff entirely. It tastes like wet cardboard and leaves you feeling hungry an hour later.
You also need to repurpose leftovers creatively to save money. Don’t let small amounts of food go to waste. I transform leftover roasted chicken into wraps using whole wheat tortillas, or I use leftover quinoa as the base for a new grain bowl with different toppings. If I have a tiny bit of roasted bell pepper left, I blend it into hummus for a sandwich spread. This budget-friendly approach aligns perfectly with the 2026 trend of reducing food waste and maximizing the ingredients you already bought. I used to throw away half-eaten containers of rice on Friday afternoons. Now, I toss that leftover rice into a hot skillet with an egg and some soy sauce for a quick five-minute fried rice lunch. It saves money, and it tastes incredible.
Getting your weekly lunch meal prep under control doesn’t require culinary school skills. You just need proper glass containers, a solid batch-cooking strategy, and a few smart shortcuts from the freezer aisle. I’ve saved hundreds of dollars this year just by refusing to buy overpriced salads at the hot bar. If you found this breakdown helpful, pin this article to your favorite meal prep board so you have the grocery list handy for your next Sunday prep session. Let’s make lunchtime less stressful.
Frequently Asked Questions
How long does weekly lunch meal prep food last in the fridge?
Most cooked proteins like chicken and ground turkey last three to four days in the refrigerator. Cooked grains like rice and quinoa can last up to five days. Always practice FIFO (First In, First Out) and label your containers with the date.
What is the 50/25/25 rule for meal prep?
Dietitians recommend filling your container with 50 percent fruits and vegetables, 25 percent lean protein, and 25 percent grains or starchy carbohydrates. This balanced ratio provides sustained energy and prevents the mid-afternoon crash.
Are glass containers better than plastic for meal prep?
Glass containers are superior for reheating and long-term storage because they don’t absorb odors, stain from acidic foods like tomatoes, or warp in the dishwasher. Plastic is only recommended for cold lunches that require lighter portability.
How do I stop my mason jar salads from getting soggy?
Always put your liquid dressing at the very bottom of the jar. Layer hard, non-absorbent vegetables like chickpeas or whole cherry tomatoes next, followed by softer vegetables. Pack your delicate leafy greens at the very top to keep them dry.
