What’s Inside
- Select Firm Meal Prep Sweet Potatoes at the Store
- Scrub Vigorously and Keep the Peel
- Cut Uniform 1-Inch Cubes for Even Roasting
- Roast at 425 Degrees for Crispy Edges
- Soak Fries in Cold Water for 20 Minutes
- Use an Instant Pot for Hands-Off Prep
- Peel After Cooking to Save Time
- Keep Seasoning Simple for Meal Prep Sweet Potatoes
- Cool Completely Before Packing
- Vacuum Seal for Long-Term Freezer Storage
Last November at Whole Foods, I bought ten pounds of yams, thinking I had my Sunday sorted. I tried to meal prep sweet potatoes by throwing them all on one baking sheet. The result? A soggy, steamed disaster. It’s a common trap. You buy a massive bag, hack them to pieces, crowd the pan, and end up with wet orange mush by Wednesday. I ruined three batches before I figured out the chemistry of roasting root vegetables. Let’s walk through how to process these efficiently. I’ve spent the last two years testing different temperatures, soaking methods, and storage containers to figure out what actually holds up in the fridge for five days. Skip the complicated glazes and focus on the technique. If you get the baseline prep right, you won’t have to force yourself to eat sad, limp vegetables by the end of the week. Trust me on this.
1. Select Firm Meal Prep Sweet Potatoes at the Store

Picking the right foundation matters. I used to grab whatever bag was cheapest at the front of the produce section. Last Tuesday at Sprouts, I spent ten minutes sorting through the bin because getting the right texture starts before you even turn on the oven. You want firm, small to medium-sized sweet potatoes with smooth skin. Avoid anything with soft spots, cracks, or deep shriveling near the ends. Maricel Gentile, a produce expert I follow, notes that a healthy sweet potato should feel heavy and dense for its size. If it feels light, it’s likely dried out and pithy inside. Expect to pay around $0.66 to $1.85 per pound for wholesale sweet potatoes in the US, though retail prices at places like Sprouts or Kroger hover closer to $1.49 a pound. I bought a five-pound bag of organic ones last week for $6.99. When you buy them too large, they take forever to cook and the center gets stringy. I stick to the medium ones, about the size of my hand. They roast evenly and portion out perfectly for a week of lunches. Don’t buy them more than a week before you plan to cook them. I left a bag in my pantry for three weeks once. They sprouted deep purple eyes and went completely soft. Learned that the hard way.
2. Scrub Vigorously and Keep the Peel

Always thoroughly wash your produce under cool running water. I use the OXO Good Grips Vegetable Brush. It costs exactly $7.99 at Target, and the stiff nylon bristles actually get the dirt out of the deep grooves without tearing the skin. You have to scrub them even if you plan to peel them later; otherwise, your peeler just drags surface dirt straight into the flesh. But honestly, you shouldn’t peel them at all. The skin is packed with fiber, antioxidants, and nutrients like Vitamins A, C, E, potassium, and manganese. These compounds support gut health and immunity. The beta-carotene in orange sweet potatoes even acts as a minor natural sunblock and helps prevent dry, wrinkled skin. I used to spend twenty minutes peeling five pounds of potatoes every Sunday. It was tedious and completely unnecessary. The skin roasts up beautifully if you treat it right. Plus, keeping the peel on helps the cubes hold their shape in your lunch container instead of turning into mush by Thursday. If you buy organic, just scrub them well and chop. The texture contrast between the crispy skin and soft interior is the best part of the whole vegetable.
3. Cut Uniform 1-Inch Cubes for Even Roasting

When roasting, you have to chop sweet potatoes into uniform 1-inch cubes or wedges to ensure even cooking. Inconsistent sizing is a mistake I made for months. I’d rush through the prep, hacking them into random chunks. The result was a pan where the tiny pieces were blackened and bitter, while the massive chunks were still raw and crunchy in the middle. You can’t fix that once it’s in the oven. I use a Victorinox 8-inch Fibrox Pro Chef’s Knife. I bought it on Amazon for $39.95 three years ago, and it handles dense root vegetables easily. Sweet potatoes are notoriously hard to cut. You need a sharp blade and a stable cutting board. Slice off the very ends first so you have a flat surface, stand the potato up, and slice it into one-inch thick planks. Then cut those planks into sticks, and finally into cubes. It takes an extra five minutes to measure your cuts visually, but it guarantees every single piece finishes cooking at the exact same time. If you’re making wedges for a side dish, cut the potato in half lengthwise, then cut each half into three or four even wedges. You might also like: 15 Brilliant Salmon Dinner Ideas for Any Style

M MCIRCO 10-Pack,22 Oz Glass Meal Prep Containers
M MCIRCO 10-Pack punches above its price — 86 buyers rated it 4.5 stars. I would buy it again.
4. Roast at 425 Degrees for Crispy Edges

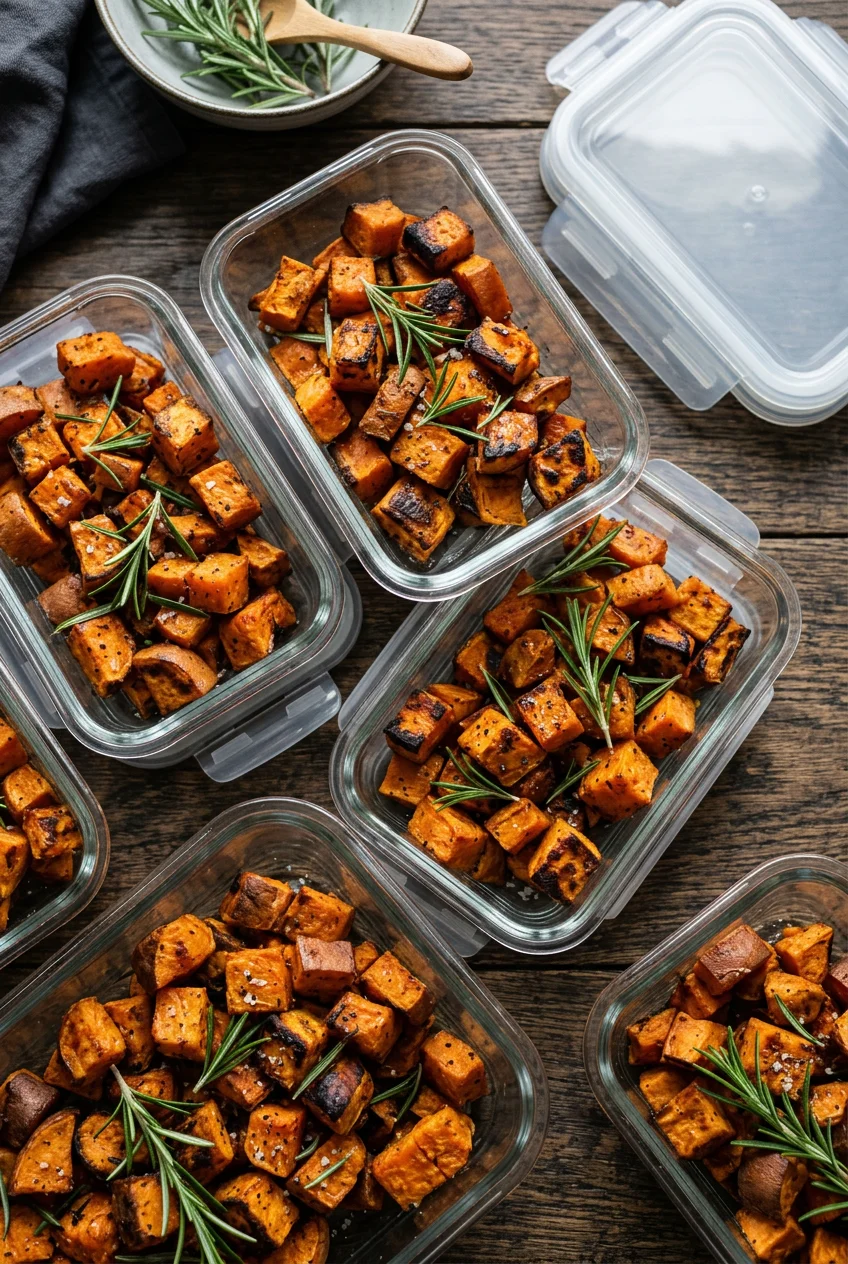
Preheat your oven to a high temperature, ideally 425 degrees Fahrenheit. Low heat just dehydrates the potatoes. High heat caramelizes the natural sugars. Toss your cubed sweet potatoes with a high-heat oil. I use Chosen Foods 100% Pure Avocado Oil. A 16.9-ounce bottle is $12.49 at Target. Dietitians recommend avocado oil for its antioxidant properties and high monounsaturated fat profile, but I use it because its smoke point is 500 degrees. Olive oil will burn and turn bitter at 425 degrees. Spread the cubes in a single layer on a baking sheet. I stopped using disposable parchment paper and switched to reusable silicone baking mats. A genuine Silpat costs $18.70, or you can get the OXO Good Grips silicone mat for around $25. They prevent sticking and reduce waste. The most critical step here is space. Don’t crowd the pan. If the pieces are touching, they’ll steam each other instead of roasting, preventing any crispiness. I usually need two large half-sheet pans for a standard meal prep session. Roast them for 40 to 45 minutes, taking the pans out to toss the cubes once halfway through. You might also like: 15 Brilliant Simple Meal Prep Ideas for a Fresh New Look
5. Soak Fries in Cold Water for 20 Minutes

For exceptionally crispy sweet potato fries or wedges, soak the cut pieces in a large bowl of cold water for at least 20 minutes before cooking. I thought this was a myth until I tried it last spring. Sweet potatoes have a high starch content on the surface after you cut them. That surface starch acts like glue in the oven, causing the fries to burn quickly or stick to the pan while the inside stays soggy. The cold water bath draws out that excess starch. You’ll actually see the water turn cloudy. After 20 minutes, drain them completely. Here is the catch. You have to dry them thoroughly before adding any oil. Water and oil don’t mix, and any residual moisture will steam the fries. I lay them out on flour sack towels. I buy the Mainstays 5-pack of flour sack towels from Walmart for $5.94. They aren’t expensive, they’re lint-free, and they absorb water instantly. Pat the fries completely dry, wipe out your mixing bowl, and then toss them with your avocado oil and seasonings. It adds an extra 25 minutes to your prep time, but you can use that window to chop your other vegetables or clean the kitchen. You might also like: 20 Clever Aesthetic Food Prep That Actually Work
6. Use an Instant Pot for Hands-Off Prep

If you want soft, mashable sweet potatoes ideal for purees, breakfast bowls, or baking fillings, use an Instant Pot. Roasting whole potatoes takes over an hour and heats up the whole house. The pressure cooker method is entirely hands-off. I use the standard 6-quart Instant Pot Duo, which retails for $99.99. Place the metal trivet at the bottom of the stainless steel insert. Add exactly 1 cup of cold water to the 6-quart model. If you have the larger 8-quart version, you need 1.5 cups of water to build pressure. Scrub your potatoes and place them whole on the trivet. Cook times depend strictly on the width of the potatoes. For small ones under 2 inches wide, set it to high pressure for 15 minutes. Medium potatoes around 2 to 3 inches need 30 minutes. Large ones spanning 3 to 4 inches require a full 60 minutes. Once the cooking cycle completes, don’t hit the quick release valve. Let the pot perform a natural pressure release for 10 minutes before manually venting the rest. The skins will look slightly wrinkled, and a fork will slide into the center with zero resistance.
![[8-Pack,30 oz]Glass Meal Prep Containers](https://m.media-amazon.com/images/I/713Zfdsgi4L._AC_UL320_.jpg)
[8-Pack,30 oz]Glass Meal Prep Containers
A dependable everyday pick — [8-Pack pulls in 7 ratings at 4.5 stars. Not flashy, just solid.
7. Peel After Cooking to Save Time

If a specific recipe requires peeled sweet potatoes, like a smooth casserole or a pie filling, consider baking or steaming them first. The skin of a cooked sweet potato slides off effortlessly, whereas peeling a raw one is a miserable chore. I learned this the hard way. Two Thanksgivings ago, I bought a massive 10-pound bulk bag of sweet potatoes from Costco for $8.99. I stood at the sink with a standard vegetable peeler, hacking away at the tough raw skins. I slipped, sliced my thumb, and wasted a ridiculous amount of the actual potato flesh in the process. Now, I just cook them whole in the Instant Pot or bake them at 400 degrees until soft. Once they are cool enough to handle, you can literally pinch the skin at one end and pull it straight off in large strips. It leaves 100 percent of the flesh intact and takes about ten seconds per potato. You can then mash the warm flesh with a potato masher or run it through a food processor. This method is incredibly efficient for batch prepping mashed sweet potatoes for the freezer. No exaggeration.
8. Keep Seasoning Simple for Meal Prep Sweet Potatoes

Season batch-prepped sweet potatoes simply with salt, black pepper, and garlic powder if you plan to use them in both sweet and savory dishes throughout the week. I use McCormick Garlic Powder. A 3.12-ounce bottle is $3.48 at Kroger. If you cover your Sunday prep in heavy chili powder and cumin, you’re locked into savory meals. By keeping the base seasoning neutral, you maintain versatility. You can always add more specific, aggressive seasonings later when you actually assemble your daily meals. For instance, I might take a cup of neutral roasted cubes on Tuesday, toss them in a skillet with some smoked paprika and black beans for tacos. On Thursday morning, I can take those same neutral cubes, warm them up, and drizzle them with maple syrup and cinnamon for a breakfast bowl. Looking ahead to trending recipes for 2026, neutral prep allows you to easily incorporate them into sweet potato waffles. You just combine pureed sweet potato with eggs, flour, baking powder, cinnamon, and milk. Or you can mash them with quinoa, breadcrumbs, and onions for quick veggie burgers. A blank canvas gives you options.
9. Cool Completely Before Packing

A common and frustrating mistake is storing warm sweet potatoes. You must always allow cooked sweet potatoes to cool completely to room temperature before transferring them to airtight containers. I ruined a lot of good food by rushing this step. I used to pull the baking sheet out of the oven, immediately scoop the hot cubes into plastic containers, snap the lids on, and shove them in the fridge. The residual heat creates massive amounts of condensation inside the sealed container. That water drips back down onto the potatoes, turning your perfectly roasted crispy edges into a soggy, wet sponge. Worse, that trapped moisture creates a breeding ground for bacteria, leading to premature spoilage. By Thursday, they’d smell distinctly sour. Now, I let the baking sheets sit on the counter for at least 45 minutes. Once they are entirely cool to the touch, I pack them into glass meal prep containers. I bought a 20-piece set (10 glass containers and 10 locking lids) on Amazon for $21.95. Glass is superior because it won’t warp in the microwave, it’s freezer safe, and it prevents microplastic leaching into your food.

Skroam 10 Pack Glass Meal Prep Containers
If you want something that just works, Skroam 10 Pack Glass Meal Prep Containers is a safe bet (57 reviews, 4.5 stars).
10. Vacuum Seal for Long-Term Freezer Storage

Store cooked sweet potatoes in airtight containers in the refrigerator for up to 5 days. For longer storage, you need to freeze them. Roasted cubes, mashed sweet potatoes, and even stuffed halves freeze beautifully for up to 3 months in standard bags. However, for maximum longevity and to prevent freezer burn, use a vacuum sealer. I use the NESCO Deluxe VS-12, which costs around $134. If you want a budget-friendly option, the GERYON Vacuum Sealer Machine runs about $40. Vacuum-sealed sweet potatoes can last 10 to 12 months in the deep freeze because you remove all the oxygen that causes degradation. When you’re ready to eat, reheating smartly dictates the final texture. For crispy roasted cubes, the air fryer is unmatched. I toss frozen cubes straight into my air fryer basket at 375 degrees for about five minutes. They crisp right back up. If you use a microwave, reheat in 30-second bursts, stirring in between. Microwaves can dry out the flesh, so I add a splash of chicken broth or water to mashed potatoes before heating. Last week, I pulled a vacuum-sealed bag of mash I prepped in January, heated it up, and served it with some Trader Joe’s chicken sausages. It tasted like I just cooked it that afternoon.
Meal prep doesn’t have to mean eating bland, soggy food by the end of the week. If you take the time to cut uniform pieces, give them space on the pan, and let them cool completely before packing, your sweet potatoes will actually taste good on Thursday. I highly recommend investing in the glass containers and a decent avocado oil. They make a noticeable difference in the final texture. Pin this guide for your next Sunday prep session, and let me know if the cold water trick works as well for you as it did for me.
Frequently Asked Questions
How long do meal prep sweet potatoes last in the fridge?
Cooked sweet potatoes will last up to 5 days in the refrigerator when stored in an airtight container. Ensure they are completely cooled before sealing to prevent condensation and premature spoilage.
Can you freeze roasted sweet potatoes?
Yes, roasted sweet potato cubes freeze exceptionally well. Store them in standard freezer bags for up to 3 months, or use a vacuum sealer to extend their freezer life to 10-12 months without freezer burn.
Why are my roasted sweet potatoes soggy?
Soggy sweet potatoes are usually caused by crowding the baking sheet, which steams the cubes instead of roasting them. Storing them in containers before they have completely cooled also traps moisture, ruining the texture.
Do I need to peel sweet potatoes before meal prepping?
No, peeling is unnecessary and removes valuable nutrients like fiber and antioxidants. Simply scrub the skin vigorously with a vegetable brush. Keeping the peel also helps roasted cubes hold their shape during the week.
