What’s Inside
- Start Small to Avoid Burnout (Meal Prep For Beginners)
- Invest in Quality, Versatile Storage Containers
- Master the 50/25/25 Rule for Balanced Meals
- Batch Cook Components, Not Just Full Meals
- Prioritize Food Safety: Cool and Store Promptly
- Label and Date Everything to Prevent Waste
- Embrace “No-Cook” Meal Prep For Beginners
- Utilize Time-Saving Kitchen Appliances
- Freeze Cooked Grains in Flat Bags for Quick Reheating
- Use Deli Containers for Layered Salads and Dressings
- Reheat Foods to 165°F for Safety
Last Tuesday at Whole Foods, I tossed three bags of slimy spinach and a container of fuzzy strawberries. That was $18 straight into the trash. When you look into meal prep for beginners, the internet makes it look like a pristine grid of matching glass containers filled with symmetrical broccoli florets. My reality was a fridge full of rotting ambition. I tried copying a fitness influencer’s 21-meal Sunday routine and ended up crying over a mountain of dirty dishes at midnight. Meal prep shouldn’t require a culinary degree or a weekend sacrificed to the kitchen. It shouldn’t force you to eat dry chicken breast for seven days straight, either. After three years of trial and error, I’ve found a system that works without making me hate Sundays. It’s methodical. It’s boring. It keeps me from eating dry cereal on Thursdays when I’m too tired to cook. Here’s exactly how I do it, down to the brands, aisles, and temperature rules.
1. Start Small to Avoid Burnout (Meal Prep For Beginners)

Registered dietitian Samantha Nimmons, MS, recommends beginners start with two or three days of meals. I ignored this for months. I tried to prep breakfast, lunch, and dinner for five days straight. By Wednesday, the chicken smelled funky and the zucchini had the texture of a wet sponge. You’re better off prepping just lunches for Monday through Wednesday. This keeps the food fresh and cuts down on burnout. Last week, I bought a 1.5 lb package of Good & Gather chicken breast from Target for $5.99. I cooked it, divided it into three portions, and stopped. It took twenty minutes. When you force yourself to prep 15 meals at once, the mental friction is so high you won’t want to do it again. Prepping for two days builds the habit without the dread. Once you realize that three lunches take ten minutes, you can add breakfasts. Don’t rush it. The goal is consistency, not a photogenic fridge full of food you won’t eat. I learned that the hard way.
2. Invest in Quality, Versatile Storage Containers

You can’t do this with a random assortment of stained takeout boxes. I used cheap plastic for a year. They warped in the microwave and smelled like garlic. I finally bought a set of Pyrex Simply Store Glass Containers at Walmart for $34.98. They resist stains, hold 3 cups of food, and go directly into the oven without the lids. If you drop things and need plastic, the Rubbermaid Brilliance Leak-Proof Containers are $33 for five. They have an airtight seal that snaps down hard. I bought these for my husband after his teriyaki sauce leaked all over his car seat. If you’re on a budget, Prep Naturals Glass Meal Prep Containers cost under $25 on Amazon. The tradeoff is that the locking flaps can snap off after eight months of dishwasher cycles. Whatever you choose, buy a uniform set. Stacking matching containers saves fridge space and keeps things from feeling chaotic. It works, trust me.
3. Master the 50/25/25 Rule for Balanced Meals

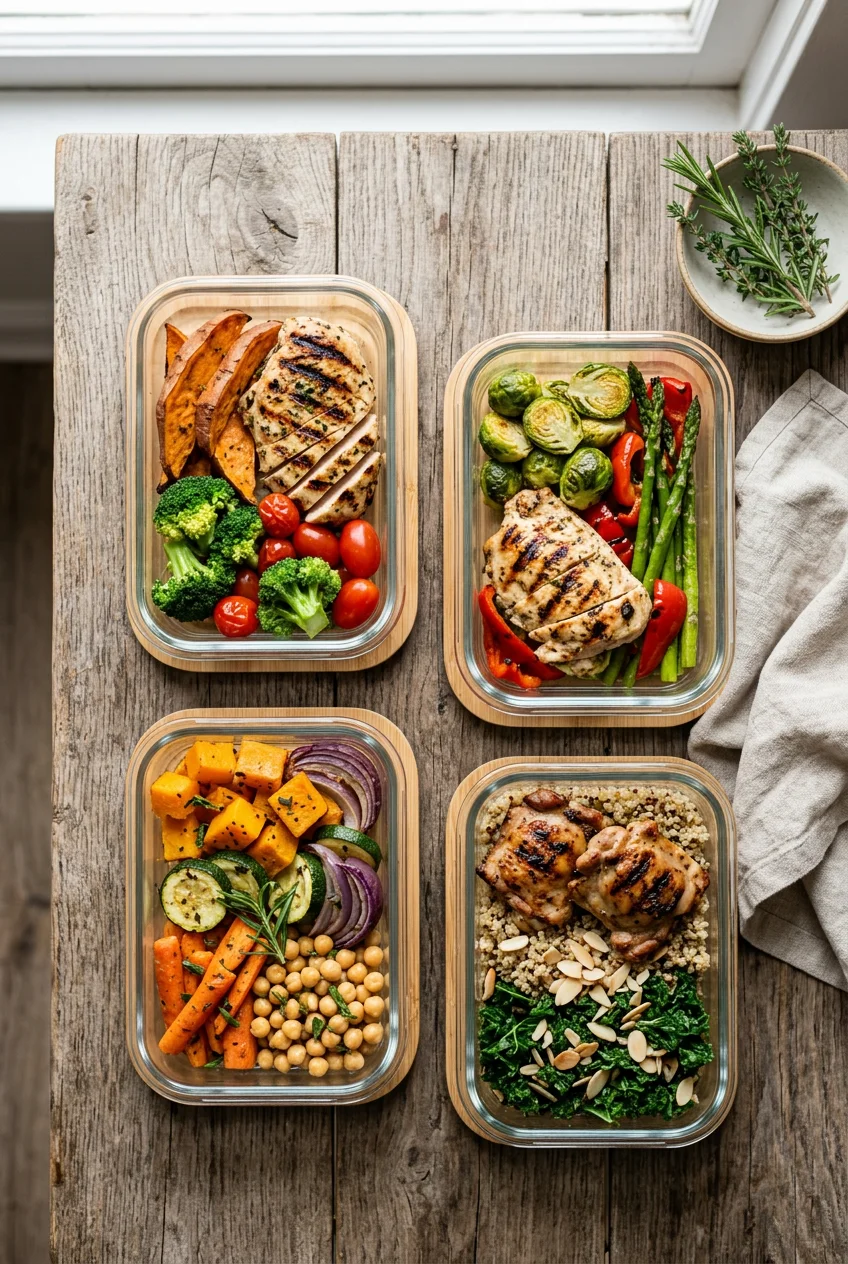
Figuring out what to put in the containers is where people freeze. You don’t need complex recipes. Just use the 50/25/25 rule. Aim for a plate that’s 50 percent vegetables or fruits, 25 percent lean protein, and 25 percent grains or starchy vegetables. I build every meal this way. A standard container for me holds 1 cup of roasted broccoli and bell peppers, a 4 oz portion of grilled chicken breast, and 1/2 cup of cooked quinoa. I buy organic white quinoa from Trader Joe’s for $3.99 per 16 oz bag. It cooks in fifteen minutes and doesn’t get mushy like white rice. This ratio keeps you full without making you feel heavy at 2 PM. Skip the fat-free dressings. They taste like wet cardboard. I use 1 tablespoon of regular olive oil and a pinch of salt on the broccoli. It costs pennies and makes the vegetables taste good enough that you’ll actually eat them on day three. You might also like: 15 Inspiring Chicken Meal Prep Ideas You Haven’t Thought Of

M MCIRCO 10-Pack,30 Oz Glass Meal Prep Containers 2
If you want something that just works, M MCIRCO 10-Pack is a safe bet (23 reviews, 4.5 stars).
4. Batch Cook Components, Not Just Full Meals

Instead of cooking three complicated casseroles, cook individual components in bulk. This buffet-style method fixed my Sunday routine. I roast a large sheet pan of mixed vegetables, usually 2 lbs of carrots and 1 lb of Brussels sprouts. I cook 2 cups of dry brown rice. Then I pull the meat off a $4.99 Costco rotisserie chicken. I store these in separate containers. On Monday morning, I scoop 1/2 cup of rice, 1 cup of vegetables, and 4 oz of chicken into my lunch container. On Tuesday, I might mix that same chicken with 2 tablespoons of mayo and put it over salad greens. When you batch cook components, you aren’t forced to eat the same flavor profile every day. You just mix and match. The downside is spending three minutes assembling your meal, but the flexibility is worth it. I tried prepping fully assembled stir-fries, and the sauce always made the rice soggy by Wednesday. Keeping components separate preserves the texture. You might also like: 20 Clever School Lunch Ideas You Can Try Today
5. Prioritize Food Safety: Cool and Store Promptly

Food safety is boring until you get food poisoning. I learned this the hard way two years ago. I made a 6-quart pot of turkey chili, left it on the stove for four hours, and spent two days regretting it. You must refrigerate cooked foods within two hours to prevent bacteria. If you have a large batch, don’t put the giant pot in the fridge. It’ll raise the temperature and put your other groceries at risk. Portion the hot food into smaller, shallow containers instead. This allows the food to cool fast. Leave the lids cracked for twenty minutes so condensation doesn’t build up, then seal them tight. Also, check your fridge temperature. It needs to be at or below 40 degrees Fahrenheit. I bought a Taylor refrigerator thermometer at Target for $7.99. I keep it on the middle shelf. It’s a cheap way to ensure your groceries aren’t spoiling. You might also like: 15 Brilliant Good Meal Prep Ideas That Changed Everything
6. Label and Date Everything to Prevent Waste

You will forget when you cooked that pork shoulder. By Thursday, time becomes a blur. I used to play a guessing game with mystery containers in the back of my fridge. Now, I label everything. I use a Sharpie Pro ($4.50 for a two-pack) and a roll of Scotch blue painter’s tape ($5.99 at Home Depot or Kroger). The tape sticks to glass and plastic but peels off cleanly. Write the name of the food and the date. Refrigerated meals should be tossed after 3 to 4 days. If you freeze food, use it within 3 to 6 months. A frozen block of chili looks identical to pasta sauce. I once defrosted what I thought was taco meat, only to realize it was pureed eggplant from three months prior. It ruined my dinner. Taking ten seconds to write “Beef Taco Meat 10/12” saves you from surprises. It’s a lifesaver.
![C CREST [10 Pack] Glass Meal Prep Containers](https://m.media-amazon.com/images/I/81HfSfzlqUL._AC_UL320_.jpg)
C CREST [10 Pack] Glass Meal Prep Containers
Honestly, C CREST [10 Pack] Glass Meal Prep Containers surprised me — sturdier than it looks in the photos, and over 349 buyers gave it 4.5 stars.
7. Embrace “No-Cook” Meal Prep For Beginners

You don’t have to turn on your oven. When I have a busy weekend, I rely on assembly-only meals. This means salads with pre-cooked proteins, overnight oats, or yogurt parfaits. I buy a 5 oz can of Starkist chunk light tuna from Kroger for $1.14. I drain it, mix it with 1 tablespoon of hummus instead of mayo, and eat it with 1 cup of baby carrots and 10 Nut-Thins crackers. That’s a complete lunch that took four minutes. You can also wash and chop 2 heads of romaine, slice 1 English cucumber, and boil 6 eggs. Store them in separate containers. Hard-boiled eggs last a week in their shells. I use a $15 Dash rapid egg cooker from Amazon because I’m terrible at boiling eggs on the stove. Focusing on minimal-cook ingredients removes the barrier of a hot kitchen and a sink full of dirty pans.
8. Utilize Time-Saving Kitchen Appliances

Chopping vegetables by hand for an hour is miserable. If you want to stick with this, you need tools that do the heavy lifting. I bought a 14-cup Cuisinart food processor for $249 three years ago. It shreds a 2 lb block of cheese in ten seconds and slices 4 lbs of carrots in under a minute. The negative side is that washing the bowl and blade takes up space, but the time saved makes it worth it. If you don’t want to spend that much, an 8-quart Instant Pot ($129 at Target) is great for batch cooking. You can throw in 2 lbs of frozen chicken, 1 cup of broth, and a jar of salsa. Press a button and 25 minutes later you have shredded chicken. You don’t have to stand over a stove. Let the appliances handle the cooking while you portion out snacks or wash your fruit.
9. Freeze Cooked Grains in Flat Bags for Quick Reheating

Cooking a fresh batch of rice every night takes 45 minutes. Cooking a massive batch on Sunday and leaving it in the fridge means you’ll be eating dry, hard rice by Thursday. The solution is freezing cooked grains in flat bags. I learned this from a restaurant kitchen. I cook 4 cups of dry quinoa or brown rice. Once it cools, I portion 2 cups into Ziploc freezer quart bags ($5.49 for 38 bags at Sprouts). Here is the important part. Press the bag flat, squeeze out all the air, and seal it. Stack these like books in your freezer. Because they’re flat, they freeze fast and thaw in minutes. When I need a quick carbohydrate, I pull out a bag, break off a chunk, and microwave it in a bowl with a splash of water for two minutes. It steams perfectly. It eliminates the 45-minute wait for grains on a Wednesday night.

Vtopmart 5Pack 22oz Glass Storage Containers with Lids
Vtopmart 5Pack 22oz Glass Storage Containers with Lids punches above its price — 34 buyers rated it 4.5 stars. I would buy it again.
10. Use Deli Containers for Layered Salads and Dressings

Packing salads for work usually ends in tragedy. The greens get soggy and the dressing leaks. Use plastic deli containers instead of wide, flat ones. I buy DuraHome 32 oz heavy-duty deli containers ($15.99 for 24 on Amazon). They are tall and narrow, which makes layering easy. The key is the order. You pour 2 tablespoons of dressing at the bottom. Next, add hard vegetables that won’t absorb the dressing, like 1/2 cup of cherry tomatoes or cucumbers. Then add your grains and protein. Finally, pack 2 cups of dry salad greens at the top. Because the container is tall, the greens stay separated from the dressing. When you’re ready to eat, shake the container or dump it into a bowl. I tried this with flat glass, and the dressing always sloshed around and ruined the spinach. The tall deli containers solve the physics problem.
11. Reheat Foods to 165°F for Safety

You’ve spent the time prepping, storing, and keeping it cold. The final step is reheating safely. You must reheat prepped meals to an internal temperature of 165 degrees Fahrenheit. This ensures any bacteria that multiplied in the fridge are killed. I used to microwave my chicken and rice for two minutes and eat it, even if the center was cold. That’s a massive risk, especially with poultry. Now, I use a ThermoPro digital meat thermometer ($14.99 on Amazon) to check the thickest part of the meat. Microwaves heat unevenly. To fix this, I arrange my food in a ring shape, leaving a hole in the middle. This helps the microwaves penetrate more evenly. I also sprinkle a teaspoon of water over the food and place a damp paper towel over the top. It creates steam, which heats the food faster and keeps the chicken from turning into rubber. It takes an extra thirty seconds, but it makes a leftover meal pleasant to eat.
I’ve used this exact system for two years. The Pyrex containers, the flat-frozen rice, and the 50/25/25 ratio keep my grocery bill predictable and my evenings free of cooking stress. You don’t need to be perfect. Just prep two days of lunches this Sunday and see how it feels. If you found this helpful, pin this article to your favorite board so you have the container brands and rules handy when you head to the store this weekend.
Frequently Asked Questions
How many days should a beginner meal prep for?
Beginners should start by prepping for just two or three days. Prepping an entire week of meals at once often leads to burnout, food waste, and eating soggy food by Thursday. Starting small builds the habit sustainably.
What are the best containers for meal prep?
Glass containers like Pyrex Simply Store are excellent because they don’t absorb stains or odors and can go in the oven. For plastic, Rubbermaid Brilliance offers a highly durable, leak-proof seal. Always buy a uniform set so they stack easily in your fridge.
How long do prepped meals last in the fridge?
Cooked meals should generally be eaten within 3 to 4 days when stored in an airtight container in the refrigerator. To prevent waste, always label your containers with the date using painter’s tape and a marker.
Do I have to cook everything on Sunday?
No. You can embrace no-cook meal prep by relying on canned proteins like tuna, pre-washed greens, and overnight oats. Alternatively, you can batch-cook a few base components like rice and roasted vegetables, and assemble them quickly throughout the week.
