What’s Inside
- Stop Guessing with a Precision Meat Thermometer
- The Two-Zone Grilling Trick for Grilled Chicken Meal Prep
- Ditch the Plastic for Glass Containers
- Freeze Raw in Marinade for Quick Grilled Chicken Meal Prep
- Stop the Cross-Contamination Madness
- Timing Your BBQ Sauce Perfectly
- Upgrade Your Setup with GrillGrates
- Experiment with Wood Pellets for Flavor
- Cool and Portion Before It Spoils
- Buy the Good Stuff and Pound It Flat
- Embrace Smart Thermometers for Lazy Sundays
Last Tuesday at Whole Foods, I caught a glimpse of myself in the deli glass looking like a panicked raccoon because my usual pre-cooked chicken strips were sold out. That’s when I realized relying on store-bought grilled chicken meal prep is a recipe for disaster and dry, rubbery lunches. Let’s be honest. Nobody wants to eat sad, gray poultry on a Wednesday afternoon. I’ve spent years chewing through tough, overcooked breasts that tasted like wet cardboard. I tried this wrong for months before figuring it out. I’d just throw raw meat on a scorching hot grate, burn the outside, and pray the inside wasn’t pink. It was a terrible strategy. Now, I’m fully committed to doing it right. Preparing your protein ahead of time doesn’t have to mean sacrificing flavor or moisture. You just need a solid plan and a few specific tools to make the process foolproof. I’m going to walk you through exactly how I make my weekly batch.
1. Stop Guessing with a Precision Meat Thermometer

I used to be that person who sliced into every single piece of meat to check if it was done. All the juices would run out, leaving me with dry, stringy chunks that were impossible to swallow by Thursday. You’re ruining your food if you do this. Always ensure your chicken reaches a safe internal temperature to prevent foodborne illness and guarantee optimal texture. Cook breasts and ground meat to 165°F. Dark meat cuts like thighs and drumsticks can actually be cooked to 170°F or even 175°F for extra tenderness. I personally swear by the ThermoWorks Thermapen One. It costs exactly $115.00, but it gives rapid, 1-second accurate readings. If that’s too steep, grab the ThermoMonster Instant-Read Thermometer for $15.99 on Amazon. I bought the cheaper one for my sister last year, and it works perfectly fine. Just poke the thickest part of the meat. Don’t touch the bone if you’re cooking thighs. Trust me. Getting this right is the single biggest factor in avoiding food poisoning and terrible textures. I’ve eaten undercooked chicken once in my life, and I won’t ever make that mistake again. Invest in the tool.
2. The Two-Zone Grilling Trick for Grilled Chicken Meal Prep

Avoid dry, overcooked chicken by implementing a two-zone grilling method. I learned this the hard way at a backyard party in 2022. I dumped a massive bag of Kingsford Original Charcoal (the 16 lb bag is $9.98 at Walmart) right in the middle of the grill. I burned the outside of every single piece to a crisp while the centers were completely raw. It was humiliating. Now, I start by searing my meat over direct high heat for about 3 to 4 minutes per side to achieve those dark, crusty grill marks. Then, I move it to the indirect heat zone. This is a cooler part of the grill with no direct flame or coals underneath. You let it finish cooking slowly over there. This technique is recommended by Food Network culinary editor Heath, and it absolutely prevents the meat from toughening. It ensures it cooks through without drying out. You’re basically getting the best of both worlds. You get the charred, smoky exterior and the tender, juicy interior. I’ve used this method every single Sunday since that disastrous party. It takes a little more charcoal management, but the results are worth the effort.
3. Ditch the Plastic for Glass Containers

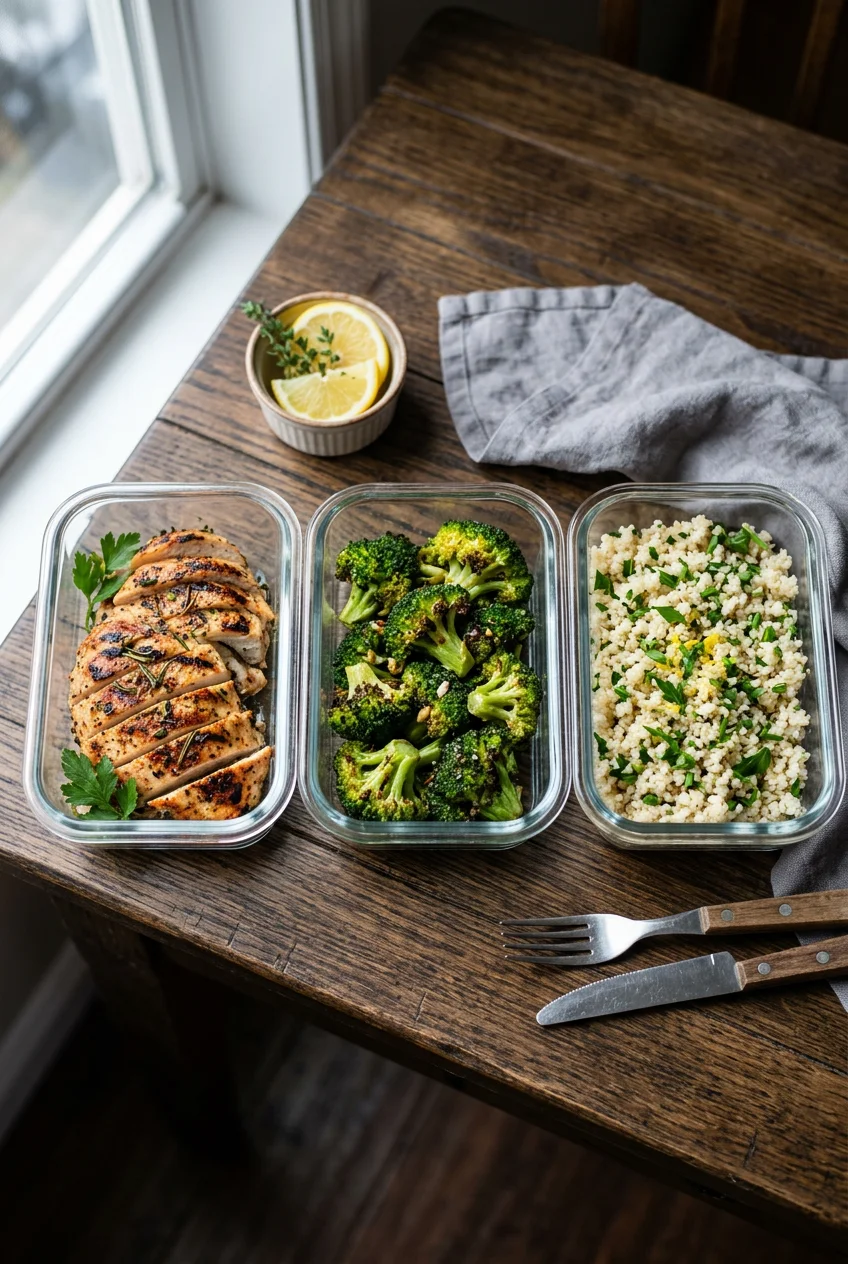
Skip the plastic storage tubs. They absorb grease, turn orange from spices, and make your food taste like wet cardboard and dish soap. I’m very stubborn about this. For storing your food, opt for durable glass containers instead. Glass prevents staining, odor retention, and potential chemical leaching. It’s a healthier and more sustainable choice. I heavily rely on the Rubbermaid Brilliance Glass 3.2-Cup containers. A 3-pack costs $22.99 at Target. They have these amazing snap-on lids that never leak in my tote bag. If you want a cheaper option, the Pyrex Simply Store 3-Cup rectangular containers are usually $19.99 for a set at Kroger. Choose rectangular containers in the 28 to 34 oz range (approximately 3.5 to 4 cups). This size is perfect for holding 4 oz of meat, 1/2 cup of rice, and a huge handful of roasted broccoli. I tried jamming everything into tiny round bowls for months before realizing rectangular shapes stack so much better in the fridge. Honestly, the visual appeal of perfectly stacked glass containers in your fridge on a Sunday night is satisfying. They are oven, microwave, freezer, and dishwasher safe. You won’t ever go back to flimsy plastic once you hear that satisfying click of a heavy glass lid. You might also like: 15 Brilliant Batch Cooking Ideas That Actually Work

M MCIRCO 10-Pack,30 Oz Glass Meal Prep Containers 2
M MCIRCO 10-Pack punches above its price — 23 buyers rated it 4.5 stars. I would buy it again.
4. Freeze Raw in Marinade for Quick Grilled Chicken Meal Prep

Marinating your meat for at least 30 minutes significantly enhances flavor and tenderizes the fibers. But a time-saving approach is to freeze raw chicken directly in its marinade. I do this every time I buy in bulk. Portion exactly 1 pound of chicken breast with about 1/4 cup of Pompeian Extra Virgin Olive Oil ($8.99 at Sprouts) and your chosen seasonings into Ziploc Gallon Slider Bags ($5.49 for 24 bags). Squeeze all the air out. This allows for quick freezer-to-grill meals later, requiring only thawing in the fridge overnight before cooking. I used to leave raw meat sitting in a marinade in the fridge for three days. By the time I cooked it, the acid from the lemon juice had turned the meat into a mushy, sour-smelling disaster. Don’t do that. Freezing it stops the marinating process in its tracks. As it thaws, it absorbs the flavors perfectly without breaking down the texture. It’s incredibly convenient. I usually prep four bags at once on a Sunday afternoon. It takes exactly 15 minutes of active work, and I’ve got a month’s worth of protein ready to go. You might also like: 15 Stunning Lunch Weekly Meal Prep Ideas You Haven’t Thought Of
5. Stop the Cross-Contamination Madness

A common mistake is cross-contamination, which can lead to severe foodborne illness. I almost poisoned my college roommate back in 2018 because I used the same knife to slice raw poultry and then chop salad greens. It was a terrifying wake-up call. Always use separate cutting boards and utensils for raw and cooked meat. Thoroughly wash and sanitize any surfaces that come into contact with raw juices before preparing other ingredients. I scrub my sink and knives with Dawn Ultra Dish Soap ($3.99 for an 18 oz bottle at Target) and blazing hot water. Consider buying color-coded cutting boards to easily differentiate between raw meat and produce. I bought the OXO Good Grips 2-Piece Cutting Board Set for $22.95 at Trader Joe’s. I strictly use the red one for raw meat and the green one for vegetables. You can’t mess it up when it’s color-coded. I also keep a roll of Bounty Select-A-Size Paper Towels ($6.49 per roll) nearby to wipe my hands instead of using my clean kitchen towels. It sounds paranoid, but raw poultry juice is nothing to mess around with. Wash your hands constantly. You’re going to feel much more confident in the kitchen when your sanitation routine is locked down. You might also like: 15 Brilliant Simple Meal Prep Ideas for a Fresh New Look
6. Timing Your BBQ Sauce Perfectly

Most people get this wrong. If you’re using a sugar-based BBQ sauce, apply it only during the last 5 to 10 minutes of grilling. Applying it too early will cause the sugars to burn rapidly. This results in a bitter, charred black exterior long before the center is fully cooked internally. I ruined an entire batch of thighs last summer because I slathered them in Sweet Baby Ray’s Original BBQ Sauce ($2.49 for an 18 oz bottle at Walmart) right at the beginning. The smell of burning sugar filled the entire neighborhood. The crust was thick, sticky, and completely bitter. It was totally inedible. Now, I keep the meat bare or just use a dry rub of salt, pepper, and garlic powder for the first 15 minutes. Once the internal temperature hits around 155°F, I grab a silicone basting brush. I use the OXO Good Grips Silicone Basting Brush ($11.99 at Target). I paint a thin, even layer of sauce on both sides. The heat caramelizes the sauce perfectly without scorching it. You get that sticky, sweet glaze that looks like it came from a professional pitmaster. Patience is everything here. Don’t rush the sauce process.

Vtopmart 5Pack 22oz Glass Storage Containers with Lids
Honestly, Vtopmart 5Pack 22oz Glass Storage Containers with Lids surprised me — sturdier than it looks in the photos, and over 34 buyers gave it 4.5 stars.
7. Upgrade Your Setup with GrillGrates

Enhance your outdoor cooking experience by adding GrillGrates to your existing setup. These are interlocking aluminum panels designed to provide more even heat distribution. They significantly reduce flare-ups and create impressive, restaurant-quality sear marks. A standard set costs around $89.99 on their website. They are compatible with gas, charcoal, and pellet grills, leading to juicier and more flavorful results. I used to struggle with massive grease fires on my cheap Weber Spirit II E-210 Gas Grill ($399 at Home Depot). The fat would drip down, catch fire, and engulf my dinner in black soot. The meat tasted like lighter fluid and ash. Once I dropped these grates on top, the flare-ups completely stopped. The juices sizzle in the valleys of the grates, sending flavor right back up into the meat. It’s brilliant. I’m honestly shocked at how much better my food looks and tastes now. You’re basically upgrading a cheap grill into a premium cooking machine for under a hundred bucks. I scrub them down with a stiff wire brush after every use, and they hold up beautifully. If you’re serious about your weekly prep, this tool is mandatory. Highly recommend grabbing a set.
8. Experiment with Wood Pellets for Flavor

For those with pellet grills or anyone looking to infuse a deep smoky flavor, you have to experiment with different wood pellets. Traeger offers a massive variety of options that completely change the profile of your food. Traeger Hickory Pellets ($19.99 for a 20 lb bag at Costco) provide a bold, classic smoky taste that reminds me of traditional Texas barbecue. Mesquite delivers a very hearty, intense flavor that can sometimes be a bit overpowering if you aren’t careful. I actually prefer using Cherry or Apple pellets. They impart a subtle, sweet, and fruity note that complements poultry beautifully without masking the natural taste of the meat. I tried using straight mesquite once for my weekly lunches. By Wednesday, the heavy smoke flavor gave me a massive headache. It was just too much for a midday office meal. Now, I stick to the fruit woods. The smell of applewood smoke drifting across the patio on a Sunday afternoon is relaxing. It makes the entire neighborhood jealous. You’re missing out if you’re only using basic charcoal or propane. A 20-pound bag lasts me about a month of heavy use, making it an affordable flavor upgrade.
9. Cool and Portion Before It Spoils

After removing your food from the heat, allow it to cool completely at room temperature. However, ensure it’s refrigerated within two hours to prevent dangerous bacterial growth. Once cooled, portion the meat into your airtight glass containers. Cooked poultry can be safely stored in the refrigerator for 3 to 4 days when kept at or below 40°F. I made a huge mistake a few years ago. I left a massive tray of cooked breasts sitting on the kitchen counter for five hours while I binge-watched a TV show. I felt terrible throwing it all in the trash, but I wasn’t going to risk food poisoning. Now, I set a strict timer on my phone for 45 minutes. I loosely cover the tray with Reynolds Wrap Heavy Duty Aluminum Foil ($4.99 for 50 sq ft at Kroger) to keep the flies away while it cools. Once the timer goes off, I immediately chop the meat into bite-sized pieces. I measure out exactly 4 oz portions using my Escali Primo Digital Kitchen Scale ($24.95 at Target). Then, straight into the fridge they go. It keeps the texture perfect and the food safe.
![C CREST [10 Pack] Glass Meal Prep Containers](https://m.media-amazon.com/images/I/81HfSfzlqUL._AC_UL320_.jpg)
C CREST [10 Pack] Glass Meal Prep Containers
If you want something that just works, C CREST [10 Pack] Glass Meal Prep Containers is a safe bet (349 reviews, 4.5 stars).
10. Buy the Good Stuff and Pound It Flat

While it’s potentially a higher upfront cost, investing in quality meat can significantly improve your results. I exclusively buy Kirkland Signature Boneless, Skinless Chicken Breast from Costco. It’s priced around $18.99 for a 6.5 lb package. It’s noted for not being injected with saline solutions, offering a much purer, cleaner taste. Cheaper brands pump their meat full of water. When you cook it, all that water bleeds out, effectively boiling the meat instead of searing it. It’s disgusting. Here is a surprising tip. If you’re using breasts, you must pound them to an even 1-inch thickness. This ensures uniform cooking and prevents dry spots. I use the OXO Meat Tenderizer ($17.99 at Target). I place the meat between two sheets of Kirkland Signature Plastic Wrap ($12.99 for 3000 sq ft) and whack the thick end until it matches the thin end. I skipped this step for years. I ended up with pieces that were rubbery on the thin edges and raw in the thick centers. Pounding the meat takes exactly three extra minutes, and it completely solves the uneven cooking problem. You’ll notice a massive difference in how juicy the final product is.
11. Embrace Smart Thermometers for Lazy Sundays

A trending approach in 2026 for advanced outdoor cooks is the use of smart wireless meat thermometers. I’m obsessed with this technology. Devices like the MEATER Plus (ranging from $99 to $130 on Amazon) or the Chef IQ Sense ($129.99 at Best Buy) offer unparalleled convenience. They provide real-time internal temperature monitoring directly to your phone. They send alerts to your smartphone for flip reminders and even estimate total cook times. This allows for perfect doneness without constant grill-side attention. I used to stand outside sweating in the 95-degree Texas heat, constantly hovering over the grates. Now, I insert the MEATER probe into the thickest breast, set my target temperature to 165°F in the app, and go back inside to sit in the air conditioning. The app literally yells at me when it’s time to take the food off the heat. It’s incredibly accurate. The probe itself is thick, so it leaves a small hole in the meat, but that’s a tiny price to pay for perfectly cooked lunches. You won’t regret spending the money on this gadget. It makes the entire Sunday routine feel effortless. If you want to completely eliminate the guesswork, buy one immediately.
I’ve burned, dried out, and ruined more lunches than I care to admit. But once you lock in these techniques, your weekly routine becomes a breeze. You don’t have to suffer through rubbery, tasteless protein anymore. Grab a good thermometer, switch to glass containers, and stop crowding your grates. I highly recommend starting with the two-zone method this weekend. It completely changed the way I cook. If you found these tips helpful, please save this post and pin it for your next Sunday prep session!
Frequently Asked Questions
How long does grilled chicken meal prep last in the fridge?
When stored in airtight glass containers, your grilled chicken meal prep will stay fresh and safe to eat for 3 to 4 days in the refrigerator. Ensure your fridge temperature is set to 40°F or below to prevent bacterial growth.
Can I freeze my grilled chicken meal prep for later?
Yes, you absolutely can. Cooked and cooled chicken freezes beautifully for up to 3 months. I recommend slicing or dicing the meat before freezing so it thaws quickly. Just move the container to the fridge the night before you plan to eat it.
How do I reheat my grilled chicken meal prep without drying it out?
To keep the meat juicy, sprinkle a few drops of water or chicken broth over the chicken before microwaving. Cover the glass container loosely with a damp paper towel and heat on medium power for 60 to 90 seconds.
What is the best cut of meat for grilled chicken meal prep?
Boneless, skinless chicken thighs are incredibly forgiving and stay juicy even after reheating. However, if you prefer a leaner option, boneless chicken breasts work perfectly as long as you pound them to an even thickness and use a meat thermometer.
