What’s Inside
- Choose the Right Salmon for Your Budget
- Portion Control for Consistent Meal Prep Salmon
- Partially Cook to Prevent Dryness
- Gentle Cooking Methods Save the Texture
- Season Generously 30 Minutes Before
- Sheet Pan Efficiency is Everything
- Quality Glass Containers for Odor Control
- Store Dressings and Sauces Separately
- Master the Reheating Process
- Microwave Rules if You Have No Choice
- Eat It Cold and Skip Reheating
I sat at my desk last Tuesday, staring at a glass container filled with gray, rubbery fish. The office lights made the coagulated white proteins on the side of the fillet look gross. The smell of my overcooked, three-day-old meal prep salmon wafted over the cubicle wall, earning me a loud, dramatic sigh from my coworker Dave. I took one bite, and the texture was so chalky I had to chug half my water bottle just to swallow it. I’ve ruined so many expensive fillets by treating them like regular chicken breasts. It’s frustrating. You spend good money at the grocery store, only to end up chewing on something that tastes like wet cardboard by Wednesday afternoon.
Getting your meal prep salmon right isn’t just about throwing it in the oven. It requires a specific strategy so the flesh stays tender, flaky, and tasty four days later. You need to control the heat, manage the moisture, and store it right. I’m sharing the methods I use every Sunday to keep my seafood fresh all week long. Let’s fix those sad, dry desk lunches.
1. Choose the Right Salmon for Your Budget

I believe in buying the best fish you can afford, but I won’t pretend we all have limitless budgets. Last month at Whole Foods, I saw wild-caught Alaskan Sockeye salmon fillets priced at $33.50 per pound. It’s stunning fish with a vibrant ruby color and great omega-3s, but that price tag hurts. If you’re prepping for five days, that adds up fast.
Don’t feel bad about buying farmed Atlantic salmon. I usually grab a bulk pack from Costco for about $14.50 per pound. The farmed stuff has more fat. That extra fat is a secret weapon because it means the fish is much more forgiving when you reheat it. Wild-caught salmon is leaner, so it dries out in seconds if you aren’t careful. I’ve turned beautiful $20 wild Coho fillets into dust because I walked away to check my phone for two minutes. Learned that the hard way.
If you want the benefits of wild-caught without the premium price, hit the freezer aisle. I recently found a 2-pound bag of flash-frozen wild salmon at Sprouts for $22.99. Just remember to thaw the portions overnight in the fridge. Whatever you choose, always check the smell. It shouldn’t smell fishy or sour. It should smell clean, like the ocean.
2. Portion Control for Consistent Meal Prep Salmon

Eyeballing your portions is a massive mistake. I tried this for months before figuring it out. I’d buy a huge side of fish, cut it into random chunks, bake them all on the same pan, and wonder why the small tail pieces were burnt while the thick center cuts were raw. It was a disaster.
You need a digital kitchen scale. I bought a simple Taylor digital scale at Target for $19.99, and I use it every Sunday. Aim for individual portions of 4 to 6 ounces (about 113 to 170 grams). A 6-ounce fillet is a perfect size when paired with a half cup of jasmine rice and a handful of roasted vegetables.
When you cut your fish into uniform 5-ounce blocks, they all cook at the same rate. You won’t have to pull the pan out of the oven three times to rescue the smaller pieces. Plus, knowing your exact portion sizes helps you track your protein intake. If I’m buying a 1.5-pound side of salmon from Kroger, I slice it into four equal 6-ounce strips before doing anything else. Taking five minutes to weigh your portions saves so much headache.
3. Partially Cook to Prevent Dryness

Here is the biggest secret to meal prep salmon that tastes good on Thursday. Don’t cook it all the way through on Sunday. If you bake it until it’s perfectly done on your prep day, it’ll be dry by the time you reheat it at the office.
I always pull my salmon out when it’s still slightly underdone. You want an internal temperature of 125 to 130 degrees Fahrenheit. This is medium-rare. I use a ThermoPro instant-read meat thermometer I picked up at Walmart for $14.99. Stick the probe right into the thickest part.
When the thermometer hits 125 degrees, take the pan out. The residual heat will finish cooking the fish as it rests. Then, when you warm it up in the microwave three days later, it finishes cooking instead of turning into a tough sponge. I ruined so many meals before I started doing this. Biting into a chalky, dry piece of fish is the worst. Keep it moist by intentionally undercooking it during your Sunday prep. You might also like: 20 Clever School Lunch Ideas You Can Try Today

M MCIRCO 10-Pack,22 Oz Glass Meal Prep Containers
If you want something that just works, M MCIRCO 10-Pack is a safe bet (86 reviews, 4.5 stars).
4. Gentle Cooking Methods Save the Texture

Skip the high-heat searing if you’re planning to eat this days later. A crispy, pan-fried skin is great fresh, but it gets soggy after sitting in a container. Gentle cooking methods are your best friend. You might also like: 15 Creative Healthy Meal Prep Ideas That Make a Real Difference
I rely on low-temperature baking. I line a large baking sheet with Reynolds Kitchens parchment paper (usually $4.49 a roll) and roast the fillets at 400 degrees Fahrenheit for 10 to 12 minutes. This keeps the moisture locked inside. You might also like: 15 Clever Family Dinner Ideas for a Fresh New Look
Poaching is another method I’ve started using. I bring a shallow pan of water, a splash of white wine, and lemon slices to a simmer. Dropping 4-ounce fillets into this liquid for 8 minutes yields the silkiest fish you’ve ever tasted. It’s almost impossible to dry it out. I tried grilling my prep meals once. The charred edges tasted bitter after sitting in the fridge for two days. Stick to the oven or poaching. Your future self will thank you.
5. Season Generously 30 Minutes Before

Most people pull their fish from the fridge, sprinkle some salt on it, and immediately shove it in the oven. That’s a mistake. You need to season your fillets with coarse salt at least 30 minutes before you cook them.
The salt draws out excess moisture. You’ll see little beads of water form on the surface. Wipe that away with a paper towel. This firms up the meat and forces the seasoning deep into the fillet. I swear by Morton Coarse Sea Salt ($3.29 at Kroger) and cracked black pepper. Trust me.
If you’re eating the same thing four days in a row, you need variety. I love using different flavor pastes to keep things interesting. On one 5-ounce fillet, I’ll rub 1 teaspoon of Trader Joe’s White Miso Paste ($2.99). On another, I’ll use a teaspoon of spicy gochujang. Chef George Duran recommends this trick for keeping your palate entertained. You bake them all on one pan, but you get four different flavor profiles. It keeps me from ordering a $20 salad on Wednesday.
6. Sheet Pan Efficiency is Everything

I don’t have the energy to wash five different pans on a Sunday. Sheet pan meals are the only way I survive. You can roast your entire week’s worth of food on one large aluminum sheet if you plan it right.
I usually grab sweet potatoes and broccolini from the Walmart produce section. The trick is cutting your vegetables so everything finishes at the same time. I dice the sweet potatoes into tiny half-inch cubes so they roast quickly. I toss them with 1 tablespoon of olive oil and salt, then spread them on one side of the pan.
The broccolini goes in the middle, and the 5-ounce salmon fillets sit on the edge. Everything roasts perfectly at 400 degrees Fahrenheit for 15 minutes. The broccolini gets slightly crispy, and the fish stays tender. Just don’t crowd the pan. If the potato cubes are piled up, they’ll steam instead of roast. Give everything space to breathe.

Skroam 10 Pack Glass Meal Prep Containers
A dependable everyday pick — Skroam 10 Pack Glass Meal Prep Containers pulls in 57 ratings at 4.5 stars. Not flashy, just solid.
7. Quality Glass Containers for Odor Control

Throw away those cheap, stained plastic containers. Storing cooked fish in plastic is a recipe for disaster. Plastic absorbs odors like a sponge. I once stored a curry-spiced fillet in a plastic tub, and every meal I put in that container for six months tasted like fishy curry. It was disgusting.
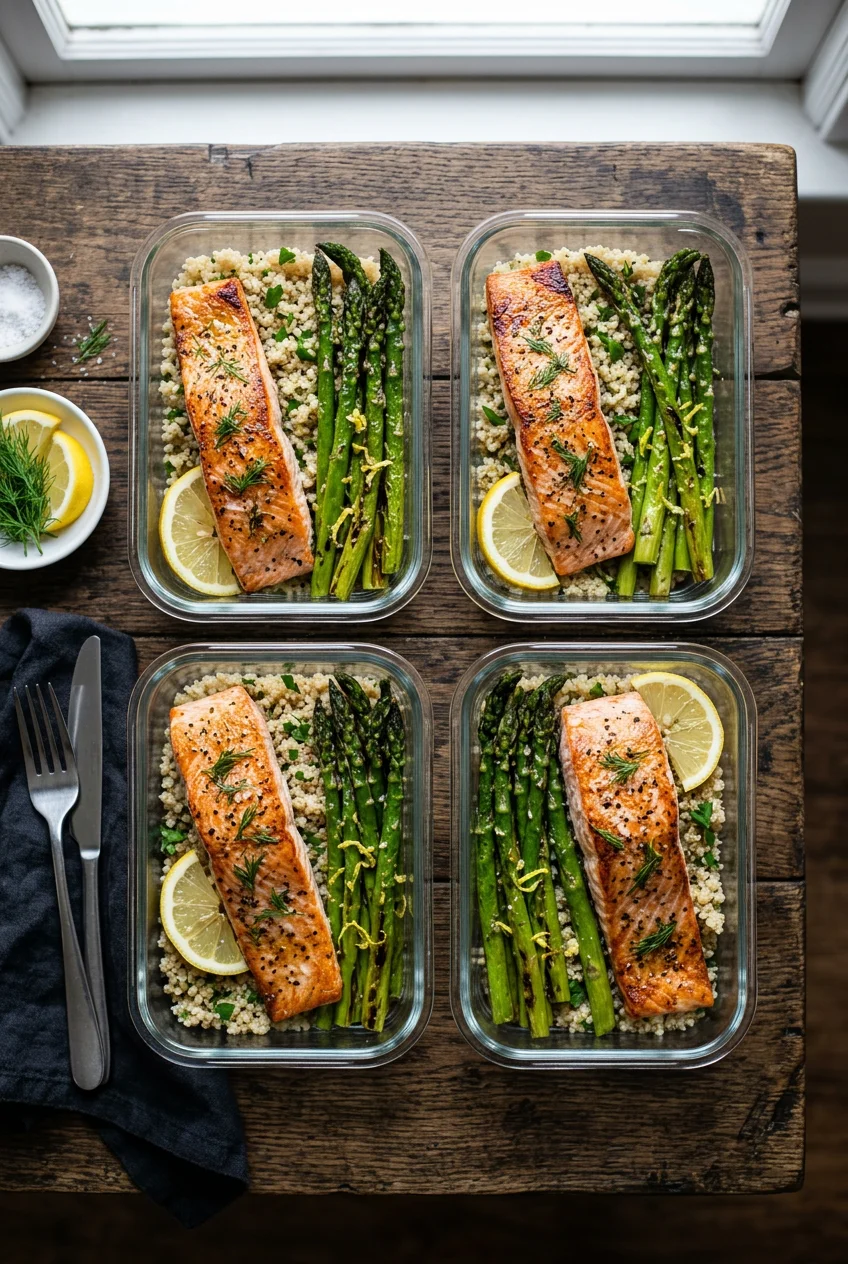
You need heavy-duty glass containers. I use the Pyrex 3-Cup Rectangular Glass Containers. You can get a set of three at Target for about $17.99. Glass is non-porous. It won’t hold onto that seafood smell or stain when you use bright turmeric or rich marinades.
Glass is also better for reheating. You don’t have to worry about chemicals leaching into your food. The thick silicone seals on the OXO Good Grips glass containers ($22.99 for a set at the Container Store) are airtight. This means the smell stays inside the container in the communal office fridge. Your coworkers won’t complain every time they reach for the coffee creamer.
8. Store Dressings and Sauces Separately

I learned this lesson the hard way. I had prepped a salad with a soy-ginger glazed fillet on top of cabbage slaw. I poured the dressing on Sunday to save time. By Tuesday, the cabbage was a slimy puddle, and the fish was a soggy, unidentifiable sponge.
You must store your wet ingredients separately. Always. I bought a pack of tiny 2-ounce plastic ramekins with snap-on lids from Amazon for $6.99. They are lifesavers. I portion out my vinaigrettes, spicy mayo, or teriyaki sauce into these cups and tuck them inside the main glass container.
If I’m making a lemon-dill yogurt sauce (using plain Fage Greek Yogurt, $4.99 at Trader Joe’s), I keep it far away from the fish until I’m ready to eat. You want the meat to remain firm. Pouring acidic lemon juice or soy sauce over cooked fish and leaving it for three days breaks down the proteins. It turns the flesh mushy. Keep it dry until you sit down for lunch.
9. Master the Reheating Process

Reheating is where 90 percent of people ruin their hard work. Blasting your food with high heat will suck all the moisture out, leaving you with fish jerky.
My favorite way to reheat a fillet is in the air fryer. I have a standard Ninja Air Fryer ($89.99 at Target). I set it to 300 degrees Fahrenheit and heat the fish for just 4 to 5 minutes. It warms the center without drying the edges.
If you don’t have an air fryer, the oven is your next best bet. Place the fish on aluminum foil, splash a drop of water on top, and loosely crimp the foil to create a steam tent. Bake at 275 degrees Fahrenheit for 10 minutes. The steam prevents the edges from turning tough. It takes a few extra minutes, but the texture difference is huge. You’re eating a meal that tastes freshly cooked, rather than a rubbery afterthought.
![[8-Pack,30 oz]Glass Meal Prep Containers](https://m.media-amazon.com/images/I/713Zfdsgi4L._AC_UL320_.jpg)
[8-Pack,30 oz]Glass Meal Prep Containers
[8-Pack has been one of the most consistently praised picks in this category. 7 reviewers averaged 4.5/5.
10. Microwave Rules if You Have No Choice

Look, I get it. Sometimes the office microwave is your only option. If you must use it, follow strict rules. I used to hit the 2-minute button on high and walk away. The result was a mini explosion of fish bits on the ceiling and a smell that haunted the breakroom for hours.
Turn the power level down to 50 percent. Cover the glass container. I take a single sheet of Bounty paper towel, dampen it, and drape it over the dish. This creates a steaming effect that protects the fish from the harsh microwaves.
Heat it in 60-second bursts. Check it after the first minute. It usually only takes two minutes total on half-power. Do not aim for piping hot. If it’s steaming aggressively, you’ve gone too far, and it’s going to be dry. Just take the chill off. And please, wipe the microwave out when you’re done.
11. Eat It Cold and Skip Reheating

Honestly, the easiest way to avoid dry meal prep salmon is to just not reheat it. I eat my fish cold at least twice a week. It eliminates the stress of finding a microwave or offending my coworkers.
Cold, cooked salmon is refreshing. Last Thursday, I took a cold 5-ounce fillet, flaked it with a fork, and tossed it into a bowl of mixed greens ($1.99 a bag). I added half an avocado, cherry tomatoes, and a drizzle of balsamic. It was a perfect lunch.
You can also mix cold fish with a tablespoon of Primal Kitchen Mayo ($9.99 at Whole Foods), diced celery, and fresh dill for a quick salmon salad. Scoop it up with cucumber slices or stuff it into a pita. Just remember the 4-day rule. If I know I won’t eat it by Thursday, I freeze the cooked portion in a Ziploc bag on Sunday.
I hope these tips save you from the tragedy of dry, rubbery lunches. Prepping seafood doesn’t have to be intimidating once you know how to control the heat and protect the moisture. I’ve ruined enough expensive fillets to know that a little extra care on Sunday makes a massive difference by Wednesday. Try the partial-cooking method first. It’s the one trick that changed my routine. If you found this helpful, save it for your next Sunday prep!
Frequently Asked Questions
How long does meal prep salmon last in the fridge?
Cooked salmon stays fresh for 3 to 4 days when stored in an airtight glass container in the refrigerator. If you aren’t going to eat it by day four, I’d highly recommend freezing it immediately.
Can you eat meal prep salmon cold?
Yes, eating it cold is actually my favorite method! Cold salmon is incredibly delicious flaked over mixed greens or mashed with a little mayo for a quick salmon salad. It completely avoids the risk of drying it out in the microwave.
How do you reheat salmon without drying it out?
I’m obsessed with using an air fryer at 300 degrees Fahrenheit for about 4 minutes. You can also use an oven at 275 degrees. The key is low heat and adding a tiny splash of water to create steam.
Why does my meal prep salmon smell so fishy?
It usually smells fishy if you’re storing it in cheap plastic containers that absorb odors, or if you’re aggressively overcooking it in the microwave. Always use glass containers and gently warm it on 50% power to minimize that harsh smell.
