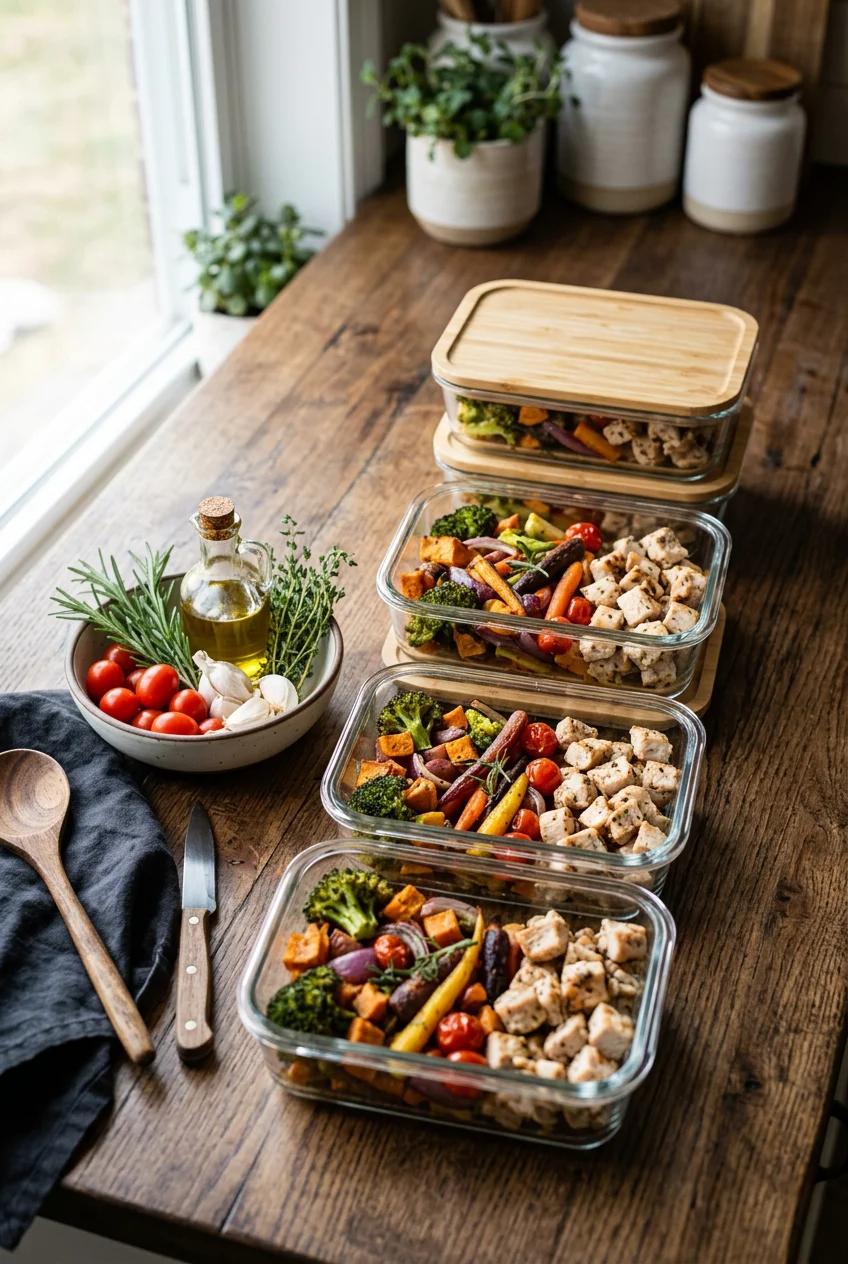
What’s Inside
- Invest in High-Quality, Portion-Specific Containers
- Embrace Vacuum Sealing for Extended Freshness
- Always Cool Meals Completely Before Freezing
- Portion with Purpose to Avoid Waste
- Label Everything Clearly with Contents and Date
- Leave Adequate Headspace for Expanding Liquids
- Choose Freezer Friendly Meal Prep Recipes Wisely
- Flash Freeze Individual Components for Better Texture
- Utilize Freezer Bags Effectively and Efficiently
- Freeze Casseroles Unbaked for Superior Results
- Master Freezer Friendly Meal Prep by Skimming Fat from Soups
Last November, I stood in my kitchen crying over a shattered glass container of chicken noodle soup that had literally exploded in my freezer. Honestly, my first attempt at freezer-friendly meal prep was a total disaster. I’d spent four hours on a Sunday batch-cooking, only to end up with sticky frozen broth covering my ice maker and the sharp smell of wasted thyme stinging my nose. I did this wrong for months before figuring it out. I’d buy cheap plastic tubs from Walmart, shove boiling hot food inside, and wonder why everything tasted like freezer burn and regret. Learned that the hard way. But once you get the hang of it, proper freezing saves your sanity and your grocery budget. Freezer-friendly meal prep doesn’t have to be a frustrating mess of mystery bags and icy mush. Let’s fix your freezer stash right now.
1. Invest in High-Quality, Portion-Specific Containers

I’m telling you right now, stop saving those flimsy takeout containers. They crack, they leak, and they ruin your hard work. The cheap plastic holds onto the smell of old garlic and stains bright orange from tomato sauce. Last Tuesday at Costco, I saw a woman loading up on cheap plastic bins, and I had to physically restrain myself from warning her. I personally swear by Souper Cubes for freezing liquids. They cost exactly $19.95 per tray on Amazon, and they’re worth every single penny. You pour your soup or chili into the 1-cup or 2-cup silicone slots, freeze them solid, and pop them out like giant ice cubes. The satisfying pop of the silicone tray releasing a perfect brick of minestrone is the best sound. For solid meals, I only use Pyrex glass containers. You can buy them in 3-cup, 4-cup, 6-cup, 7-cup, and 11-cup sizes. They cost around $25 for a set at Target. They transition from the freezer to the microwave or oven without shattering. I’ve dropped a frozen 4-cup Pyrex dish of baked ziti directly onto my hardwood floor, and it didn’t even chip. Skip the fat-free stuff and the cheap plastic. It’s just not worth it.
2. Embrace Vacuum Sealing for Extended Freshness

If you’re buying meat in bulk to save money, you need a vacuum sealer. I used to just wrap my 6 oz chicken breasts in plastic wrap and pray. Six weeks later, they’d emerge covered in thick, white ice crystals, smelling absolutely foul. A vacuum sealer sucks out all the air, preventing freezer burn and keeping food fresh up to five times longer. I grabbed the Sonix Pack Compact Vacuum Sealer for $79.99, and it’s incredibly reliable. The loud, mechanical hum of the machine sucking the plastic tight against a marinated pork chop is weirdly thrilling. If you want something fancier, the Anova Culinary Precision Vacuum Sealer runs around $74 and works beautifully. Executive Chef Bernard Janssen of ZWILLING J.A. Henckels recommends their ZWILLING Fresh & Save system. Starter sets range from $80 to $130. It uses glass containers and reusable bags with a little handheld pump. I bought a huge pack of wild-caught salmon at Whole Foods last month, portioned it into 4 oz fillets, and vacuum-sealed them. They still look bright pink and perfectly fresh today. Don’t skip this step. Air is the enemy of frozen food.
3. Always Cool Meals Completely Before Freezing

Most people get this wrong. I definitely did. I used to pull a boiling pot of turkey chili off the stove, ladle 2 cups into a container, snap the lid on, and shove it straight into the freezer. Don’t do this. Putting hot food directly into your freezer raises the internal temperature of the whole appliance. It partially thaws the food around it. Plus, the steam from your hot food gets trapped under the lid. That steam turns into heavy condensation, which drips down onto your food and freezes into giant ice crystals. When you reheat it, that ice melts and turns your dinner into a watery, mushy mess. You need to let your cooked meals cool to room temperature. Aim for under 70°F (21°C). I usually leave my 11-cup Pyrex of roasted vegetables sitting on the cool granite counter for exactly an hour. To speed up the cooling process for a massive batch of soup, divide it into smaller 1-cup portions first. You can actually see the steam stop rising when it’s ready. Only then should you secure the lids. You might also like: 15 Creative Cold Lunch Ideas to Transform Your Space

M MCIRCO 10-Pack,30 Oz Glass Meal Prep Containers 2
M MCIRCO 10-Pack has been one of the most consistently praised picks in this category. 23 reviewers averaged 4.5/5.
4. Portion with Purpose to Avoid Waste

There is nothing worse than craving just one bowl of macaroni and cheese, but realizing you froze a massive 9×13 pan of it. You can’t just hack off a piece with a butter knife. I tried doing that with a 4-pound block of frozen shepherd’s pie once. I nearly sliced my thumb open and ended up thawing the whole thing, eating one serving, and throwing the rest away because you really shouldn’t refreeze thawed leftovers. Freeze your meals in single or family-sized portions that match exactly what you’ll actually eat. Food Editor Taylor Ann Spencer recommends freezing strictly in single-sized portions for easy grab-and-go lunches. I love doing this with 1.5-cup portions of chicken tikka masala. I snagged this idea from the Trader Joe’s frozen aisle. Their single-serving Indian meals are perfectly sized. I recreate them at home, freeze them in 2-cup glass containers, and just grab one on my way out the door to work. It completely eliminates food waste. Plus, smaller portions freeze faster and thaw faster. It’s just smarter meal prep. You might also like: 15 Stunning Healthy Dinner Ideas to Steal Right Now
5. Label Everything Clearly with Contents and Date

You think you’ll remember what’s inside that frosted plastic container. You won’t. Trust me on this. Last spring, I pulled out a container of what I thought was 2 cups of frozen marinara sauce to serve over spaghetti. I heated it up, poured it over the pasta, and took a bite. It was pureed strawberries. I’d completely ruined dinner because I was too lazy to write a label. Avoid mystery meals by meticulously labeling every single container and bag. I use Avery freezer labels. They cost about $6.49 for a pack of 120 at Target. Red Oak Label also makes incredibly durable ones. These specific labels are designed to withstand extreme cold and moisture. They won’t peel off, and your sharpie ink won’t smudge into a blurry blue cloud on the frosted plastic when the container sweats during thawing. I always write the exact dish name, the date I cooked it, and the portion size. For example, “Beef Stew – 2 cups – Oct 14”. If a meal needs specific reheating instructions, write that down too. Your future self will thank you. You might also like: 15 Brilliant Good Meal Prep Ideas That Changed Everything
6. Leave Adequate Headspace for Expanding Liquids

Remember my opening story about the exploding chicken noodle soup? That happened because I filled the glass container to the absolute brim. Liquids expand when they freeze. If you don’t give them room to grow, the pressure will literally blow the lid off your plastic tub or shatter your glass jars into a hundred icy shards. When you’re freezing liquids like soups, stews, or bone broth, you must leave at least 1 inch of empty headspace at the top of the container. If you’re using mason jars (I buy the 16 oz Ball jars for $12.99 at Kroger), only fill them up to the “shoulder”. That’s the part where the glass begins to curve inwards toward the rim. I learned this the hard way after losing a massive batch of homemade chicken stock. I heard a loud, sharp crack from inside the freezer door. Opening it to find a sticky, frozen waterfall of broth was infuriating. Now, I actually use a little ruler if I’m unsure. Give your liquids room to breathe.

Vtopmart 5Pack 22oz Glass Storage Containers with Lids
A dependable everyday pick — Vtopmart 5Pack 22oz Glass Storage Containers with Lids pulls in 34 ratings at 4.5 stars. Not flashy, just solid.
7. Choose Freezer Friendly Meal Prep Recipes Wisely

Not everything belongs in the freezer. I used to think I could meal prep anything and freeze it. I was so wrong. Do not freeze dishes with high water content. Delicate raw vegetables like lettuce, cucumbers, or zucchini turn into a soggy, translucent mush that tastes like wet dirt when thawed. Fried foods lose all their crunch and become intensely greasy. Cream-based sauces made with heavy dairy will completely separate, leaving you with a grainy, oily puddle. Valerie Li, a kitchen editor I follow, suggests sticking to heavy hitters like stir-fries, thick soups, rich stews, curries, and baked casseroles. These hold their textures beautifully. Cooked pasta and rice generally freeze well, but here is a massive pro tip. You have to undercook your pasta by about two minutes. If the box says boil for 10 minutes, only boil it for 8 minutes. When you reheat the frozen meal, the pasta will finish cooking in the sauce. If you freeze fully cooked pasta, it turns into a gummy, unappetizing paste. Stick to hearty recipes for successful freezer-friendly meal prep.
8. Flash Freeze Individual Components for Better Texture

If you just dump two dozen freshly made turkey meatballs into a Ziploc bag and freeze them, they will fuse together into one giant, impenetrable meat boulder. You’ll have to thaw all twenty-four meatballs just to eat three. The secret is flash freezing. This technique prevents individual items from clumping together. You take a large metal baking sheet, line it with parchment paper, and spread your items out so they aren’t touching. I do this with fresh blueberries, 1-tablespoon mounds of leftover tomato paste, and grated ginger. Put the baking sheet in the freezer for about two hours. Once the items are rock solid, you can transfer them all into a single freezer bag or container. They will stay completely separate. The clinking sound of frozen meatballs hitting the glass storage bowl is incredibly satisfying. I buy huge flats of fresh strawberries at Sprouts when they go on sale for $2.99, wash them, slice them, and flash freeze them. It takes a little extra effort upfront, but it’s totally worth it.
9. Utilize Freezer Bags Effectively and Efficiently

Glass and silicone containers are great, but they take up a lot of physical space. For flat items or thick sauces, I rely heavily on freezer bags. But you can’t just use the cheap, thin sandwich bags. They will rip, and your food will get freezer burn immediately. I only buy Ziploc Freezer Bags in the Power Shield or Grip ‘N Seal varieties. A box of 60 gallon-sized bags runs about $11.89 at Walmart. If you prefer reusable options, Stasher silicone bags are incredible. A half-gallon Stasher bag costs $21.99. To get the best results without a fancy vacuum sealer, I use the straw trick. Put your food in the bag, zip it almost all the way shut, stick a reusable metal straw into the tiny opening, and physically suck the excess air out with your mouth. Pull the straw out and snap it sealed. Then, lay the bag completely flat on a baking sheet to freeze. Once it’s frozen into a rigid, flat board, you can store it vertically like a book on a shelf. It maximizes your freezer space perfectly.

KOMUEE 10 Packs 30 oz Glass Meal Prep Containers
A dependable everyday pick — KOMUEE 10 Packs 30 oz Glass Meal Prep Containers pulls in 46 ratings at 4.5 stars. Not flashy, just solid.
10. Freeze Casseroles Unbaked for Superior Results

I used to bake my lasagnas completely, let them cool, and then freeze them. When I reheated them, the cheese on top turned into a rubbery, burnt crust, and the pasta was completely blown out. If you’re prepping casseroles, stuffed shells, or chicken pot pies, you need to freeze them unbaked. Assembling the raw ingredients and freezing them preserves the fresh taste and prevents you from basically cooking the meal twice. Freezing before baking also helps preserve the nutrient content in fresh vegetables like bell peppers or spinach mixed into the dish. I build my 9×13 inch casseroles in a metal pan, wrap the top tightly with a layer of plastic wrap, and then add a tight layer of heavy-duty aluminum foil. When you’re ready to eat it, you don’t even have to thaw it. Just remove the plastic wrap, put the foil back on, and bake it directly from frozen. You’ll just need to add an extra 15 to 25 minutes to the recipe’s original baking time. The cheese gets perfectly golden and bubbly.
11. Master Freezer Friendly Meal Prep by Skimming Fat from Soups

This is a step I skipped for years because I was just too lazy. When you cook a rich dish with a lot of fat, like a beef chuck roast stew or a heavy pork braise, a thick layer of liquid fat rises to the surface. If you freeze the meal with all that fat still mixed in, it can actually spoil over time in the freezer. Fat goes rancid much faster than protein or water, significantly shortening the frozen shelf life of your hard work. After I cook my stew, I let it cool on the counter. As it cools, the fat naturally rises to the top and forms a slightly cloudy, greasy layer. I take a large metal spoon and carefully skim that fat off and throw it in the trash. I did this last Sunday with a massive batch of short rib ragu. The meat cost me $24 at Whole Foods, and I won’t let it taste funky in two months. Skimming the fat leaves you with a cleaner, richer flavor when you finally reheat the meal. It takes five extra minutes.
Once your freezer is beautifully stocked, you have to manage it properly. I highly recommend implementing a First In, First Out system. When you add a new batch of turkey chili, put it behind the older containers so nothing gets forgotten in the icy depths. And please, master safe thawing techniques. Never leave frozen meat sitting on your kitchen counter all day. I thaw my meals overnight in the refrigerator (it takes about 5 hours per pound) or use the defrost setting on my microwave if I’m in a rush. Proper freezer-friendly meal prep absolutely saved my weeknight dinners and my grocery budget. It takes a little practice to get the cooling and labeling habits down, but you’ll get there. I’d love to hear what recipes you’re freezing this week. Pin this guide to your favorite meal prep board so you don’t forget these container sizes and temperature rules.
Frequently Asked Questions
Can I put hot food straight into the freezer?
No, you absolutely can’t. Putting hot food in the freezer raises the appliance’s internal temperature and creates heavy condensation under your container lids. This moisture freezes into ice crystals, causing severe freezer burn and ruining the texture of your food. Always cool to room temperature first.
What are the best containers for freezer friendly meal prep?
I highly recommend Souper Cubes for freezing liquids like soups in exact 1-cup portions. For solid meals, Pyrex glass containers are fantastic because they don’t hold onto smells and transition safely from the freezer to the oven without shattering.
How do I prevent frozen pasta from becoming mushy?
The trick is to undercook your pasta by about two minutes before freezing it. If the box says boil for 10 minutes, stop at 8 minutes. When you reheat the dish, the pasta will finish cooking in its sauce, keeping a perfect al dente texture.
Is it safe to thaw frozen meals on the kitchen counter?
You definitely shouldn’t thaw meals at room temperature because it encourages rapid bacterial growth. The safest methods are thawing overnight in the refrigerator (plan for 5 hours per pound), using your microwave’s defrost setting, or submerging the sealed bag in cold water.
