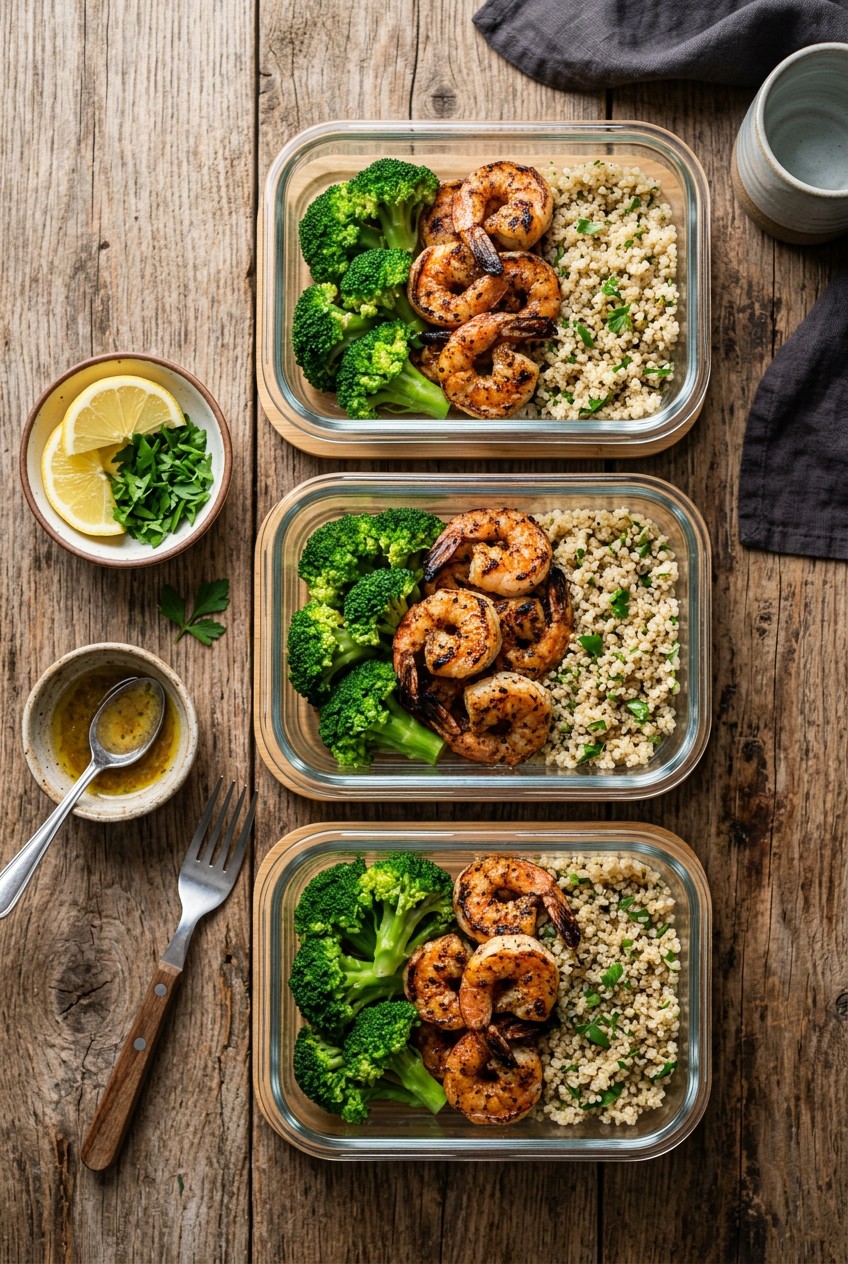
What’s Inside
- Prioritize Quality Frozen Shrimp for Shrimp Meal Prep
- Stock Up on Bulk Value Brands
- Master Safe Thawing Techniques
- Quick Thaw with Cold Water (Safely)
- Prevent Rubberiness with Baking Soda
- Pat Shrimp Dry for Optimal Sear
- Avoid Overcrowding the Pan
- Embrace Sous Vide for Perfect Texture
- Season Generously for Flavor Longevity
- Combat Warmed-Over Flavor in Shrimp Meal Prep
- Prep Avocado Salsa Strategically
- Reheat Gently to Maintain Texture
Last Tuesday at Whole Foods, I dropped a leaky bag of overpriced fresh shrimp right on my suede boots. It smelled like low tide for three straight days. That disaster forced me to rethink my entire shrimp meal prep strategy. I’m telling you right now, shrimp meal prep is totally worth making every week if you stop buying the wet, sad stuff from the seafood counter. I used to dread prepping seafood. It always felt too delicate or too smelly to pack for lunch. But once you learn a few basic rules about temperature and moisture, it becomes the easiest protein in your fridge. You’re going to save so much time. Here is exactly how I keep my lunches tasting fresh, snappy, and delicious all week long.
1. Prioritize Quality Frozen Shrimp for Shrimp Meal Prep

I’m completely done with the fresh seafood counter at Kroger. I tried buying their fresh shrimp for months before figuring out it’s literally just frozen shrimp they thawed out yesterday. It gets mushy. It smells fishy. Skip the counter stuff. It tastes like wet cardboard. Instead, I buy Trader Joe’s Wild Raw Argentinian Red Shrimp. It costs exactly $10.99 for a 16 oz bag. This specific bag changed my weekly routine. The shrimp are red even when raw, and they have a sweet, firm texture that honestly tastes like lobster. I use 1 tablespoon of olive oil and sear them up in the hot cast iron pan. I’ve wasted so much money on bad shrimp over the years. Took me years to figure out. Now I just grab three bags from the Trader Joe’s freezer aisle and I’m set for the month. You’re getting much better quality because they freeze it right on the boat. The icy crunch of the bag is a guarantee of freshness. When you bite into them after cooking, there is a snappy resistance. You don’t get that powdery, mushy texture from old shrimp. Buy it frozen. It’s the only way to go.
2. Stock Up on Bulk Value Brands

If you’re prepping for a whole family, boutique grocery stores can get pricey fast. That’s when I head straight to Costco. I always grab the Kirkland Signature Farm-Raised Raw Shrimp. It costs $16.99 for a massive 2 lb bag. This makes shrimp surprisingly affordable for regular consumption. I’m obsessed with how easy they peel. Last month, I tried a cheaper, no-name brand from a local discount store. Big mistake. Half the shells were stuck to the meat, and I spent 45 minutes peeling them while my kitchen smelled like a bait shop. Never again. The Kirkland brand is clean, smells like fresh ocean water, and cooks up beautifully. I usually portion out exactly 8 oz of frozen shrimp per meal prep container. I pair it with 1/2 cup of jasmine rice and 1 cup of steamed broccoli. Buying in bulk means I won’t hesitate to throw shrimp into a random Tuesday lunch. Just make sure you check the bag for ice crystals. If the bag looks like a snow globe inside, it thawed and refroze during shipping. Put it back and grab a pristine bag from the bottom of the freezer.
3. Master Safe Thawing Techniques

Most people get this wrong. I certainly did. I used to just toss a frozen block of shrimp on the counter and hope for the best. That’s a food safety nightmare. The safest method for thawing shrimp is overnight in the refrigerator. I take a rimmed baking sheet, line it with three layers of Bounty paper towels, and spread the shrimp in a single, even layer. I cover it tightly with plastic wrap and let it sit for 8 to 12 hours. The paper towels absorb all that gross, fishy water as the ice melts. If you let them thaw in a bowl of their own juices, they get a terrible mushy texture. I learned this the hard way last summer when I ruined a $15 bag of Northern Chef Wild Baja shrimp. They turned into absolute mush in my skillet. Now, I’m militant about the paper towel method. It keeps the flesh firm and snappy. You’re going to notice a huge difference in how they sear when they aren’t waterlogged. It takes a little planning, but it’s worth it.

Vtopmart 5Pack 22oz Glass Storage Containers with Lids
Vtopmart 5Pack 22oz Glass Storage Containers with Lids punches above its price — 32 buyers rated it 4.5 stars. I would buy it again.
4. Quick Thaw with Cold Water (Safely)

Sometimes I completely forget to take the shrimp out the night before. It happens to the best of us. When time is short, you can quick-thaw them safely. Do not use warm water. I repeat. Do not use warm or hot water. I tried running hot tap water over frozen shrimp once to speed things up. They literally started cooking in the sink and turned into rubbery little tires. It’s absolutely disgusting. Instead, put your frozen shrimp in a heavy-duty Ziploc freezer bag. Squeeze all the air out so it sinks. Submerge that sealed bag in a large mixing bowl filled with freezing cold tap water. Weigh it down with a heavy ceramic plate so it stays under the water. Let it sit for 15 to 30 minutes. If they need longer, you have to dump the water and refill it with fresh cold water every 30 minutes. This prevents dangerous bacterial growth. Once they’re soft and bendy through the plastic, they’re ready to go. I usually prep a quick marinade with 2 tablespoons of soy sauce and 1 tablespoon of sesame oil while I wait. You might also like: 15 Creative Cold Lunch Ideas to Transform Your Space
5. Prevent Rubberiness with Baking Soda

This is a wild expert tip that changed how I cook seafood forever. If you want surprisingly tender shrimp, you need baking soda. I know it sounds weird. I was super skeptical when I first heard about it. Last October, I bought a 12 oz bag of Sprouts brand raw shrimp. I sprinkled exactly 1/4 teaspoon of Arm & Hammer baking soda over the raw, thawed shrimp. I tossed them well and let them sit for exactly 15 minutes. No longer, or they get a weird soapy taste. I rinsed them off thoroughly under cold water and cooked them. You won’t believe the texture. The baking soda alters the pH level of the meat. It keeps them plump, juicy, and prevents them from shrinking down into tiny, tough little commas. I’m never skipping this step again. It gives them that snappy, restaurant-quality bite. I’ve ruined so many expensive bags of shrimp by overcooking them into rubber bands. This little baking soda trick gives you a built-in safety net. Just make sure you rinse it off completely before you add your spices. You might also like: 15 Clever Family Dinner Ideas for a Fresh New Look
6. Pat Shrimp Dry for Optimal Sear

I can’t stress this enough. Moisture is the absolute enemy of a good sear. After thawing and rinsing your shrimp, you have to pat them completely dry. I’m talking bone dry. I use two more sheets of those Bounty paper towels and literally press down hard on the shrimp. If your shrimp go into the pan wet, they won’t sear. They will steam in their own juices. You end up with a pale, gray, sad-looking piece of seafood instead of a beautifully caramelized crust. I used to skip this step because I was lazy and hated wasting paper towels. My shrimp always looked boiled and tasted bland. Then I started drying them thoroughly. Now, when they hit the hot oil, you hear that aggressive, satisfying sizzle. I usually coat them in 1 tablespoon of avocado oil and 1 teaspoon of smoked paprika before they hit the pan. The spices stick so much better to a dry surface. It makes a messy pile of wet paper towels on the counter, but it’s 100 percent necessary for good texture. Don’t skip it if you want restaurant-quality color. You might also like: 20 Beautiful Food Prep Ideas for a Fresh New Look

KOMUEE 10 Packs 30 oz Glass Meal Prep Containers
KOMUEE 10 Packs 30 oz Glass Meal Prep Containers punches above its price — 45 buyers rated it 4.5 stars. I would buy it again.
7. Avoid Overcrowding the Pan

I’m incredibly guilty of being impatient in the kitchen. For years, I’d dump an entire 2 lb bag of Costco shrimp into one medium skillet. I wanted to finish meal prepping faster so I could watch TV. It was a massive mistake. The temperature of the pan plummets immediately when you add that much cold food. Instead of searing, the shrimp just sit in a pool of lukewarm, bubbling gray water. They boil. They get rubbery. It’s awful. Now, I use a massive 12-inch Lodge Cast Iron Skillet. I let it get smoking hot. I cook the shrimp in small batches. I leave at least half an inch of space between each piece. Yes, it takes an extra 10 minutes to do two or three batches. But the result is perfectly pink shrimp with a crisp, golden-brown edge. I pull them out with a pair of OXO Good Grips tongs the second they curl into a loose C shape. If they curl into a tight O, they’re overcooked. Give them plenty of space to breathe in the pan.
8. Embrace Sous Vide for Perfect Texture

I’m calling it right now. The biggest 2026 trend for high-protein meal prep is sous vide cooking. I got an Anova Culinary Sous Vide Precision Cooker for $129.00 on Amazon last Christmas, and it’s a massive upgrade for my kitchen. Shrimp are notoriously easy to overcook. You look away for five seconds to check a text, and they turn into pencil erasers. With the sous vide, you set the water bath to exactly 135 degrees Fahrenheit. I toss 1 lb of shrimp into a vacuum-sealed bag with 1 tablespoon of Kerrygold butter and two sprigs of fresh thyme. I drop the bag in the water for exactly 30 minutes. You get consistently moist, juicy, and tender results every single time. It completely eliminates the risk of overcooking. I was terrified of sous vide at first. I thought it was just for fancy restaurant chefs with tweezers. But honestly, it’s foolproof. I pull the bag out, pat the shrimp dry with a paper towel, and give them a blindingly fast 30-second sear in a hot pan. You get perfect texture without any of the stress.
9. Season Generously for Flavor Longevity

Meal prepped food loses its punch after a few days in the fridge. You have to over-season your shrimp if you want them to taste good on Thursday. I learned this when I prepped plain salt-and-pepper shrimp for a week. By Wednesday, they tasted like absolutely nothing. Just bland, chewy sadness. Now, I use aggressive seasonings. My current obsession is a homemade Cajun blend. I mix 1 teaspoon of McCormick Smoked Paprika, 1/2 teaspoon garlic powder, 1/2 teaspoon onion powder, 1/4 teaspoon dried thyme, and a hefty pinch of cayenne pepper. I toss 1 lb of shrimp in this mixture until they’re completely coated in a thick, red paste. If I want something sweeter, I do a honey garlic marinade. I whisk 2 tablespoons of Kikkoman Soy Sauce, 1 tablespoon of local honey, 1 teaspoon of minced garlic, and 1/2 teaspoon of crushed red pepper flakes. The bold flavors seep into the meat and actually taste better after sitting in the fridge for a day or two. Don’t be shy with the spices. Your future self will thank you.

M MCIRCO 10-Pack,22 Oz Glass Meal Prep Containers
Honestly, M MCIRCO 10-Pack surprised me — sturdier than it looks in the photos, and over 86 buyers gave it 4.5 stars.
10. Combat Warmed-Over Flavor in Shrimp Meal Prep

Have you ever reheated leftover meat and it tastes slightly like a wet dog? That’s called Warmed-Over Flavor or WOF. It happens because of lipid oxidation. It’s disgusting. Addressing WOF is a huge 2026 meal prep trend. Seafood is especially prone to this nasty fridge taste. I used to throw away so much prepped shrimp because I couldn’t stomach the funky flavor on day three. To combat this, I started using moisture-locking marinades. Adding an acidic component, like 1 tablespoon of fresh lemon juice, helps stabilize the fats. But the biggest trick is rapid cooling. I don’t let my cooked shrimp sit on the stove for an hour. The longer they sit warm, the more they oxidize. I transfer the hot cooked shrimp immediately to a cold glass Pyrex container. I leave the lid off and stick it straight in the fridge to cool down rapidly. Once they’re cold, I snap the airtight lid on tight. This simple rapid cooling trick completely eliminated that gross leftover taste for me. It keeps the shrimp tasting fresh and clean all week long.
11. Prep Avocado Salsa Strategically

I love pairing my shrimp with a fresh avocado salsa. It adds healthy fats and a gorgeous pop of bright green color to my containers. But prepping avocados is notoriously tricky. They turn brown and mushy so incredibly fast. Last month, I made a huge batch of salsa on Sunday. By Tuesday, it looked like swamp mud. I had to scrape it straight into the trash. Now, I prep it strategically. I go to Whole Foods and buy three slightly underripe, firm Hass avocados. You want them to have a little give, but mostly firm. I dice them up and toss them with 1/2 cup of chopped red onion, 1/4 cup of fresh cilantro, and a very generous squeeze of fresh lime juice. I use at least 2 tablespoons of lime juice. The citric acid slows down the browning process. I pack the salsa in tiny 4 oz Glad Mini round containers. I press a piece of plastic wrap directly onto the surface of the salsa before putting the lid on. It keeps the air out. It stays perfectly green for exactly two days.
12. Reheat Gently to Maintain Texture

Reheating is where most people completely destroy their beautiful meal prep. You spent all this time perfectly searing your shrimp, and then you blast them in the office microwave for two minutes on high. They turn into hot, rubbery bullets. I’ve ruined so many lunches this way. You have to reheat gently. If I’m at home, I prefer the stove. I put a small non-stick pan over medium-low heat. I add 1 teaspoon of water or chicken broth. I toss the shrimp in and cover it with a lid for just 60 seconds. The steam warms them through without cooking them further. If I’m stuck at the office, I use the microwave, but I lower the power level. I set the microwave to 50 percent power. I heat my glass meal prep container for 45 seconds, stir, and then do another 30 seconds. They come out warm, soft, and still juicy. Cooked shrimp should be stored in airtight containers and eaten within 3 to 4 days for optimal safety. I use Ello glass containers because they don’t hold onto weird smells. Treat your leftovers gently.
I’m so glad I finally figured out how to make shrimp work for my weekly routine. It’s light, it’s packed with protein, and it breaks up the endless monotony of dry chicken breasts. Grab a bag of good frozen shrimp this weekend and try that baking soda trick. I promise you won’t regret it. Save this post for your next grocery run, and definitely pin it to your favorite meal prep board so you don’t lose these temperature tricks! Let’s make this week’s prep the best one yet.

M MCIRCO 10-Pack,30 Oz Glass Meal Prep Containers 2
If you want something that just works, M MCIRCO 10-Pack is a safe bet (23 reviews, 4.5 stars).
Frequently Asked Questions
How long does shrimp meal prep last in the fridge?
Cooked shrimp will last 3 to 4 days in the refrigerator when stored properly in airtight glass containers. For the best flavor and texture, eat them earlier in the week and use rapid cooling methods to prevent funky fridge tastes.
Can you freeze cooked shrimp for meal prep?
Yes, cooked shrimp can be frozen for 2 to 3 months. Make sure they are completely cooled before freezing in airtight containers or heavy-duty freezer bags to prevent freezer burn. Thaw them overnight in the fridge before eating.
How do you reheat meal prepped shrimp without it getting rubbery?
Never blast shrimp on high heat. If using a microwave, lower the power to 50 percent and heat in 30-second intervals. On the stove, use medium-low heat with a splash of water and a lid to gently steam them warm.
Why do you put baking soda on shrimp?
Tossing raw shrimp with a tiny amount of baking soda (about 1/4 teaspoon per pound) and letting them sit for 15 minutes alters their pH level. This keeps the meat plump, juicy, and prevents them from shrinking or getting rubbery when cooked.
