What’s Inside
- Glass Containers Are Mandatory For Meal Prep Bowls
- Use The Pasta Method For Perfect Grains
- Respect The Two-Hour Cooling Rule
- Separate Wet And Dry Ingredients
- Stop Chopping By Hand And Buy A Gadget
- Roast Sturdy Veggies For Your Base
- Lean On High-Quality Store-Bought Sauces
- Label Everything With Masking Tape
- Use The Freezer For Extended Storage
- Batch Cook Plant-Forward Proteins
- Add A Clean Spicy Kick
- Trader Joe’s Hacks For Asian-Inspired Meal Prep Bowls
I spent my first year of clean eating choking down fridge-cold mush that tasted like wet cardboard. My first attempt at meal prep was a disaster: overcooked brown rice and slimy spinach packed into a cheap plastic tub. It was so bad I tossed it and bought a greasy slice of pizza instead. I’m Esperanza Eliza, and I run simpleprepsunday.com because I want to save you from sad, uninspiring desk lunches. If you’re tired of spending all Sunday in the kitchen only to hate your food by Wednesday, you’re in the right place. I’ve made every mistake in the book so you don’t have to. Let’s fix your routine right now with some practical advice that actually works.
1. Glass Containers Are Mandatory For Meal Prep Bowls

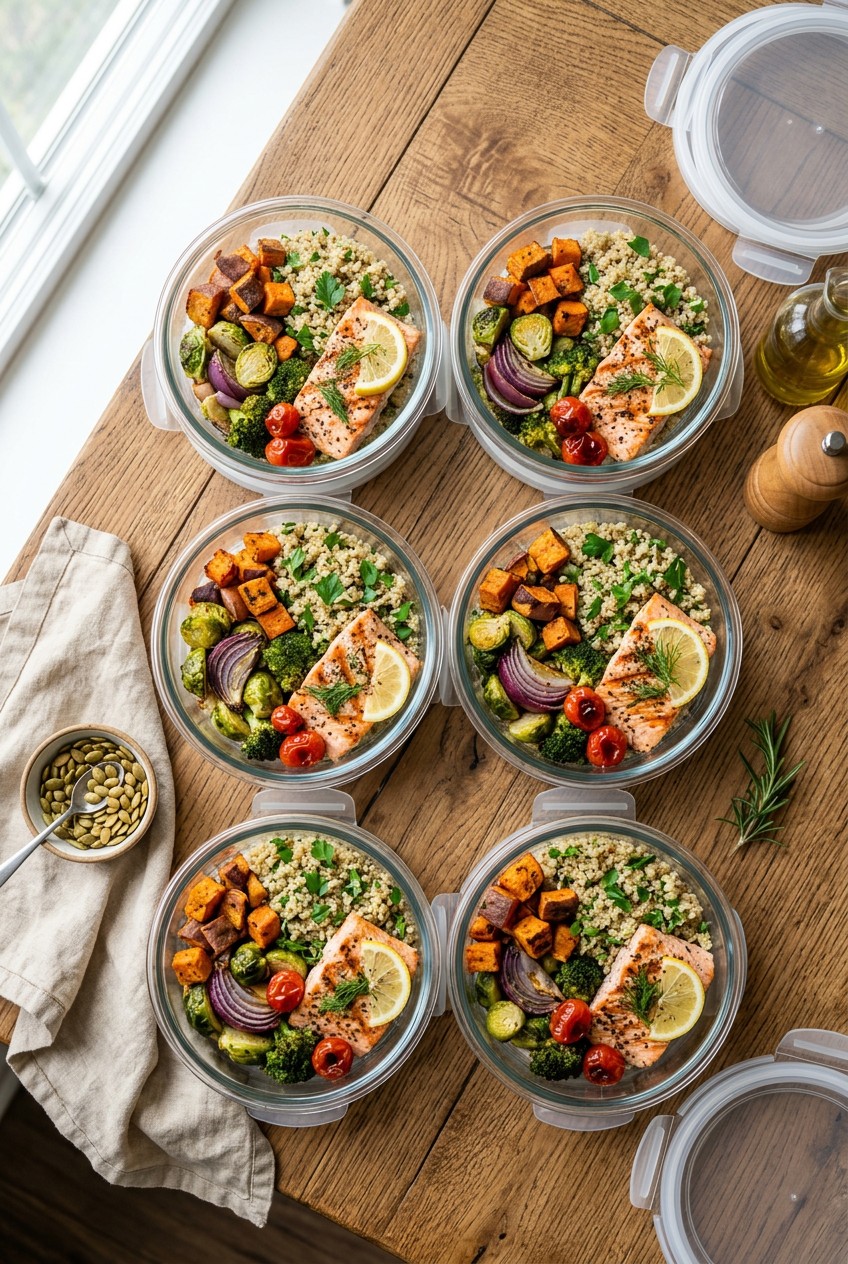
Skip the cheap plastic tubs. I used to buy those flimsy sets from Target, and within a month, they were permanently stained orange from turmeric chicken. They also warped in the microwave, leaving the lids impossible to snap shut. It’s frustrating to spend two hours cooking on Sunday only to have your lunch leak all over your car seats on Monday morning. Now, I exclusively use Prep Naturals Glass Containers. A 5-pack of their 30 oz borosilicate glass containers costs $39.99 on Amazon, and it’s worth every penny. Borosilicate glass is crucial. Standard tempered glass requires a 10-minute resting period between the cold fridge and the hot microwave, or it shatters. I learned that the hard way last Tuesday when a cheap bowl cracked, spilling 2 cups of hot lentil soup all over my office microwave. It was humiliating. Borosilicate glass can handle temperature changes safely up to 450 degrees Fahrenheit. You can pull a container of baked ziti out of the freezer and shove it straight into the oven without a second thought. Plus, glass is non-porous. It won’t absorb the smell of that heavy garlic curry you made. Look for sets with snap-lock lids and thick silicone gaskets. You need a leak-proof seal if you’re carrying saucy bowls in your bag on a crowded train.
2. Use The Pasta Method For Perfect Grains

If your quinoa turns out like a sticky clump of wet sand, you’re cooking it wrong. I struggled with mushy grains for months before figuring out the pasta method. Instead of measuring water ratios and praying for perfect absorption, just boil your grains like pasta. Grab a 16 oz bag of Whole Foods 365 Organic Quinoa ($4.49 in the dry goods aisle) and dump 1 cup into a massive pot of heavily salted boiling water. Let it roll at a rapid boil until tender, which usually takes about 12 minutes. Then, drain it thoroughly through a fine-mesh sieve. Here is the most important part: don’t put hot grains straight into your containers. Spread the cooked quinoa out in a thin layer on a large aluminum baking sheet to cool completely. This stops the cooking process and prevents mushiness. Once it’s room temperature, portion out about 1/2 to 3/4 cup per bowl. This method works for farro, brown rice, and pearl couscous too. I used to hate my lunches because the base was always a soggy disaster. This trick fixed my texture issues overnight. The grains stay fluffy for five days in the fridge. You won’t believe the difference. Trust me.
3. Respect The Two-Hour Cooling Rule

Food safety isn’t exciting, but food poisoning is worse. You can’t just leave a massive batch of hot chicken sitting on your counter all Sunday afternoon. To prevent bacteria, ensure all cooked foods cool to 40 degrees Fahrenheit or below within two hours. I made a huge, expensive mistake early on by packing piping hot roasted sweet potatoes into deep plastic containers and sealing the lids. Condensation built up, the food stayed in the danger zone for hours, and the batch went sour by Wednesday. I threw away $20 worth of groceries. Now, I divide hot food into shallow containers. They shouldn’t be more than 2 inches deep to allow heat to escape. Sometimes I line a sheet pan with Reynolds Wrap Heavy Duty Aluminum Foil (the 75 sq ft roll is $7.89 at Walmart) and spread out my roasted veggies to speed things up. Registered dietitian Samantha Nimmons points out that airtight containers are essential for freshness, but only after the food is cooled. Don’t trap that heat inside the box. Let it cool on the counter, then seal it up tight and get it into the fridge.

M MCIRCO 10-Pack,30 Oz Glass Meal Prep Containers 2
If you want something that just works, M MCIRCO 10-Pack is a safe bet (23 reviews, 4.5 stars).
4. Separate Wet And Dry Ingredients

Nothing ruins a lunch faster than a puddle of dressing turning your greens into swamp weed. A common mistake is allowing sauces to commingle with greens or grains on Sunday, leading to complete sogginess by Tuesday. You must keep liquid components and crunchy toppings separate until the moment you’re ready to eat. I swear by the OXO Prep & Go Divided Container. The 3.3 cup size is $16.99 at Target, and it features multiple leak-proof compartments. I put 4 oz of grilled chicken and 1 cup of fresh spinach in the main section, and 2 tablespoons of dressing in the tiny middle pod. If you don’t want new containers, buy a pack of 2 oz plastic portion cups from the paper goods aisle. Keep your croutons, slivered almonds, or pumpkin seeds in a tiny Ziploc bag inside the bowl. I once packed a beautiful Greek salad and poured the vinaigrette right over the feta and cucumbers. By Wednesday, it smelled like fermented socks and looked like a science experiment. Keep the wet stuff far away from the dry stuff. It’s non-negotiable if you want your food to taste fresh. You might also like: 15 Brilliant Salmon Dinner Ideas for Any Style
5. Stop Chopping By Hand And Buy A Gadget

If you’re spending two hours every Sunday standing over a cutting board, you’re going to burn out. I used to chop every bell pepper, zucchini, and onion by hand with a dull knife. By the time I finished, my lower back ached and I resented the food I just made. Invest in tools that cut down your prep time. The Fullstar Vegetable Chopper is $34.99 on Amazon (get the 4-blade version); it’s my favorite tool. You can dice an entire large yellow onion in 30 seconds. You just slam the heavy lid down and uniform pieces fall right into the catch tray. I use it for zucchini, carrots, cucumbers, and hard-boiled eggs. Some people think gadgets are a waste, but when you’re making a massive batch of pico de gallo or a salad base, this thing pays for itself in one afternoon. I bought mine after a frustrating Saturday where I bought $50 worth of produce and let half of it rot in the crisper drawer because I was too lazy to chop it all. Make it easy on yourself and buy the chopper. You might also like: 20 Clever Quick Lunch Ideas You Haven’t Thought Of
6. Roast Sturdy Veggies For Your Base

Delicate greens like spring mix don’t hold up for five days. By Thursday, they turn into a slimy mess you’ll just end up throwing away. You need sturdy vegetables that survive a few days in the fridge and a trip through the office microwave. I build my bowls around broccoli florets, halved Brussels sprouts, cubed sweet potatoes, or thick-cut bell peppers. I toss them with 1 tablespoon of olive oil, a pinch of salt, and roast at 400 degrees Fahrenheit for 20 to 30 minutes. They get crispy, caramelized edges that taste amazing even when reheated. If you’re short on time, grab the Kirkland Signature Stir Fry Vegetable Blend from Costco. A 5.5-pound bag is only $11.99, and it’s loaded with sturdy broccoli, snap peas, and water chestnuts. You can dump 2 cups of the frozen mix straight onto a sheet pan and roast it without thawing. Dietitian Samantha Nimmons advises including a complex starch and a fibrous vegetable with your protein for a balanced meal. Sturdy roasted veggies check the fiber box and actually taste delicious on day four. Skip the delicate stuff. You might also like: 20 Inspiring Sunday Dinner Ideas You Need to See

Vtopmart 5Pack 22oz Glass Storage Containers with Lids
Vtopmart 5Pack 22oz Glass Storage Containers with Lids has been one of the most consistently praised picks in this category. 32 reviewers averaged 4.5/5.
7. Lean On High-Quality Store-Bought Sauces

I used to think clean eating meant making every sauce from scratch. I spent hours simmering crushed tomatoes and blending soaked cashews until my blender overheated. It was exhausting and unnecessary. Don’t shy away from high-quality, lower-sugar store-bought sauces. The condiment aisle is much better now than it was ten years ago. For a simple Italian bowl, I use Yo Mama’s Foods Tomato Sauce Marinara. A 25 oz jar is $8.99 at Whole Foods or Sprouts. It’s a fantastic dietitian-approved option with no added sugar and very low sodium. I pour 1/2 cup over lean turkey meatballs and lentil pasta. It tastes just as good as homemade, and it saves me an hour of stirring a pot. Beginners often mess up by buying cheap BBQ sauces loaded with high fructose corn syrup, turning a healthy lunch into dessert. Read your labels. Look for jars with less than 4 grams of added sugar per serving. Rotating sauces is the easiest way to prevent flavor fatigue. You can eat the same chicken and rice every day, but if you change the sauce, it feels new.
8. Label Everything With Masking Tape

You think you’ll remember what’s in that opaque container pushed to the back of the fridge. Trust me, you won’t. I can’t tell you how many times I’ve played a dangerous game of “is this chicken from this Sunday or last Sunday?” You must label all containers with the contents and the date. I don’t buy fancy dissolving labels. I use a standard roll of Scotch Blue Painter’s Tape. A 0.94-inch roll is $4.99 at Target, and it peels off glass perfectly without leaving a sticky residue. I write “Turkey Chili – Sunday 10/12” in thick black Sharpie. You also need a strict “first in, first out” system. Older meals get pushed to the front of the shelf so they get eaten first. Cooked meats and mixed meals typically remain safe for 3 to 4 days. If I hit day five, I throw it out. It’s not worth the stomach ache or the risk of food poisoning. This simple taping practice helps avoid massive food waste. I used to throw away so much food just because I was too scared to guess how old it was.
9. Use The Freezer For Extended Storage

Sometimes life happens, and you go out for a spontaneous lunch with coworkers instead of eating your prepped meals. If you know you aren’t going to finish your food within that 3 to 4-day window, freeze it immediately. Don’t wait until day four when it’s already questionable. For meals I want to save, I use Ziploc Endurables Silicone Pouches. The medium 4-cup size is $14.99 at Kroger. They are thick, freezer-safe, and you can boil or microwave them right in the bag. Always portion your meals into single servings before freezing. I tried freezing an entire 9×13 glass pan of baked oatmeal once. Trying to hack a single slice out of a frozen block of solid oats at 6 AM on a Tuesday was a nightmare. I ended up throwing the whole thing in the trash. Now, I freeze individual 1-cup portions. When I need a quick lunch, I pull one pouch out, vent the seal, and microwave it for 3 minutes. It thaws perfectly. Just remember that things with high water content, like zucchini or tomatoes, turn to mush in the freezer.

KOMUEE 10 Packs 30 oz Glass Meal Prep Containers
If you want something that just works, KOMUEE 10 Packs 30 oz Glass Meal Prep Containers is a safe bet (45 reviews, 4.5 stars).
10. Batch Cook Plant-Forward Proteins

Eating plain grilled chicken breast five days a week gets boring. It also gets expensive if you’re buying high-quality meat. I recommend working plant-forward proteins into your routine. They hold up beautifully and usually cost a fraction of the price of meat. I love using Nasoya Organic Extra Firm Tofu. A 14 oz block is $2.99 at Walmart. I press the water out, cube it, toss it with 1 tablespoon of soy sauce and 1 teaspoon of garlic powder, then bake at 400 degrees Fahrenheit for 25 minutes. It gets super crispy and stays firm all week. Canned chickpeas and green lentils are also amazing. Just rinse a can of chickpeas, pat them dry, and roast them until crunchy. People complain that healthy eating is too expensive, but if you swap out two chicken meals for two lentil meals, your grocery bill drops significantly. Plus, plant proteins don’t get that funky warmed-over flavor that reheated chicken sometimes develops by day four. I keep a batch of crispy tofu in a glass container all week.
11. Add A Clean Spicy Kick

Clean eating doesn’t mean bland eating. If your food tastes like a hospital tray, you won’t stick to your diet for more than a week. You’ll end up ordering a $20 burrito on DoorDash by Wednesday afternoon out of sheer boredom. Boost the flavor with high-quality spices and hot sauces. I’m obsessed with Yellowbird Blue Agave Sriracha. A 9.8 oz bottle is $7.49 at Whole Foods. Unlike the traditional red rooster bottle packed with refined sugar and preservatives, Yellowbird uses organic ingredients, dates for sweetness, and minimal sodium. It’s oil-free, too. I drizzle about 1 teaspoon over my hard-boiled egg and sweet potato breakfast bowls. It provides a massive punch of flavor without adding junk. Rotate your spice blends, too. I used to dump plain salt and pepper on everything, and I hated my lunches. Now, I keep a drawer of smoked paprika, cumin, and dried oregano. Fresh herbs are great, but they wilt. If you’re prepping for five days, stick to dried spices on Sunday, and maybe toss a handful of fresh cilantro on top right before you eat.
12. Trader Joe’s Hacks For Asian-Inspired Meal Prep Bowls

Sometimes you just need a shortcut. When I’m exhausted on a Sunday afternoon, I make an Asian-inspired bowl using Trader Joe’s ingredients. I grab a 12 oz bottle of Trader Joe’s Toasted Sesame Dressing for $3.99. It’s hands down the best store-bought dressing I’ve ever tasted. It has a rich, nutty flavor from toasted sesame oil and soy sauce that makes everything taste incredible. I cook a quick batch of frozen edamame, shred some purple cabbage, and slice up some cucumbers. I pack 1/2 cup of brown rice, 1/2 cup of edamame, and a huge handful of cabbage into my glass containers. Then, I put 2 tablespoons of the sesame dressing into a tiny separate container. When it’s time for lunch, I mix it all together. It tastes like a fancy $15 salad from a trendy cafe, but it costs maybe $3 a serving. I tried making my own sesame dressing once. I knocked over a $10 bottle of toasted sesame oil, spilling it all over my kitchen floor. It took three days to mop up the grease. Stick to the $3.99 bottle. No exaggeration.
Honestly, mastering your weekly prep routine takes time and patience. Don’t beat yourself up if your first few batches aren’t picture-perfect. I ate a lot of soggy broccoli and rubbery chicken before I figured out these tricks. Start small. Buy a good set of glass containers, grab a reliable store-bought dressing, and try prepping just three lunches for your work week. Once you see how much time and money you save, you won’t want to go back to buying expensive, sad salads at the deli. It changes how you approach your weekdays when you know a good meal is waiting in the fridge. If you found these tips helpful, please pin this article to your favorite Pinterest board so you can find it later when you’re writing your Sunday grocery list! Happy prepping!
![[8-Pack,30 oz]Glass Meal Prep Containers](https://m.media-amazon.com/images/I/713Zfdsgi4L._AC_UL320_.jpg)
[8-Pack,30 oz]Glass Meal Prep Containers
[8-Pack punches above its price — 7 buyers rated it 4.5 stars. I would buy it again.
Frequently Asked Questions
How long do meal prep bowls last in the fridge?
Cooked meats and mixed meals typically remain safe and fresh for 3 to 4 days in the refrigerator. Always use an airtight glass container and label it with the date.
How do you keep meal prep bowls from getting soggy?
You must keep wet and dry ingredients separate. Store your dressings, sauces, and crunchy toppings in small, separate containers and only mix them into your bowl right before eating.
What are the best containers for meal prep bowls?
Borosilicate glass containers with snap-lock lids and silicone gaskets are the best option. They don’t absorb odors, won’t stain, and can safely transition from the fridge to the microwave without shattering.
Can you freeze meal prep bowls?
Yes, but only freeze dense grains, beans, and meats. High-water vegetables like zucchini will turn to mush. Portion your meals into single servings using freezer-safe silicone bags before freezing.
