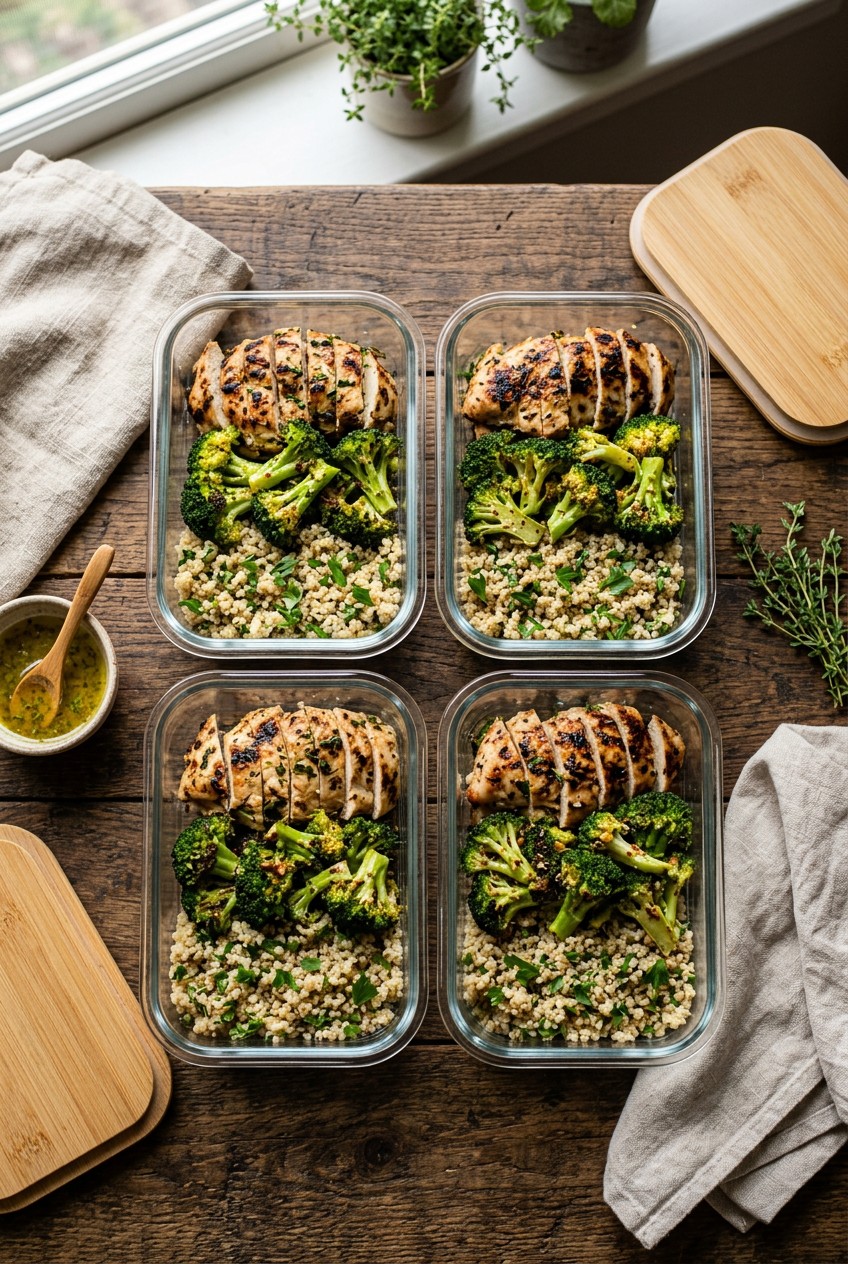
What’s Inside
- Optimize Your Cuts for Easy Chicken Meal Prep Budgeting
- Master the Air Fryer for an Easy Chicken Meal Prep Routine
- Stop Cooking Cold Chicken Straight from the Fridge
- Batch Cook with Neutral Seasonings First
- Flavor-Boost with Strategic Dry Rubs and Marinades
- Prevent Dry Chicken by Cooking to Temp, Not Time
- The Chef’s Cooling Secret to Stop Soggy Containers
- Shred Your Chicken for Superior Reheating
- Store Sauces Separately for Fresher Reheats
Last Tuesday at Trader Joe’s, I was staring at a pathetic, overpriced pack of chicken breasts, dreading my Sunday cooking routine. I realized my approach to easy chicken meal prep was completely broken. You know that distinct smell of sad, reheated poultry that permeates the office breakroom. I was the culprit for years. I tried this wrong for months before figuring it out. I’d cook a massive batch of dry breasts, shove them into cheap plastic, and wonder why I hated my lunches by Wednesday. It tasted like wet cardboard. I’m here to tell you it doesn’t have to be this way. I’ve ruined enough lunches to know exactly what works. Let’s fix your Sunday routine with methods that actually keep your food juicy and flavorful.
1. Optimize Your Cuts for Easy Chicken Meal Prep Budgeting

I used to buy the most expensive organic chicken breasts at Whole Foods, spending a small fortune just to dry them out in a hot cast iron pan. As of March 2026, standard boneless, skinless chicken breasts sit around $4.17 to $4.70 per pound. They make a great lean protein. But they’re unforgiving if you miss the cooking window by even a minute. Honestly, I’m a massive fan of switching to boneless, skinless chicken thighs. I grabbed a massive family pack at Costco last week for exactly $2.99 per pound. Thighs have a bit more fat. This means they hold onto their moisture better during the reheating process. You won’t get that chalky, dry texture that ruins a good Wednesday lunch. If you’re strictly tracking macros and need the leaner breast meat, that’s fine. Just know you’ll have to be hyper-vigilant about your cooking temperatures. When I first started, I bought a 3-pound pack of Tyson chicken breasts ($12.49 at Target) and baked them until they looked like shriveled hockey pucks. Don’t do that. Pick the cut that fits your budget and your tolerance for chewy meat. I’ve found that saving money on thighs leaves more room in the budget for high-quality sauces and fresh vegetables. Learned that the hard way.
2. Master the Air Fryer for an Easy Chicken Meal Prep Routine

I swear by my Ninja Air Fryer ($99.99 at Target) for getting that perfect golden crust without drying out the inside. Most people get this wrong. They just throw cold chicken into the basket and blast it at 400 degrees Fahrenheit. I did exactly this last month when I was rushing before a gym session. The outside was burnt and tasted like bitter ash. The inside was barely warm and raw in the center. It was a disaster. Instead, preheat your air fryer to 370 or 380 degrees Fahrenheit. Take your 1-inch thick chicken breasts and cook them for exactly 6 minutes on the first side. You’ll hear an aggressive sizzle when you open the drawer to flip them. Flip the meat and cook for an additional 4 to 9 minutes. You need a digital meat thermometer for this. I use the ThermoPro TP20, which costs $29.99 on Amazon. You’re looking for an internal temperature of 165 degrees Fahrenheit. The air fryer circulates heat fast, locking in juices, provided you don’t leave it in there for twenty minutes. It’s quick. It’s mess-free. And you won’t heat up your entire kitchen on a hot Sunday afternoon.
3. Stop Cooking Cold Chicken Straight from the Fridge

This is a hill I’ll die on. Cooking cold chicken straight from the refrigerator is the fastest way to ruin your meal. I used to yank a pack of Perdue chicken breasts ($8.49 at Kroger) right out of the fridge and toss them into a screaming hot cast iron pan. The result was always the same. The outside would sear and stick, while the inside remained raw and rubbery. The muscle fibers tense up when they hit the heat while freezing cold. This gives you a tough, stringy texture that no amount of sauce can fix. Let your chicken sit out on the counter for 15 to 20 minutes before you cook it. This brings the meat closer to room temperature for a beautifully even cook. I also recommend patting the raw chicken completely dry with paper towels. I use Bounty Select-A-Size ($3.49 for a single roll at Walmart). Removing that surface moisture allows the chicken to brown and develop a crust instead of steaming in its own cloudy juices. It’s a tiny step that changes the mouthfeel of your final dish. Skip the wet, steamed chicken. I’ve done it the lazy way, and it’s never worth it. Trust me. You might also like: 20 Inspiring Carnivore Meal Prep Ideas That Are Totally Worth It
![[8-Pack,30 oz]Glass Meal Prep Containers](https://m.media-amazon.com/images/I/713Zfdsgi4L._AC_UL320_.jpg)
[8-Pack,30 oz]Glass Meal Prep Containers
[8-Pack punches above its price — 7 buyers rated it 4.5 stars. I would buy it again.
4. Batch Cook with Neutral Seasonings First

Meal fatigue is real. If you flavor all three pounds of your chicken with heavy taco seasoning on Sunday, you’ll be sick of tacos by Thursday. I learned this the hard way last year when I prepped a massive batch of lemon pepper chicken. By day three, the smell of artificial lemon made my stomach turn. Now, I dedicate at least half of my batch to completely neutral seasonings. You only need 1 teaspoon of kosher salt (I use Diamond Crystal, $8.99 at Kroger) and 1/2 teaspoon of coarse black pepper per pound of raw chicken. This creates a blank canvas. You can shred this into a spicy tortilla soup on Monday, toss it into a Caesar salad on Tuesday, and mix it with BBQ sauce on Wednesday. It won’t clash with anything. I store these plain portions in Ziploc gallon slider bags ($5.49 at Target) or basic glass containers. When you open the fridge, you won’t be hit with a wall of competing garlic and citrus smells. It just smells like clean, roasted poultry ready to be adapted to whatever you’re craving. It’s the smartest way to keep your tastebuds interested all week long. When you roast plain chicken with just salt and pepper, your kitchen smells like a classic Sunday roast instead of a chaotic mix of spices. You might also like: 15 Brilliant Salmon Dinner Ideas for Any Style
5. Flavor-Boost with Strategic Dry Rubs and Marinades

For the other half of your batch, go heavy on the flavor. I like to prep a cilantro lime marinade using 1/4 cup fresh lime juice, 1 teaspoon cumin, a pinch of sea salt, black pepper, a dash of cayenne, and 2 tablespoons of chopped fresh cilantro. I grab my produce at Sprouts because their cilantro bundles are massive and only cost about $0.98. If I’m lazy, I’ll just coat the chicken in Kinder’s Buttery Steakhouse Seasoning ($4.98 at Walmart). It has a rich, savory garlic and butter profile that smells incredible when it hits a hot pan. Marinate your chicken breasts for at least 30 minutes, but ideally up to 24 hours in a sealed Ziploc freezer bag. A quick warning: double-bag your marinades. Last summer, I had a bag of soy ginger marinade poke a hole and leak all over the bottom shelf of my fridge. Cleaning sticky, raw chicken juice out of the vegetable crisper at ten at night is a nightmare I won’t repeat. When done right, a good dry rub or liquid marinade caramelizes on the surface. This gives you those dark, sticky, flavorful edges that make leftovers enjoyable. You might also like: 15 Stunning Easy Lunch Ideas You Need to See
6. Prevent Dry Chicken by Cooking to Temp, Not Time

The biggest lie in home cooking is following the exact time on a recipe card for chicken breasts. Every oven cooks differently. Every chicken breast has a different thickness. If you just set a timer for 25 minutes and walk away, you’re playing Russian roulette with your lunch. Always use a digital meat thermometer. I mentioned the ThermoPro TP20 earlier, and I mean it. It’s mandatory. You want your chicken to reach a safe internal temperature of 165 degrees Fahrenheit in its thickest part. Here’s the secret most people miss. Pull the chicken off the heat when it hits exactly 160 degrees Fahrenheit. Transfer it to a cutting board and let it rest for 5 to 10 minutes. The residual heat trapped inside will cause carryover cooking, pushing the final temperature perfectly to 165 degrees. If you leave it in the pan until it hits 165, it’ll carryover cook to 175. You’ll be chewing on dry, stringy fibers. I used to cut into my chicken right out of the pan to check if it was pink. All the hot juices would bleed out onto the plate, leaving the meat parched. Let it rest. Your future self will thank you.

M MCIRCO 10-Pack,22 Oz Glass Meal Prep Containers
A dependable everyday pick — M MCIRCO 10-Pack pulls in 86 ratings at 4.5 stars. Not flashy, just solid.
7. The Chef’s Cooling Secret to Stop Soggy Containers

You just spent all this time cooking perfect, juicy chicken. Don’t ruin it by shoving it into a plastic box while it’s still steaming hot. I did this for my first two years of college. I’d pack hot chicken and broccoli into cheap plastic tubs, snap the lid shut, and throw them in the fridge. The trapped steam creates intense condensation. By the next day, the chicken was sitting in a pool of watery, gray liquid. The crust was gone, replaced by a soggy slime. To prevent this, use the chef’s cooling method. Spread your freshly cooked chicken in a single layer on a clean baking sheet. I use a heavy-duty Nordic Ware half sheet pan ($14.99 at Target). Let the chicken cool at room temperature for 30 minutes. Then, put the entire baking sheet into the refrigerator, uncovered, for another 30 minutes. This stops the cooking process and lets the surface moisture evaporate. Once it’s fully chilled, you can portion it into your Glasslock meal prep containers ($24.99 for an 18-piece set at Costco). Your chicken will stay firm, fresh, and free of that gross container sweat.
8. Shred Your Chicken for Superior Reheating

If you know you aren’t going to eat your prepped meals until Thursday or Friday, shred your chicken instead of dicing it. Sliced or cubed chicken breasts lose their internal moisture fast in the fridge. By day four, heating up diced chicken in the microwave feels like a punishment. Shredded chicken, on the other hand, acts like a sponge. It holds onto whatever cooking liquid, salsa, or broth it was cooked in, keeping the texture soft all week. I rely on my 6-quart Instant Pot Duo ($99.95 at Target) for this. I toss in 2 pounds of chicken breasts and exactly 1/2 cup of chicken broth (Swanson Chicken Broth, $2.69 at Kroger). I set it to high pressure for 20 minutes. If the chicken is frozen, I bump it to 30 minutes. Once it beeps, I do a quick release of the pressure. The chicken practically falls apart when you touch it with two forks. You can watch the meat fibers soak up the liquid, plumping up and becoming tender. The steam rolling out of the pot smells like a rich, comforting chicken soup. Shredding it right in those hot juices guarantees that every single bite will be tender, even after a minute in the office microwave four days later.
9. Store Sauces Separately for Fresher Reheats

The final piece of the puzzle is container management. If you pour a heavy teriyaki sauce or a vinaigrette directly over your chicken and rice on Sunday, it’ll turn into a mushy, fermented-tasting disaster by Wednesday. The acid in dressings actually breaks down the meat fibers, turning the chicken strangely mealy and soft. I experienced this with a batch of Greek chicken bowls. I poured the lemon vinaigrette over everything on prep day. When I opened the container at work, the chicken was mushy, the cucumbers were translucent, and it smelled faintly of sulfur. Never again. Keep your sauces strictly separated. I pack my dry chicken and veggies in glass Pyrex meal prep containers ($29.99 at Target). Then, I portion my sauces into tiny OXO Good Grips leakproof condiment containers ($9.99 for a set of three at Whole Foods). They are the perfect size for 2 tablespoons of dressing or hot sauce. You just pop the lid off the tiny container, microwave your chicken, and drizzle the fresh, cold sauce over the hot meal. The contrast in temperatures and the preservation of the chicken’s texture makes it taste like a freshly cooked meal, not leftovers. Took me years to figure out.
I really hope these tips save you from eating another sad, dry lunch. I’ve spent way too much time chewing on rubbery chicken, and I don’t want that for you. If you start buying the right cuts, letting your meat rest, and storing your sauces in separate containers, your weekday lunches will taste so much better. I’m telling you, it’s worth the extra ten minutes of planning on a Sunday. No exaggeration.
If you found this helpful, please pin this post to your favorite Pinterest board so you can find it next time you’re stuck in a cooking rut. Let’s make meal prep something we actually look forward to eating!

Skroam 10 Pack Glass Meal Prep Containers
Honestly, Skroam 10 Pack Glass Meal Prep Containers surprised me — sturdier than it looks in the photos, and over 57 buyers gave it 4.5 stars.
Frequently Asked Questions
How long does prepped chicken last in the fridge?
Cooked chicken safely lasts 3 to 4 days in an airtight container in the refrigerator. If you aren’t going to eat it by day four, I highly recommend freezing the individual portions immediately after cooking.
Why does my meal prep chicken always taste dry?
You’re likely overcooking it or slicing it while it’s too hot. Always use a digital meat thermometer, pull the chicken off the heat at 160 degrees Fahrenheit, and let it rest for 10 minutes before cutting.
Is it better to bake or air fry chicken for meal prep?
I prefer the air fryer for speed and texture. It circulates heat rapidly, giving you a golden crust in about 15 minutes. Baking is fine for massive batches, but the air fryer locks in moisture much better.
Can I freeze cooked chicken in meal prep containers?
Yes. You can freeze cooked chicken for up to 3 to 4 months. Use high-quality glass containers or vacuum-sealed bags to prevent freezer burn. Let the chicken thaw overnight in the fridge before reheating.
