What’s Inside
- Invest in a High-Powered Blender for Silky Smoothness
- Master the Freezer Pack Method for Smoothie Meal Prep
- Layer Ingredients Strategically for Optimal Blending
- Prioritize Gut Health with Prebiotic Powerhouses
- Boost Wellness with Collagen Peptides
- Balance for Satiety to Avoid the Sugar Bomb
- Add Liquids Separately and Wisely
- Pre-Freeze Tricky Ingredients to Prevent Clumping
- Avoid Over-Blending and Thaw Slightly
- Shop in Bulk for Your Smoothie Meal Prep
Last Tuesday at 6:15 AM, I stood in my kitchen chipping away at a frozen block of spinach and almond milk with a butter knife. The glass jar was frosted over, my hands were freezing, and the butter knife was making a terrible scraping sound against the ice. I thought I was being efficient by freezing all my wet and dry ingredients together in a single mason jar the night before. I was wrong. Effective smoothie meal prep requires a specific, methodical strategy, otherwise you’re just creating unblendable ice sculptures that ruin your morning. I’ve spent the last three years testing different freezing methods, container types, and ingredient ratios to figure out what actually works when you’re half awake, holding a toddler, and trying to get out the door by 7 AM. The internet makes it look like you just throw pretty fruit into a cup, but the reality involves preventing freezer burn, balancing macros so you aren’t starving by 10 AM, and protecting your blender motor. Let’s walk through the steps, products, and measurements that make this process work. I’ll show you how I prep two weeks of breakfasts in under forty-five minutes on a Sunday afternoon, without wasting money on ingredients that turn to mush.
1. Invest in a High-Powered Blender for Silky Smoothness

If you’re trying to blend frozen kale in a twenty-dollar blender you kept from college, you’ll end up chewing your morning drink. I tried this wrong for months. I used a cheap glass blender I bought on clearance at Target, and every morning I choked down fibrous, stringy chunks of spinach that felt like wet paper stuck to the roof of my mouth. The texture was gritty, the ice never fully crushed, and the small motor smelled like burning rubber if I ran it longer than thirty seconds. I finally upgraded to the Vitamix Explorian E310. It costs $349 for the 48-ounce model. That’s a steep cost, but I’ve used this machine daily for two years and it hasn’t degraded at all. The heavy blades pulverize frozen fruit seeds, dense chia seeds, and tough leafy greens into a smooth, velvety liquid. There’s zero grit. If $349 isn’t in your budget, the Ninja Professional Blender runs about $99 at Walmart and is a decent alternative. The major tradeoff with the Ninja is the stacked blade design. It’s harder to clean because you have to pull the entire sharp blade tower out of the plastic pitcher to wash it. Skip the cheap plastic blenders. They won’t last more than a few months. Learned that the hard way.
2. Master the Freezer Pack Method for Smoothie Meal Prep

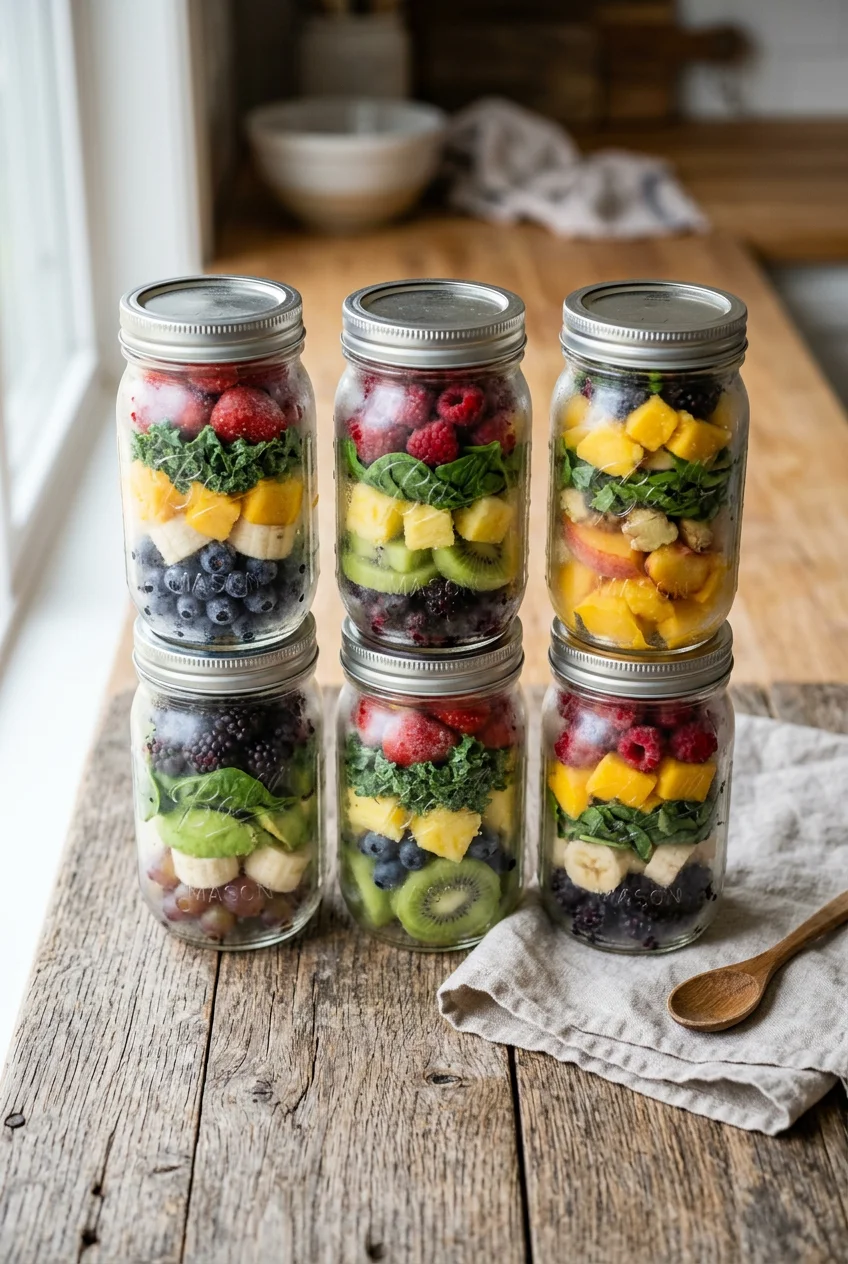
The core of successful smoothie meal prep is the freezer pack method. You portion out all your solid, dry ingredients into bags on Sunday afternoon, so Monday morning requires zero measuring, cutting, or thinking. I used to use standard zip-top plastic bags from the baking aisle at Kroger. After a month, I realized I was throwing away fifteen plastic bags a week. The sharp, jagged edges of frozen pineapple chunks kept puncturing the thin plastic. This left sticky, frozen juice crystals all over my freezer shelf that I had to scrape off. I switched to reusable silicone Stasher bags. The sandwich size costs $21 at Whole Foods. The initial investment stings when you buy five or six of them, but the thick, food-grade silicone doesn’t tear, and the pinch-loc seal doesn’t warp in the freezer. To make a standard pack, I measure 1 cup of frozen fruit, 1 tightly packed cup of fresh leafy greens, and my dry powders directly into the Stasher bag. I press the air out and lay them flat on top of each other so they freeze into neat, stackable rectangles. The silicone is thick, which means it takes a little effort to push the frozen block out. Running the outside of the sealed bag under warm tap water for three seconds solves that instantly.
3. Layer Ingredients Strategically for Optimal Blending

Loading your blender pitcher is a mechanical process. If you dump your solid frozen block into the pitcher first and pour the liquid on top, the blender blades will spin in an empty air pocket while the frozen fruit bridges across the bottom. I did this constantly when I started. The blades would shriek, the motor would strain, and I’d have to turn the machine off three times to jam a wooden spoon down the sides to break up the ice bridge. The correct sequence starts with liquids at the bottom, right against the metal blades. Pour 1 to 1.5 cups of your liquid base in first. Next, add your dry powders like protein powder or ground flaxseed. Putting them in the liquid allows them to dissolve instantly rather than sticking to the damp plastic walls. Then, add your fresh, unfrozen leafy greens. Finally, dump your heavy frozen fruit and hard vegetables on top. The weight of the frozen items pushes the light greens down into the liquid. The spinning liquid creates a vortex that pulls the hard pieces down into the blades without jamming. I use a 32-ounce glass measuring cup to measure my liquid. It’s a non-negotiable rule. Liquid first, or you’re wasting time. Trust me.

Rubbermaid Brilliance Tritan Plastic Food Storage
Rubbermaid Brilliance Tritan Plastic Food Storage Containers BPA Free has been one of the most consistently praised picks in this category. 583 reviewers averaged 4.5/5.
4. Prioritize Gut Health with Prebiotic Powerhouses

Adding prebiotic fiber to your morning routine changes how your digestion functions. Prebiotics act as food for the beneficial bacteria in your gut. I used to throw a handful of berries and a banana in a cup and call it a day, but I felt bloated and sluggish by 2 PM. I started adding specific prebiotic ingredients to my Sunday freezer packs. I measure 1/2 cup of dry rolled oats. I use the Bob’s Red Mill brand, which is $5.49 for a 32-ounce bag at Sprouts. I also add 1 tablespoon of whole black chia seeds into every silicone bag. The oats add a thick texture that mimics a milkshake, while the chia seeds gel up to bind the liquid. If you don’t like the heavy texture of oats, use a tasteless prebiotic supplement instead. I currently use the LOAM Prebiotic Fiber Formula. It costs $28 for a 30-serving pouch online. It’s a white powder that dissolves in cold liquid. I measure one scoop into the dry ingredients of my freezer pack. The downside to raw chia seeds is they can get stuck in your teeth, so the LOAM powder is a cleaner alternative for busy mornings. You might also like: 15 Brilliant Simple Meal Prep Ideas for a Fresh New Look
5. Boost Wellness with Collagen Peptides

Protein is mandatory for a breakfast replacement, but I add collagen peptides for joint support and skin elasticity. I use Vital Proteins Collagen Peptides. I buy the large 24-ounce tub at Costco for $27.99 because buying the smaller canisters at the grocery store is a waste of money. I measure 2 tablespoons of the unflavored collagen powder into my freezer packs alongside the frozen fruit and greens. The powder is tasteless, but it behaves strangely if it gets wet before the blending process. One morning, I pre-mixed the collagen powder with my cold almond milk in a shaker bottle the night before. By 7 AM, the powder had turned into a gelatinous, rubbery puck stuck to the bottom of the bottle that wouldn’t dissolve. Collagen needs the high-speed friction of the blender blades to incorporate into a cold liquid. When you add it to the dry ingredients in your freezer pack, it stays dry until the second you turn the blender on. It adds a pleasant frothiness to the drink. I’ve used this brand for two years. The plastic scoop always buries itself at the bottom, but the formula dissolves better than cheaper versions. You might also like: 10 Dinner Meal Prep for Every Budget
6. Balance for Satiety to Avoid the Sugar Bomb

A smoothie made entirely of fruit isn’t a balanced breakfast. It’s a sugar spike that will leave you shaking, irritable, and starving by 10 AM. When I first started, I used two cups of frozen mango, a whole banana, and a cup of orange juice. It tasted like a tropical vacation, but two hours later at my desk, my hands were jittery and I was snacking on pretzels. You have to balance the natural fruit sugar with protein and fat. I limit my fruit to 1 cup per serving. To counter the carbohydrates, I add 1 scoop of Naked Whey protein powder. It costs $95 for a 5-pound tub online, and it provides 25 grams of protein with one ingredient. For healthy fats, I add 1 tablespoon of Kirkland Signature Almond Butter. It costs $13 for a 27-ounce jar at Costco. The almond butter adds a dense, nutty richness and keeps me full until 1 PM. The primary tradeoff with Naked Whey is that it has no artificial flavoring, so your smoothie tastes like the raw fruit you use. Skip the fat-free, heavily sweetened protein powders. They taste like wet cardboard. You might also like: 15 Stunning Aesthetic Batch Cooking You Need to See

buluker 4 Pack Bento Lunch Box Set 3 Compartment Food
buluker 4 Pack Bento Lunch Box Set 3 Compartment Food Storage Containe punches above its price — 23 buyers rated it 4.5 stars. I would buy it again.
7. Add Liquids Separately and Wisely

Never freeze your liquids inside the same container as your solid ingredients. I can’t stress this enough. As I mentioned, I once tried freezing almond milk, raw spinach, and mixed berries together in a glass mason jar. I thought I could pull the jar out, let it thaw, and blend it with an immersion blender. The liquid expanded as it froze, cracking the glass. The jar that survived contained a solid block of green ice that wouldn’t blend after sitting on the counter for thirty minutes. Keep your wet and dry ingredients separate until the moment of blending. I use 1.5 cups of unsweetened almond milk per smoothie. I buy the Trader Joe’s refrigerated unsweetened almond milk for $2.29 per 32-ounce carton. It has a neutral flavor and a thin consistency that helps the blades move quickly. If you want a thicker texture, oat milk works, but it adds unnecessary carbohydrates. Pour the cold liquid from the fridge into the blender pitcher right before you dump the frozen pack in. It guarantees a fluid blend rather than a broken machine.
8. Pre-Freeze Tricky Ingredients to Prevent Clumping

Some ingredients refuse to behave when tossed into a freezer bag. If you slice a fresh banana and throw it into a bag with fresh strawberries, they will freeze together into an impenetrable brick. The same rule applies to nut butter. If you drop a tablespoon of peanut butter into a bag of frozen fruit, it instantly freezes onto the side of the bag. You’ll spend five minutes the next morning scraping it out with a spoon while your ingredients melt. The solution is flash freezing. I take a large aluminum baking sheet and line it with parchment paper. I slice my bananas into thick coins and lay them flat. Then, I take my tablespoon and drop individual dollops of almond butter onto the parchment paper next to the bananas. I put the baking sheet in the freezer for thirty minutes. Once the banana slices and nut butter are frozen solid on the outside, I toss them into the individual Stasher bags. Because their exterior is frozen, they won’t stick to the silicone walls. It adds thirty minutes to your Sunday prep, but it saves you from cursing on a busy Tuesday morning.
9. Avoid Over-Blending and Thaw Slightly

There is a narrow window for optimal blending. If you under-blend, you’ll end up chewing your drink. If you over-blend, the friction from the high-speed blades heats the liquid, cooking the raw ingredients. I once left my Vitamix running on high for three minutes because I walked away to answer an email. When I poured it into my travel cup, the smoothie was lukewarm, and the texture had separated into a foamy layer on top and a watery sludge on the bottom. It was repulsive. The ideal blending time is 45 to 60 seconds on the highest speed. To make this work without leaving chunks, pull your freezer pack out and let it sit on the counter for 5 to 10 minutes before you blend. I usually pull the bag out, set it next to the blender, and go brush my teeth. This short thawing period allows rock-hard strawberries and mango chunks to soften slightly. They release their natural juices faster once the blades hit them, which gives you a creamier consistency. The temperature stays ice-cold, but the texture becomes velvety.

Food Scale, 11lb Digital Kitchen Scale with 6 Units LCD
A dependable everyday pick — Food Scale pulls in 21 ratings at 4.5 stars. Not flashy, just solid.
10. Shop in Bulk for Your Smoothie Meal Prep

If you’re buying tiny bags of frozen fruit at a premium grocery store, you’re defeating the financial purpose of making breakfast at home. A small 10-ounce bag of frozen blueberries at my local Kroger costs $4.99. That barely covers three days. I switched to buying 3-pound bags of organic frozen mixed berries at Costco for $10.99. When you calculate the cost per serving, my homemade version comes out to roughly $1.85 per drink. A medium green drink at the smoothie shop down the street costs $8.50 plus a tip. The savings are massive, but you have to organize the bulk items properly. When I prep my bags on Sunday, I use a strip of blue painter’s tape and a black Sharpie to label every bag. I write the flavor and the date. I learned to do this after I accidentally blended a bag of frozen cauliflower rice into a chocolate peanut butter smoothie because the white chunks looked like bananas. Keep your recipes simple. The trend for 2026 leans toward the 3-ingredient drink rule: one fruit, one green base, one protein source. It keeps your grocery bill low.
Smoothie meal prep doesn’t have to be a complicated, messy chore. Once you get the right blender, invest in proper silicone bags, and learn the sequence for loading your ingredients, the process becomes second nature. I recommend starting with just three basic freezer packs this Sunday to see how it changes your Monday morning. You won’t be stressed, you won’t be hungry at 10 AM, and you won’t have to clean a cutting board before work. The initial cost of the reusable bags and a decent blender pays for itself within a month when you stop buying overpriced drinks at a drive-thru. If you found these measurements and layering strategies helpful, pin this guide or save it to your phone. Having the ingredient ratios and flash-freezing steps ready when you hit the grocery store this weekend will prevent you from making the same mistakes I did. Start small, label your bags clearly, and remember that liquid always goes in the pitcher first. No exaggeration.
Frequently Asked Questions
Can you freeze liquids in smoothie meal prep bags?
No. Freezing liquids with your solid ingredients creates an impenetrable block of ice that will crack glass jars and strain your blender motor. Always keep your almond milk or water in the fridge and add it directly to the blender pitcher right before blending.
How long do smoothie meal prep packs last in the freezer?
When stored in thick, airtight silicone bags, prep packs will easily last up to three months without developing freezer burn. However, for the best flavor and texture, it’s recommended to consume them within two to three weeks of your initial Sunday prep session.
Why is my smoothie always chunky?
You are likely putting your frozen ingredients into the blender first. Always pour your liquid base in first, followed by powders, fresh greens, and finally the frozen fruit on top. The heavy frozen items will push the greens down into the liquid vortex, preventing chunks.
What is the best container for smoothie meal prep?
Reusable food-grade silicone bags, like Stasher bags, are the most effective containers. They don’t tear when punctured by sharp frozen fruit, they stack flat to save horizontal freezer space, and you can run them under warm water to easily release the frozen block of ingredients.
