What’s Inside
- Invest in Quality Glass Containers for Easy Healthy Lunch Meal Prep
- Master the Air Fryer for Crispy Proteins and Veggies
- Embrace Sous Vide for Perfectly Cooked Proteins
- Utilize Your Rice Cooker for More Than Just Grains
- Prep Versatile Base Grains in Bulk for Easy Healthy Lunch Meal Prep
- Don’t Underestimate the Power of Healthy Homemade Sauces
- Incorporate Buffet Style Meal Prep for Variety
- Use Silicone Baking Cups for Portion Control and Separation
- Prioritize Proper Food Safety and Cooling Techniques
Last Tuesday at Whole Foods, I watched a container of three-day-old leftover chili leak entirely through my canvas tote bag. It smelled like cumin and regret. That specific disaster is why I finally cracked the code on easy healthy lunch meal prep. If you’re tired of soggy salads and smelling like garlic at your desk, this method works. I tried the whole cook-five-identical-meals-on-Sunday thing for months before figuring it out. It just leads to throwing away Thursday and Friday’s portions because they taste like wet cardboard. Let’s fix that. You don’t need to eat sad desk lunches. You just need a better system.
1. Invest in Quality Glass Containers for Easy Healthy Lunch Meal Prep

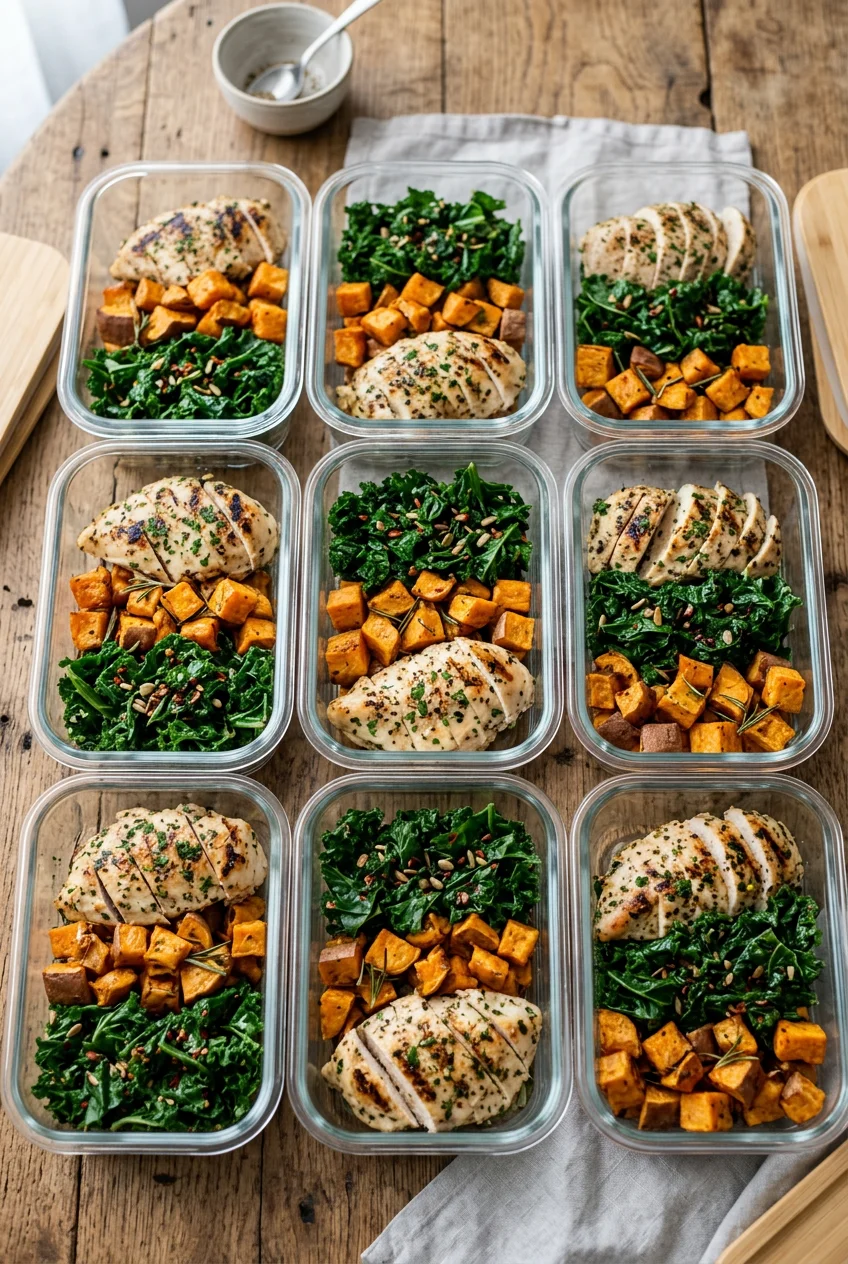
I used to hoard cheap plastic takeout containers. By week three, they were permanently stained orange from tomato sauce and warped from the microwave. The edges would get that weird melted texture, and they always smelled faintly of old garlic no matter how much I scrubbed them. I finally bought a 10-piece set of Ello DuraGlass containers from Target for $44.99. The thick silicone sleeve prevents them from sliding around on my fridge shelves, and the glass doesn’t absorb last week’s salmon scent. For liquids, I prefer Prep Naturals glass containers (around $32.99 for a 5-pack on Amazon) because the snap-locking lids actually keep my lentil soup inside the bowl instead of all over my car seats. Glass is heavier to carry in your work bag. That’s the one honest negative. When I walk from the parking garage to my office, I definitely feel the extra two pounds. But it’s oven, microwave, freezer, and dishwasher safe. You aren’t replacing them every two months. I can pull a glass container straight from the fridge, pop it in the microwave for two minutes, and eat a hot meal without worrying about weird chemicals leaching into my food. If you’re still using stained plastic, throw it away. Spend the thirty bucks.
2. Master the Air Fryer for Crispy Proteins and Veggies

I used to bake my chicken breasts in the oven. They always came out rubbery, pale white, and completely unappetizing. Now, I use my air fryer for almost all my protein prep. I take 1 lb of cubed chicken breast, toss it with 1 tablespoon of olive oil, 1 teaspoon of garlic powder, and 1 teaspoon of smoked paprika. I throw it in the basket at 375 degrees Fahrenheit for 12 to 15 minutes, shaking it exactly halfway through. The edges get crispy and browned, while the inside stays actually chewable. I bought the Ninja 4-Quart Air Fryer at Walmart for $89.00 last November. The non-stick basket is great, but the grate at the bottom is a nightmare to clean if you don’t soak it immediately. I learned that the hard way after letting sweet potato residue bake onto it for three days. It required a metal scraper. Despite the cleaning annoyance, it cuts my cooking time in half. You can also air-fry 2 cups of broccoli florets for 10 minutes. They get those charred, crispy edges that make them taste like restaurant vegetables instead of mushy microwave sadness. If you’re prepping on a Sunday afternoon, you can run three batches of different ingredients through the air fryer in under forty minutes.
3. Embrace Sous Vide for Perfectly Cooked Proteins

Cooking meat in advance usually means eating dry, stringy protein by Thursday. I tried this wrong for months before figuring it out. I’d grill four days’ worth of salmon, and by the end of the week, it tasted like fishy chalk. I bought an Anova Culinary Sous Vide Precision Cooker for $129.00 at Target, and it fixed the texture issue entirely. You vacuum-seal your protein, drop it in a water bath, and the machine holds the exact temperature. For my lunches, I seal 4 to 6 oz salmon fillets with a slice of lemon and a sprig of dill. I cook them at 115 degrees Fahrenheit for 45 minutes. The vacuum seal slows down oxidation, meaning the fish stays fresh in the fridge for up to five days. I buy the bulk farm-raised salmon from Costco for about $10.99 a pound, portion it out, seal it, and freeze half. The major downside here is the plastic waste from the vacuum bags. I hate throwing away heavy plastic every single day. I’ve tried the reusable silicone bags, but getting the raw meat smell out of the corners takes twenty minutes of scrubbing. It’s a frustrating tradeoff. Still, the precise temperature control means you literally can’t overcook your food.

buluker 4 Pack Bento Lunch Box Set 3 Compartment Food
If you want something that just works, buluker 4 Pack Bento Lunch Box Set 3 Compartment Food Storage Containe is a safe bet (23 reviews, 4.5 stars).
4. Utilize Your Rice Cooker for More Than Just Grains

Most people get this wrong. They leave their rice cooker in the cabinet unless they’re making a stir-fry. I keep my Zojirushi Micom Rice Cooker (the 5.5-cup model, $192.00 on Amazon) on the counter permanently. Beyond making perfect jasmine rice, a multi-function rice cooker is a massive time-saver for lunches. You can cook large batches of quinoa or farro, and simultaneously steam vegetables right on top. Last month, I layered 1/2 pound of seasoned ground turkey and 1 cup of sliced carrots in the steamer basket over 2 cups of dry brown rice. The meat juices dripped down and flavored the grains, and the whole thing finished in 40 minutes while I was folding laundry. I buy my bulk farro from Sprouts for $3.49 a pound in the bulk bins. It has a nutty, chewy texture that holds up beautifully in cold salads. One mistake I made early on was adding too much water when steaming vegetables over the rice. The condensation drips down, and you end up with a soggy, porridge-like mess at the bottom of the pot. You have to reduce the base water by about 1/4 cup if you’re steaming wet vegetables like zucchini.
5. Prep Versatile Base Grains in Bulk for Easy Healthy Lunch Meal Prep

If you’re doing easy healthy lunch meal prep, you need a carbohydrate base that won’t turn to mush after 24 hours in the fridge. I prep 4 to 6 cups of dry grains every Sunday. I used to make massive batches of white rice, but it gets hard and grainy when cold. Now, I stick to complex grains. I buy the 16 oz bags of Organic Quinoa from Trader Joe’s for $3.99. I cook a huge batch and keep it in a large glass bowl in the fridge. This gives me a neutral base to scoop from Monday through Friday. I’ll take 1/2 cup of cold quinoa, toss it with arugula, cherry tomatoes, and feta. It takes two minutes to assemble in the morning. I’ve definitely messed this up, though. I once forgot to rinse the quinoa before boiling it. The natural coating on the seeds made the entire batch taste like bitter soap, and I had to throw four days of food into the compost bin. Always rinse your quinoa in a fine mesh strainer for at least thirty seconds. Having the starch already cooked and chilled is the single biggest hurdle to get over. Once the grains are done, the rest of the lunch is just assembly. You might also like: 15 Brilliant Good Meal Prep Ideas That Changed Everything
6. Don’t Underestimate the Power of Healthy Homemade Sauces

A common mistake is eating completely unseasoned, dry food. That’s a fast track to meal prep burnout. By Wednesday, you’re ordering a sandwich on DoorDash because you can’t stomach another bite of plain chicken and broccoli. I prepare one or two healthy sauces at the start of the week to fix this. My current rotation includes a creamy tahini dressing. I whisk 1/4 cup of tahini, 2 tablespoons of fresh lemon juice, 2 tablespoons of warm water, one minced garlic clove, salt, and black pepper. I store these sauces in 8 oz glass Weck jars. I buy them at Crate & Barrel for $4.95 each. The glass lids and rubber gaskets keep the sauce airtight for up to a week. I also make a miso maple glaze using 1 tablespoon of white miso paste (I get the Cold Mountain brand from Whole Foods for $6.49), 1 tablespoon of maple syrup, and 1 teaspoon of toasted sesame oil. The honest negative about homemade sauces is that they separate in the fridge. The tahini dressing turns into a thick cement block by Tuesday morning. You have to let it sit on your desk at room temperature for twenty minutes and shake it aggressively before it’s pourable again. You might also like: 8 Chicken Meal Prep Recipes You Need to See

Bento Box Adult Lunch Box – 4 Pack, 5
A dependable everyday pick — Bento Box Adult Lunch Box – 4 Pack pulls in 24 ratings at 4.5 stars. Not flashy, just solid.
7. Incorporate Buffet Style Meal Prep for Variety

Instead of assembling five identical plastic tubs of food on Sunday, I use the buffet style method. I prep individual components and store them separately. This prevents flavor fatigue. I roast 2 lbs of mixed vegetables all at once. I’ll buy zucchini, bell peppers, and red onions from Kroger (usually around $8 total for the produce), chop them into uniform one-inch pieces, toss them in 2 tablespoons of olive oil, and roast at 400 degrees Fahrenheit for 25 minutes. I store the roasted vegetables in one large container, my cooked chicken in another, and my grains in a third. Each morning, I mix and match. Monday might be a warm grain bowl. Tuesday might be those same vegetables wrapped in a tortilla with hummus. I tried the traditional assembly method for a year. I’d put the wet tomatoes right next to the dry rice. By the time I ate it on Thursday, the rice had absorbed the tomato juice and turned into a pink, mushy paste. It was disgusting. Storing components individually keeps the textures intact. It does mean you’re washing three large storage containers at the end of the week instead of just five small ones, which takes up more dishwasher space.
8. Use Silicone Baking Cups for Portion Control and Separation

This is a weird trick that completely fixed my snack boxes. I bought a 12-pack of OXO Good Grips reusable silicone baking cups for $11.99 on Amazon. I don’t use them for baking muffins. I use them as structural dividers inside my glass containers. If I’m packing a bento-style lunch, I’ll put 1/4 cup of almonds in one silicone cup, and a handful of fresh blackberries in another. This separates the wet and dry ingredients. There is nothing worse than a damp, soggy almond that’s been sitting next to a wet strawberry for eight hours. The silicone cups keep the crackers crunchy and the fruit contained. They are oven, air fryer, microwave, and freezer safe. The only frustrating part is washing them. The ridges on the sides of the silicone cups hold onto grease and dish soap smells. If you don’t rinse them with scalding hot water, your next batch of almonds will taste faintly of Dawn dish soap. I’ve ruined a perfectly good lunch that way. Hand-wash them carefully, or put them on the very top rack of the dishwasher secured under a lighter plastic lid so they don’t flip over and fill with dirty water.
9. Prioritize Proper Food Safety and Cooling Techniques

You can’t talk about prepping food for five days without talking about bacterial growth. I got severe food poisoning in 2019 from a batch of turkey meatballs I left sitting on the counter for four hours before refrigerating. I learned my lesson. Now, I ensure all cooked foods cool quickly and are in the fridge within two hours. If I make a massive pot of lentil soup, I don’t put the giant, hot pot directly into the fridge. That raises the internal temperature of the refrigerator and puts your milk and eggs at risk. Instead, I divide the hot soup into 16 oz shallow glass containers. The smaller volume cools down significantly faster. I label every single lid with a strip of blue painter’s tape and a sharpie, writing the meal name and the date. I buy a roll of 3M Scotch Blue tape at Home Depot for $4.98, and it lasts me two years. It doesn’t leave a sticky residue on the glass like regular masking tape does. I consume all refrigerated meals within four days. If I prep on Sunday, Thursday is the absolute cutoff. Anything meant for Friday goes straight into the freezer on Sunday afternoon.
Lunch doesn’t have to be a stressful event. Once you get your containers sorted and stop forcing yourself to eat the exact same meal five days in a row, the whole process becomes automatic. Start with just two or three days of food if you’re feeling overwhelmed. Pin this guide for your next Sunday prep session, and let me know if the silicone cup trick works for you.

EASYFUN Bento Box Adult, Lunch Box
EASYFUN Bento Box Adult has been one of the most consistently praised picks in this category. 13 reviewers averaged 4.5/5.
Frequently Asked Questions
How long do easy healthy lunch meal prep bowls last in the fridge?
Most prepped meals last three to four days in the refrigerator. If you prep on Sunday, Thursday should be your absolute cutoff. To extend freshness, store wet ingredients like dressings in separate containers and freeze anything meant for Friday.
What are the best containers for meal prepping lunches?
Glass containers with snap-locking lids and silicone seals are the best choice. Brands like Ello DuraGlass or Prep Naturals prevent leaks and don’t absorb food odors or stains like plastic containers do. They are also microwave and dishwasher safe.
How do I stop my prepped salads from getting soggy?
The secret is keeping your dressing completely separate until right before you eat. Use small glass jars or silicone dressing cups. Also, ensure your washed greens are completely dry before packing, and place heavier ingredients like cucumbers at the bottom.
Can I freeze my meal prep lunches?
Yes, but it depends on the ingredients. Soups, stews, and cooked meats like chicken or shredded beef freeze beautifully. Avoid freezing raw vegetables, fresh greens, or dairy-based sauces, as their textures will become mushy or grainy when thawed.
