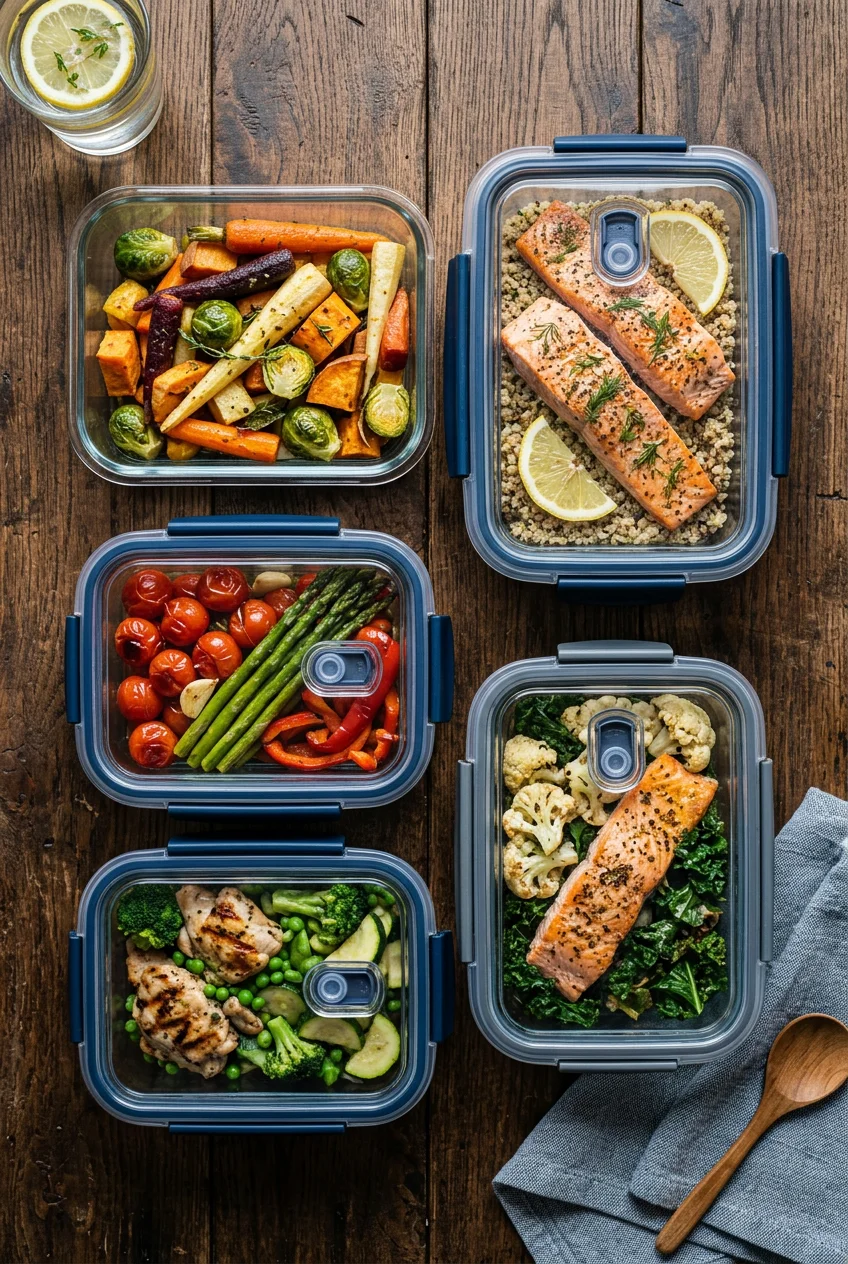
What’s Inside
- Extend Shelf Life with the Right Machine
- Budget Bags That Actually Hold the Seal
- The Cooling Rule for Vacuum Seal Meal Prep
- Flash Freezing Liquids First
- Leaving Blank Space in the Bag
- Bone Guards for Sharp Edges
- Portioning Before Sealing
- Labeling to Avoid Mystery Meals
- Fast Marinating Under Pressure
- Blanching Veggies for Vacuum Seal Meal Prep
I threw away three pounds of freezer-burned chicken breast last Tuesday. The edges were white, dry, and smelled faintly of old ice. That single trash can moment cost me $14. I’ve wasted so much money on ruined groceries, which is exactly why I finally figured out vacuum seal meal prep. If you’re tired of pulling unidentifiable, frost-covered blocks out of your freezer, vacuum seal meal prep fixes the problem completely. My early attempts were a disaster. I sucked hot soup into my machine motor and melted bags together. Learned that the hard way. Now, I keep my per-serving costs under $5 and pull perfectly preserved meals from the freezer months later. Let’s walk through exactly how to do this without ruining your food or your equipment.
1. Extend Shelf Life with the Right Machine

I spent two years wrapping chicken in plastic wrap and shoving it into generic freezer bags before I checked the math on my food waste. Standard freezer storage gives you six months before the texture turns into wet cardboard. I bought the FoodSaver V4840 at Costco for $199.99 last November. The automatic bag detection means I don’t have to awkwardly hold the plastic while pressing buttons. Vacuum sealing pulls all the oxygen out, which means refrigerated meals last 7 to 10 days instead of 3 or 4. Freezer meals stay fresh for 1 to 3 years. I tested this with a batch of shredded pork shoulder. I sealed half in standard bags and half with the FoodSaver. Six months later, the standard bag had ice crystals piercing the meat fibers. The vacuum-sealed pork looked exactly like the day I cooked it. The upfront cost of $200 feels steep, but when you’re buying family packs of protein at Costco, you recover the cost in about four months of zero food waste. The machine is bulky. It takes up a massive 18-inch footprint on my counter, so I have to store it in the pantry. But the heavy-duty motor seals tight every single time, unlike the cheap $30 models that leave air pockets around the food.
2. Budget Bags That Actually Hold the Seal

I tried saving money by buying off-brand plastic rolls on Amazon for $12. That was a massive mistake. Half the bags lost their vacuum pressure within a week, leaving my meal-prepped salmon exposed to the freezer air. I switched to the official FoodSaver Vacuum Seal Bags. A 100-count box costs $19.98 at Walmart. At roughly 20 cents per bag, it keeps my total meal cost well under $5 per serving. These bags are thick, BPA-free, and have specific channels molded into the plastic that allow the machine to pull air out efficiently. I use the 1-quart size for almost everything. They hold exactly 6 ounces of protein and 1 cup of vegetables perfectly. You can wash and reuse them if you only stored dry goods, but I throw them away after storing raw meat to avoid cross-contamination. The texture of the FoodSaver bags is rigid. They don’t puncture easily when I toss them into my crowded chest freezer. If you want a slightly cheaper alternative that still works, the Anova Precision Vacuum Sealer Bags run $15.99 at Target for a 50-count box of pre-cut bags. Pre-cut bags save you the step of measuring and melting the bottom seam yourself. I use the pre-cut ones when I’m prepping 20 meals at once and need to move fast.
3. The Cooling Rule for Vacuum Seal Meal Prep

I ruined a massive batch of turkey chili last October because I didn’t understand basic thermodynamics. I scooped the chili straight from the stove into the plastic bags and hit the seal button. The heat from the chili created steam inside the bag. As the machine pulled the air out, the steam condensed into water droplets along the seal line. The plastic melted unevenly, the seal failed, and chili leaked all over the inside of my machine. You must cool your food completely before sealing it. I now portion my hot meals into Pyrex glass containers ($24.99 for a 3-pack at Target) and leave them in the fridge overnight. Once the food hits 40 degrees Fahrenheit, I transfer it to the vacuum bags. Cold food doesn’t release steam. This simple step ensures the plastic melts together in a clean, solid line. Sealing warm food also traps heat in the center of the package, which encourages bacterial growth before the freezer can drop the temperature. I learned this the hard way when a batch of chicken and rice smelled sour after thawing. Wait the 12 hours. Let the fridge do the cooling work before you even plug your sealer in.

Etekcity Food Kitchen Scale
Etekcity Food Kitchen Scale punches above its price — 1,736 buyers rated it 4.5 stars. I would buy it again.
4. Flash Freezing Liquids First

If you try to vacuum seal a bag of liquid chicken noodle soup, the pump will literally suck the broth up the plastic channel and spray it into the internal motor. I spent 45 minutes cleaning sticky chicken fat out of my FoodSaver with Q-tips after making this exact error. To seal liquids, you have to flash-freeze them first. I use Souper Cubes ($34.95 at Whole Foods). They are thick silicone trays that mold liquids into perfect 1-cup blocks. I pour my lentil soup into the tray, freeze it solid overnight, and pop the frozen blocks out the next morning. Then I drop the hard blocks of soup into a vacuum bag and seal it. Because the liquid is completely solid, the machine pulls out the air without drawing up a single drop of moisture. This technique works for stews, pasta sauces, and even wet marinades. Once sealed, you have a perfectly flat, airtight brick of soup that stacks neatly in the freezer. When I’m ready to eat, I cut the bag open and drop the frozen block directly into a saucepan on medium heat. It melts back into soup in about 12 minutes. No messy plastic containers to wash, and zero freezer burn on the surface of the broth. You might also like: 10 Healthy Breakfast Meal Prep That Actually Work
5. Leaving Blank Space in the Bag

When I first started, I tried to maximize my plastic usage by filling the bags all the way to the top. I’d leave maybe a quarter-inch of space, thinking I was being economical. The machine couldn’t clamp down properly. The food squished up into the heat bar, burning the edges of my meal and ruining the seal. You need to leave a minimum of 3 inches of empty space at the top of the bag. The machine needs that flat, clean surface area to grip the plastic and apply even heat. If I’m sealing something I plan to open, take a portion from, and reseal, I leave 5 to 6 inches of empty bag at the top. I do this constantly with large blocks of Tillamook cheddar cheese ($11.99 at Kroger). Every time you cut the bag open, you lose about an inch of plastic. That extra space means I can reseal the same cheese block four or five times before I have to transfer it to a new bag. It feels wasteful to look at empty plastic, but a failed seal ruins the entire portion of food. I buy the 20-foot continuous rolls at Costco so I can cut the exact length I need with my kitchen shears, allowing for that necessary blank space without feeling like I’m wasting pre-cut bags. You might also like: 15 Stunning Easy Lunch Ideas You Need to See
6. Bone Guards for Sharp Edges

I bought a family pack of bone-in pork chops at Sprouts for $14.50. I sealed them up, tossed them in the freezer, and checked on them a month later. Every single bag had a tiny puncture hole, and the meat was covered in frost. The sharp edges of the bones had pierced the plastic as the vacuum pulled the bag tight. To fix this, you have to use a bone guard. You don’t need to buy expensive commercial bone guards. I just fold a heavy-duty Bounty paper towel ($3.49 a roll at Target) into a small square and wrap it over the sharp edge of the bone before I put the meat in the bag. The paper towel acts as a cushion. When the machine pulls the vacuum, the plastic tightens around the soft paper towel instead of the jagged bone. I also use this trick for dry foods with sharp edges, like penne pasta or dried banana chips. If a bag gets punctured, the entire vacuum environment is compromised. The paper towel absorbs a tiny bit of moisture, but it completely protects the structural integrity of the plastic. Since I started wrapping the bones, I haven’t lost a single pork chop or chicken thigh to freezer burn. You might also like: 11 Meal Prep Ideas High Protein for Every Budget

Bento Box Adult Lunch Box – 4 Pack, 5
Bento Box Adult Lunch Box – 4 Pack punches above its price — 24 buyers rated it 4.5 stars. I would buy it again.
7. Portioning Before Sealing

Do not vacuum seal an entire casserole in one massive bag. I did this with a large batch of shepherd’s pie. When I wanted a single serving for lunch, I had to thaw the entire 4-pound block, cut out a slice, and then figure out what to do with the remaining three pounds of wet, thawing food. You can’t refreeze it without ruining the texture. Portion your meals into individual servings before you seal them. I use an OXO Good Grips food scale ($55.99 at Whole Foods) to measure exactly 5 ounces of cooked protein and 150 grams of complex carbs per bag. This precise portioning keeps my meal costs strictly under $5 per serving. It also means I can grab exactly what I need for a Tuesday lunch without disturbing the rest of my prep. Individual portions freeze faster and thaw faster. A 1-inch thick single serving of chili thaws in a bowl of cold water in about 20 minutes. A massive family-sized block takes two days in the fridge. The upfront time investment of weighing and bagging 14 individual portions takes an extra 15 minutes on Sunday, but it saves me hours of frustrating thawing logistics during the workweek.
8. Labeling to Avoid Mystery Meals

Once a meal is vacuum-sealed and frozen solid, it transforms into an unrecognizable brown or grey brick. Last January, I confidently thawed what I thought was a bag of pulled pork for tacos. It turned out to be pureed eggplant I had prepped for a dip. The texture of thawed eggplant in a taco shell is exactly as terrible as it sounds. Now, I label every single bag before I put the food inside. Trying to write on a bag that’s already full of lumpy food is impossible. I use a thick black Sharpie Extreme ($4.99 for a 2-pack at Walmart) because standard markers rub off when the plastic gets covered in condensation. I write the exact contents, the date I cooked it, and the macronutrients. For example: “Shredded Salsa Chicken, 10/14/26, 45g P.” This system ensures proper food rotation. I pull the oldest meals to the front of the freezer and put the newest ones in the back. The Sharpie ink doesn’t smear when the bags rub against each other in the ice bin. Don’t skip the date. Even though vacuum-sealed food lasts for years, you still want to eat the older prep first to maintain the best possible texture and flavor profile.
9. Fast Marinating Under Pressure

I hate waiting 24 hours for chicken to marinate. The vacuum sealer actually solves this. When you pull the air out of the bag, the vacuum pressure physically forces the liquid marinade deep into the meat fibers. I tested this last Friday with a bottle of Trader Joe’s Soyaki sauce ($3.99). I put two raw chicken breasts in a bag with half a cup of the sauce and sealed it. In just 90 minutes, the chicken absorbed as much flavor as it normally would sitting in a bowl in the fridge overnight. The pressure opens up the pores of the protein. You have to be careful with the liquid, though. If your machine doesn’t have a specific moist setting, the pump will try to suck the Soyaki sauce out. I fold a paper towel into a strip and place it horizontally across the top of the bag, just below the seal line. The paper towel catches the liquid as it creeps up the plastic, allowing the machine to finish the vacuum process and seal the bag dry. This trick saves me so much time. I can decide I want teriyaki chicken at 4 PM, seal it, and have deeply flavored meat ready to grill by 5:30 PM.

Food Scale -33lb Digital Kitchen Scale for Food Ounces
A dependable everyday pick — Food Scale -33lb Digital Kitchen Scale for Food Ounces Grams Rechargea pulls in 78 ratings at 4.5 stars. Not flashy, just solid.
10. Blanching Veggies for Vacuum Seal Meal Prep

You can’t just chop raw broccoli, throw it in a vacuum bag, and freeze it. I tried this with three heads of fresh broccoli from Kroger. Two months later, I opened the bag and the broccoli had turned a dull, sickly grey. It smelled like sulfur and turned to absolute mush when I steamed it. Raw vegetables contain natural enzymes that continue to break down the plant tissue even in a vacuum-sealed, freezing environment. You have to blanch them first. I boil a large pot of water, drop the chopped broccoli in for exactly 60 seconds, and then immediately scoop it out with a spider strainer into a bowl of ice water. The boiling water kills the enzymes, and the ice bath stops the cooking process instantly. Once the broccoli is completely cold, I dry it thoroughly with paper towels. Any excess water on the outside of the vegetables will form ice crystals inside the bag. I bag the dry, blanched broccoli and seal it. When I reheat it months later, it stays bright green and retains a crisp snap. It adds an extra 10 minutes to my prep time, but it’s the only way to preserve the texture of dense vegetables like green beans, asparagus, and broccoli.
Vacuum sealing takes a little practice to get right. You’ll probably mess up a bag or two when you first start. I certainly did. But once you lock down the flash-freezing and blanching steps, you’ll stop throwing away expensive groceries. Keeping your meals under $5 a serving is entirely possible when zero food goes into the trash. Pin this guide so you don’t forget the cooling rules before your next big Sunday prep session.
Frequently Asked Questions
How long do vacuum-sealed meals last in the fridge?
Vacuum-sealed meals typically last 7 to 10 days in the refrigerator. By removing the oxygen, you significantly slow down bacterial growth compared to standard plastic containers, which only keep food fresh for 3 to 4 days.
Can you vacuum seal hot food?
No, you can’t vacuum seal hot food. The heat creates steam inside the bag, which compromises the seal and traps warmth that encourages bacterial growth. Always cool food completely in the fridge before sealing.
How do you vacuum seal liquids like soup?
To vacuum seal liquids, you must flash-freeze them first. Pour your soup into a silicone tray, freeze it solid overnight, and then seal the frozen block. This prevents the machine from sucking liquid into the motor.
Why do my vacuum seal bags lose their seal?
Bags usually lose their seal due to moisture along the seal line, sharp bones puncturing the plastic, or cheap bag materials. Leaving 3 inches of blank space at the top and cooling food first prevents most failures.
