What’s Inside
- Master the Chicken Base for Meal Prep Bowls Healthy
- Opt for Low-Mercury, Sustainable Canned Tuna
- Embrace Diverse Plant-Based Proteins from the Bulk Aisle
- Prioritize Complex Carbohydrates Without the Mush
- Perfect Your Roasted Vegetables to Avoid Soggy Bowls
- Dressings and Avocado Tricks for Freshness
- Glass Containers Are Non-Negotiable
- The 3-Day Rule and 2026 Gut Health Trends
Last Tuesday, I opened my lunch container in the breakroom and got hit by the smell of sulfur and wet dog. My broccoli had turned to gray mush, and the chicken was so dry it squeaked against my teeth. That was the moment I realized making meal prep bowls healthy isn’t just about throwing random ingredients into plastic containers on a Sunday afternoon. It takes actual technique. I did this wrong for months before figuring it out. I used to chop up whatever produce was on sale, roast it all on one crowded baking sheet, and cram it into cheap plastic bins while it was still steaming hot. By Wednesday, my lunches were a watery, unappetizing disaster. I ended up throwing away more food than I ate. This completely defeated the point of saving money and eating better.
Making meal prep bowls healthy means understanding how different foods react to storage, temperature, and reheating. You can’t just cook food and expect it to stay perfect for five days without a real plan. I started paying attention to the science of food storage. I learned that condensation is the enemy of texture, and that salting vegetables at the wrong time ruins them. I also stopped thinking that meal prep had to be complicated or require fifty expensive ingredients. You really just need a solid carbohydrate base, a reliable protein, vegetables that hold their shape, and a dressing that won’t separate in the fridge. I’m going to walk you through how I build my lunches now. I’ve included the specific brands I buy, the exact temperatures I use, and the mistakes that cost me time and money. Generic advice isn’t helpful. You need specifics.
1. Master the Chicken Base for Meal Prep Bowls Healthy

Chicken breast is the default protein for a reason, but most people get it wrong by cooking it until it’s like shoe leather. For lean proteins like chicken breast, you must cook to an internal temperature of 165°F (74°C) to keep it safe without drying it out. I used to guess when my chicken was done by poking it with a fork. Bad idea. I ended up with undercooked, dangerous chicken or chalky, dry meat. I fixed this by buying a MEATER wireless meat thermometer. It costs $99.95, which felt steep at the time, but the app alerts my phone the second the internal temperature hits 165°F. No more guessing. It pays for itself in groceries I don’t have to throw away. Trust me on this.
After cooking, you have to let the chicken rest for at least 5 minutes on a cutting board before slicing it. This helps redistribute the juices and keeps the meat moist for later. If you cut it immediately, all the moisture runs out onto your board, leaving the chicken dry. I usually buy the bulk pack of Kirkland Signature organic chicken breasts at Costco for $14.99 (about 6 lbs). I portion them into 4 oz servings. I also practice diligent food safety. Always wash your hands, clean surfaces with hot soapy water, and use separate cutting boards for raw meats to prevent cross-contamination. I keep a dedicated red plastic cutting board just for raw poultry. Keep your refrigerator at or below 40°F (4°C) to store the cooked meat safely.
2. Opt for Low-Mercury, Sustainable Canned Tuna

When I don’t have time to grill chicken, canned tuna is my backup. But you can’t just grab the cheapest can on the shelf. I bought a 99-cent can of generic tuna at Walmart once, and it tasted like literal metal. It ruined my entire lunch. When using canned fish, you need to choose brands that prioritize quality and testing. I buy Safe Catch Elite Wild Tuna. They test every single tuna for mercury and claim their levels are 10 times lower than the FDA limit. A 5 oz can usually runs me about $3.50 at Sprouts. It’s worth the price.
If you want something cheaper but still high quality, Trader Joe’s Wild Skipjack Tuna is a great alternative. It costs $1.99 for a 5 oz can. Wild Planet Albacore Wild Tuna is another solid option you can find at most grocery stores for around $4.50. I drain the cans completely, pressing the lid down hard to squeeze out the excess water. Soggy tuna will ruin the grains underneath it. I mix the drained tuna with 1 tablespoon of plain Greek yogurt, 1 teaspoon of Dijon mustard, and a pinch of black pepper. Skip the fat-free mayonnaise. It tastes like wet cardboard. The Greek yogurt provides creaminess and adds a little extra protein without the artificial stabilizers found in low-fat mayo. You might also like: 10 Healthy Lunch Meal Prep Worth Trying
3. Embrace Diverse Plant-Based Proteins from the Bulk Aisle

You don’t need meat in every single meal. Integrating affordable plant proteins like lentils, chickpeas, and black beans is the easiest way to cut your grocery bill in half. A standard 1/2 cup serving of cooked green lentils provides significant fiber and protein, which keeps you full longer than a basic salad. I used to buy canned beans exclusively because I was intimidated by dried beans. I’d open a can of black beans, dump them unrinsed into my container, and wonder why my food tasted slimy. Always rinse canned beans in a colander under cold water for at least thirty seconds. You might also like: 10 Postpartum Meal Prep You Need to See
To save even more money, I started buying dried beans and lentils in bulk from the bins at Food4Less. You can save 50% or more compared to canned. Dried green lentils cost me about $1.29 per pound. I boil 1 cup of dried lentils in 3 cups of vegetable broth for about 20 minutes until tender. This yields about 2.5 cups of cooked lentils. Always compare unit prices on the store tags to find the best deals. Planning your meals around these cheap staples and sticking to a grocery list will stop those expensive impulse buys in the snack aisle. You might also like: 11 Toddler Meal Prep for Every Budget

Food Scale, 11lb Digital Kitchen Scale with 6 Units LCD
Food Scale punches above its price — 21 buyers rated it 4.5 stars. I would buy it again.
4. Prioritize Complex Carbohydrates Without the Mush

The base of your bowl dictates how it holds up over the week. You need to stock up on complex carbohydrates like brown rice, quinoa, and steel-cut oats. These are among the cheapest bulk foods available, costing pennies per serving, and they provide energy so you don’t crash at 2 PM. I buy Lundberg Family Farms organic short grain brown rice. It’s $7.49 for a 32 oz bag at Sprouts. I cook a massive batch at the start of my prep week. I use 4 cups of dry brown rice, which yields about 12 cups cooked.
Here is where most people ruin their prep: packing hot food into containers. I did this for a whole year. I’d scoop steaming brown rice into my plastic bins, snap the lids shut, and put them in the fridge. The trapped steam created condensation, which dripped back down and turned the rice into a soggy, gelatinous block. You must let all cooked ingredients cool to room temperature before sealing them. I spread my cooked rice out on a large baking sheet for about 20 minutes. The increased surface area lets the steam escape quickly. Once it’s completely cool, I portion exactly 1/2 cup into each of my glass bowls.
5. Perfect Your Roasted Vegetables to Avoid Soggy Bowls

Vegetables are usually the first thing to go bad. The trick is roasting them so they keep some texture. I roast dense vegetables like broccoli, cauliflower, carrots, and bell peppers at a high heat, between 400-425°F (204-218°C). A key tip to prevent sogginess is to avoid crowding the baking sheet. You want to let moisture escape rather than steam the vegetables in their own juices. A single large half-sheet pan can hold about 20-24 ounces (560-670g) of chopped broccoli without overcrowding. I toss the broccoli with exactly 1 tablespoon of olive oil. Not two. Too much oil makes them greasy.
I learned a tip about salting that changed my vegetables. For high-moisture vegetables like zucchini, mushrooms, and cherry tomatoes, salt them after roasting instead of before. I used to salt my zucchini before the oven, and the salt would draw out all the water prematurely. The zucchini would boil in its own liquid on the pan. It was gross. Now, I roast them plain and sprinkle 1/2 teaspoon of kosher salt over the pan right when they come out of the oven. This keeps them firmer. Again, let these cool entirely on the pan before boxing them up.
6. Dressings and Avocado Tricks for Freshness

Avocados are a nightmare for meal prep because they turn brown in hours. To keep them vibrant, you have to exclude the air. Immediately after cutting, I squeeze 1 teaspoon of fresh lemon juice over the flesh. Then, I press a piece of plastic wrap directly against the avocado to stop air pockets. I also discovered a weird but effective trick: storing avocado halves with a thick slice of raw red onion in an airtight container helps tremendously. The onion releases sulfur compounds that fight the browning enzymes. It sounds crazy, but it works.
For flavor, homemade dressings give you better control. A simple base I use weekly is 1/4 cup extra virgin olive oil whisked with 1/4 cup white wine vinegar. I make a Lemon Pepper Dressing by adding 1 tablespoon of lemon juice and 1 teaspoon of lemon pepper seasoning. If I’m short on time, I buy dietitian-recommended dressings. I look for Annie’s Organic Balsamic Vinaigrette, which is low in sugar. It costs $3.99 for an 8 oz bottle at Kroger, about $0.50 per serving. Primal Kitchen Honey Mustard Vinaigrette is another great choice made with avocado oil, costing about $7.99 at Whole Foods. I always keep my dressing in a separate 2 oz stainless steel condiment container. Pouring dressing on your bowl on Sunday guarantees a mushy lunch on Tuesday. I learned that the hard way.

Etekcity Food Kitchen Scale
Etekcity Food Kitchen Scale punches above its price — 1,736 buyers rated it 4.5 stars. I would buy it again.
7. Glass Containers Are Non-Negotiable

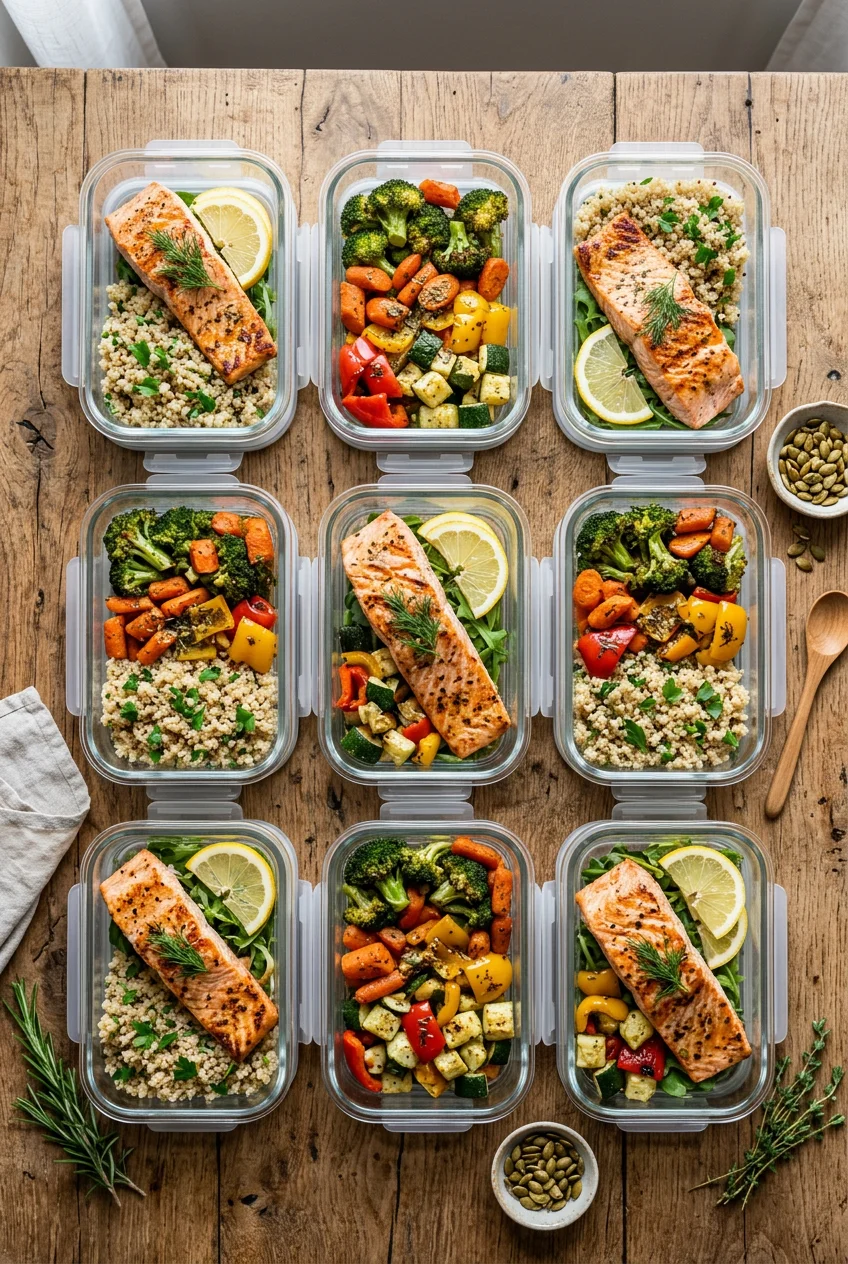
If you’re still using flimsy plastic takeout containers, stop. For durability, food safety, and aesthetics, you must invest in borosilicate glass containers. Plastic absorbs smells and stains. Last November, I put a turmeric chicken curry in a plastic container. The plastic turned neon yellow and smelled like cumin for months. Borosilicate glass doesn’t hold onto odors or stains. It’s also oven-safe up to 450°F and freezer-to-microwave ready.
Look for sets with snap-lock clips on all four sides and thick silicone gaskets for an airtight, leak-proof seal. I bought Target’s Ello 20-piece Color Lock Mixed Food Storage Container Set. It’s around $37.99 and includes 10 glass bases and 10 locking lids. The silicone sleeves on the outside protect the glass from chipping when I bang them against the granite countertop. When I pack my lunch, I know the dressing won’t leak out of a locked glass container. Keeping your food sealed also stops it from picking up weird fridge smells. Make sure your freezer is at 0°F (-18°C) if you plan to freeze these.
8. The 3-Day Rule and 2026 Gut Health Trends

The biggest mistake beginners make is prepping way too much food. You get motivated on Sunday and make six days’ worth of meals. By Friday, that chicken is questionable and the vegetables are weeping. Dietitian Samantha Nimmons suggests starting with just 2-3 days’ worth of meals to keep things fresh. I follow a strict 3-day rule. Cooked proteins like salmon or chicken are only safe and appetizing for about three days. I prep for Monday, Tuesday, and Wednesday. On Wednesday night, I do a quick 30-minute mini-prep for Thursday and Friday. It breaks up the monotony. Took me years to figure that out.
Looking ahead to 2026, there’s a big shift toward gut health and fiber. I’ve started adding fermented foods and extra fiber to my bowls. I buy Cleveland Kitchen Classic Kimchi. It’s $5.99 for a 16 oz pouch at Whole Foods. I add exactly 2 tablespoons of kimchi to the corner of my bowl right before eating. It adds incredible umami flavor and probiotics. I pair this with fiber-rich ingredients like roasted sweet potatoes (diced into 1-inch cubes and roasted at 400°F for 25 minutes). This combination of complex carbs, lean protein, and fermented cabbage keeps my digestion on track and makes the meal way more interesting than plain chicken and rice.
Building a better lunch routine doesn’t require a culinary degree. It just takes a little planning, a good meat thermometer, and the willingness to throw away your stained plastic Tupperware. Start by prepping just three days of food this week using the cooling and salting tricks I mentioned. You’ll notice the difference in texture immediately. If you found these tips helpful, pin this article to your meal prep boards so you can reference the exact temperatures and brand names next time you’re in the grocery store.
Frequently Asked Questions
How long do meal prep bowls stay fresh in the fridge?
Cooked proteins and vegetables generally stay fresh for 3 to 4 days in an airtight glass container. It’s best to prep for Monday through Wednesday, then do a smaller prep on Wednesday night for the rest of the week.
How do I keep my roasted vegetables from getting soggy?
Roast vegetables at 400-425°F and do not crowd the baking sheet. Let them cool completely to room temperature before sealing them in containers to prevent condensation. Salt high-moisture vegetables after roasting, not before.
What are the best containers for meal prep?
Borosilicate glass containers with locking lids and silicone gaskets are the best option. They don’t absorb odors or stains like plastic, and they are safe for the oven, microwave, and dishwasher.
How can I add more flavor without extra calories?
Make your own simple dressings using a base of olive oil and vinegar. You can also incorporate fermented foods like kimchi or sauerkraut, which add strong umami flavor and gut-health benefits without heavy calorie counts.
