What’s Inside
- Choose Sturdy, Thick-Cut Bread for a Solid Foundation
- Toast Your Bread to Create a Moisture Barrier for Sandwich Meal Prep
- Apply a Double Moisture Barrier with Spreads and Cheese
- Thoroughly Dry All Wet Ingredients Before Assembly
- Layer Strategically to Keep the Wet Stuff in the Middle
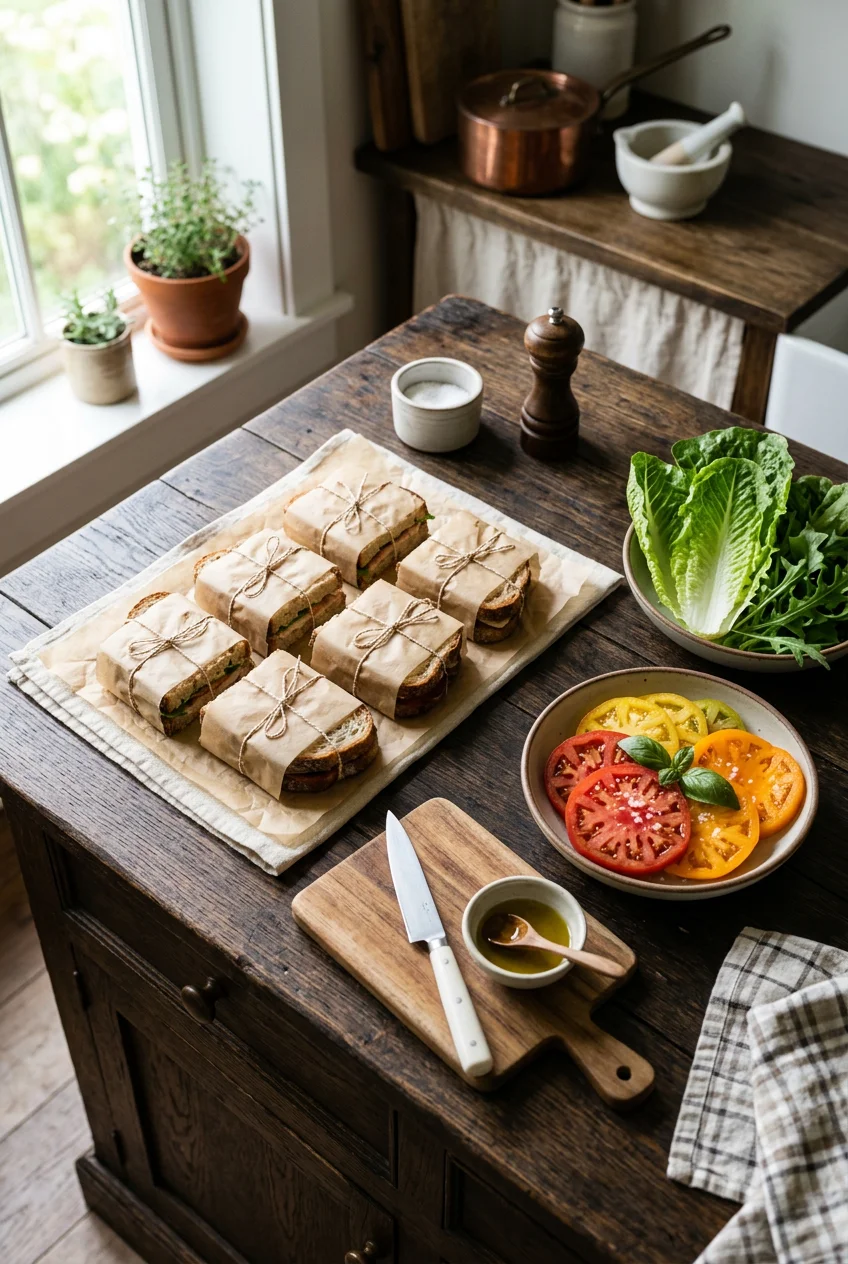
- Use Parchment Paper for Tight Wrapping and Structural Integrity
- Store in the Right Containers to Prevent Crushing
- Skip the Hot Ingredients During Sandwich Meal Prep
- Keep Highly Acidic Dressings on the Side Until Lunch
I sat at my desk last Tuesday, opened my glass storage container, and found my lunch had turned into a wet, gray paste. My attempt at sandwich meal prep was a total disaster because the tomato juice had completely dissolved the bottom slice of wheat bread. The texture was slimy, the crust was nonexistent, and the whole thing smelled like old, funky ketchup. Sandwich meal prep requires actual structural engineering. It’s not just slapping deli meat between two slices of whatever you have in the pantry. I tried this wrong for months before figuring it out. Took me years to get it right. You can’t just treat a prepped sandwich like one you eat immediately. Moisture migration over 24 to 72 hours will ruin your food. I threw that soggy turkey mess straight into the breakroom trash and bought a $14 salad instead. That stung. I decided to analyze exactly why my lunches were failing so miserably. The problem was water. Water from tomatoes, condensation from warm bread, and liquid leaking from cheap deli meat. I spent the next three weeks testing different fat barriers, wrapping methods, and ingredient orders to see what actually survived a three-day stint in the refrigerator. Here’s the exact, methodical approach I use to build lunches that stay crispy, dry, and fresh from Sunday afternoon until Thursday at noon.
1. Choose Sturdy, Thick-Cut Bread for a Solid Foundation

Let’s talk about the actual mechanics of bread. Soft white bread is essentially a sponge waiting to absorb liquid. I bought a loaf of generic white bread at Kroger for $1.99 last month because it was on sale. I made four ham and cheese sandwiches for the week. By Tuesday, the bread had absorbed so much moisture from the ham that it literally fell apart in my hands. The texture was identical to wet paper towels, and I had to eat the filling with a fork. You need sturdy bread varieties like sourdough, ciabatta, baguettes, rye, or pumpernickel. These breads are naturally denser. Their gluten structure is tighter. They’re less prone to absorbing moisture. For the best structural integrity, buy whole loaves and slice them yourself with a heavy serrated knife. You want a thickness of exactly 3/4 to 1 inch. I currently use the Trader Joe’s San Francisco Style Sourdough ($3.49 for a 24 oz loaf). The crust is incredibly tough. It provides a solid base that withstands heavy fillings without collapsing. When you cut it yourself, you control the thickness. A 1-inch slice takes significantly longer for moisture to penetrate compared to a standard 1/2-inch pre-sliced piece. If you’re building a sandwich that needs to sit in a fridge for three days, that extra half inch of dry starch is your primary defense. Skip the thin, pre-sliced stuff entirely. It won’t hold up.
2. Toast Your Bread to Create a Moisture Barrier for Sandwich Meal Prep

Lightly toasting your bread dries out the surface layer. This creates a firm, dehydrated crust that acts as a natural physical barrier against wet ingredients. I use a basic Hamilton Beach 2-slice toaster I bought for $22.99 at Target. I set it to level 3. You aren’t trying to make crunchy croutons. You just want to remove the surface moisture so the bread feels slightly rough to the touch. Here is the critical mistake most people make. I did this constantly when I first started prepping lunches. I’d toast the bread, immediately slap the cold turkey and cheese on it, put it in a container, and put it in the fridge. The residual heat from the warm toast created massive condensation inside the cold plastic container. By the next day, the sandwich was sitting in a literal puddle of its own sweat. The bread was soggy. The cheese was slimy. You must ensure the toasted bread cools completely to room temperature before assembling your sandwich. I lay my toasted slices on a wire cooling rack for exactly 15 minutes. If you lay them flat on a cutting board, the bottom side will steam against the wood and get soft. The air needs to circulate underneath. Once the bread feels completely cool to the touch on both sides, you can start building. This one step reduces the bread’s ability to soak up wet ingredients by at least half.
3. Apply a Double Moisture Barrier with Spreads and Cheese

Water destroys bread. Oil repels water. This is basic chemistry, and you need to apply it to your sandwich meal prep. You must coat the inside of both slices of bread with a fat-based barrier. I generously apply a thick, oil-based spread to the completely cooled, toasted bread. I use Hellmann’s Real Mayonnaise. I buy the 30 oz jar for $5.48 at Walmart. You can also use softened butter or a dense, oil-heavy pesto. Skip the fat-free stuff. It tastes like wet cardboard. Fat-free mayonnaise contains high amounts of water and chemical stabilizers, which will soak straight into your bread and defeat the entire purpose of the barrier. Spread the mayonnaise all the way to the very edges of the crust. Don’t leave dry spots in the corners. Moisture will find those spots and seep in. After the mayonnaise, you apply the second layer of the double moisture barrier. Place a slice of cheese directly on the spread-coated bread. I prefer Sargento Provolone ($3.68 for 11 slices at Walmart) or Tillamook Medium Cheddar ($4.50 at Sprouts). The dense fat in the cheese physically blocks the moisture from the meat and vegetables from reaching the bread. You need cheese on both the top slice and the bottom slice. This dual-layer approach encapsulates the wet ingredients in the center of the sandwich. You might also like: 20 Inspiring Sunday Dinner Ideas You Need to See

M MCIRCO 10-Pack,30 Oz Glass Meal Prep Containers 2
If you want something that just works, M MCIRCO 10-Pack is a safe bet (23 reviews, 4.5 stars).
4. Thoroughly Dry All Wet Ingredients Before Assembly

High-moisture vegetables are major culprits for soggy lunches. Sliced tomatoes, cucumbers, and washed leafy greens like romaine lettuce or spinach carry an incredible amount of surface water. Last summer, I prepped four BLTs for the week. I sliced the tomatoes, threw them straight onto the bacon, and packed them up. The tomato juice leaked everywhere. The bacon turned rubbery, and the bottom bread dissolved completely. It smelled like old ketchup and tasted worse. You must remove the excess water mechanically. For lettuce, I use an OXO Good Grips Salad Spinner ($29.99 at Whole Foods). I spin it twice, then lay the leaves on a dry kitchen towel for ten minutes. For tomatoes and cucumbers, I slice them 1/4 inch thick and place them on a double layer of Bounty paper towels. I take another paper towel and vigorously pat the tops of the slices. You want to blot away all the visible liquid and seeds. If you’re using pickles, take them out of the jar and dry them off too. The brine will eat through your bread in hours. Pickles hold a lot of vinegar in their center. I actually press them down slightly with the paper towel to squeeze out the excess juice. It takes an extra three minutes of prep time, but it’s the only way to keep the crunch intact over multiple days.
5. Layer Strategically to Keep the Wet Stuff in the Middle

The order in which you stack your ingredients dictates how long the sandwich will survive in the fridge. You want the driest ingredients touching the bread and the wettest ingredients trapped in the dead center. My standard architecture goes like this: bottom bread, mayonnaise, cheese layer, dry lettuce, deli meat, tomatoes, more deli meat, second cheese layer, mayonnaise, top bread. The deli meat acts as an internal envelope for the tomatoes. I use Applegate Naturals Oven Roasted Turkey Breast. It costs $6.49 for a 7 oz package at Whole Foods. Cheap deli meats are often pumped full of water and saline solutions to increase their weight. When they sit in your fridge for two days, that water slowly leaks out and ruins your bread. Buy higher quality, drier meats. If you’re using a wet ingredient like roasted red peppers, place them exactly in the middle of the turkey stack. Never let a tomato or a pepper physically touch the cheese or the bread. The acid will break down the cheese over a 48-hour period, making it slimy and gross. I learned this the hard way when I put wet banana peppers directly on a slice of Swiss. The Swiss cheese turned into a translucent, sticky mess by Wednesday. Build a meat bunker for your wet vegetables. You might also like: 10 Healthy Breakfast Meal Prep That Actually Work
6. Use Parchment Paper for Tight Wrapping and Structural Integrity

How you wrap the sandwich is just as important as how you build it. I used to throw my sandwiches naked into plastic zip-top bags. The air inside the bag allowed the bread to dry out on the edges while the center got soggy from the meat. Then I tried wrapping them in cheap plastic wrap. The plastic wrap trapped the internal moisture and made the bread sweat. The crusts lost all their crunch and became chewy and tough. You need to wrap your sandwiches tightly like a professional deli using parchment paper. I use Reynolds Kitchens Unbleached Parchment Paper. A roll costs $4.99 at Target. Parchment paper breathes just enough to let condensation escape, but it protects the bread from the dry air of the refrigerator. Cut a large square of parchment, place the sandwich in the center, bring the top and bottom edges together, and fold them down tightly against the bread. Fold the sides in like a present and tuck them underneath. This tight wrapping compresses the sandwich slightly. It holds all the layers together so the tomatoes don’t slide out of the meat bunker. When you’re ready to eat, you just slice the sandwich in half straight through the parchment paper. It keeps your hands clean and holds the sandwich intact while you eat it at your desk. You might also like: 15 Cozy Freezer Meals Ideas to Transform Your Space

M MCIRCO 10-Pack,22 Oz Glass Meal Prep Containers
If you want something that just works, M MCIRCO 10-Pack is a safe bet (86 reviews, 4.5 stars).
7. Store in the Right Containers to Prevent Crushing

A perfectly constructed, parchment-wrapped sandwich won’t survive if you crush it in your work bag. I ruined a beautiful ciabatta and roast beef sandwich by shoving it into the front pocket of my backpack next to my heavy laptop charger. The heavy bread compressed, the tomatoes ruptured under the pressure, and the juices soaked straight through the parchment paper and into the bread. You must use hard-sided containers for transportation and storage. I use Pyrex 3-cup rectangle glass containers. I bought a set of them at Costco, but they break down to about $6.99 each. The 3-cup size is exactly large enough to hold a standard sandwich cut in half and stacked, without pressing down on the top bread. Glass is vastly superior to plastic because it doesn’t absorb odors. If you prep a sandwich with red onions on Sunday, a cheap plastic container will smell like onions for the next three years. Glass washes completely clean every time. I line the bottom of the Pyrex container with one dry paper towel before putting the wrapped sandwich inside. If there is any ambient moisture in the fridge, the paper towel absorbs it before it can reach the parchment paper. Stack the containers in the back of your fridge where the temperature is the most stable, away from the door.
8. Skip the Hot Ingredients During Sandwich Meal Prep

Mixing temperatures is the fastest way to destroy your lunch. If you’re using leftover cooked ingredients, they must be completely, utterly cold before they go near your bread. I cooked chicken breasts on a Sunday afternoon and decided to slice one up for a sandwich while it was still warm. I layered it with fresh spinach and provolone, wrapped it up, and put it in the fridge. The radiant heat from the warm chicken steamed the spinach into a dark green slime and melted the provolone into a weird, rubbery disk. The condensation soaked the top bun entirely. When you’re doing sandwich meal prep, patience is non-negotiable. If I roast red peppers from a Trader Joe’s jar ($2.69) or grill chicken thighs, I put them in an uncovered container in the fridge for at least four hours before assembling the sandwiches. You want the internal temperature of the meat to match the ambient temperature of the fridge perfectly. Even slightly warm bacon will ruin the structural integrity of the fat barrier you created with the mayonnaise and cheese. The heat melts the fat right into the bread. Cook your hot ingredients on Saturday night if you plan to assemble your lunches on Sunday afternoon. It gives everything plenty of time to chill properly.
9. Keep Highly Acidic Dressings on the Side Until Lunch

You can’t put vinaigrette on a sandwich on Sunday and expect to eat it on Wednesday. Vinegar is an acid. It will aggressively break down the cellular structure of the bread, the meat, and the cheese. It dissolves everything it touches into mush. I enjoy Italian subs, but I used to hate prepping them because the oil and vinegar always turned the hoagie roll to paste. The solution is simple isolation. You have to keep the highly acidic dressings on the side until the exact moment you sit down to eat. I use Sistema 1.1 oz dressing containers. You can get a 4-pack for $5.99 at Walmart. They have screw-on lids that actually seal tight. I fill them with Ken’s Steak House Balsamic Vinaigrette ($3.48 for 16 oz). I pack the tiny container inside the glass Pyrex next to the wrapped sandwich. When I sit down at my desk at noon, I unwrap the sandwich, open the top half, and drizzle the dressing directly onto the dry lettuce layer. You get the sharp, acidic bite of the vinegar without any of the textural degradation. This rule applies to hot sauce, oil and vinegar, thin mustards, and watery hot pepper relishes. Keep the liquids in a plastic cage until you need them.
Meal prepping doesn’t have to mean eating sad, soggy food. It just requires a methodical approach to moisture control and a little bit of patience. If you respect the ingredients and build the proper physical barriers, you can eat a crispy, fresh-tasting sandwich on Thursday that you made on Sunday afternoon. I’ve eaten hundreds of these lunches at my desk, and following these specific layering rules completely eliminated the wet bread issue. No exaggeration. Try the parchment paper wrapping method this weekend. It takes a little practice to get the folds tight, but it makes a massive difference in how the sandwich holds up in the fridge. Pin this guide to your meal prep boards so you can reference the exact layering order next time you’re building your lunches for the week.

Vtopmart 5Pack 22oz Glass Storage Containers with Lids
Honestly, Vtopmart 5Pack 22oz Glass Storage Containers with Lids surprised me — sturdier than it looks in the photos, and over 34 buyers gave it 4.5 stars.
Frequently Asked Questions
How long do meal prep sandwiches last in the fridge?
When built with proper moisture barriers like mayonnaise and cheese, meal prep sandwiches easily last three to four days in the refrigerator. Using sturdy bread and keeping wet ingredients isolated in the center prevents the bread from getting soggy over time.
Can I freeze sandwiches for meal prep?
You can freeze sandwiches if you strictly use dry ingredients like deli meat and cheese. Never freeze sandwiches containing lettuce, tomatoes, or cucumbers, because the water inside the vegetables expands when frozen and turns to mush when thawed.
What is the best bread for sandwich meal prep?
The best breads are dense, thick-cut varieties like sourdough, ciabatta, or rye. These robust breads have a tight gluten structure that resists moisture absorption much better than soft white or wheat sandwich bread.
How do I keep sliced tomatoes from ruining my sandwich?
You must vigorously pat the tomato slices dry with a paper towel to remove excess surface liquid and seeds. Then, layer the dried tomatoes between slices of deli meat so they never directly touch the cheese or the bread.
