What’s Inside
- Mastering the 3-4 Day Protein Rule for Meal Prep For School
- Investing in Insulated Lunch Gear That Actually Keeps Things Cold
- Bento Boxes and Silicone Dividers for Picky Eaters
- The Boiling Water Thermos Trick for Hot Meal Prep For School
- Pre-Prepping Produce for Grab-and-Go Mornings
- Strategic Freezing to Double as Ice Packs
- Batch Cooking Grains and Proteins with Smart Appliances
- The 20-Minute Sunday Planning Routine
Last September, I opened my daughter’s lunchbox at 4:00 PM and the smell of warm, spoiled turkey hit me like a physical wall. The bread was soggy. The cheese was sweating. That single disaster changed how I handle school lunches. I used to just toss a sandwich in a brown paper bag and hope for the best. Now I treat packing like a science experiment. A bruised apple or a lukewarm yogurt tube is enough to make most kids toss their lunch in the cafeteria trash. I learned that the hard way. If you’re tired of throwing away soggy food every afternoon, let’s fix it. I’ll walk you through exactly what works for me, down to the temperatures and container sizes. No fluff. Just the methods that keep food safe and appetizing.
1. Mastering the 3-4 Day Protein Rule for Meal Prep For School

I used to cook a massive batch of chicken on Sunday and pack it for Friday. I thought I was being efficient. Then I took a bite of a leftover piece on a Thursday night. It had a slick, slimy texture and a sour smell. I tossed the container immediately. To prevent foodborne illness, cooked proteins like chicken, turkey, or beef have a strict expiration date. They should be eaten within 3 to 4 days when stored properly. If you cook a batch of shredded chicken on Sunday, plan to use it through Wednesday. Thursday is the absolute latest. Freeze any remaining portions immediately in airtight containers.
I buy the family pack of organic chicken breasts from Whole Foods for $5.99 a pound. I bake them with 1 tablespoon of olive oil and 1/2 teaspoon of kosher salt. After they cool, I portion them into 4 oz servings using a digital kitchen scale. I place three portions in the fridge for Monday, Tuesday, and Wednesday. I put the rest in the freezer. This stops me from questioning if the meat is still safe by Friday. You can’t guess with poultry. The 3-4 day rule applies to hard-boiled eggs and ground beef too. I tried stretching ground turkey meatballs to a Friday lunch once. My son complained his stomach hurt that evening. Never again. Stick to the timeline.
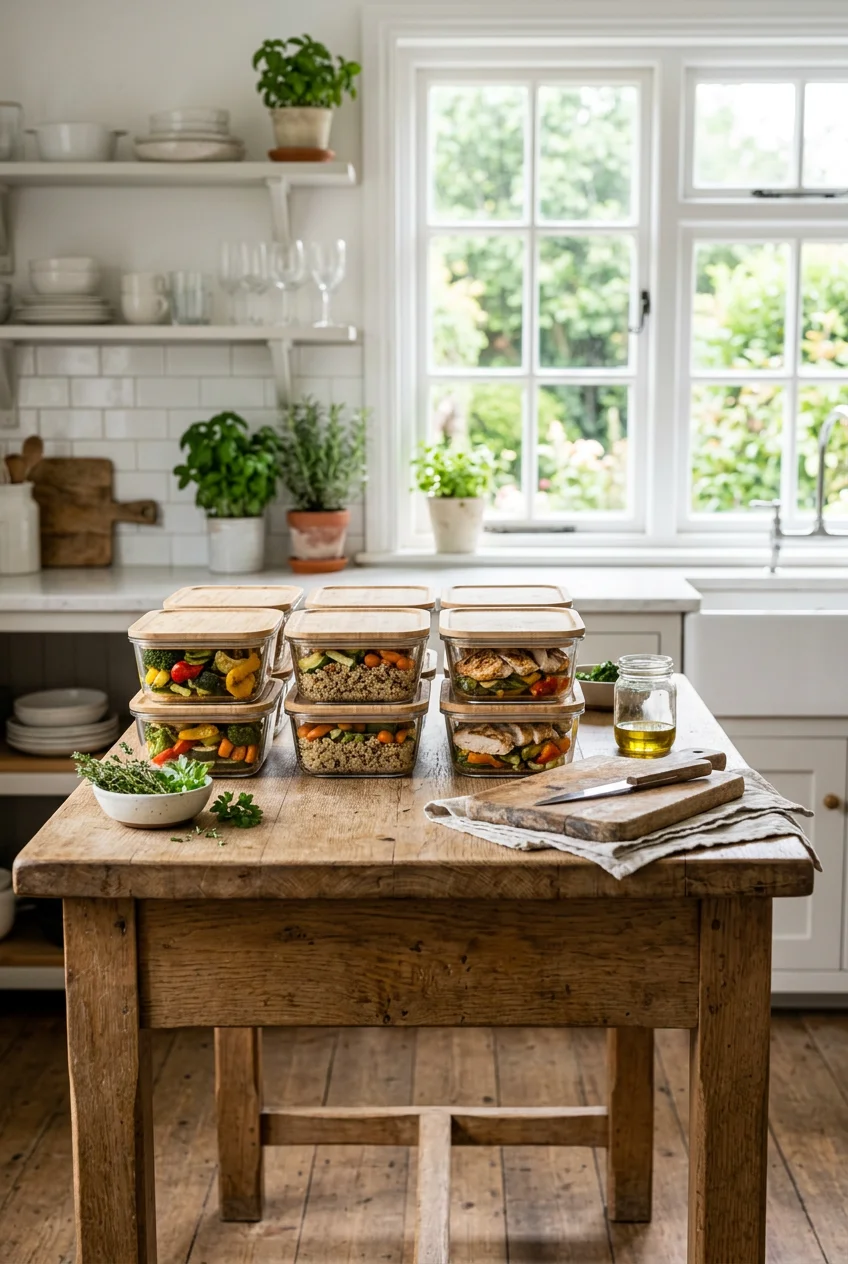
I store my prepped proteins in glass Pyrex containers with snap-on lids. The 3-cup rectangular size costs $6.99 at Target. Glass doesn’t hold onto smells like plastic does. When I used cheap bins, the garlic smell from Monday’s chicken would seep into Thursday’s fruit. It’s gross. Wash your hands with soap and warm water for at least 20 seconds before handling cooked meat. Cross-contamination happens easily when you’re rushing on a Sunday.
2. Investing in Insulated Lunch Gear That Actually Keeps Things Cold

An insulated lunch bag is non-negotiable. I bought a cheap, uninsulated canvas tote from a craft store two years ago because it had a cute pattern. By noon, the ice pack was melted, and the interior felt like a sauna. Perishable items shouldn’t sit in the danger zone between 40°F and 140°F for more than two hours. A flimsy bag guarantees your child’s lunch hits that zone before recess. Trust me.
I switched to the LunchBots insulated bag. It costs $38.99 on Amazon. The thick thermal lining actually holds the cold. But the bag alone isn’t enough. You need at least two cold sources. I use slim gel packs from Target. They cost $4.99 for a two-pack. I place one flat gel pack on the bottom of the bag, stack the containers, and lay the second gel pack on top. Cold air sinks, so that top ice pack does the heavy lifting.
A frequent error is packing a room-temperature bag in the morning. A simple trick: place your empty insulated lunch bag in the freezer overnight. I clear a spot next to the peas and shove the open bag in. This ensures the interior fabric is freezing cold when I pack it at 7:00 AM. It keeps perishable food safe for much longer. I tested this with a meat thermometer. A pre-chilled bag kept a turkey sandwich at 38°F until 1:00 PM. An unchilled bag let the same sandwich reach 45°F by noon. That 7-degree difference matters when you’re packing mayo or cheese. Tell your kids to store their bags in a cool, shaded area if their classroom doesn’t have a fridge.
3. Bento Boxes and Silicone Dividers for Picky Eaters

My youngest child despises it when her foods touch. If a drop of strawberry juice bleeds onto her crackers, she won’t eat either. I spent months individually wrapping grapes in plastic and using five tiny Tupperware containers. It took forever to wash them. Bento-style lunch boxes solve this. I use the Bentgo Kids Lunch Box. It runs about $27.99 at Walmart. The compartments are perfectly sized and have a rubberized seal that stops liquids from leaking across sections.
To add functionality, I use reusable silicone muffin liners. I buy the Wudkey brand. A 12-pack costs $8.99 on Amazon. These fit inside the larger bento compartments to create more subdivisions. I put 2 tablespoons of hummus in a silicone cup, right next to 1/2 cup of baby carrots. The silicone grips the bottom of the plastic tray, so it doesn’t slide around when the backpack gets tossed onto the school bus floor. You might also like: 9 Cheap High Protein Meal Prep Worth Trying
Nutritionists advocate for a rainbow plate. These divided boxes make it obvious if you’re missing a food group. I aim for a lean protein like 2 oz of sliced turkey, complex carbs like 1/4 cup of brown rice, healthy fats like 1/8 of an avocado, and colorful produce. The bright colors of the silicone cups make raw vegetables look appealing. I tried packing a monochromatic lunch once. Plain chicken, white rice, peeled apples, and cauliflower. My daughter brought the entire thing home untouched. Visual appeal matters as much as taste in a loud, distracting cafeteria. The bento box forces me to pack varied, colorful components every morning. You might also like: 15 Brilliant Simple Meal Prep Ideas for a Fresh New Look
![[8-Pack,30 oz]Glass Meal Prep Containers](https://m.media-amazon.com/images/I/713Zfdsgi4L._AC_UL320_.jpg)
[8-Pack,30 oz]Glass Meal Prep Containers
If you want something that just works, [8-Pack is a safe bet (7 reviews, 4.5 stars).
4. The Boiling Water Thermos Trick for Hot Meal Prep For School

Packing hot lunches requires a specific technique. You can’t just microwave soup, pour it in, and expect it to stay warm. I tried that with leftover chili. My son opened his lunch at noon to find a lukewarm, congealed puck of beans and ground beef. The fat had solidified. It looked awful. For warm lunches like soup, chili, or pasta, an insulated food thermos is essential. I use the 10 oz Thermos Funtainer. I bought it at Kroger for $16.99.
To keep food hot until lunch, it needs to stay above 140°F. You have to pre-heat the thermos. I boil 2 cups of water in my electric kettle. I pour the boiling water into the empty thermos, screw the lid on, and let it sit for 5 minutes. This transfers heat to the stainless steel walls. While it sits, I heat 1 cup of macaroni and cheese in the microwave until it’s steaming. I dump the water, wipe the rim, and spoon the hot food inside. You might also like: 15 Cozy Freezer Meals Ideas to Transform Your Space
Secure the lid immediately. Don’t let it sit open. The steam needs to stay trapped. I’ve used this for chicken noodle soup, spaghetti, and even oatmeal. The pre-heating step makes a massive difference. Without it, the cold steel walls absorb the heat from the food, dropping the temperature instantly. When I skip the boiling water trick, the food is cold in two hours. When I do it right, the pasta is still steaming at 12:30 PM. It takes five extra minutes, but it prevents the food from going straight into the trash.
5. Pre-Prepping Produce for Grab-and-Go Mornings

Washing and chopping fruit on a Tuesday at 6:30 AM is a recipe for disaster. I usually end up cutting myself or skipping the vegetables because I’m out of time. Pre-prepping on the weekend is the only way I get greens into my kids’ lunches. I dedicate 30 minutes on Sunday to wash, chop, and portion everything.
I buy bags of organic apples, cucumbers, and bell peppers from Trader Joe’s. I wash them in a colander. I slice the bell peppers into strips and cut the cucumbers into 1/4-inch rounds. I store these in airtight glass containers. I place a folded paper towel at the bottom of the cucumber container. Cucumbers release a lot of water. Before the paper towel trick, my Wednesday cucumbers would turn into a soggy mess. The towel absorbs moisture and keeps them crisp for four days.
I portion 1/2 cup servings of blueberries and strawberries into small snack bags. This makes assembly quick each morning. Just grab the bags and toss them in. I don’t pre-cut apples or pears. They brown too quickly, even with lemon juice. My kids won’t eat brown apples. Instead, I pack small whole apples, like Gala or Fuji varieties that fit in a child’s hand. Having the vegetables already chopped encourages healthy snacking for me, too. When I’m hungry at 3:00 PM, I grab the $3.99 bag of pre-cut carrots instead of chips.
6. Strategic Freezing to Double as Ice Packs

Ice packs take up valuable real estate in a lunch bag. A lesser-known trick is to freeze specific food items overnight so they double as cold sources. They keep the surrounding food safe and thaw by lunchtime. I buy Stonyfield organic yogurt tubes. A box of eight costs $4.69 at Sprouts. I put the box directly into the freezer when I get home.
In the morning, I pack a frozen 2 oz yogurt tube next to a cheese stick. It acts like a mini ice block. By noon, the yogurt is thawed but still slushy and cold. My kids prefer the texture of the thawed yogurt over refrigerated. I do the same with GoGo squeeZ applesauce pouches. They cost about $8.49 for a 12-pack at Target. They freeze solid and thaw into a refreshing slush.
I learned what not to freeze. Never freeze carbonated drinks or anything in a rigid plastic container full of liquid. I put a small bottle of apple juice in the freezer. The liquid expanded, the plastic cracked, and it leaked sticky juice over a turkey sandwich and a math worksheet. A total disaster. Stick to flexible pouches that have a little air space for expansion. I also tried freezing a small container of ranch. The emulsion broke when it thawed, leaving a pool of oil. Keep dairy-based dips in the fridge and rely on the frozen yogurt tubes for your ice packs.

KOMUEE 10 Packs 30 oz Glass Meal Prep Containers
A dependable everyday pick — KOMUEE 10 Packs 30 oz Glass Meal Prep Containers pulls in 46 ratings at 4.5 stars. Not flashy, just solid.
7. Batch Cooking Grains and Proteins with Smart Appliances

Standing over a stove to cook rice every night is exhausting. I used to do this. I’d put 1/2 cup of rice in a saucepan, get distracted with homework, and smell burning starch ten minutes later. The bottom would be charred black. Smart appliances like pressure cookers and air fryers cut down prep time and eliminate the babysitting aspect of cooking.
I use the 6-quart Instant Pot. I bought it on sale at Costco for $89.99. I embrace the cook once, eat twice philosophy. On Sunday, I add 2 cups of rinsed quinoa and 3 cups of chicken broth to the pot. I set it to high pressure for 1 minute, followed by a 10-minute natural release. It yields a massive batch of fluffy quinoa with zero effort. I serve half for dinner. I scoop the rest into a glass storage container for the fridge.
I use that cold quinoa as a base for school lunches all week. I mix 1/2 cup of the grain with diced cucumbers, tomatoes, and 1 tablespoon of Italian dressing. It takes two minutes to assemble. I also use my slow cooker for pulled pork overnight. I buy a 3 lb pork shoulder from Walmart for $12.00. I rub it with salt and paprika, cook it on low for 8 hours, and shred it in the morning. That meat goes into tacos for dinner and gets packed into the thermos for lunches. Letting appliances do the heavy lifting saves me an hour of active cooking time.
8. The 20-Minute Sunday Planning Routine

Flying blind at the grocery store guarantees you’ll forget a crucial ingredient. I used to wander the aisles of Kroger, grabbing random snacks and hoping they’d form a meal. They rarely did. Dedicate 20 minutes on Sunday to map out your family’s meals. This planning streamlines shopping, reduces waste, and ensures you aren’t packing the same turkey sandwich five days in a row.
I use an app called Paprika. It costs $4.99 on the app store. I sit at my kitchen island with coffee and pull up the app. I assign a main course, fruit, and vegetable to each weekday. Monday is chicken salad. Tuesday is leftover pulled pork. Wednesday is hard-boiled eggs and crackers. The app generates a consolidated shopping list based on the recipes I select. It categorizes the list by grocery aisle, which saves me from walking back and forth across the store.
I involve my kids in this session. Nutritionists say involving children in meal planning increases the likelihood they’ll actually eat the food. I give them a choice between two options. Do you want carrots or cucumbers on Thursday? Do you want a yogurt tube or an applesauce pouch? Giving them agency stops the complaints. I also assign them age-appropriate tasks. My seven-year-old washes the apples and counts out ten whole-grain crackers. It took me years to figure out that when they help build it, they won’t throw it away.
Meal prep for school doesn’t have to be a chaotic, last-minute scramble at 6:00 AM. It just takes a few specific tools, a strict adherence to temperature safety, and a solid Sunday routine. I rely on the boiling water thermos trick and pre-chilled lunch bags. They keep food appetizing and safe. Skip the flimsy, uninsulated bags. They aren’t worth the risk. If you found these measurements and product details helpful, pin this post to your favorite meal prep board. Save it for the next time you’re standing in the grocery aisle wondering how long chicken actually lasts in the fridge.
Frequently Asked Questions
How long does cooked chicken last in the fridge for school lunches?
Cooked poultry like chicken or turkey must be eaten within 3 to 4 days. If you prep a batch on Sunday, Thursday is the absolute latest you should pack it. Freeze any remaining portions immediately to prevent foodborne illness.
How do I keep hot food warm until lunchtime?
You have to pre-heat an insulated stainless steel thermos. Pour boiling water into the empty thermos, let it sit for five minutes, dump the water out, and immediately add your steaming hot food. Secure the lid tightly.
What are the best ice packs for insulated lunch bags?
Slim, flexible gel packs work best. Place one flat gel pack on the bottom of the insulated bag and a second one directly on top of the food containers. Cold air sinks, so the top pack is crucial for maintaining safe temperatures.
Can I freeze yogurt for my child’s lunch?
Yes, freezing flexible yogurt tubes or applesauce pouches is a great strategy. They act as edible ice packs to keep the surrounding food cold, and they thaw into a cold, slushy texture by noon that most kids prefer over warm yogurt.
