What’s Inside
- Master the Base Gravy (Bhuna Masala)
- Pre-Boil Lentils and Legumes for Indian Meal Prep
- Utilize Your Instant Pot for Efficiency
- Embrace the Air Fryer for Crispy Components
- Prep Your Ginger-Garlic Paste and Green Chilies
- Batch Cook Grains Smartly for Indian Meal Prep
- Pre-Chop and Store Vegetables Correctly
- Make High-Protein Batters
- Create Versatile Chutneys and Condiments
- Cook to 75% Doneness for Reheating
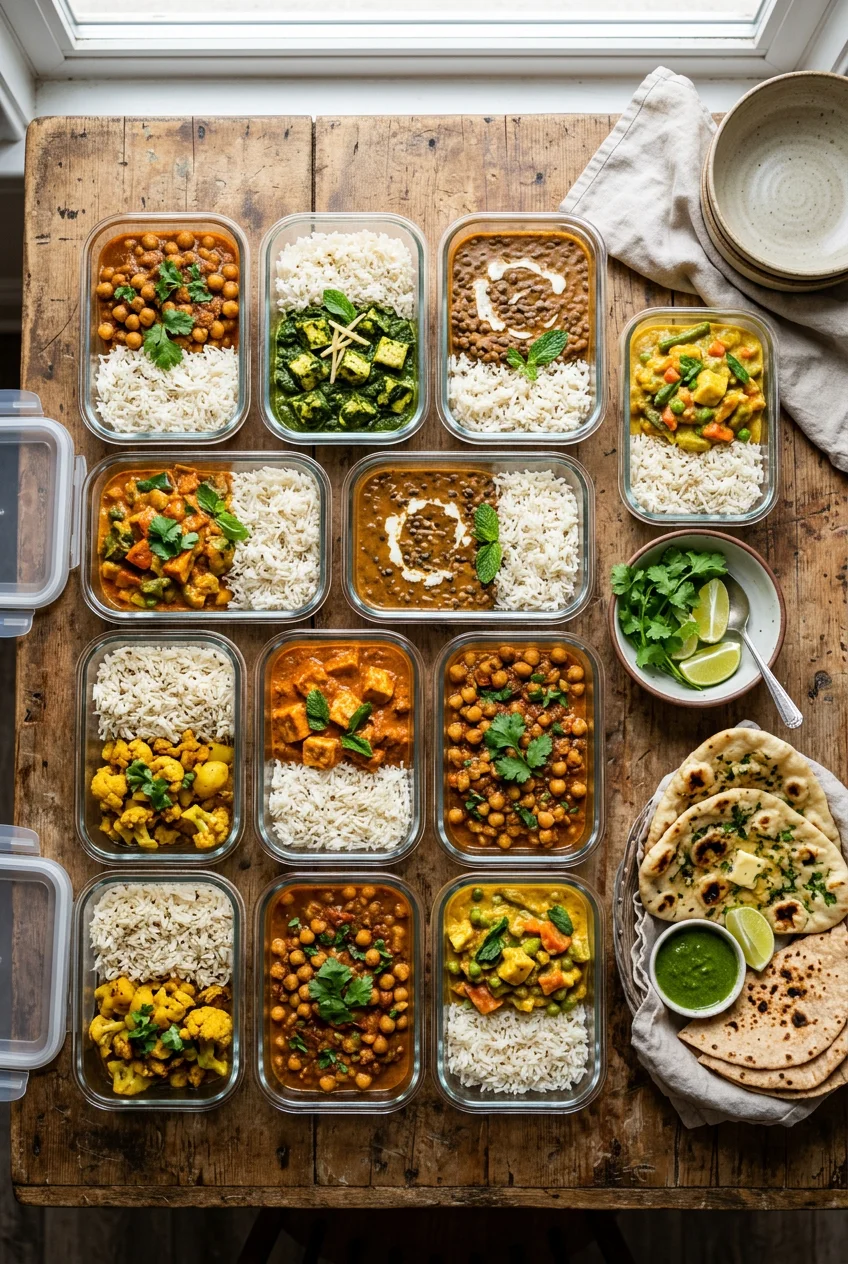
Last Tuesday at Whole Foods, I stared at a $14 plastic container of bland, watery chickpea curry and realized my lunch strategy was a total disaster. My early Indian meal prep usually ended with me scrubbing scorched turmeric out of a cheap plastic Tupperware at 11 PM on a Sunday. It wasn’t sustainable. The food always tasted like a faded shadow of itself by Wednesday. Indian cooking relies on layered spices, slow-cooked aromatics, and fresh textures. When you try to cook a full traditional meal from scratch every weeknight, you’ll burn out fast. I tried the “cook seven identical meals on Sunday” routine for months before figuring out it just leads to flavor fatigue. Learned that the hard way. Instead of cooking finished plates, the secret is prepping versatile, high-impact components you assemble later. Building a flexible meal system is the only way to stick to your goals without eating wet, reheated rice. Let’s break down the exact steps, measurements, and tools you need to build a routine that actually works.
1. Master the Base Gravy (Bhuna Masala)

If you only take one thing away from this, make it the base gravy. I spent years chopping onions every night before realizing restaurants never do this. You need a large batch of bhuna masala, a versatile onion-tomato base for ninety percent of traditional curries. I start by finely chopping 2 to 3 kilograms of yellow onions. Cook these down in a large, heavy-bottomed pot until they’re deeply caramelized. This takes at least forty-five minutes. Don’t rush it. If the onions are pale, your final dish will taste raw and sweet in a bad way. Once they’re dark brown, add 1 kilogram of pureed tomatoes. I use San Marzano canned tomatoes because fresh winter ones taste like crunchy water. Cook until the oil physically separates and pools around the edges of the cast iron pan. That visual cue means the moisture’s gone and the flavors are concentrated. I store this in OXO Smart Seal Glass Container Sets (about $29.99 for a set at Target). Glass is non-negotiable. I ruined three plastic containers because the tomato and turmeric stained them neon orange forever. The base lasts up to four days in the fridge. For longer storage, I freeze it in 1-cup portions using Souper Cubes ($29.95 for a tray). Pop a frozen cube into a pan with some protein, and dinner’s ready in ten minutes.
2. Pre-Boil Lentils and Legumes for Indian Meal Prep

Dried beans and lentils are cheap, but the soak times make them impossible for a quick Tuesday dinner. Dedicate time on Sunday to boil a variety of lentils and legumes like chana (chickpeas), rajma (kidney beans), moong dal, and toor dal. For a standard Dal Makhani, I measure out exactly 1 cup (200 grams) of whole urad dal and 1/4 cup (55 grams) of rajma. I buy Goya Dry Kidney Beans for $2.49 a bag at Kroger. You must soak these overnight. I tried skipping the soak once and boiled them for two hours; they still had a chalky, gritty center that ruined the whole batch. After soaking, I pressure cook them for exactly 20 minutes with just water and a pinch of salt. Here’s a massive mistake I made for a long time: don’t add acidic ingredients like tomatoes or lemon juice to the cooking water. Acid hardens the skin of the beans, and they won’t soften properly. I store the cooked beans in separate glass containers with a little cooking liquid to keep them from drying out. Throughout the week, I scoop them into a simmering pan of bhuna masala, toss them into a salad, or mash them into a quick patty.
3. Utilize Your Instant Pot for Efficiency

The electric pressure cooker changes how you approach this cuisine. Stovetop pressure cookers are traditional, but they require babysitting to count the whistles. I use an Instant Pot Duo 7-in-1, which I picked up for $99.95 at Walmart. It cuts cooking times for dals, biryanis, and root vegetable curries, letting you walk away entirely. For example, I prepare a massive batch of Chana Masala in under an hour without standing over a hot stove. Sauté your whole spices, dump in the soaked chickpeas and water, set the timer, and leave. There’s a specific technique regarding the pressure release. Never use the quick release valve when cooking meats or large beans. The sudden drop in pressure causes the liquid inside to violently boil, which shreds meat and blows the skins off your chickpeas. You end up with a mushy, stringy mess. Always let the pressure release naturally for at least fifteen minutes. The hissing steam and the caramel-butter smell of cumin and coriander filling the kitchen is my favorite part of Sunday afternoon. No exaggeration. I also use the pot-in-pot method to cook dal in the bottom and a steel bowl of rice on a trivet above it, cooking two components at once. You might also like: 15 Brilliant Good Meal Prep Ideas That Changed Everything
![[8-Pack,30 oz]Glass Meal Prep Containers](https://m.media-amazon.com/images/I/713Zfdsgi4L._AC_UL320_.jpg)
[8-Pack,30 oz]Glass Meal Prep Containers
[8-Pack punches above its price — 7 buyers rated it 4.5 stars. I would buy it again.
4. Embrace the Air Fryer for Crispy Components

Traditionally, many snacks and proteins are deep-fried in ghee. That tastes incredible, but it leaves you sluggish and makes a greasy mess on the stovetop. Air fryers are excellent for preparing less oily versions of these components with zero splatter. I use a Ninja AF101 Air Fryer ($89.99 at Costco) to prep my proteins. My standard routine is Air Fryer Paneer Tikka. I take 250 grams of paneer cubes. I usually buy Haldiram’s Paneer for $6.99 at my local Sprouts because it has a firm texture that holds up to heat. I marinate the cubes in thick yogurt, kashmiri chili powder, turmeric, and mustard oil. I air-fry them at 390 degrees for about eight minutes until charred and crispy. You can do the same thing with chicken thighs. The biggest mistake is crowding the basket. If the pieces touch, they steam instead of roasting. You end up with a pale, rubbery texture that tastes like wet cardboard. Cook in batches, and shake the basket halfway through. I keep the charred pieces in the fridge and throw them into salads or wrap them in a roti for a quick lunch. You might also like: 15 Lovely Kids School Lunch Ideas That Changed Everything
5. Prep Your Ginger-Garlic Paste and Green Chilies

Peeling garlic and grating ginger every night is the fastest way to lose your motivation. You can save significant time by preparing a bulk batch of ginger-garlic paste on the weekend. The store-bought jars taste metallic and have a weird, sour preservative aftertaste. Making it fresh takes five minutes. I blend 2 inches of peeled ginger, 20 large garlic cloves, and 10 green chilies into a coarse paste. You can adjust the chilies based on your spice tolerance, but this ratio provides a solid, sharp base. I store this in small Ball Mason Jars (the 4 oz size, which cost $12.99 for a 12-pack at Target). Crucial step: blend the paste with a teaspoon of neutral oil and a hefty pinch of salt. Don’t use water to get the blender moving. If you use water, the paste will oxidize and turn a terrifying, swampy greenish-blue color after three days. The oil creates a seal and the salt acts as a natural preservative. When sealed tightly, this paste stays bright and pungent in the refrigerator for up to a week. For longer storage, I spoon the paste into silicone ice cube trays, freeze them solid, and pop the cubes into a freezer bag. You might also like: 20 Cozy High Protein Lunch Ideas for Any Style
6. Batch Cook Grains Smartly for Indian Meal Prep

Rice is a staple, but cooking a fresh pot every night is annoying when you’re tired. I batch cook basmati rice, brown rice, or quinoa on Sundays. For my weekly prep, I measure out 6 cups of raw basmati rice. I strictly use Royal Basmati Rice, which I buy in a 15-pound burlap bag for $18.99 at Costco. The long grains stay separate and fluffy, unlike cheaper varieties that turn to mush. You have to wash the rice thoroughly. I rinse it in a mesh strainer under cold water for at least two minutes, using my hands to agitate the grains until the water runs clear. If you skip this, the surface starch turns into a gluey paste, and you end up with a solid brick of rice. If I’m using a pot, I use a one-to-two ratio of rice to water, bring it to a boil, drop the heat to the lowest setting, cover it tightly, and simmer for exactly 20 minutes. Don’t lift the lid to peek, or you’ll lose the steam. Once cooled, I portion the grains into Zoku 11-Piece Neat Stack containers (about $16.99 on Amazon). Portioning them out immediately makes grabbing a container for work completely mindless.

KOMUEE 10 Packs 30 oz Glass Meal Prep Containers
A dependable everyday pick — KOMUEE 10 Packs 30 oz Glass Meal Prep Containers pulls in 46 ratings at 4.5 stars. Not flashy, just solid.
7. Pre-Chop and Store Vegetables Correctly

Having your vegetables washed, peeled, and chopped at the start of the week removes the biggest mental hurdle to cooking dinner. On Sunday morning, I process onions, tomatoes, carrots, green beans, and bell peppers. The key here is moisture control. If you just throw chopped vegetables into a plastic bag, they’ll turn into a slimy, foul-smelling swamp by Wednesday. I experienced the infamous slimy cabbage incident of 2023, which stunk up my apartment for days. You must store them in airtight containers, preferably glass. I use Borosil borosilicate glass containers, which cost around $35.00 for a set at Macy’s. Glass is ideal because it prevents the pungent odor of chopped onions from seeping into other food. For shredded vegetables like cabbage or carrots, I place a folded dry paper towel at the bottom of the container, and another one under the lid. The paper towels absorb excess condensation. This simple trick keeps chopped greens and delicate vegetables fresh for up to a week. I also keep my chopped tomatoes in a separate container, as their high acid and water content will quickly break down softer vegetables if they touch.
8. Make High-Protein Batters

Breakfast is usually the hardest meal to prep for because nobody wants a heavy curry at 7 AM. A highly effective approach is preparing high-protein batters from scratch. I combine equal parts quinoa and yellow moong dal. I use Bob’s Red Mill Quinoa ($8.49 at Whole Foods) because it’s pre-rinsed and doesn’t have that bitter saponin coating. I soak the quinoa and dal for four hours, then blend them into a smooth batter with water. I stir in finely chopped onions, cabbage, bell peppers, grated carrots, salt, and red chili powder. Right before cooking, I add a tiny pinch of baking soda to make it light and airy. The batter has a slightly sour, fermented smell and a bubbly texture that indicates it’s ready. Use this to make quick savory pancakes (chillas), dosas, or steamed appe. It stays fresh for 3 to 4 days in the refrigerator. Here’s a mistake I made during my first winter: don’t add salt to the batter before letting it ferment if your kitchen is cold. Salt slows down the fermentation process. Leave the salt out until the batter has rested and bubbled, then season it right before you put it in the fridge.
9. Create Versatile Chutneys and Condiments

A good meal prep system relies on sauces to prevent the food from tasting repetitive and dry. I prepare flavorful condiments like fresh mint-cilantro chutney or spicy coconut chutney in advance. These bring a bright, acidic punch that cuts through heavy, rich gravies. I also make a non-traditional “rajma hummus” for snacking. I blend leftover boiled kidney beans with a block of Trader Joe’s Organic Firm Tofu ($1.99; it adds great protein without altering the flavor), garlic, lemon juice, and olive oil. I use Pompeian Smooth Extra Virgin Olive Oil ($9.98 at Walmart) because it has a mild flavor. This creates a creamy, protein-rich spread that lasts 5 to 7 days in the fridge and works perfectly on toast or as a dip for cucumbers. Here’s a tip that changed my prep waste: don’t discard your vegetable peels. The peels from lauki (bottle gourd), tori (ridge gourd), and even organic potatoes are packed with fiber. I wash them thoroughly, roast them with oil and cumin, and blend them into my green chutneys. They add a thick, rich texture and a subtle earthy flavor, and it keeps perfectly good food out of the trash.

Vtopmart 5Pack 22oz Glass Storage Containers with Lids
Honestly, Vtopmart 5Pack 22oz Glass Storage Containers with Lids surprised me — sturdier than it looks in the photos, and over 34 buyers gave it 4.5 stars.
10. Cook to 75% Doneness for Reheating

The biggest complaint about meal prep is that reheated food tastes like mush. You should only cook your curries, dry sabzis, and proteins to about 75% doneness on Sunday. This ensures they remain firm and fresh, ready for a quick finish on the stove right before serving. It prevents overcooking and maintains the structural integrity of the vegetables. When you pull the container out on Thursday, you finish that last 25% in a hot pan. This is also when you apply the most important technique: the tadka (tempering). A frequent error is adding raw spices directly to a finished dish. You must temper your spices in hot oil or ghee to unlock their aroma. I heat a tablespoon of ghee, drop in a teaspoon of Spice Jungle Cumin Seeds ($8.95 for a jar), and wait for the sputtering and popping sound. I pour this hot, fragrant oil over the reheated food. Another common mistake is overloading the dish with garam masala early on. Garam masala is a finishing spice, not a base. I use TRS Garam Masala Mix ($4.49 at my local Indian grocer). If you boil it for an hour, the delicate floral notes burn off and leave a bitter taste. Add just a half teaspoon right at the end. Finally, while frying spices in oil is crucial, I wait to add my high-quality fats until the very end to preserve their nutritional value.
Building a routine around these components rather than full plates gives you the freedom to eat exactly what you’re craving. You aren’t locked into eating the exact same chicken curry four days in a row. You can mix the bhuna masala with the boiled chickpeas on Tuesday, and use that same masala with air-fried paneer on Wednesday. This “meal builder” approach prevents the dreaded meal fatigue and makes eating healthy food at home sustainable. If you’re tired of throwing away spoiled produce and spending an hour at the stove every night, start by just making the base gravy and boiling a batch of dal this Sunday. Save this guide and refer back to these specific measurements when you’re ready to stock your fridge.
Frequently Asked Questions
How long does bhuna masala last in the fridge?
A cooked onion-tomato base gravy (bhuna masala) lasts up to four days in an airtight glass container in the refrigerator. For longer storage, freeze it in silicone cube trays for up to four weeks.
Can I meal prep Indian breads like roti or naan?
Yes, you can knead the dough in advance and store it in an airtight container in the fridge for up to three days. Alternatively, cook the rotis halfway, freeze them between layers of parchment paper, and finish them on a hot pan before eating.
Why do my meal prepped lentils taste chalky?
Chalky lentils are usually the result of undercooking, skipping the overnight soak, or adding acidic ingredients like tomatoes and salt to the boiling water before the beans have fully softened.
What is the best way to reheat indian meal prep containers?
For the best texture, reheat your curries and proteins on the stovetop rather than the microwave. Add a splash of water to loosen the gravy, and finish with a fresh tadka (tempered spices) and a pinch of garam masala.
