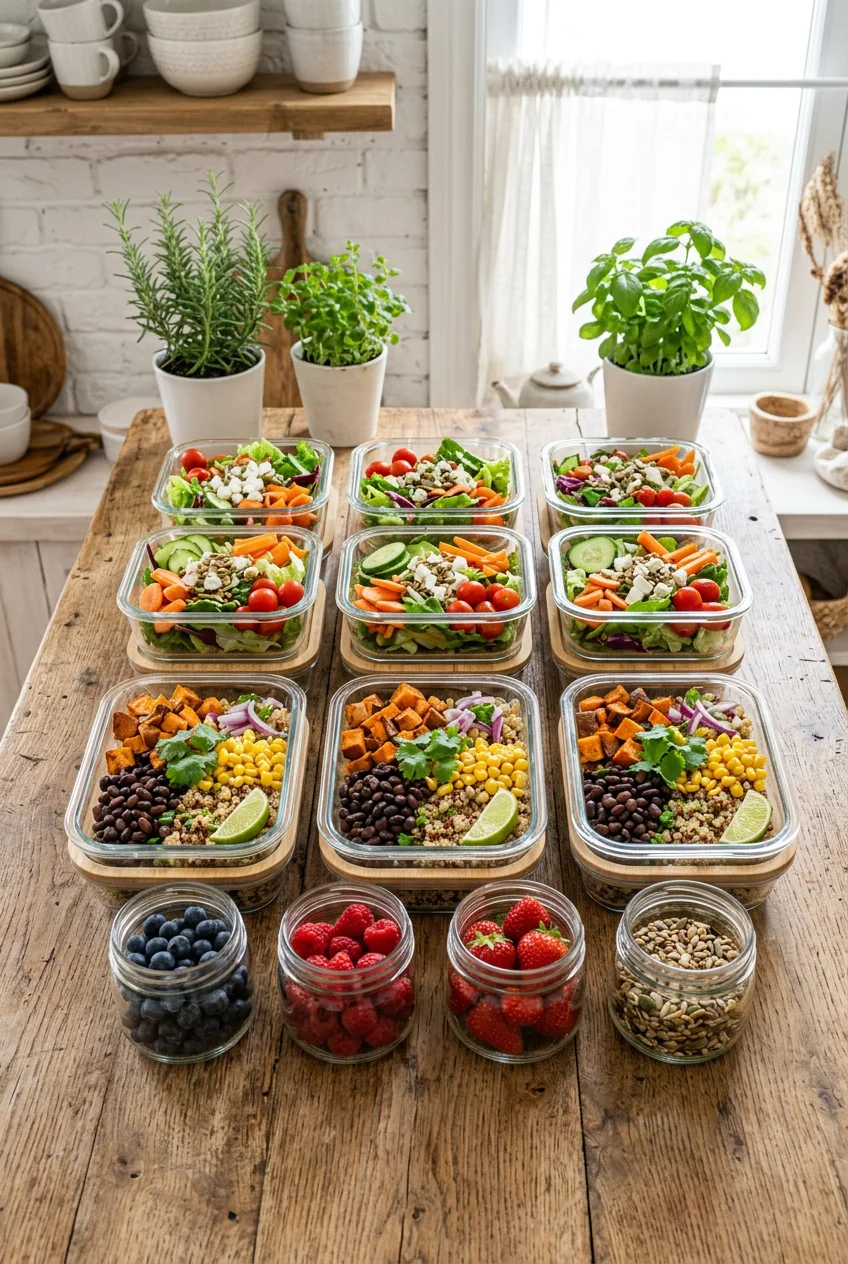
What’s Inside
- Invest in Heavy-Duty Glass Containers (Pyrex)
- Use Bento-Style Boxes for Snack Lunches (Bentgo)
- Master the Layered Mason Jar Salad (Weck Jars)
- Build a Moisture Barrier for Sandwiches (Kerrygold)
- Cool Your Proteins Rapidly (Target Storage)
- Prep Hearty Grain Bowls for Meal Prep Cold Lunches
- Pack Multiple Cold Sources in Insulated Bags (Arctic Zone)
- Isolate Your Dressings and Acidic Sauces (Sistema)
- Label Everything to Stop Wasting Food (Sharpie)
- Rely on No-Cook Proteins for Fast Meal Prep Cold Lunches
- Freeze PB&J Sandwiches for Emergency Lunches (Smucker’s)
- Batch Cook Ingredients Instead of Full Meals (Broccoli)
Last Tuesday at Whole Foods, I saw a woman crying over a spilled, lukewarm container of tuna salad. I knew exactly how she felt. My first attempt at meal prep cold lunches ended with a backpack smelling like wet cat food and a ruined laptop. Let’s avoid that. I’m Esperanza Eliza, and I’ve spent years perfecting the art of packing food that actually tastes good straight from the fridge. Most people get this wrong. They throw hot rice into cheap plastic, seal it up, and wonder why their Tuesday lunch tastes like a damp sponge. Skip the fat-free stuff. It tastes like wet cardboard. Instead, I’m sharing my exact blueprint for keeping your food crisp, safe, and cheap. I’m talking under five bucks a serving. Trust me on this.
1. Invest in Heavy-Duty Glass Containers (Pyrex)

I tried this wrong for months before figuring it out. I bought a flimsy fifty-pack of plastic tubs from Amazon. By week three, they were stained orange from turmeric and warped from the dishwasher. Honestly, you’re throwing money away. You need quality glass. I personally swear by the Snapware two-cup glass containers. I grabbed a ten-piece set at Target last month for exactly $24.99. Glass is non-porous. It won’t absorb that garlicky chicken smell from yesterday. It prevents chemical leaching, which is a huge deal when you’re storing acidic foods like tomato vinaigrette. Plus, glass lasts five to ten times longer than plastic. When I portion out 4 oz of shredded chicken and 1/2 cup of diced bell peppers, I want to see exactly what I’m grabbing from the fridge. A major mistake I see beginners make is buying mismatched containers. The lids get lost. The stacking is a nightmare. Buy one solid set of Pyrex or Snapware. Yes, it’s heavy to carry to the office. I once dropped my bag on the subway grating and heard a terrifying clink, but the thick glass survived without a scratch. The peace of mind is worth the extra weight.
2. Use Bento-Style Boxes for Snack Lunches (Bentgo)

Sometimes you just don’t want a massive salad. You want a little bit of everything. This is where bento-style containers save the day. I picked up a Bentgo Salad Container at Walmart for $14.97. It completely shifted how I pack my Friday meals. The multiple compartments are crucial for keeping wet and dry ingredients separate until the exact minute you’re ready to eat. I usually pack 1/4 cup of raw almonds, 2 tablespoons of hummus, 1/2 cup of baby carrots, and 3 oz of sharp cheddar cheese blocks. If you let the hummus touch the almonds, you end up with a mushy, sad mess. I learned that the hard way during a picnic at the park last summer. The almonds turned into a weird paste. Don’t do that. Another great option is the Rubbermaid Brilliance Salad and Snack Lunch Combo Kit. I found a two-pack at Kroger for $16.99. They have these secure latches that absolutely won’t pop open in your tote bag. The deconstructed meal concept gives you flexibility. You get different textures. You get the crunch of the carrots and the creamy bite of the cheese. It feels like a fancy charcuterie board.
3. Master the Layered Mason Jar Salad (Weck Jars)

Let’s talk about salads. I used to pack my greens and dressing together. By noon, my spinach looked like dark green slime. It was repulsive. Then I discovered the layering method. You need tall, narrow jars for this to work properly. I use the Weck 742 jars, which hold about 19 ounces. I buy them individually at Sprouts for $4.99 each. They have these gorgeous glass lids and rubber gaskets that create an airtight seal. Here is the strict order you must follow. Pour 3 tablespoons of dressing at the very bottom. Next, add your hard vegetables. I usually drop in 1/2 cup of chopped cucumbers and 1/4 cup of shredded carrots. They sit in the dressing and marinate without getting gross. Then add your grains, like 1/2 cup of cooked quinoa. Next goes your protein. I like 4 oz of grilled tofu. Finally, stuff the top with 2 cups of fresh arugula. The greens stay completely dry at the top of the jar. When you’re ready to eat, you just shake it violently or dump it into a bowl. I prepped five of these last Sunday. By Thursday, the arugula was still snapping with crispness.

M MCIRCO 10-Pack,30 Oz Glass Meal Prep Containers 2
A dependable everyday pick — M MCIRCO 10-Pack pulls in 23 ratings at 4.5 stars. Not flashy, just solid.
4. Build a Moisture Barrier for Sandwiches (Kerrygold)

A soggy sandwich is a tragedy. I remember sitting in the breakroom two years ago, peeling wet, gummy bread off a turkey sandwich. I ended up throwing it away and buying a fifteen-dollar salad downstairs. Never again. The secret to prepping sandwiches days in advance is building a fat barrier. You need to spread a thin layer of fat directly on the bread before you add any wet ingredients like sliced tomatoes or tuna salad. I’m obsessed with Kerrygold Pure Irish Butter. I buy the 8 oz foil blocks at Costco for about $4.50 each. I let it soften, then spread exactly 1 teaspoon edge-to-edge on both slices of sourdough. You can also use cream cheese. I spread 1 tablespoon of Philadelphia Cream Cheese on my bagels before adding smoked salmon. This creates a waterproof seal. The moisture from the meat or veggies can’t penetrate the fat layer to reach the bread. Food safety experts advise this trick to extend sandwich freshness for up to two days. Don’t use mayonnaise for this barrier step. Mayo has too much water content and will eventually soak into the crumb. Stick to pure butter or dense cream cheese for perfect crusts. You might also like: 15 Brilliant Batch Cooking Ideas That Actually Work
5. Cool Your Proteins Rapidly (Target Storage)

This is a public service announcement about food safety. Most people get this wrong. They cook a massive batch of chicken breast, throw it immediately into a deep Tupperware, snap the lid on, and shove it in the fridge. That is a recipe for disaster. The center of that chicken will stay warm for hours, creating a perfect breeding ground for bacteria. You can’t leave food in the temperature danger zone for more than two hours. I learned this after getting wicked food poisoning from some questionable meal prep back in college. Now, I prioritize rapid cooling. I use shallow, wide glass baking dishes. I bought a 9×13 inch Pyrex dish at Target for $12.99 specifically for cooling. I spread my 1 pound of cooked ground turkey in a thin layer, less than two inches deep. It cools down to forty degrees in about thirty minutes. Once it’s completely cold to the touch, then I transfer it to my individual meal prep containers. If you trap steam in your containers, it creates condensation. That water drips back onto your food and ruins the texture of everything. Let your hot food chill out before you lock it up. You might also like: 20 Gorgeous Meal Planning Ideas for Any Style
6. Prep Hearty Grain Bowls for Meal Prep Cold Lunches

Grain bowls are my ultimate fallback when I’m too tired to think. They hold up incredibly well in the fridge and taste amazing straight from the chill. You don’t even need a microwave. I usually start with a base of farro or quinoa. I buy the 16 oz bags of organic tricolor quinoa from Trader Joe’s for $3.99. I cook exactly 2 cups of dry quinoa on Sunday afternoon. The nutty smell fills my whole kitchen. For the bowls, I layer 1/2 cup of the cooked quinoa with 1 cup of roasted sweet potatoes and 1/2 cup of raw bell peppers. Then I add 4 oz of rinsed canned chickpeas. Grains like farro and brown rice actually get a better, chewier texture after sitting in the fridge for a day or two. They absorb the flavors around them without turning to mush. You can’t say the same for pasta, which usually gets hard and chalky when cold. Grain bowls are going to be massive staples for meal prep cold lunches this year because they are ridiculously cheap. A single bowl costs me maybe $2.15 to make. Just remember to keep your dressing on the side. You might also like: 20 Lovely Work Lunch Ideas to Inspire Your Next Project

Vtopmart 5Pack 22oz Glass Storage Containers with Lids
If you want something that just works, Vtopmart 5Pack 22oz Glass Storage Containers with Lids is a safe bet (34 reviews, 4.5 stars).
7. Pack Multiple Cold Sources in Insulated Bags (Arctic Zone)

If you’re commuting or don’t have access to a fridge at work, you need to take temperature control seriously. A flimsy plastic grocery bag won’t cut it. I use the Arctic Zone Titan Deep Freeze insulated lunch bag. I grabbed mine at Kroger last month for $14.99. It has a reflective interior that genuinely traps the cold. But the bag alone isn’t enough. The USDA recommends using at least two cold sources to keep your food below that crucial forty-degree mark. I use two hard-shell frozen gel packs. I buy the Yeti Thin Ice packs. They are pricey at $15.00 each at REI, but they freeze solid and don’t sweat condensation all over my containers. I place one 5×3 inch ice pack flat on the bottom of the bag, put my glass container in, and lay the second ice pack directly on top. It creates a little freezing sandwich for my food. Sometimes I’ll freeze a small 8 oz plastic water bottle and use that as my second cold source. By noon, the water is perfectly slushy to drink, and my chicken salad is still safely chilled. Don’t risk eating warm chicken. It’s gross and dangerous.
8. Isolate Your Dressings and Acidic Sauces (Sistema)

I can’t stress this enough. Never dress your food ahead of time. Acidic ingredients like vinegar and lemon juice will chemically cook your vegetables and break down your proteins. I ruined a beautiful batch of chopped kale once by tossing it in a heavy lemon vinaigrette on Sunday. By Tuesday, the kale was brown, wilted, and smelled like sulfur. It went straight into the trash. Now, I religiously use Sistema Dressing Pots. I found a four-pack at Whole Foods for $5.99. They hold exactly 1.18 ounces of liquid, which is the perfect portion for a standard salad. They have screw-on lids that actually seal. I’ve tossed them into the bottom of my purse, and they’ve never leaked a single drop of olive oil. I line up five of these little pots on Sunday, fill them with my homemade balsamic mustard dressing, and store them in the door of my fridge. When I pack my lunch, I just toss one little pot into my bag. Pouring the dressing fresh right before you eat makes the whole meal taste better. It keeps the crunchy things crunchy and the fresh things fresh. It’s a non-negotiable step for me.
9. Label Everything to Stop Wasting Food (Sharpie)

We all do it. You open the fridge on a Thursday night, spot an unmarked container of pasta salad, and play the dangerous game of guessing its age. I used to rely on my memory, which resulted in me throwing away perfectly good food just because I was scared it was old. Now, I label every single thing I prep. It takes thirty seconds and saves me so much money. I use standard beige masking tape and a black Fine Point Sharpie. I buy a three-pack of tape at Walmart for $2.50. I rip off a small piece, stick it to the glass lid, and write the meal name and the exact date I cooked it. For example, I write “Greek Chicken – Prepped Oct 12.” Most cold prepped meals are completely safe for three to four days. If I see a container hitting day five, I know I need to eat it immediately or toss it. Seafood is the exception. If I prep 4 oz of baked salmon, I write a giant warning on the tape. Masking tape peels off glass and plastic easily without leaving that sticky, horrible residue behind. Labeling is incredibly satisfying.
![[8-Pack,30 oz]Glass Meal Prep Containers](https://m.media-amazon.com/images/I/713Zfdsgi4L._AC_UL320_.jpg)
[8-Pack,30 oz]Glass Meal Prep Containers
[8-Pack has been one of the most consistently praised picks in this category. 7 reviewers averaged 4.5/5.
10. Rely on No-Cook Proteins for Fast Meal Prep Cold Lunches

Some Sundays, I’m just too exhausted to turn on the oven. The thought of roasting chicken breasts makes me want to cry. That’s when I pivot to no-cook proteins. This is the ultimate cheat code for meal prep cold lunches. My absolute favorite is the Kirkland Signature Rotisserie Chicken from Costco. It’s a massive, hot bird for exactly $4.99. I buy one, bring it home, and immediately shred the meat while it’s still warm. It yields about 4 cups of cooked chicken. I toss 4 oz of the shredded breast meat directly into my cold wraps or over my greens. It takes zero active cooking time. Canned proteins are also lifesavers. I stock up on Wild Planet Canned Pink Salmon. I get a three-pack at Sprouts for $11.99. I just drain a 5 oz can, mix it with 1 tablespoon of Greek yogurt and some dill, and it’s ready. Hard-boiled eggs and canned chickpeas work exactly the same way. You don’t have to cook every single component from scratch to have a healthy, cheap lunch. Let the grocery store do the heavy lifting for you. It frees up your entire Sunday afternoon for relaxing.
11. Freeze PB&J Sandwiches for Emergency Lunches (Smucker’s)

I know freezing sandwiches sounds completely unhinged, but stay with me. You can’t freeze lettuce, tomatoes, or mayonnaise. They turn into a watery, disgusting mess when they thaw. But you absolutely can freeze peanut butter and jelly. I learned this trick from a mom of three at my gym, and it blew my mind. I buy a loaf of classic white bread, a 16 oz jar of Smucker’s Strawberry Preserves for $3.29 at Target, and a jar of creamy peanut butter. I make ten sandwiches at once. I spread peanut butter on both sides of the bread to create that moisture barrier we talked about earlier, then put 1 tablespoon of jelly in the middle. I place each sandwich in a plastic bag, press all the air out, and lay them completely flat in my freezer. When I need a desperate, last-minute lunch, I grab a frozen sandwich at seven in the morning. By noon, it’s perfectly thawed, soft, and ready to eat. The bread doesn’t get soggy at all. It’s the cheapest, fastest prep you can possibly do. I keep a stack of these in the back of my freezer at all times.
12. Batch Cook Ingredients Instead of Full Meals (Broccoli)

I used to prep seven identical containers of chicken, rice, and broccoli. By Wednesday, I was so bored of eating the exact same flavor profile that I’d order a twenty-dollar burrito on DoorDash. Meal fatigue is real, and it destroys your budget. Now, I batch cook versatile components instead of rigidly structured meals. Last Sunday, I bought a giant bag of raw broccoli florets at Sprouts for $5.99. I tossed 3 cups of broccoli with olive oil, salt, and pepper, and roasted them until the edges were charred and crispy. I also boiled six large eggs and baked 1 pound of tofu cubes. I store all these components in separate, large glass containers in the fridge. On Monday morning, I might throw 1 cup of the roasted broccoli into a wrap with some hummus. On Tuesday, I’ll chop up two hard-boiled eggs and mix them into a spinach salad with the tofu. Mixing and matching keeps your palate entertained. You’re still prepping ahead of time, but you aren’t locking yourself into a monotonous menu. It feels spontaneous, even though you did all the hard work days ago. Don’t force yourself to eat boring food. Took me years to figure out.
Honestly, mastering these prep habits completely changed my weekdays. I’m no longer stressing about finding a microwave or spending fifteen dollars on a mediocre deli sandwich. If you stick to glass containers, keep your dressings separate, and embrace no-cook proteins, you’ll save hundreds of dollars a month. I’d love to hear what combinations you come up with. Let’s make sad desk lunches a thing of the past. Pin this guide to your favorite Pinterest board so you have these exact measurements and grocery prices ready for your next Sunday prep session! No exaggeration.
![C CREST [10 Pack] Glass Meal Prep Containers](https://m.media-amazon.com/images/I/81HfSfzlqUL._AC_UL320_.jpg)
C CREST [10 Pack] Glass Meal Prep Containers
Honestly, C CREST [10 Pack] Glass Meal Prep Containers surprised me — sturdier than it looks in the photos, and over 349 buyers gave it 4.5 stars.
Frequently Asked Questions
How long do meal prep cold lunches stay fresh in the fridge?
Most prepped meals stay safe and delicious for three to four days when stored properly in airtight glass containers. If you’re using seafood or dairy-based sauces, you should eat those within one to two days to ensure maximum food safety and texture.
Can I freeze sandwiches for my weekly meal prep?
You absolutely can freeze certain sandwiches. The trick is avoiding high-water ingredients like lettuce, tomatoes, and mayonnaise. Peanut butter and jelly freezes perfectly. Just build a fat barrier with peanut butter on both slices of bread before adding the jelly to prevent sogginess.
What are the best containers for meal prep cold lunches?
I highly recommend investing in heavy-duty glass containers like Pyrex or Snapware. Glass is non-porous, won’t absorb lingering odors, and prevents chemical leaching. For snack-style meals, segmented bento boxes from brands like Bentgo are fantastic for keeping wet and dry ingredients totally separate.
How do I keep my prepped salads from getting soggy?
The secret is keeping your dressing completely separate until the exact moment you’re ready to eat. Use small, airtight dressing pots. If you’re building a mason jar salad, pour the dressing at the very bottom, followed by hard vegetables, grains, proteins, and finally greens.
