What’s Inside
- Adhere Strictly to the 3-4 Day Rule for Refrigerated Chicken Lunch Meal Prep
- Master Air Fryer Chicken Breasts for Consistent Juiciness
- Invest in High-Quality Glass Meal Prep Containers
- Embrace Sous Vide for Unbeatable Tenderness and Nutrient Retention
- Shred Chicken Effortlessly with a Hand Mixer
- Prioritize Chicken Thighs for Flavor and Cost-Effectiveness
- Pre-Marinate and Freeze Raw Chicken for Future Meals
- Craft Versatile All-Purpose Seasoning Blends
- Store Sauces Separately to Maintain Texture
- Brine Chicken for Superior Moisture Retention
Last Tuesday at Whole Foods, I stared at a sad, rubbery piece of leftover poultry in my plastic container and almost cried. The harsh fluorescent lights of the break room made it look totally unappetizing. It smelled faintly of wet dog and old garlic, and when I took a bite, it tasted like chalk. The stringy texture got stuck in my teeth. That was my rock bottom with chicken lunch meal prep. If you’re struggling to make chicken lunch meal prep actually taste good by Wednesday, I feel your pain. I’ve ruined so many batches over the years by overcooking, under-seasoning, and storing things wrong. Let’s fix this together. I’m sharing the exact methods I use to keep my meals juicy, flavorful, and safe to eat all week. Skip the fat-free stuff. It tastes like wet cardboard. We’re going to make food you actually want to eat, using real ingredients and proper techniques. I’ll walk you through my grocery store staples, the specific temperatures you need to memorize, and the reheating tricks that work. Grab your notepad.
1. Adhere Strictly to the 3-4 Day Rule for Refrigerated Chicken Lunch Meal Prep

I used to push my luck with leftovers. I’d eat five-day-old chicken on a Friday and wonder why my stomach felt cramped by the afternoon. Don’t do this. Cooked chicken, regardless of how you cooked it or how much salt you used, should be eaten within 3 to 4 days when stored at or below 40°F. I learned that the hard way after a miserable weekend of food poisoning. Now, I’m ruthless about my fridge clean-outs. If I cook a massive batch on Sunday, I know I can’t eat it past Thursday lunch. For longer storage, you need to freeze those portions immediately. I buy the Ziploc Quart Storage Bags ($4.29 for a 40-count box at Target) and freeze whatever I won’t eat in that four-day window. They keep the air out and prevent freezer burn. You can freeze cooked chicken for up to 3 months safely. When you pull it out, let it thaw overnight on the bottom shelf of the fridge. The texture stays firm, and you aren’t risking your health. Honestly, tracking your days is the most basic step, but most people get this wrong. Grab a black Sharpie. Write the date directly on your glass container or a piece of masking tape. It takes two seconds, costs pennies, and saves you from a miserable weekend of stomach pain.
2. Master Air Fryer Chicken Breasts for Consistent Juiciness

I tried this wrong for months before finally figuring it out. I’d throw thick, uneven, freezing cold chicken breasts into my air fryer, blast them on high, and pull out something resembling a hockey puck. The outside would be tough, and the inside would be dry and white. To get perfectly tender chicken breasts, you need a repeatable formula. Preheat your air fryer to 375°F. I use the Ninja 4-Quart Air Fryer ($89.00 at Walmart) because it circulates the air perfectly. Take a 6-ounce chicken breast (I buy the Foster Farms brand for $5.99 per pound at Kroger). If it’s too thick on one end, pound it down slightly so it cooks evenly. Cook it for exactly 15 to 17 minutes, flipping it halfway through with silicone tongs. You want the internal temperature to reach exactly 163°F, not a degree higher. Remove it from the hot basket immediately and let it rest on a wooden cutting board. Tent it loosely with a piece of Reynolds Wrap Aluminum Foil ($4.99 at Kroger). Let it sit there in the dark for 5 to 10 minutes. The carryover cooking will bring it up to the food-safe 165°F while locking all the juices inside the meat fibers. When you finally slice into it, you’ll see the moisture pooling on the board. It’s perfectly tender every time.
3. Invest in High-Quality Glass Meal Prep Containers

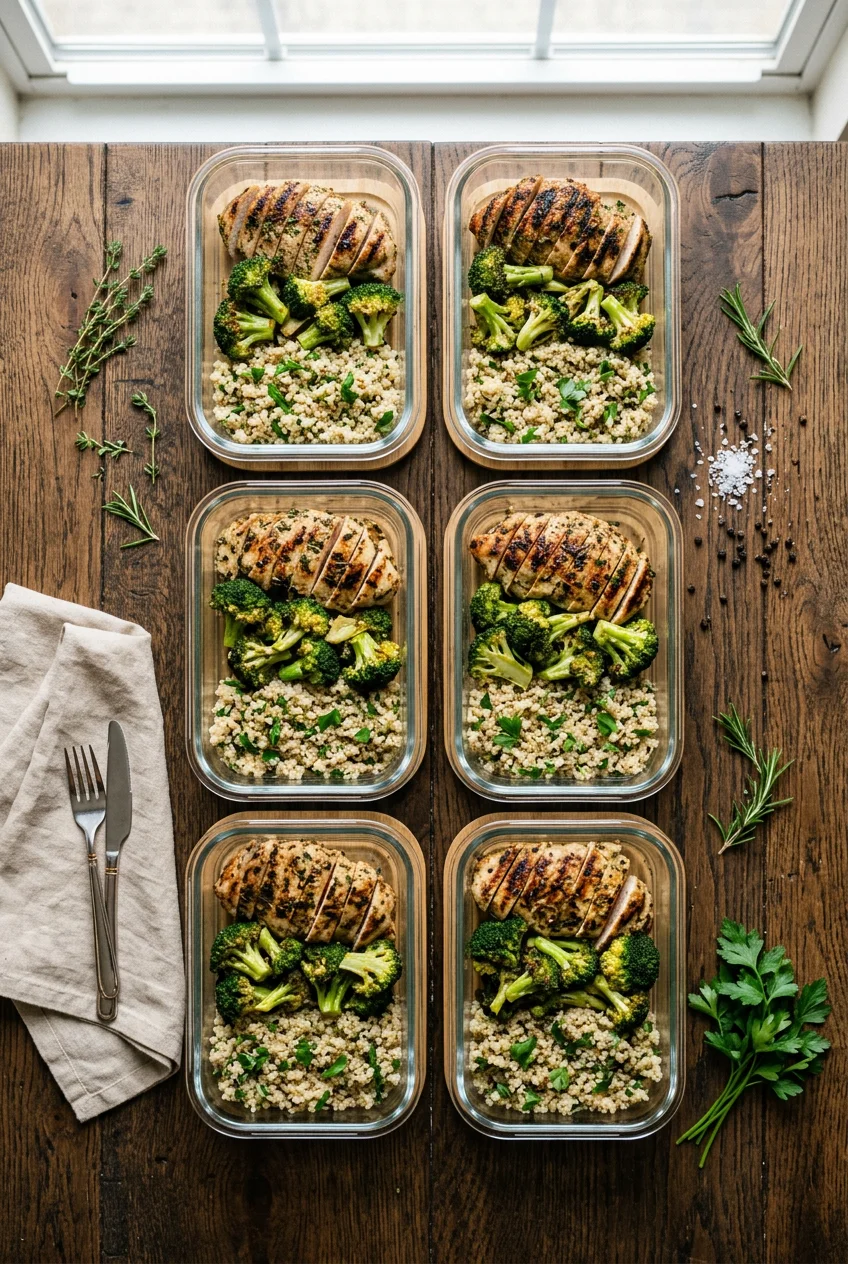
Ditch your flimsy plastic containers right now. I kept using cheap plastic tubs for years because I didn’t want to spend the money on an upgrade. My chicken always tasted vaguely like my citrus dishwasher soap, and the plastic was permanently stained orange from old paprika marinades. It’s disgusting to look at and worse to eat from. You need durable, airtight glass containers. I personally swear by the Pyrex 3-Cup Rectangular Glass Containers. You can get a 3-pack for $19.98 at Walmart. They don’t absorb weird odors. They don’t stain when you use turmeric. They are completely microwave, oven, and freezer-safe. When you reheat your chicken in heavy glass, it heats more evenly and you aren’t leaching chemicals into your hot food. The OXO Good Grips Smart Seal Glass Containers ($11.99 for a 4-cup size at Target) are another incredible option because the thick silicone seal prevents any messy leaks in your work bag. I dropped one of my old plastic containers in the parking lot of my office last year, and the lid popped right off, dumping my roasted chicken and rice directly onto the wet concrete. I had to buy a sad vending machine lunch that day. The snap-lids on these glass ones won’t budge even if you drop them. You might also like: 15 Brilliant Batch Cooking Ideas That Actually Work
![C CREST [10 Pack] Glass Meal Prep Containers](https://m.media-amazon.com/images/I/81HfSfzlqUL._AC_UL320_.jpg)
C CREST [10 Pack] Glass Meal Prep Containers
Honestly, C CREST [10 Pack] Glass Meal Prep Containers surprised me — sturdier than it looks in the photos, and over 349 buyers gave it 4.5 stars.
4. Embrace Sous Vide for Unbeatable Tenderness and Nutrient Retention

Sous vide cooking sounds pretentious. I avoided it for years because I thought it was only for fancy chefs with massive kitchens. I was wrong. This specific cooking method is trending for 2026, and it’s the best way to guarantee tender chicken that won’t dry out in the fridge. You vacuum-seal your raw chicken with marinades and drop it into a precise temperature water bath. I use the Anova Culinary Nano Sous Vide Precision Cooker ($99.00 at Target). It clips right onto any large pot. For a standard chicken breast, I set the water to 145°F and let it cook for 1.5 hours. Because the chicken is sealed tightly in a bag, all the juices, fats, and nutrients stay trapped inside the meat instead of evaporating into the hot pan. You can even freeze your marinated raw chicken directly in the vacuum-sealed bags, then drop the rock-hard frozen bag straight into the hot water bath (just add 30 minutes to the total cook time). I use the FoodSaver 1-Quart Pre-Cut Bags ($19.99 for a 44-count box at Costco) because they never leak. When you pull the chicken out, it looks a little pale. Give it a quick 30-second sear in a smoking hot cast-iron skillet with a tiny drop of avocado oil for some color. The texture is unbelievably soft. It practically melts in your mouth. You might also like: 20 Inspiring Sunday Dinner Ideas You Need to See
5. Shred Chicken Effortlessly with a Hand Mixer

Shredding hot chicken with two forks is a miserable, tedious chore. My hands would cramp up, and it would take me ten minutes just to prep enough meat for a few salads. I saw a trick online last year and it blew my mind. After boiling or pressure cooking your chicken, grab your baking tools. I throw 2 pounds of raw chicken breasts into my Instant Pot ($99.95 at Target) with 1 cup of low-sodium chicken broth. I cook it for exactly 10 minutes on high pressure, followed by a 5-minute natural release. Then, I carefully transfer the steaming hot, cooked chicken to a massive glass mixing bowl. I take my KitchenAid 5-Speed Hand Mixer ($59.99 at Best Buy) and turn it on the lowest setting. Just press the metal beaters directly into the hot chicken chunks. It shreds perfectly in about 30 seconds. The meat breaks apart into fine, even strands that soak up heavy sauces beautifully. Just make sure you use a very deep bowl. The first time I tried this, I used a shallow pasta plate and launched hot chicken pieces all over my kitchen counter and floor. My dog was thrilled, but I was furious. Keep the mixer on low, use a deep bowl, and you’ll save so much time. You might also like: 15 Stunning Lunch Weekly Meal Prep Ideas You Haven’t Thought Of
6. Prioritize Chicken Thighs for Flavor and Cost-Effectiveness

Stop buying expensive chicken breasts for every meal. I know the fitness influencers push plain white chicken breasts constantly, but they dry out so fast in the fridge. Chicken thighs are the actual secret to meals that taste good on a Thursday afternoon. They have a slightly higher fat content, which makes them incredibly flavorful and very forgiving if you accidentally overcook them by a few minutes. They won’t turn into dry chalk. Plus, they are way more budget-friendly when you look at the receipt. I buy the Trader Joe’s Boneless Skinless Chicken Thighs for $4.49 per pound. Breasts are usually $1 to $2 more per pound at the same store. That adds up fast when you’re prepping every Sunday for a whole family. I love roasting thighs on a heavy Nordic Ware aluminum sheet pan. The edges get slightly crispy in the oven, and the dark meat stays rich and juicy inside. If you’re reheating a thigh in the depressing office microwave, it still tastes remarkably fresh. I used to force myself to eat dry, rubbery breasts because I thought it was the only healthy option. It’s a miserable way to live. Switch to thighs. Your tastebuds and your weekly grocery budget will thank you.

M MCIRCO 10-Pack,22 Oz Glass Meal Prep Containers
M MCIRCO 10-Pack punches above its price — 86 buyers rated it 4.5 stars. I would buy it again.
7. Pre-Marinate and Freeze Raw Chicken for Future Meals

Some Sundays, I’m just too exhausted to chop garlic, measure oils, and mix complex marinades. That’s why I prep my raw chicken the second I get home from the grocery store. I’ll buy a massive bulk pack of chicken and immediately divide it into Ziploc Gallon Freezer Bags ($5.79 at Kroger). I add my wet and dry marinades directly to the raw meat before freezing. My favorite mix for 1 pound of chicken breast is 1/4 cup Pompeian Balsamic Vinegar ($4.28 at Walmart), 2 tablespoons extra virgin olive oil, and 1.5 tablespoons McCormick Italian Seasoning. Squish the plastic bag around with your hands so the chicken is coated in the dark liquid, push all the extra air out, and toss it flat in the freezer. It stays perfectly good for up to 3 months. When I know I have a busy week coming up, I just move a solid bag to the fridge on Saturday night. As it thaws slowly overnight, it marinates itself. By Sunday afternoon, I just dump the entire contents onto a baking sheet. It smells incredible while it cooks, deeply tangy and herbaceous. This eliminates the messy prep work on my actual cooking day.
8. Craft Versatile All-Purpose Seasoning Blends

Flavor fatigue is a real problem. If you eat the same lemon pepper chicken five days in a row, you’re going to hate it by Wednesday. Instead of buying expensive pre-made rubs that are mostly just cheap salt, I craft my own versatile seasoning blends at home. I keep a small glass mason jar ($1.25 at Dollar Tree) filled with my favorite base blend on my counter. For 1 to 2 pounds of chicken, I mix 1 teaspoon garlic powder, 1 teaspoon onion powder, 1/2 teaspoon Diamond Crystal Kosher Salt ($8.99 at Whole Foods), 1/2 teaspoon dried parsley, 1/4 teaspoon smoked paprika, and 1/8 teaspoon black pepper. This specific ratio gives the chicken a beautiful reddish crust in the pan without overpowering the natural flavor. It tastes savory, slightly smoky, and pairs perfectly with white rice, whole wheat pasta, or bitter salad greens. I used to just dump random spices from my cabinet directly onto my chicken without measuring. Sometimes it was bland, and other times it was so salty I couldn’t even swallow it. Measuring out a master batch of seasoning ensures your chicken tastes consistently amazing every time you cook.
9. Store Sauces Separately to Maintain Texture

I ruined a perfectly good crispy chicken and rice bowl last month by pouring my heavy dressing all over it on Sunday night. By Tuesday lunch, the white rice was mush, the chicken breading was soggy and falling off, and the whole container looked like a sad green swamp. Fitness experts like Noel Deyzel always talk about this. Never add your wet sauces directly to your food during your Sunday meal prep. You have to store them separately. I buy the Sistema To Go Dressing Containers ($5.49 for a 4-pack at Target). They hold exactly 1.18 ounces, which is the perfect portion for a rich, heavy sauce. I love making a quick homemade tzatziki with plain Greek yogurt, grated cucumber, and fresh dill, or a vibrant chimichurri with chopped fresh parsley and minced garlic. I fill these tiny plastic containers and tuck them into my lunchbox right next to my heavy glass Pyrex. Right before I sit down to eat, I drizzle the cold sauce over the warm chicken. The meat stays firm, the roasted veggies stay crisp, and the sauce tastes fresh. It takes five extra seconds of planning but saves the entire texture of your lunch.
![[8-Pack,30 oz]Glass Meal Prep Containers](https://m.media-amazon.com/images/I/713Zfdsgi4L._AC_UL320_.jpg)
[8-Pack,30 oz]Glass Meal Prep Containers
[8-Pack punches above its price — 7 buyers rated it 4.5 stars. I would buy it again.
12. Brine Chicken for Superior Moisture Retention

If you’re baking or air frying your chicken breasts, you really should be brining them first. I skipped this crucial step for years because it sounded like too much extra work for a simple weekday lunch. Last Thanksgiving, I brined my turkey and realized I could do the same thing for my weekly meal prep. A quick wet brine forces liquid and salt deep into the muscle fibers, breaking them down slightly and trapping moisture inside. I make a simple buttermilk brine in my kitchen. In a large glass bowl, I mix 1 cup of Kroger brand Buttermilk ($2.49), 1/4 cup of Vlasic Pickle Juice (I just pour it straight from the green jar in my fridge), and 1 tablespoon of coarse kosher salt. Submerge 1 to 2 pounds of raw chicken breasts completely in this cloudy mixture and let it sit in the fridge for 1 to 2 hours. The tangy smell of the buttermilk and the sharp dill from the pickle juice infuses right into the raw meat. When you finally cook it, the chicken holds onto so much extra water that it physically can’t dry out in the oven. The bite is tender and juicy. Just wipe off the excess thick brine with a paper towel before cooking so the outside browns nicely.
I really hope these tips help you rescue your weekday lunches. I’ve spent too many years eating sad, dry poultry at my desk, and I promise you don’t have to live like that anymore. By using a digital thermometer, upgrading to heavy glass containers, and mastering a quick buttermilk brine, you’ll actually look forward to eating your leftovers every single day. If you found this guide helpful, please save this post and pin it to your favorite board for your next Sunday prep session. Let’s make meal prep enjoyable again!

Skroam 10 Pack Glass Meal Prep Containers
If you want something that just works, Skroam 10 Pack Glass Meal Prep Containers is a safe bet (57 reviews, 4.5 stars).
Frequently Asked Questions
How long does chicken lunch meal prep last in the fridge?
Cooked chicken safely lasts 3 to 4 days in the refrigerator when stored at or below 40°F. If you prep on Sunday, you need to eat or freeze the leftovers by Thursday to avoid foodborne illness.
How do I keep my chicken lunch meal prep from drying out?
Always use a meat thermometer and pull the chicken at 163°F, letting it rest. When storing, add a tablespoon of chicken broth to your glass container. Reheat it with the lid loosely resting on top to steam the meat.
Is it better to use chicken breasts or thighs for meal prep?
Chicken thighs are generally better for meal prep. They have a slightly higher fat content, which keeps them juicy and flavorful after days in the fridge and multiple rounds in the microwave.
Can I freeze my cooked chicken lunch meal prep?
Yes. You can freeze cooked chicken in airtight glass containers or heavy-duty freezer bags for up to 3 months. Let it thaw overnight in the refrigerator before reheating for the best texture.
