What’s Inside
- The Essential Foundation For Salad Jars Meal Prep
- The Golden Rule Of Layering Salad Jars Meal Prep
- Why Vinaigrettes Beat Creamy Dressings Every Time
- Building The Sturdy Vegetable Barrier
- Adding Substance With Legumes And Cooked Veggies
- Packing In The Protein For Staying Power
- Boosting Energy With Cooked Grains
- Choosing The Right Leafy Greens For The Top
- Handling The Crunch Factor Separately
- Smart Shortcuts For Faster Prep
- Adding Flavor Bombs With Cheese
- The Secret To Actually Eating Them
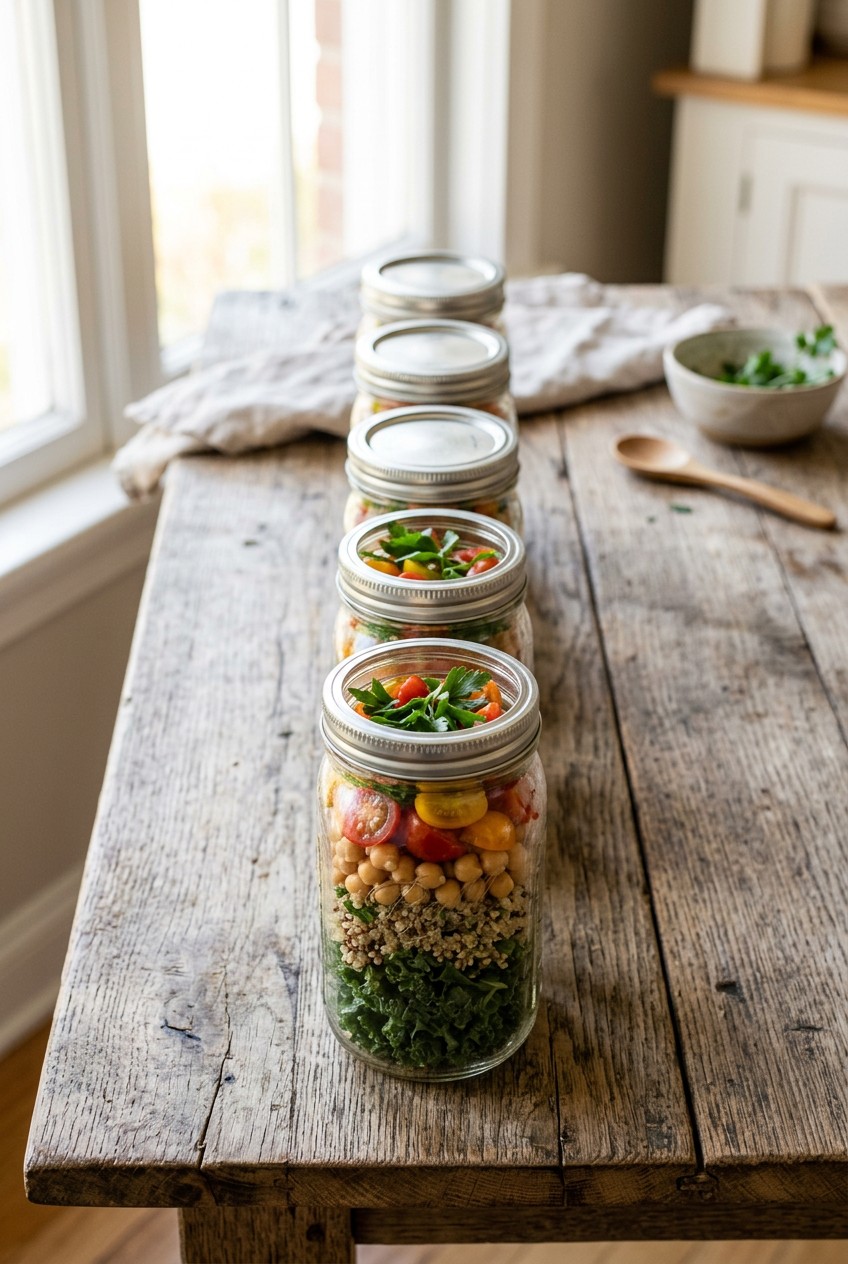
I sat on my kitchen floor last Tuesday, staring at a puddle of balsamic vinaigrette leaking from a flimsy plastic container. My sad, wilted spinach was swimming in a brown liquid that looked completely unappetizing. That exact moment of lunch-ruining despair is why salad jar meal prep became my weekly obsession. If you want to actually enjoy your weekday lunches, salad jars are the best way to keep your food fresh. Trust me on this. Forget those sad desk salads that taste like wet paper. We’re going to build masterpieces in glass containers that survive the entire work week.
I’ve ruined perfectly good groceries by packing them wrong. I tried this the wrong way for months before figuring it out. Now, I’ve got a foolproof system that keeps everything crisp, crunchy, and packed with flavor. Let’s walk through the exact steps, specific brands, and precise measurements you’ll need to make your Sunday prep work.
1. The Essential Foundation For Salad Jars Meal Prep

When I first started prepping my lunches, I bought standard regular-mouth jars because they were on sale. That was a massive mistake. I vividly remember sitting in my office breakroom, aggressively stabbing a rogue cherry tomato with a plastic fork through a tiny glass opening. My hand cramped up. My shirt got stained with olive oil. It’s not worth the frustration. You need wide-mouth glass jars. They’re easier to fill, layer, and eat from. I personally swear by the Ball 32 oz Wide Mouth Mason Jars. You can grab a 12-pack for exactly $14.99 at Target. This quart size is ideal for a full meal-sized salad that keeps you full until dinner. If you’re just making a small side salad to go with your soup, the 16 oz pint-sized jars work best. But I always reach for the 32 oz ones. The heavy glass feels substantial in your hands, and they survive the dishwasher without warping like cheap plastic. Plus, the wide opening means you can easily drop in a 1/2 cup measuring scoop without spilling ingredients all over your clean kitchen counters.
2. The Golden Rule Of Layering Salad Jars Meal Prep

The fundamental rule for preventing soggy salads is to keep your wet ingredients separated from your delicate greens. Most people get this wrong on their first try. They just throw everything in a bowl, dump it in a jar, and wonder why it turns to mush by Wednesday. You have to put the dressing at the very bottom. Period. I pour exactly 2 tablespoons of dressing into the base of my 32 oz jar. If I’m using a store-bought option, I love the Primal Kitchen Greek Vinaigrette. It comes in an 8 oz bottle for $6.49 at Sprouts. The oil and vinegar sit quietly at the bottom of the glass, completely isolated from the spinach at the top. This creates a safe zone. As long as you keep the jar standing upright in your fridge, your dressing won’t touch the upper layers until you’re ready to shake it up. I learned that the hard way after tossing a jar into my work bag horizontally. The dressing leaked all the way up to the romaine lettuce. Keep them vertical, and your layering strategy won’t fail you.
3. Why Vinaigrettes Beat Creamy Dressings Every Time

Skip the fat-free creamy stuff. It tastes like wet cardboard and ruins the texture of your meal. Oil-based vinaigrettes are generally better for salad jars because they distribute much more easily when shaken. I used to pack thick ranch dressing at the bottom of my jars. When it came time to eat, I’d shake the jar violently, but the thick ranch just stayed glued to the bottom glass. It was infuriating. A simple homemade vinaigrette is so much better. I make a basic version using 1 tablespoon of Bragg Organic Apple Cider Vinegar (16 oz for $5.99 at Kroger), 3 tablespoons of California Olive Ranch Extra Virgin Olive Oil (16.9 oz for $11.99 at Target), 1/2 teaspoon of Dijon mustard, and 1/2 teaspoon each of salt and pepper. The oil and vinegar slide effortlessly over the vegetables when you finally mix it all together. The smell of the sharp apple cider vinegar mixed with the rich olive oil is incredible when you first open the jar. It coats the greens perfectly without weighing them down. You might also like: 20 Inspiring Carnivore Meal Prep Ideas That Are Totally Worth It

KOMUEE 10 Packs 30 oz Glass Meal Prep Containers
If you want something that just works, KOMUEE 10 Packs 30 oz Glass Meal Prep Containers is a safe bet (45 reviews, 4.5 stars).
4. Building The Sturdy Vegetable Barrier

For optimal freshness, you need a physical barrier between your liquid dressing and your softer ingredients. You must select sturdy vegetables for the layers directly above the dressing. These are ingredients that can sit in vinegar for four days without turning to mush. In fact, they actually taste better when they marinate. I always use cherry tomatoes, chopped bell peppers, and thick cucumber slices. I aim for approximately 1/2 cup of these sturdy vegetables per quart-sized jar. My absolute favorite base layer is the Sunset Wild Wonders Cherry Tomatoes. I buy the big 2 lb container for $4.99 at Costco. I leave them whole so they don’t release their juices into the dressing prematurely. Then I add 1/4 cup of chopped English cucumbers. The crisp snap of a cold cucumber that’s been lightly resting in vinaigrette is incredibly satisfying. Don’t put sliced mushrooms or soft avocados in this bottom layer. They act like sponges and will soak up all the oil, turning into a slimy mess that you won’t want to eat. You might also like: 15 Brilliant Simple Meal Prep Ideas for a Fresh New Look
5. Adding Substance With Legumes And Cooked Veggies

Once your sturdy barrier is in place, it’s time to add substance. This is where I layer in items like chickpeas, black beans, corn, or cooked zucchini. Legumes are fantastic because they hold their shape perfectly and provide a great texture contrast to the crisp raw vegetables. I always add 1/2 cup of rinsed chickpeas to my jars. I use the Goya Canned Chickpeas (15.5 oz can for $1.49 at Walmart). You have to rinse them thoroughly under cold water and pat them completely dry with a paper towel before adding them to the jar. If you skip the drying step, you’re just adding extra water to your salad, which waters down your carefully crafted vinaigrette. I tried skipping the drying step once when I was rushing on a Sunday night. By Tuesday, my salad was sitting in a pool of watery, flavorless liquid. Taking an extra two minutes to dry your beans makes a massive difference in the final taste and texture of your meal. You might also like: 15 Creative Healthy Meal Prep Ideas That Make a Real Difference
6. Packing In The Protein For Staying Power

A salad without protein is just a snack that leaves you starving an hour later. You need to add about 1/2 cup of cooked protein to each jar to make your salad a complete, satisfying meal. I’ve experimented with everything from baked tofu to canned tuna, but my absolute go-to is grilled chicken. To save time, I rely heavily on pre-cooked rotisserie chicken. The Costco Kirkland Signature Rotisserie Chicken is a massive 3 lb bird for just $4.99. It’s the best deal in the grocery store. I spend twenty minutes shredding the warm chicken on a Sunday afternoon. The smell of the savory, salty skin is amazing. I pack exactly 4 oz of shredded white meat into the middle layer of my jars. Placing the meat in the middle keeps it away from the wet dressing at the bottom and away from the condensation that sometimes forms near the top lid. If you’re vegetarian, cubed firm tofu works beautifully here too. Just make sure whatever protein you choose is completely cooled before it goes into the jar. Warm chicken will create steam, and steam equals soggy lettuce.

M MCIRCO 10-Pack,30 Oz Glass Meal Prep Containers 2
A dependable everyday pick — M MCIRCO 10-Pack pulls in 23 ratings at 4.5 stars. Not flashy, just solid.
7. Boosting Energy With Cooked Grains

If I don’t include complex carbohydrates in my lunch, I crash hard by 3 PM. I always include 1/4 cup of cooked grains such as quinoa, farro, or brown rice in my salad jars. These grains add incredible substance and absorb some of the dressing’s flavor when you finally shake the jar. I personally swear by the Trader Joe’s Tricolor Quinoa. It comes in a 16 oz bag for $3.99. The nutty smell of toasted quinoa cooking on the stove is one of my favorite Sunday prep aromas. The key here is texture. Quinoa provides a tiny, satisfying pop when you chew it. Just like the protein, your grains must be absolutely cold before you layer them. I usually cook my quinoa on Saturday, leave it in the fridge overnight, and build my jars on Sunday. This guarantees the grains are chilled and won’t wilt the greens above them. I once layered warm farro into a jar and sealed the lid tightly. The resulting condensation turned my expensive arugula into a dark green, slimy paste.
8. Choosing The Right Leafy Greens For The Top

The top layer is the most delicate part of the entire operation. You fill the remaining space at the very top of the jar with your chosen greens. Because they’re the furthest away from the dressing, they stay perfectly dry and crisp. I highly recommend using sturdy greens like romaine lettuce, kale, or mature spinach. I buy the Organic Girl Romaine Heart Leaves (5 oz clamshell for $4.99 at Whole Foods). The leaves are crisp, sweet, and hold up beautifully for five days. I pack exactly 2 cups of chopped romaine into the top of my 32 oz jar. You have to pack it down gently but firmly. Don’t crush the leaves, but make sure the jar is entirely full to the brim. Leaving too much empty air in the jar allows the ingredients to bounce around too much if you carry it in a backpack. Spring mix is the one green I actively avoid for meal prep. The delicate red and purple leaves bruise easily and tend to get slimy by Thursday, even if they aren’t touching the dressing.
9. Handling The Crunch Factor Separately

Nuts, seeds, and croutons should never go inside the jar during your Sunday prep. I can’t stress this enough. Even though the top of the jar is relatively dry, the ambient moisture from the tomatoes and cucumbers will slowly soften anything that’s supposed to be crunchy. I tried putting toasted almonds at the very top of my jar once. By Wednesday, they had the texture of wet cardboard. It completely ruined the eating experience. Instead, I pack my crunchy toppings in tiny, separate containers. I love using Diamond Sliced Almonds (6 oz bag for $3.49 at Target). I measure out 2 tablespoons of almonds and 1 tablespoon of roasted sunflower seeds into a small plastic dressing cup. I keep these little cups next to my jars in the fridge. When I’m ready to eat, I dump the crunchy bits over the top of my salad right before taking my first bite. The sharp crunch of a fresh almond contrasting with the soft quinoa and juicy tomatoes is exactly what makes these salads taste like they came from an expensive restaurant.
![[8-Pack,30 oz]Glass Meal Prep Containers](https://m.media-amazon.com/images/I/713Zfdsgi4L._AC_UL320_.jpg)
[8-Pack,30 oz]Glass Meal Prep Containers
A dependable everyday pick — [8-Pack pulls in 7 ratings at 4.5 stars. Not flashy, just solid.
10. Smart Shortcuts For Faster Prep

Honestly, this changed how I view meal prep completely. I used to chop every single vegetable by hand. I’d stand at my cutting board for two hours on a Sunday, dicing onions and shredding carrots until my feet hurt. I hated my life and almost gave up on meal prep entirely. Then I discovered the magic of pre-chopped vegetables. You don’t have to do everything from scratch. I buy the Trader Joe’s Mirepoix mix (14 oz container for $3.29). It’s pre-chopped celery, carrots, and onions. I just scoop 1/2 cup of it directly into my jars right above the dressing layer. It saves me so much time and cleanup. I also buy pre-washed greens and pre-shredded cabbage. Yes, it costs a little bit more money than buying whole vegetables, but the convenience ensures that I actually stick to my meal prep routine. If the prep process is too exhausting, you won’t do it. Buying a few strategic shortcuts keeps the whole process under thirty minutes.
11. Adding Flavor Bombs With Cheese

Cheese is the ultimate flavor enhancer for any salad, but it requires careful placement in your jar. Soft cheeses like goat cheese or fresh mozzarella will dissolve into a messy paste if they touch the vinaigrette. Hard cheeses like parmesan can dry out if left exposed to the air at the very top. The sweet spot is right above your grains and right below your leafy greens. I love adding 2 tablespoons of Athenos Feta Cheese Crumbles (6 oz tub for $4.49 at Kroger). The salty, briny flavor of the feta cuts through the rich olive oil dressing beautifully. When you finally dump the jar into a bowl, the feta crumbles scatter evenly throughout the greens. I’ve also had great success with sharp cheddar cubes or shaved asiago. Just remember to keep the portions reasonable. Cheese is delicious, but adding a full cup of cheddar to your jar defeats the purpose of eating a light, energy-boosting lunch. Stick to 2 tablespoons for the perfect balance of flavor without the heavy feeling afterward.
12. The Secret To Actually Eating Them

Most people get this wrong when they finally sit down to eat. Do not try to eat the salad directly out of the jar. It’s awkward, messy, and you won’t get a good ratio of ingredients in your bites. You’ll just eat dry lettuce for five minutes before hitting a dense wall of plain chicken and then a pool of pure dressing at the bottom. The entire point of the jar is transportation and preservation, not serving. You need to dump the jar into a wide bowl. I keep a set of Corelle 28 oz Soup Bowls ($24.99 for a 4-pack at Target) at my office desk specifically for this. When you tip the jar upside down over the bowl, gravity does the mixing for you. The dry greens fall out first, creating a bed in the bowl. Then the grains and protein tumble out. Finally, the sturdy vegetables and the dressing pour over the top, perfectly dressing the entire salad. The satisfying plop of the ingredients reversing order into a bowl is the best part of my lunch break. Grab a fork, give it one quick toss, and you’re ready to eat.
I hope these specific details help you master your own weekly meal prep. It takes a little bit of practice to get the layers exactly right, but once you do, you’ll never go back to buying expensive, soggy takeout salads. I’d highly recommend grabbing a 12-pack of wide-mouth jars this weekend and testing out a simple chicken and quinoa combination. Please save this article or pin it to your favorite meal prep board so you can reference the exact measurements and layering order next Sunday!

Skroam 10 Pack Glass Meal Prep Containers
If you want something that just works, Skroam 10 Pack Glass Meal Prep Containers is a safe bet (56 reviews, 4.5 stars).
Frequently Asked Questions
How long do salad jars last in the fridge?
If you layer them correctly with the dressing at the very bottom and the greens at the very top, salad jars easily last four to five days in the fridge. Always ensure your jars are tightly sealed and stored upright.
What size jar is best for salad jars meal prep?
A 32 oz (quart-sized) wide-mouth glass mason jar is the ideal size for a full, satisfying meal. The wide mouth makes it much easier to pack ingredients in and pour them out without making a mess.
Do I have to put the dressing at the bottom?
Yes, absolutely. Putting the liquid dressing at the very bottom keeps it away from delicate leafy greens. This physical separation is the only way to prevent your salad from becoming a soggy mess by Wednesday.
Can I put crunchy toppings inside the jar?
It is highly recommended to keep nuts, seeds, and croutons in a separate small container. The ambient moisture inside the sealed glass jar will soften crunchy items over a few days, ruining their texture.
