What’s Inside
- Invest in Quality Silicone Portion Trays
- The Straw Vacuum Hack for Ziploc Bags
- Master Modular Freezable Meal Prep
- Use Glass Pyrex for Oven-to-Freezer Bakes
- Cool Food Completely Before Freezing
- Label Everything with Painter’s Tape
- Avoid Freezing High-Water Vegetables
- Skip Cream-Based Sauces and Soft Cheeses
- Freeze Eggs the Right Way for Breakfasts
- Chill Rice on a Stainless Steel Pan
- Mastering Freezable Meal Prep Burritos
- Flat Freezing with Hefty Slider Bags
Last Tuesday at Whole Foods, I found myself staring blankly at a $14 pre-made salad. I was exhausted. My attempt at freezable meal prep had failed the night before. I thawed a container of chicken and rice, only to find a soggy, freezer-burned brick that tasted like wet cardboard. That was my breaking point. I realized I was doing it all wrong. Freezable meal prep isn’t just about throwing hot leftovers into cheap plastic tubs. It requires a real strategy. I spent the next six months testing containers, temperatures, and ingredients to figure out how to make a 30-minute prep session last the whole month. I literally cried over that overpriced salad because I was so frustrated with wasting food. It’s a terrible feeling when you try to be organized and it backfires. But I refused to give up. I’ve ruined batches of expensive groceries so you don’t have to. Let’s fix your freezer stash.
1. Invest in Quality Silicone Portion Trays

I’m telling you right now, ditch the mismatched plasticware. I spent years fighting with brittle plastic tubs that snapped when I tried to pry a frozen block of soup out of them. Last winter at Target, I finally bought Souper Cubes. They’re heavy-duty silicone trays that come in precise 1-cup, 2-cup, 1/2-cup, and even 2-tablespoon portions. A single 1-cup Souper Cube tray costs about $19.95, and a Starter Set is usually around $36.99. It’s worth every penny. I’ve used them to freeze big batches of turkey chili and marinara sauce. You just pour the liquid in, snap on the tight lid, and freeze. The next day, you pop out a perfect frozen brick. The silicone is thick and smooth, and the cubes slide out with a satisfying thud on the cutting board. You aren’t hacking away at ice with a butter knife anymore. Once they’re frozen solid, I transfer the bricks into a larger bag to save space. I tried this wrong for months using cheap takeout containers that made my food taste like freezer frost. Skip the cheap stuff. It tastes like wet cardboard when the seal fails.
2. The Straw Vacuum Hack for Ziploc Bags

Excess air is the enemy of frozen food. It causes freezer burn, leaving your chicken breasts looking gray and dehydrated. When I’m using Ziploc Freezer Bags, specifically the Power Shield or Grip ‘N Seal varieties that run about $8 to $21 per pack at Walmart, I use a trick that sounds ridiculous but works. You place your food in the bag and zip it almost all the way closed. Then, you stick a regular plastic straw into the tiny opening and suck the remaining air out with your mouth. You pinch it shut quickly and seal it. I’ve done this with marinated flank steak and it works flawlessly. Just be careful. I accidentally inhaled a tiny drop of spicy soy marinade last month and coughed for ten minutes. No exaggeration. It’s a small negative, but the vacuum seal is incredible. The plastic shrinks tightly around the food, locking out the air. You won’t believe the difference in quality when you thaw it three weeks later. The meat stays juicy and smells fresh. I’ve tried those expensive vacuum sealer machines, but honestly, this straw trick works just as well.
3. Master Modular Freezable Meal Prep

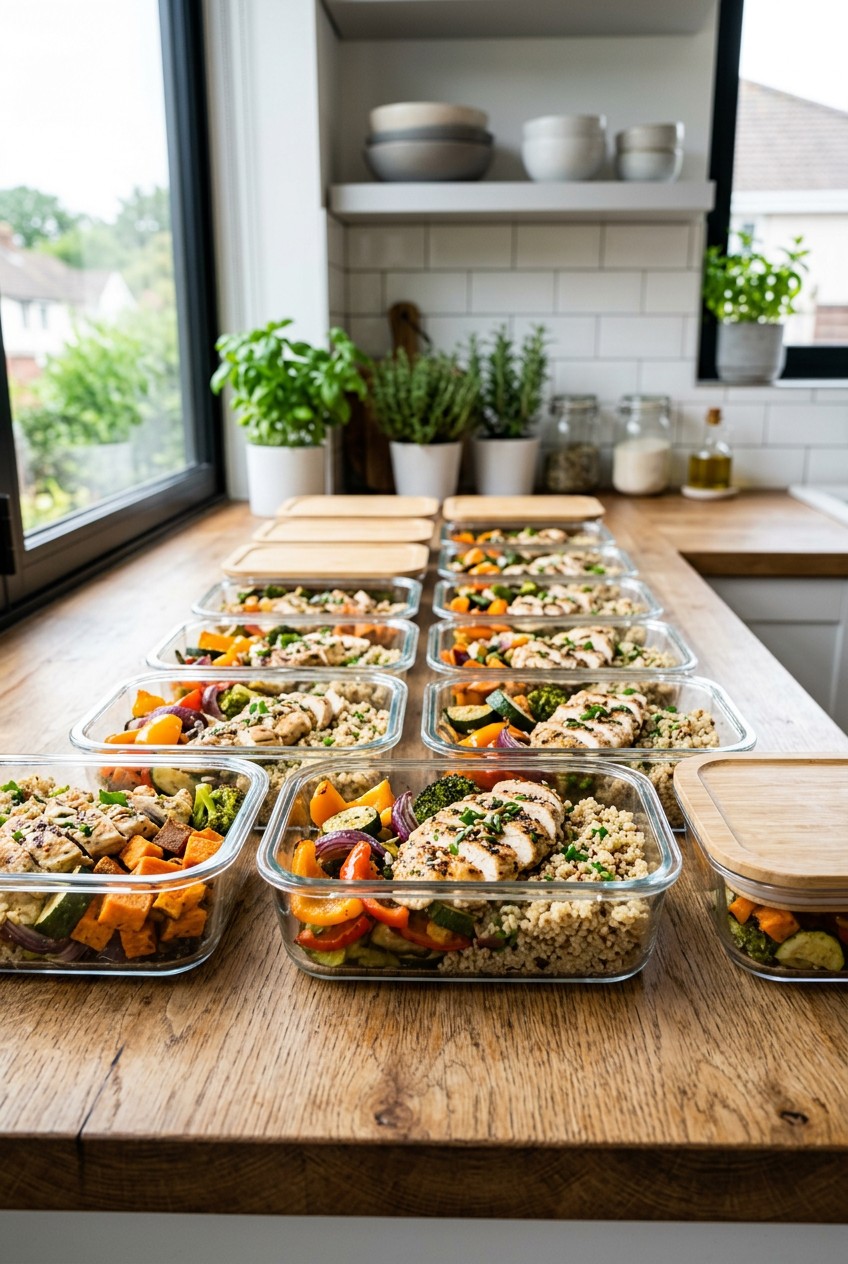
A huge trend I’m seeing for 2026 is modular meal prepping. Instead of freezing entire meals that reheat unevenly, you freeze individual components. I swear by this. I’ll cook a massive batch of 3 cups of dry quinoa from Trader Joe’s. Their organic quinoa is about $4.49 a bag. I cook it, cool it, and freeze it in 1-cup portions. Then I’ll roast a huge tray of broccoli and sweet potatoes with olive oil and garlic salt. You freeze the grains and the veggies separately. When you’re ready to eat, grab a block of quinoa and a handful of roasted veggies, toss them in a bowl, and microwave them. The textures stay so much better. I tried freezing fully assembled grain bowls for a while, but the moisture from the vegetables always made the quinoa soggy. It felt like eating baby food. Modular prep takes 30 minutes of active cooking time, and you’re left with building blocks for the whole week. I’d recommend keeping a list on your fridge of which modules you’ve got on hand. It makes dinner decisions effortless.
![[8-Pack,30 oz]Glass Meal Prep Containers](https://m.media-amazon.com/images/I/713Zfdsgi4L._AC_UL320_.jpg)
[8-Pack,30 oz]Glass Meal Prep Containers
Honestly, [8-Pack surprised me — sturdier than it looks in the photos, and over 7 buyers gave it 4.5 stars.
4. Use Glass Pyrex for Oven-to-Freezer Bakes

If you’re making casseroles or baked oatmeal, glass is the only way to go. I love the classic Pyrex 3-cup rectangular glass containers. You can usually find a set at Sprouts or online for about $22.99. The beauty of glass is that it’s oven-safe, meaning you can take a meal from the freezer, thaw it slightly, and pop it right into the oven. But I have to share a massive mistake I made last year. I took a freezing cold Pyrex dish of baked ziti straight from the freezer and shoved it into a 400-degree oven. About ten minutes later, I heard a loud, violent pop. The glass had shattered completely due to thermal shock. There was frozen pasta and jagged glass all over the bottom of my oven. The smell of burning cheese haunted my kitchen for weeks. You must let glass containers sit on the counter and come to room temperature before baking them. When done right, the edges of your lasagna get perfectly crispy and bubbling, and you don’t have to wash a separate baking dish. I’ve learned my lesson. Now, I’m extremely careful with temperature changes. You might also like: 20 Brilliant Quick Dinner Ideas You’ll Want to Bookmark
5. Cool Food Completely Before Freezing

This is the step most people get wrong. You can’t just take a boiling hot pot of chili and shove it into the freezer. I used to do this to save time, and it was a disaster. Placing hot food directly into the freezer raises the internal temperature of the entire unit. The USDA recommends cooling food to 40 degrees Fahrenheit or below within two hours of cooking. One time after a Costco run, I shredded a hot $4.99 rotisserie chicken, tossed it in warm buffalo sauce, and put the container right next to a carton of vanilla ice cream. The heat from the chicken partially melted the ice cream. When the ice cream refroze, it was full of crunchy, nasty ice crystals. Plus, the steam from the hot chicken gets trapped, turns into condensation, and creates a thick layer of frost. Always let your cooked meals sit on the counter until the steam stops, then chill them in the fridge before they ever see the inside of a freezer. I’m adamant about this rule. It’s the only way to protect your groceries. You might also like: 15 Brilliant Good Meal Prep Ideas That Changed Everything
6. Label Everything with Painter’s Tape

If you aren’t labeling your containers, you’re setting yourself up for failure. I can’t tell you how many times I’ve pulled a frozen block of brown sludge out of the freezer, totally unsure if it was beef stew or leftover gravy. It’s frustrating. Now, I use a roll of Scotch Blue painter’s tape. A roll costs about $4.99 at Kroger, and it lasts for years. You tear off a small strip, stick it to the lid, and write the meal name, the date you made it, and basic reheating instructions with a black Sharpie. The blue tape sticks perfectly in the cold, but it peels off cleanly without leaving that gummy residue on your containers. Meal prep experts talk about the first in, first out rule, and this is exactly how you enforce it. I’d suggest writing the reheat temperature right on the tape. When you’re exhausted after a long day at work, you won’t want to look up the recipe just to figure out how long to microwave your food. I’ve saved myself so many headaches just by keeping a Sharpie in my kitchen drawer. You might also like: 15 Clever Family Dinner Ideas for a Fresh New Look

M MCIRCO 10-Pack,22 Oz Glass Meal Prep Containers
If you want something that just works, M MCIRCO 10-Pack is a safe bet (86 reviews, 4.5 stars).
7. Avoid Freezing High-Water Vegetables

Listen to me carefully. Not all foods freeze well. Kate Merker, the Chief Food Director at the Good Housekeeping Institute, specifically advises against freezing high-water content items, and she’s right. I’m talking about lettuce, cucumbers, celery, and watermelon. I tried freezing a beautiful, crisp cucumber salad I made with organic produce from Whole Foods. I thought I was being smart. When I thawed it out two days later, it was a horrifying, slimy puddle of green water. The cell walls of the vegetables burst when the water inside turns to ice. When they thaw, they collapse into a mushy mess. The texture is ruined. Stick to freezing hearty vegetables like carrots, broccoli, squash, and sweet potatoes. If you’re prepping a meal that needs a fresh crunch, like a taco bowl, freeze the cooked meat and grains, and just chop the fresh lettuce on the day you plan to eat it. You can’t cheat science. Skip the watery veggies entirely if they’re going in the deep freeze. I’ve learned to just eat the cucumbers fresh. It’s not worth the disappointment.
8. Skip Cream-Based Sauces and Soft Cheeses

If you love Alfredo sauce or creamy casseroles, you need to modify your recipes before freezing. Cream-based sauces, custards, and soft cheeses like Brie or ricotta tend to separate violently when they freeze and thaw. The emulsion of fat and water breaks apart. I made a massive batch of ricotta stuffed shells last year and froze them. When I baked them, the cheese had turned grainy and was weeping with watery liquid. It looked like curdled milk and tasted awful. If you’re making a creamy soup or sauce, I’d recommend using a dairy-free alternative that freezes better. I personally swear by Thai Kitchen coconut milk. A can costs about $3.29, and it holds its creamy texture beautifully through the freezing and thawing process. If you absolutely must use heavy cream or soft cheese in a recipe, freeze the base of the meal without the dairy. Then, stir the fresh cream or cheese in while you’re reheating it on the stove. It takes an extra two minutes, but you won’t ruin your dinner. I’m never freezing ricotta again. It’s a texture nightmare.
9. Freeze Eggs the Right Way for Breakfasts

Breakfast prep is a lifesaver, but eggs are tricky. Most people get this wrong. You can’t freeze raw eggs in their shells. I tried this once to see if it would work. The liquid inside expanded as it froze, and the shells cracked wide open. I ended up with frozen, slimy egg whites glued to the bottom of my freezer drawer. It was a mess. Instead, you have to crack them first. I buy Vital Farms pasture-raised eggs. They’re a bit pricey at $6.99 a carton, but the bright orange yolks are incredible. I crack a dozen into a bowl, beat them thoroughly with a whisk until they’re smooth, and then pour the liquid into my silicone trays. You can also scramble them in a skillet first and freeze the cooked curds for breakfast burritos. If you’re freezing cooked eggs, make sure you slightly undercook them. When you microwave them later, they won’t turn into rubbery, dry sponges. I’ve eaten too many rubbery eggs to count before I figured this out. Trust me, slightly runny scrambled eggs are the secret to perfect freezer breakfasts.

KOMUEE 10 Packs 30 oz Glass Meal Prep Containers
If you want something that just works, KOMUEE 10 Packs 30 oz Glass Meal Prep Containers is a safe bet (45 reviews, 4.5 stars).
10. Chill Rice on a Stainless Steel Pan

Rice is one of the cheapest things to prep, but it can turn into a giant, gummy clump if you freeze it wrong. When you cook a fresh batch of jasmine or brown rice, it’s full of hot steam. If you pack it into a container while it’s hot, the grains stick together and turn to mush. Here’s my favorite technique. I take a Nordic Ware aluminum half sheet pan. You can grab one at Target for about $15.99. I spread the freshly cooked rice out in a thin, even layer across the entire pan. Then, I place the whole pan in the refrigerator for 30 minutes. The cold air hits the maximum surface area of the rice, chilling it rapidly and drying out the excess surface moisture. Once it’s cold, I scoop it into my freezer containers. This preserves the texture perfectly. When you reheat it, every single grain stays distinct and fluffy. You aren’t eating a solid block of starch. I’m obsessed with this method. It changed how I prep my carbohydrate bases for the week. I’ve been doing this for months, and I won’t ever go back to my old ways.
11. Mastering Freezable Meal Prep Burritos

Burritos are the ultimate grab-and-go meal, but they require a specific wrapping strategy. I use Mission 10-inch flour tortillas. They usually cost about $3.49 for a pack. The biggest mistake you can make is putting wet ingredients directly against the tortilla. I used to slather salsa and sour cream inside my burritos before freezing them. When I reheated them, the tortilla was so soggy it completely fell apart. It was a sloppy disaster. To fix this, you have to create a moisture barrier. I lay down a layer of cheese or cooked rice first, then add the meat, and keep any wet sauces on the side to dip later. Once the burrito is tightly rolled, I wrap it in aluminum foil, and then place all the wrapped burritos into a large freezer bag. When you’re ready to eat, unwrap the foil, wrap the frozen burrito in a slightly damp paper towel, and microwave it. The damp paper towel steams the tortilla, making it soft and pliable instead of hard and crusty. It’s a brilliant trick. The damp paper towel is the only way to reheat a burrito.
12. Flat Freezing with Hefty Slider Bags

Freezer space is valuable, especially if you have a standard apartment fridge. I used to just toss lumpy, awkwardly shaped bags of soup into the freezer wherever they would fit. It was a chaotic mess, and I could never find anything. Now, I exclusively use the flat-freezing method. I buy Hefty Slider Freezer Bags, which run about $6.49 a box at Walmart. I pour my cooled soups, stews, or marinades into the bag, seal it almost all the way, press out the air, and then lay the bag flat on a baking sheet. I put the baking sheet in the freezer overnight. The next morning, you have a perfectly flat, solid board of food. You can stack these flat bags upright in a plastic bin like files in a filing cabinet, or stack them neatly on top of each other like library books. It saves a ridiculous amount of space. Plus, because the food is frozen in a thin layer, it thaws out fast when you drop the bag in a bowl of warm water. You won’t believe how much more food you can fit. I’ve doubled my freezer capacity just by laying my bags flat. It’s satisfying.
That’s my exact routine. I’ve tested all these methods so you don’t have to eat another soggy, freezer-burned dinner. If you implement even half of these tips, you’re going to save money and time during the week. Pin this guide for your next Sunday prep session, and let’s get those freezers stocked the right way. I’m so glad I finally figured this out, and I know it’s going to change your kitchen routine too. You’ve got this.

Vtopmart 5Pack 22oz Glass Storage Containers with Lids
Honestly, Vtopmart 5Pack 22oz Glass Storage Containers with Lids surprised me — sturdier than it looks in the photos, and over 32 buyers gave it 4.5 stars.
Frequently Asked Questions
What containers are best for freezable meal prep?
Heavy-duty silicone trays like Souper Cubes are perfect for liquids and sauces. For casseroles, use oven-safe glass containers like Pyrex, but always let them reach room temperature before baking to prevent thermal shock.
How do I prevent freezer burn on my prepped meals?
Freezer burn is caused by excess air. Use the straw vacuum hack to suck air out of Ziploc bags before sealing, and always ensure your cooked food is completely cooled in the fridge before putting it in the freezer.
Which foods should I never freeze?
Avoid freezing high-water vegetables like lettuce, cucumbers, and watermelon, as they turn to mush. You should also skip freezing cream-based sauces and soft cheeses like ricotta, which will separate and become grainy when thawed.
How long do freezable meal prep dinners last?
Most properly sealed, freezable meal prep dinners will last 2 to 3 months in a standard freezer. Always label your containers with painter’s tape and a Sharpie so you can follow the first in, first out rule.
