What’s Inside
- Stop Buying Cheap Plastic and Get Rubbermaid Brilliance
- Master the 50/25/25 Rule for Easy Healthy Meal Prep Lunches for Work
- Batch Cook Components Instead of Full Meals
- Build Bowl-Style Meals That Actually Hold Up
- Use an Instant Pot to Save Your Sanity
- Keep Dressings Separate in Sistema Pots
- Don’t Over-Prep Perishable Ingredients
- Layer Salads Properly in Mason Jars
Last Tuesday at Whole Foods, I dropped a flimsy plastic container of leftover chili right in the parking lot. Red sauce splattered across my beige sneakers. The smell of cold cumin and sadness lingered all day. I stood there staring at the mess, realizing I was going to be hungry and angry all afternoon. That disaster is exactly why I finally perfected my system for easy healthy meal prep lunches for work. I spent years eating soggy salads and dry chicken breasts at my desk. I’m done with that. Now I make lunches that actually taste good and survive the commute. Making easy healthy meal prep lunches for work shouldn’t feel like a punishment. I tried this wrong for months before figuring it out. I’d cook a massive pot of bland soup on Sunday and hate my life by Wednesday. The texture of reheated mush just makes me miserable. I need crunch. I need flavor. I need things that don’t smell like a wet dog when I microwave them in the office breakroom. I remember forcing myself to eat plain steamed broccoli that smelled like sulfur. It was awful. I’m sharing my exact routine. I’m Esperanza Eliza. Let’s get into the messy, honest truth about prepping food for the week.
1. Stop Buying Cheap Plastic and Get Rubbermaid Brilliance

You can’t prep good food and put it in garbage containers. I learned that the hard way. Last year, I bought a random pack of cheap plastic tubs. Two days later, my homemade teriyaki sauce leaked all over my favorite canvas tote bag. The sticky brown sauce coated my laptop charger. The smell of stale soy sauce haunted my car for weeks. I was furious. That’s when I threw them all out. I went straight to Target and bought the Rubbermaid Brilliance 10-piece set for $25.99. These containers are made of Tritan plastic. They’re completely stain-resistant and fully leakproof. They snap shut with a loud, satisfying click. You know your food is secure. If you prefer glass, I also use Prep Naturals Glass Containers. A 5-pack of the 36 oz size costs $23.99 on Amazon. They have thick borosilicate glass and heavy-duty locking lids. They’re perfect for reheating meals safely. Using the wrong containers is a massive mistake. It leads to leaks, spills, and unevenly heated food. Don’t ruin your hard work with bad storage. Invest in the good stuff. It makes a huge difference. I’ve dropped my Rubbermaid containers directly onto the hard tile floor of my kitchen. They just bounce. No cracks. No explosive spills of my carefully measured 1/2 cup of black beans. I also love that the plastic stays crystal clear. Even after storing my spicy turmeric chicken for four days, they don’t turn that gross cloudy orange color. Wash them with warm soapy water and they look brand new. When I wash the Rubbermaid Brilliance containers in the dishwasher, they don’t warp or melt. The rubber seals stay perfectly intact. I’ve wasted so much money replacing cheap plastic that melted into weird, wavy shapes on the bottom rack. The heavy borosilicate glass of the Prep Naturals set feels substantial in my hands. It’s cold and solid. Honestly, seeing a fridge full of perfectly stacked, clear containers makes my brain so happy. It’s visual proof that I’ve got my life together for at least the next few days. I won’t ever go back to the flimsy takeout containers.
2. Master the 50/25/25 Rule for Easy Healthy Meal Prep Lunches for Work

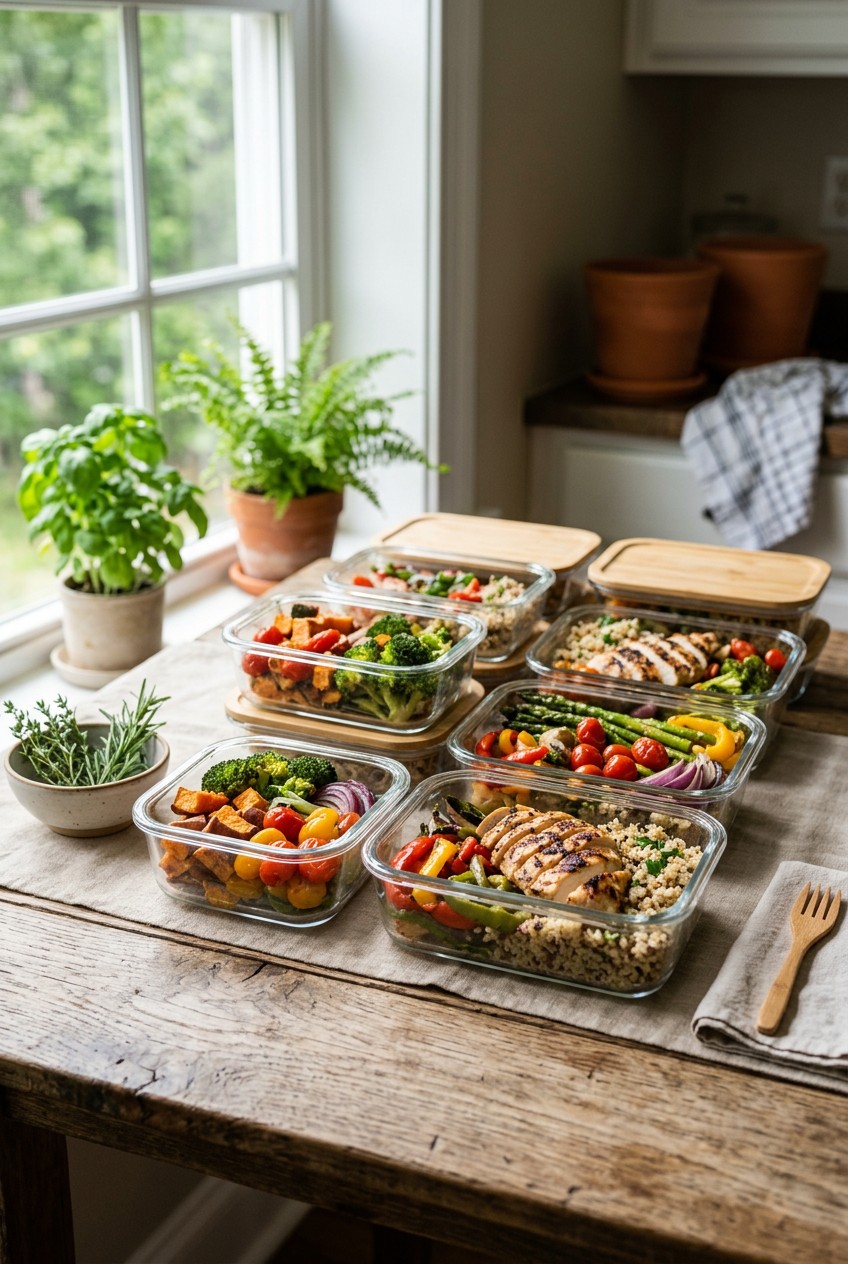
I used to pack lunches that were 90 percent pasta. I’d eat a huge bowl of spaghetti at noon. By 2 PM, I was completely comatose at my desk. My eyes would glaze over during meetings. I couldn’t figure out why I felt so awful. Then I started following the 50/25/25 rule. It’s a simple ratio. You fill your container with 50 percent vegetables or fruits, 25 percent lean protein, and 25 percent grains. It completely fixed my afternoon energy crashes. A perfect example is what I prepped last Sunday. I cooked 1 cup of Trader Joe’s Organic Brown Rice. A 30 oz bag costs $4.49. That’s my grain. Then I grilled 4 oz of chicken breast for my protein. I seasoned it heavily with smoked paprika and garlic powder. Finally, I packed 2 cups of fresh mixed greens and 1/2 cup of roasted bell peppers. That hits the 50 percent vegetable mark perfectly. The crunch of the fresh greens balances the soft, chewy texture of the brown rice. The roasted peppers add a sweet, charred flavor. I’ll take my fork and mix the roasted peppers right into the brown rice. The juices from the peppers soak into the grains. It’s incredibly satisfying. It’s filling but doesn’t make you feel heavy. Most people get this wrong. They pack way too many carbs and barely any vegetables. Then they wonder why they’re starving an hour later. You need the fiber from the vegetables to stay full. I buy huge bags of organic spinach from Costco for $4.99 just to make sure I always have enough greens to hit that 50 percent goal. It forces you to eat balanced meals.
3. Batch Cook Components Instead of Full Meals

This is where I used to fail the hardest. I’d cook a giant casserole on Sunday. I’d divide it into five identical portions. By Thursday, I was literally gagging at the thought of eating it again. The texture gets mushy. The flavor gets boring. Meal fatigue is real. Now, I batch cook versatile components instead of full meals. I roast 2 pounds of chicken breasts all at once. I cook 4 cups of Kirkland Signature Organic Quinoa from Costco. A massive 4.5 lb bag costs $10.99. It lasts me for months. I also chop and roast a big tray of sweet potatoes. I use exactly 2 tablespoons of olive oil and a heavy pinch of sea salt. The edges get crispy and caramelized. The sweet potatoes get these thick, chewy caramelized edges that taste almost like candy. I’ll eat them cold right out of the fridge sometimes because the texture is so good. Batch cooking saves my sanity. Having these plain components ready means I can mix and match. On Monday, I’ll eat the chicken and quinoa with a scoop of salsa. On Tuesday, I’ll throw the sweet potatoes and chicken over a bed of spinach. It feels like a totally different meal. You aren’t trapped eating the exact same flavor profile every single day. The smell of roasting chicken fills my kitchen on Sunday afternoons. It’s my favorite part of the week. I pull the chicken apart with two forks while it’s still warm. The shredded texture absorbs sauces so much better than dry cubes. Don’t force yourself to eat identical meals. Prep the building blocks. Let your daily cravings dictate how you put them together. You might also like: 20 Inspiring Meal Prep Ideas for Any Style

8 Pack 36oz Large Glass Meal Prep Containers with lids
8 Pack 36oz Large Glass Meal Prep Containers with lids has been one of the most consistently praised picks in this category. 866 reviewers averaged 4.5/5.
4. Build Bowl-Style Meals That Actually Hold Up

Bowl-style meals are everywhere right now. There’s a good reason for it. They hold up incredibly well in the fridge. I’m obsessed with building power bowls for work. I start with a sturdy base. Usually, I use 1 cup of cooked farro. It has this amazing chewy, nutty texture that doesn’t turn to mush after three days. Farro has this distinct snap when you bite into it. It doesn’t turn into a mushy paste like regular pasta does after sitting in a container for 48 hours. Then I add my protein. Last week, I used 4 oz of Sprouts Wild Sockeye Salmon fillets. They cost $12.99 for a 16 oz pack. I bake the salmon until it’s flaky and bright pink. Next comes the vegetables. I roast 1.5 cups of broccoli florets and red bell peppers until they have dark, charred edges. The slight bitterness of the charred broccoli pairs perfectly with the rich salmon. Finally, I add a healthy fat. A sprinkle of pumpkin seeds or a drizzle of sauce works beautifully. I keep my sauces on the side. Mixing wet and dry ingredients too early is a rookie mistake. Your farro will soak up all the liquid and become a soggy disaster. Your broccoli will lose all its texture. Keep the components separate until you’re sitting at your desk ready to eat. I assemble the dry ingredients in my glass containers on Sunday. The visual of the bright pink salmon next to the dark green broccoli makes my mouth water. It looks like a $15 salad from a fancy cafe. But I made it in my kitchen for a fraction of the cost. You might also like: 15 Lovely Kids School Lunch Ideas That Changed Everything
5. Use an Instant Pot to Save Your Sanity

I used to stand over the stove watching rice boil for what felt like hours. I’d inevitably get distracted by scrolling on my phone. The water would boil over. The rice would burn to the bottom of the pan. The smell of scorched grains is impossible to get out of your house. I ruined so many pots this way. Then I bought an Instant Pot Duo 7-in-1 at Walmart for $99.99. It completely changed my routine. I dump 2 cups of dry quinoa and 3 cups of vegetable broth into the metal pot. I lock the heavy lid. I press a button and walk away. The hissing steam valve lets me know it’s working. In about 15 minutes, I’ve got 6 cups of perfectly fluffy, soft cooked quinoa. There’s zero babysitting required. That’s enough for several lunches. I also use it to make massive batches of shredded salsa chicken. I toss in 2 pounds of raw chicken breasts and a 16 oz jar of Pace Chunky Salsa. The salsa costs $2.49 at Kroger. After 20 minutes on high pressure, the chicken falls apart with a fork. It’s juicy and packed with flavor. The salsa chicken smells heavily of cumin, garlic, and cooked tomatoes. When I open the Instant Pot lid, the steam hits my face and it smells exactly like my favorite Mexican restaurant. I’ll use tongs to pull the steaming hot chicken out. Using time-saving appliances like this is crucial. You can’t spend your entire Sunday trapped in the kitchen. You’ll burn out and go back to buying expensive takeout. Let the machines do the heavy lifting. I usually run the Instant Pot while I’m chopping vegetables. It cuts my total prep time in half. You might also like: 15 Inspiring Chicken Meal Prep Ideas You Haven’t Thought Of
6. Keep Dressings Separate in Sistema Pots

I’ve got a very strong opinion about salad dressing. Skip the fat-free stuff. It tastes like wet cardboard and chemicals. It won’t keep you full. I make my own dressings from scratch every Sunday. My current obsession is a homemade lemon-tahini dressing. I whisk together 2 tablespoons of tahini, 1 tablespoon of fresh lemon juice, a pinch of salt, and a splash of warm water. I buy Kroger brand Tahini. A 16 oz jar costs $5.49. The texture is incredibly creamy and nutty. I actually bought a tiny whisk just for making these dressings. It gets the clumps of tahini perfectly smooth. The tahini is thick, almost like peanut butter, but pouring the warm water in slowly makes it thin out into a silky, pourable sauce. The sharp citrus smell of the lemon cuts right through the richness. But here’s the most important rule. You must prep your sauces and dressings separately. I store mine in Sistema Dressing Pots. A 4-pack usually costs $7.99 at Target. They are tiny little plastic cups with screw-on lids. They never leak. The tiny Sistema pots fit perfectly in the corner of my lunch bag. If you pour dressing over your salad on Sunday, by Tuesday your lettuce will be a slimy, black mess. It’s disgusting. I’ve thrown away so many ruined salads because I was too lazy to pack the dressing separately. Now, I keep the little Sistema pots right next to my main containers in the fridge. When it’s time to eat, I pop the lid off and drizzle the thick tahini dressing over my crisp greens. Every bite tastes fresh. The lettuce still crunches loudly. It takes two extra seconds of planning but saves your entire meal. Don’t compromise on texture.

KOMUEE 10 Packs 30 oz Glass Meal Prep Containers
Honestly, KOMUEE 10 Packs 30 oz Glass Meal Prep Containers surprised me — sturdier than it looks in the photos, and over 45 buyers gave it 4.5 stars.
7. Don’t Over-Prep Perishable Ingredients

We need to talk about food safety. I see people prepping meals for 14 days at a time. That’s terrifying. I made this mistake early on in my meal prep days. I cooked a massive batch of chicken on a Sunday. By Friday, I ate the last portion. A few hours later, I was dealing with horrific stomach cramps. The chicken had a slightly slimy texture and a funky, sour smell. I ignored the warning signs because I didn’t want to waste food. Never do that. Cooked chicken is generally safe for 3 to 4 days in the fridge. That’s it. You can’t push it to day six or seven. If I’m prepping for the whole week, I freeze the meals for Thursday and Friday. I use my Prep Naturals Glass Containers for the freezer meals. I freeze the meals in individual portions. I use a piece of masking tape and a sharpie to label exactly what’s inside. There’s nothing worse than playing freezer roulette and guessing what frozen block of food you’re thawing. I just pull them out on Wednesday night to thaw in the fridge. Another option is a mid-week mini prep. I’ll cook fresh proteins on Wednesday evening. It only takes 20 minutes to pan-fry 1 pound of ground turkey. I buy the Jennie-O 93/7 Ground Turkey at Walmart for $5.99. The ground turkey browns beautifully in my hot cast iron skillet. I’ll listen to a podcast while I chop onions to mix in. It’s a peaceful Wednesday night ritual that keeps my stomach safe. The smell of the turkey sizzling with taco seasoning makes my kitchen smell amazing. It guarantees my food is actually safe and tastes fresh. Don’t risk your health to save a little time. Trust your nose. If something smells even slightly off, throw it away. Food poisoning isn’t worth it.
8. Layer Salads Properly in Mason Jars

If you’re going to pack a salad, I’ve got to layer it correctly. I learned this trick from a coworker who always had the most beautiful lunches. I use Ball Wide Mouth 32 oz Mason Jars. A 12-pack costs $14.99 at Target. The heavy, cold glass feels so sturdy in my hands. The layering technique is an absolute requirement. You start by putting 2 tablespoons of your dressing at the very bottom of the jar. Next, you add your hard vegetables. I drop in 1/2 cup of whole cherry tomatoes and some diced cucumbers. They can sit in the dressing without getting soggy. In fact, they marinate and taste better. The crisp pop of a cherry tomato that’s been soaking in vinaigrette is incredible. Next, you add your grains and proteins. I pack in 1 cup of cooked grains and 4 oz of diced chicken. Finally, you stuff the top with 2 cups of leafy greens. I push the spinach down tightly. Because the greens are at the very top, they never touch the wet dressing at the bottom. They stay completely dry and crisp for days. When I’m ready for lunch, I just shake the jar vigorously or dump it all into a bowl. When I shake the mason jar, I can hear the cherry tomatoes thudding against the thick glass. The dressing slowly creeps up from the bottom, coating the spinach leaves right before I take my first bite. The dressing coats everything evenly. I used to just throw everything in a plastic tub and hope for the best. The results were always sad and wilted. The mason jar method takes exactly the same amount of time but yields a perfect, crunchy salad every single time.
I’ve learned that making easy healthy meal prep lunches for work is all about the details. It’s about buying the right containers, mastering the 50/25/25 rule, and keeping your wet ingredients far away from your dry ones. I promise you don’t have to eat boring, sad desk lunches anymore. Opening my fridge on Monday morning and seeing a neat row of identical, perfectly portioned containers brings me genuine peace. The bright colors of the vegetables look beautiful against the clear plastic. You just need a solid plan and a little bit of practice. I still make mistakes sometimes. Just last month, I forgot to put the lid on my blender and sprayed green smoothie all over my kitchen cabinets. It happens to the best of us. But the routine saves me so much money and stress during the busy work week. I’m not running to the expensive sandwich shop at noon anymore. I’m sitting down with a meal I actually look forward to eating. You’ll feel so much better when you aren’t living on vending machine chips and overpriced iced coffee. Trust me, the energy difference is massive. I used to crash hard at 3 PM, but now I power through the afternoon. If you found these tips helpful, please pin this article to your favorite Pinterest board. Save it for your next Sunday prep session. I’m Esperanza Eliza, and I’ll catch you next week with more honest, messy meal prep advice.
Frequently Asked Questions
How long do easy healthy meal prep lunches for work last in the fridge?
Most prepped lunches containing cooked meat like chicken or turkey are safe in the fridge for 3 to 4 days. I strongly recommend freezing portions if you’re prepping for days five or six to ensure food safety.
What’s the best container to use for meal prep?
I’m a huge fan of clear, leak-proof options. Rubbermaid Brilliance containers made of Tritan plastic are completely stain-resistant and snap shut securely. For glass, Prep Naturals borosilicate containers are heavy-duty and perfect for reheating in the microwave.
How do I keep my meal prep salads from getting soggy?
The secret is keeping your wet and dry ingredients completely separate. Store your dressings in tiny, leak-proof cups like Sistema Dressing Pots. If you’re using mason jars, always put the dressing at the very bottom and leafy greens at the top.
What is the 50/25/25 rule for healthy lunches?
It’s a simple ratio for building balanced meals. Fill 50 percent of your container with vegetables or fruits, 25 percent with lean protein, and 25 percent with grains. This prevents heavy afternoon energy crashes and keeps you full.
