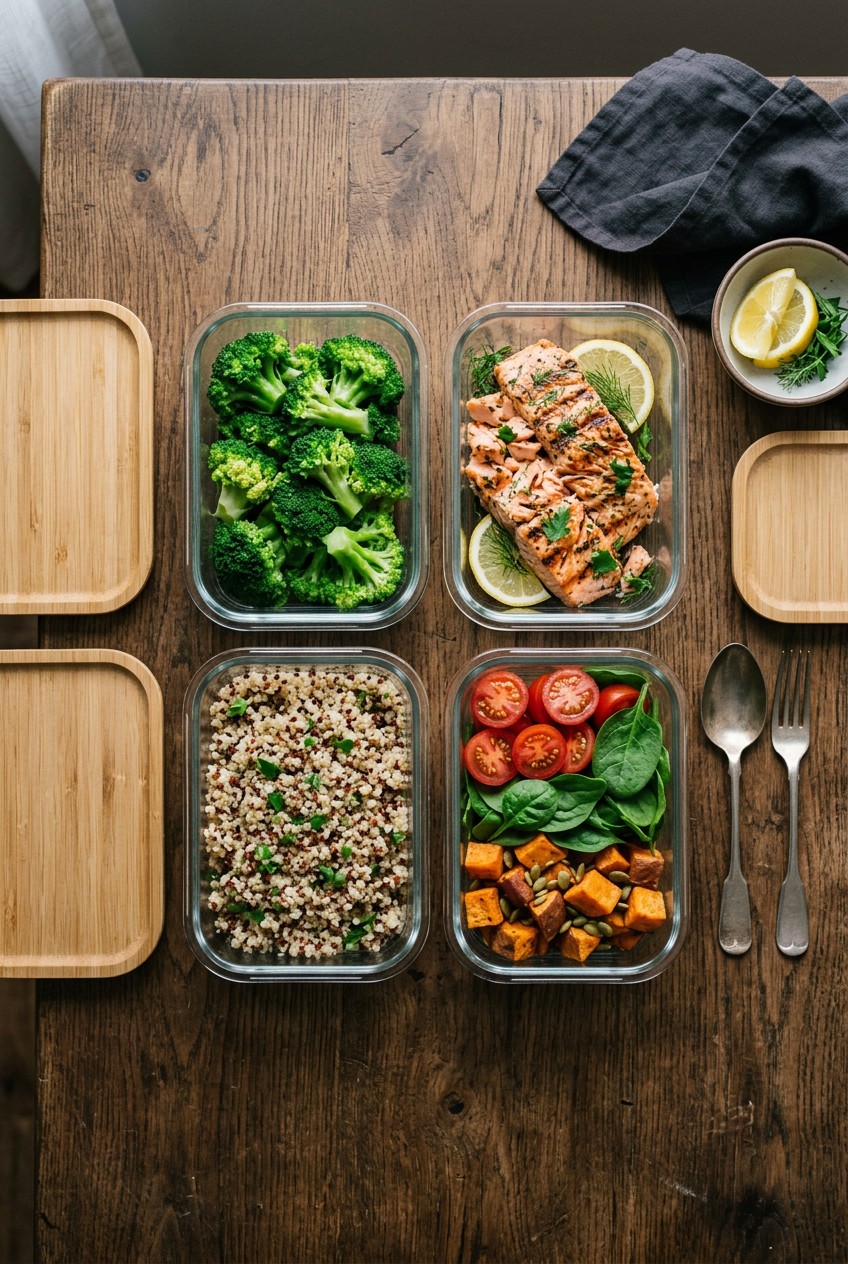
What’s Inside
- Ditch The Flimsy Plastic For Real Leak-Proof Containers
- Master Batch Cooking Lean Proteins
- Stop Boiling Vegetables And Use An Air Fryer
- Try Sous Vide For Chicken You Can Actually Chew
- Blend Your Own Sauces To Control The Ingredients
- Follow The 50/25/25 Rule For Balanced Portions
- Use Frozen Produce To Stop Wasting Money
- Build Your Own Freezer Dinners For Lazy Nights
Last Tuesday at 11:30 PM, I stood in my tiny kitchen scraping congealed, grey chicken breast into the trash. My clean meal prep attempt failed, leaving the place smelling like boiled sadness and stale garlic. The texture was the worst part. It felt like a wet kitchen sponge, and the broccoli I’d packed was a mushy, olive-green disaster. I’m Esperanza Eliza, and I’ve ruined more Sunday afternoons trying to cook for the week than I’ll admit. I did this wrong for months before figuring it out. You see perfect Instagram grids, but nobody tells you how bad it tastes by Wednesday. I learned that the hard way.
Clean meal prep doesn’t have to mean eating bland, rubbery food out of stained plastic. Honestly, if you’re eating stuff that tastes like wet cardboard, you won’t stick to your diet. You’ll order a $25 pizza by Thursday night. I know because I’ve done it dozens of times. After wasting hundreds on rotting produce and terrible containers, I finally cracked the code to making food that actually tastes good days later. I’m sharing my exact methods, including the precise measurements and the specific brands I buy. Let’s fix your Sunday routine so you aren’t crying over soggy vegetables on your lunch break.
1. Ditch The Flimsy Plastic For Real Leak-Proof Containers

Listen, I’m being brutally honest. If you’re still using those flimsy, black plastic takeout containers you bought in a 50-pack on Amazon, you’re setting yourself up for failure. Last month at my office, I opened my work bag to find that my cheap container had popped open. Two cups of oily vinaigrette and quinoa soaked into my laptop sleeve. It was a disaster. The smell of garlic and olive oil lingered on my bag for weeks. That was the day I drove straight to Target and upgraded my entire storage system.
I swear by the Rubbermaid Brilliance 10-piece set. You can grab it at Target for $28.99. These containers are made of Tritan plastic, so they’re crystal clear like glass but won’t shatter if you drop them on a tile floor. The latches on the sides make a loud, satisfying clicking sound when they lock. That sound means your food is sealed. They’re leak-proof. I’ve filled them with water and shaken them upside down over my sink just to test them. Not a single drop came out.
Most people get this wrong by buying cheap plastic that absorbs stains and smells. Have you ever tried to wash a cheap container after storing tomato sauce in it? It gets that gross, cloudy orange stain that never washes out. The Rubbermaid containers resist staining. If you prefer glass, the Glasslock 18-Piece Set is another great option. I bought mine at Costco for $39.99. Glass is heavier to carry, but it heats up beautifully in the microwave without warping. For freezer storage, I recommend Ziploc Endurables. They cost about $14.99 for a medium pouch, but they prevent that nasty freezer burn that ruins your food’s texture. Invest in good containers. It’s the foundation of everything else we’re going to do.
2. Master Batch Cooking Lean Proteins

I used to cook five identical, fully assembled meals on Sunday. By Wednesday, I was so sick of looking at the same chicken and rice that I’d throw it away. Batch cooking individual components is the only way to survive meal prep without losing your mind. I tried this wrong for months before figuring out that versatility is the secret. You need neutral proteins you can flavor differently each day.
I start my Sunday routine with a trip to Costco. I always buy their 3-pound pack of Kirkland Signature organic boneless, skinless chicken breasts for about $17.99. When I get home, I don’t chop and bake it. Baking chicken breasts for meal prep usually results in dry, chalky meat. Instead, I use my Instant Pot. I place the 3 pounds of chicken into the pot with exactly 1/2 cup of low-sodium chicken broth and a heavy pinch of salt. I set it to high pressure for 12 minutes. When the timer goes off, I let the pressure release naturally for 5 minutes before opening the valve. The steam smells incredible, like a rich, homemade soup.
I transfer the hot chicken to a large glass bowl and use two forks to shred it. The meat falls apart. It’s juicy and tender. Now, I have a massive bowl of shredded chicken I can use all week. On Monday, I’ll take 4 oz of the chicken and toss it with BBQ sauce for a wrap. On Tuesday, I’ll take another 4 oz and mix it with salsa for a taco bowl. On Wednesday, I’ll put 4 oz cold over a spinach salad. This method saves me so much time. It takes 15 minutes of hands-on work, and I have protein ready for the entire workweek. Don’t season the bulk batch too heavily. Keep it plain so you aren’t locked into one flavor profile.
3. Stop Boiling Vegetables And Use An Air Fryer

If you’re steaming broccoli in the microwave or boiling it, please stop. Steamed vegetables for meal prep are a tragedy. They release water as they sit in your fridge, turning into a soggy, foul-smelling mess by day three. Last year, I opened a container of steamed zucchini at my desk, and my coworker asked if something had died. The smell of sulfur was overwhelming. That’s when I bought an air fryer, and it changed my life. Trust me. You might also like: 15 Stunning Aesthetic Batch Cooking You Need to See
I do my produce shopping at Walmart because their prices are unbeatable. I’ll grab two large heads of broccoli for about $2.48 each and three medium zucchinis for $1.98. The trick to perfect meal prep vegetables is high heat and low moisture. I chop the broccoli into small florets and slice the zucchini 1/2 inch thick. I toss them in a large bowl with 1 tablespoon of extra virgin olive oil, 1/2 teaspoon of kosher salt, and 1/4 teaspoon of black pepper. You might also like: 15 Gorgeous Chicken Breast Dinner Ideas That Make a Real Difference
I set my air fryer to 375°F. Here is the most important rule: don’t overcrowd the basket. This is a common mistake. If you pile the vegetables on top of each other, they’ll just steam in their own juices and get mushy. You need a single, flat layer. I cook them for 10 to 12 minutes, pulling the basket out halfway through to shake it violently. The sound of the crispy vegetables rattling in the basket is music to my ears. The edges of the broccoli get perfectly charred, almost like potato chips. The zucchini gets tender but retains a firm bite. They stay perfectly crisp in the fridge for up to four days. It’s a massive upgrade from sad, wet broccoli. You might also like: 20 Lovely Work Lunch Ideas to Inspire Your Next Project

Vtopmart 5Pack 22oz Glass Storage Containers with Lids
If you want something that just works, Vtopmart 5Pack 22oz Glass Storage Containers with Lids is a safe bet (32 reviews, 4.5 stars).
4. Try Sous Vide For Chicken You Can Actually Chew

Let’s talk about the dreaded dry chicken breast. I’ve choked down so many rubbery, overcooked pieces of chicken in the name of health. It’s miserable. The texture feels like chewing on an old shoe. A few months ago, I was wandering through Whole Foods and saw a display for sous vide cooking. I thought it was just for fancy restaurant chefs, but I decided to buy the INKBIRD WIFI Sous Vide Cooker for $89.99. Honestly, this gadget is worth its weight in gold.
Sous vide means cooking food in a vacuum-sealed bag submerged in a precisely temperature-controlled water bath. It sounds complicated, but it’s foolproof. I’ll buy a pack of thick chicken breasts from the Whole Foods meat counter, usually around $12.50 for two. I season them with 1 teaspoon of smoked paprika, 1/2 teaspoon of garlic powder, and a pinch of salt. I seal them in a vacuum bag or a heavy-duty Ziploc bag using the water displacement method. I clip the INKBIRD to a large pot of water, open the app, and set the temperature to 145°F.
I drop the bagged chicken into the water and walk away. I leave it for 1.5 hours. The machine hums quietly. When I pull the chicken out, it looks a little pale, so I pat it completely dry with paper towels. Then, I heat 1 tablespoon of avocado oil in a cast-iron skillet until it’s smoking hot. I sear the chicken for 45 seconds on each side just to get a golden-brown crust. The result is the juiciest, most tender chicken breast you will ever eat. You can cut it with a butter knife. Because it’s cooked so gently, it stays incredibly moist in the fridge for up to five days. You won’t ever go back to baking it.
5. Blend Your Own Sauces To Control The Ingredients

Skip the fat-free stuff at the grocery store. It tastes like wet cardboard and chemicals. I used to buy those bottled “healthy” dressings, thinking I was doing a great job. Then I read the label. They’re packed with hidden sugars, weird gums, and cheap inflammatory oils. Plus, they have a slimy texture that coats your mouth. Making your own sauces takes five minutes and tastes a million times better.
I do my sauce ingredient shopping at Trader Joe’s. They have the best prices on avocados and fresh citrus. My favorite thing to prep is a Creamy Avocado Lime Sauce. It makes dry grains and plain chicken taste like a restaurant meal. In my small food processor, I combine 1 perfectly ripe Trader Joe’s avocado (about $1.49), 1/4 cup of plain, unsweetened Greek yogurt, 2 tablespoons of fresh lime juice, 1 teaspoon of lime zest, 1 small minced garlic clove, 1 tablespoon of olive oil, and a heavy pinch of sea salt.
I hit the blend button, and it whirs into this vibrant, bright green sauce. The smell of the fresh lime zest hitting the garlic is incredible. It smells bright and punchy. The Greek yogurt gives it a rich, creamy texture without needing heavy cream or mayonnaise. I scrape the sauce into a small, airtight glass Mason jar. I buy the 8-ounce jars in a 12-pack for $12.99 at Target. Because of the acid in the lime juice, the avocado won’t turn brown. It stays a beautiful, bright green in the fridge for up to a week. I drizzle 2 tablespoons of this over my rice bowls, and it transforms the meal. Stop relying on processed bottles and buy a food processor.
6. Follow The 50/25/25 Rule For Balanced Portions

Portion control used to be my biggest struggle. I’d pack a massive bowl of brown rice, a tiny piece of chicken, and maybe three sad slices of bell pepper. By 2:00 PM, the massive carb load would hit me, and I’d be falling asleep at my desk. My blood sugar was crashing hard. I learned about the 50/25/25 rule from a nutritionist, and it fixed my afternoon energy slumps. Took me years to figure out.
When I’m assembling my Rubbermaid containers on Sunday, I visually divide the rectangle into sections. Half of the container (50%) must be filled with non-starchy vegetables. I’ll pack 1 full cup of my air-fried zucchini and broccoli. One quarter of the container (25%) is for lean protein. I use 4 oz of my shredded Instant Pot chicken or my sous vide chicken. That’s roughly the size of my palm. The final quarter (25%) is for complex carbohydrates. I’ll add 1/2 cup of cooked quinoa or brown rice.
I usually buy my bulk grains at Sprouts. They have a massive bulk bin aisle where I can get organic tricolor quinoa for about $4.99 a pound. When I’m packing the protein, I am incredibly strict about food safety. Most people get this wrong and end up with terrible stomach cramps. I use my Thermapen instant-read thermometer. It cost me $85.00, but it reads temperatures in one second. I always make sure my poultry hits 165°F before I cool it down. I never pack hot food into the containers. I let the chicken and grains cool on the counter for 45 minutes until the steam stops rising. If you put the lid on while it’s hot, condensation builds up, bacteria breeds, and your food spoils faster. Follow the visual rule, and cool your food properly.
![[8-Pack,30 oz]Glass Meal Prep Containers](https://m.media-amazon.com/images/I/713Zfdsgi4L._AC_UL320_.jpg)
[8-Pack,30 oz]Glass Meal Prep Containers
Honestly, [8-Pack surprised me — sturdier than it looks in the photos, and over 7 buyers gave it 4.5 stars.
7. Use Frozen Produce To Stop Wasting Money

I can’t tell you how many bags of fresh spinach I’ve thrown into the garbage. I used to buy those massive plastic tubs of organic greens with the best intentions. By Thursday, the leaves at the bottom would turn into a dark, slimy, foul-smelling liquid. It’s essentially throwing a five-dollar bill directly into the trash every single week. I felt so guilty. The truth is, frozen vegetables are picked at peak ripeness and flash-frozen, locking in all the nutrients. They’re often healthier than the “fresh” stuff that’s been sitting on a truck for two weeks.
I rely on the freezer aisle at Kroger. My secret weapon is frozen shelled edamame. A large bag costs about $2.99. Edamame is packed with plant-based protein and fiber. I don’t even bother cooking it. When I’m packing my lunches, I just measure out 1/2 cup of the frozen edamame directly into my meal prep container. By the time lunch rolls around the next day, the edamame has perfectly thawed in the fridge. It retains a beautiful bright green color and a firm, satisfying snap.
I also buy huge bags of frozen mixed berries at Kroger for my morning smoothies. A 3-pound bag is around $10.99. Fresh berries mold so quickly, but the frozen ones last for months. When I drop 1/2 cup of frozen strawberries into my blender, they act like ice cubes, making the smoothie thick and frosty. The sound of the frozen berries grinding in the blender is loud, but the resulting texture is like a thick milkshake. Stop letting fresh produce rot in your crisper drawer. Embrace the freezer aisle to save your budget and your sanity.
8. Build Your Own Freezer Dinners For Lazy Nights

We all have those nights where we come home exhausted. You open the fridge, look at your perfectly prepped healthy meal, and think, “I absolutely can’t eat that right now.” You want comfort food. In the past, I’d reach for a highly processed, frozen TV dinner loaded with 1,500 milligrams of sodium. I’d microwave it, eat the watery, salty mush, and feel bloated the entire next day. You don’t have to rely on the frozen food aisle. You can make your own healthy TV dinners.
I am obsessed with Souper Cubes. I bought a two-pack of the 1-cup trays at Target for $19.95. They’re made of thick, flexible silicone. Once a month, I will make a massive batch of healthy turkey chili or a vegetable-packed lentil stew. I let the pot cool, and then I ladle 1 cup of the stew into each square compartment of the Souper Cubes tray. I snap the hard plastic lid on top and stick it in the freezer overnight.
The next morning, I pop the frozen blocks of chili out of the silicone tray. They pop out easily, just like giant ice cubes. I drop the frozen blocks into a large Ziploc Endurables pouch, label it with a Sharpie, and put it back in the freezer. Now, when I have a lazy Tuesday night, I don’t order takeout. I pull out one perfectly portioned block of frozen chili, drop it into a bowl, and microwave it for 4 minutes. The smell of the cumin and chili powder fills the kitchen, and I have a hot, comforting, clean meal with zero effort. It’s the ultimate backup plan.
Meal prep isn’t about being perfect. It’s about finding systems that work for your real life, not just for a pretty photo. If you buy the right containers, master your air fryer, and utilize your freezer, you’ll save hours of time and hundreds of dollars. I recommend starting with just the shredded Instant Pot chicken this Sunday. See how much easier your week feels. If you found these tips helpful, save this page or pin it for your next grocery run. You’ve got this!
Frequently Asked Questions
How long does clean meal prep last in the fridge?
Most cooked proteins and roasted vegetables will last 3 to 4 days in the refrigerator when stored in airtight containers like Rubbermaid Brilliance. Always use an instant-read thermometer to ensure meats are cooked to safe temperatures before storing.
Can I use an air fryer for clean meal prep?
Yes, an air fryer is perfect for meal prep. It roasts vegetables like broccoli and zucchini in 10-12 minutes at 375°F. Just make sure you don’t overcrowd the basket, or your vegetables will steam instead of getting crispy.
What is the 50/25/25 rule for portioning?
The 50/25/25 rule dictates that your meal container should be 50% non-starchy vegetables, 25% lean protein, and 25% complex carbohydrates. This balance helps prevent afternoon energy crashes and keeps your blood sugar stable.
Are frozen vegetables good for meal prep?
Absolutely. Frozen vegetables like edamame and berries are flash-frozen at peak ripeness, locking in nutrients. They are often cheaper than fresh produce and prevent the food waste that happens when fresh greens rot in the fridge.
