What’s Inside
- Smart Sourcing for Budget-Friendly Breasts
- Pound for Even Cooking and Tenderness in Your Chicken Breast Meal Prep
- Marinate for Maximum Flavor and Juiciness
- Don’t Skip the Brine for Superior Moisture
- Master the Air Fryer for Quick, Tender Results
- Poaching for Unbeatable Juiciness
- Utilize the Instant Pot for Hands-Off Shredded Chicken
- Oven Baking for Versatility and Batch Cooking
- Avoid the Common Mistake of Overcooking
- Rest Your Chicken for Juicier Results
- Portion and Store Safely in Airtight Containers
- The “Ingredient Prep” Approach for Chicken Breast Meal Prep
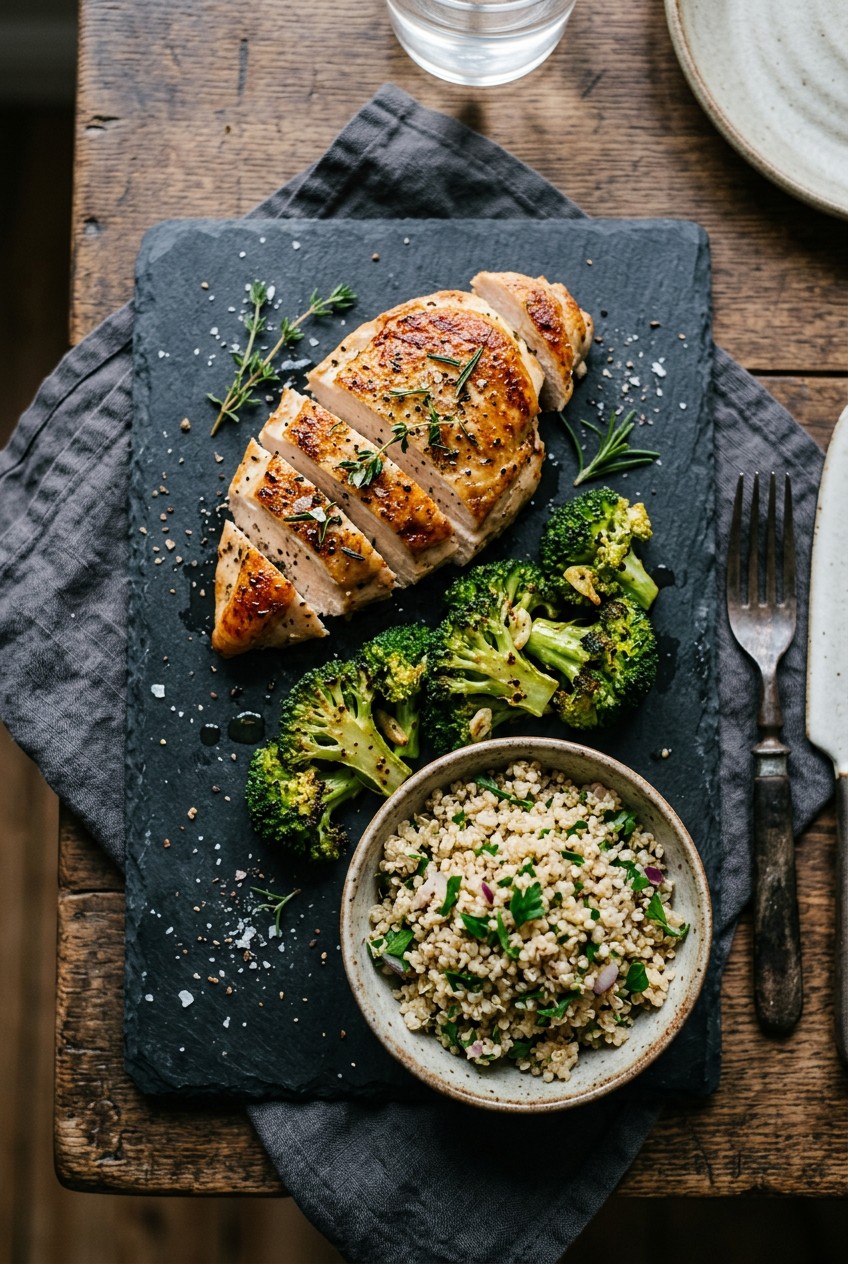
Last Tuesday at Whole Foods, I stood in the meat aisle staring at a $14 pack of dry-looking poultry and realized my chicken breast meal prep routine was broken. I used to chew through rubbery, flavorless chicken every Wednesday until my jaw hurt. It tasted like wet cardboard. Let’s fix that. I tried this wrong for months before figuring it out. Honestly, my early attempts at Sunday cooking were sad. I’d bake plain chicken at 350 degrees until it turned into chalk. My apartment smelled like sad diet food. Now, I’ve got a system that works. I’m sharing the methods I use to keep my fridge stocked with juicy, flavorful protein all week. Skip the fat-free stuff. You need real flavor and proper techniques to make this work. Here’s how I do it.
1. Smart Sourcing for Budget-Friendly Breasts

Let’s talk about the cost of buying meat. I used to grab whatever random package was at eye level. Huge mistake. I was spending way too much money on tiny, sad fillets. Now, I buy boneless, skinless chicken breasts in bulk from warehouse clubs or discount grocers. Costco’s my favorite. They offer Kirkland Signature boneless, skinless chicken breast for around $2.99 per pound in their regular packs. If you buy the massive 9 lb average weight packages, you save cash. The heavy, cold plastic package feels like a commitment when you toss it in your cart. Aldi is another great option. I often find their family packs for as low as $2.29 per pound. The smell of the cold warehouse section at Costco always reminds me I’m about to save money. You’re going to need a lot of protein if you prep for the whole week. Buying in bulk is the only way to do it without going broke. I divide the massive packs the second I get home. I wrap individual portions in freezer paper and label them with a black marker. It’s a non-negotiable step in my weekend routine. If I skip this, the meat spoils before Wednesday.
2. Pound for Even Cooking and Tenderness in Your Chicken Breast Meal Prep

Most people get this wrong. They just throw a massive, uneven chicken breast directly into a hot pan. One end cooks into dry leather while the thick middle stays raw and pink. I ruined so many dinners doing exactly this. To ensure uniform cooking and prevent those awful dry spots, you must pound thicker chicken breasts to an even 1/2-inch thickness. Dietitians and chefs recommend this because it helps the chicken cook consistently and remain juicy. I swear by placing the chicken between two pieces of Target Up&Up parchment paper ($4.29 for a 50 sq ft roll). The parchment paper stops raw chicken juices from flying all over my kitchen island. I use an OXO Good Grips meat mallet ($16.99) to flatten them out. The loud, rhythmic thwack of the mallet hitting the counter is great stress relief after a long week. You can also use a heavy rolling pin if you don’t own a mallet. Just get them flat. The texture completely changes when you do this. The meat fibers break down. You won’t believe how much softer the chicken turns out. Trust me.
3. Marinate for Maximum Flavor and Juiciness

I used to think salt and pepper were enough. I was wrong. Marinating chicken breast for at least 30 minutes, or ideally 4 to 6 hours, improves both flavor and tenderness. You can even leave it for up to 24 hours. Just don’t go past that, or the acid turns the meat into a mushy disaster. I learned that the hard way last year when I forgot a batch in the fridge. My favorite versatile marinade for 1.5 to 2 pounds of chicken starts with 1/4 cup Pompeian olive oil ($7.99 at Kroger). Then I add 1/4 cup Bragg Apple Cider Vinegar ($6.49 at Sprouts), 1 tablespoon fresh lemon juice, 1 tablespoon honey, 1 tablespoon Grey Poupon Dijon mustard ($3.49), and 2 teaspoons of McCormick Italian seasoning. The sharp, tangy smell of the vinegar mixing with the sweet, sticky honey is incredible. I mix it all in a large glass bowl. The thick mustard blends with the oil to create a creamy, golden liquid that coats the pale chicken perfectly. The acid in the vinegar and lemon juice tenderizes the meat while the oil keeps it moist. It’s the perfect balance. Your kitchen will smell amazing when this hits the hot pan. You might also like: 15 Brilliant Good Meal Prep Ideas That Changed Everything
![[8-Pack,30 oz]Glass Meal Prep Containers](https://m.media-amazon.com/images/I/713Zfdsgi4L._AC_UL320_.jpg)
[8-Pack,30 oz]Glass Meal Prep Containers
Honestly, [8-Pack surprised me — sturdier than it looks in the photos, and over 7 buyers gave it 4.5 stars.
4. Don’t Skip the Brine for Superior Moisture

This is a lesser-known trick that altered how I cook. A quick 30-minute brine makes your chicken noticeably juicier and more flavorful, even days after cooking. I tried this wrong for months before figuring it out. I used cheap iodized table salt once, and the chicken tasted like a mouthful of ocean water. It was metallic and salty. Now, I only use Morton Kosher Salt ($3.19 at Kroger). The rule is simple. Dissolve 1 tablespoon of kosher salt per cup of cold water. Submerge your chicken breasts completely. The cold, cloudy salt water works magic on the protein structures inside the meat. It forces the chicken to absorb extra liquid before it even touches the heat. When you finally cook it, that trapped water prevents the meat from drying out. I usually do this in a large glass bowl right on my counter if I’m cooking within 30 minutes. If I need longer, it goes straight into the fridge. You’ll notice the raw chicken feels heavier and plumper when you pull it out of the brine. Just remember to pat it completely dry with paper towels before cooking. You might also like: 20 Inspiring Meal Prep Ideas for Any Style
5. Master the Air Fryer for Quick, Tender Results

The air fryer remains a trend for 2026 meal prep, and for good reason. It produces tender chicken with crispy edges in a fraction of the time an oven takes. I use my Ninja Foodi 6-in-1 ($179.99 at Target) every single day. For boneless, skinless chicken tenders, I do a quick 30-minute marinade with vinegar. Then, I air fry them at 350 degrees Fahrenheit for 5 to 7 minutes. The sizzling sound coming from the dark nonstick basket is music to my ears. I burned a whole batch last month because I impatiently set the temperature to 400 degrees. The outside turned to dry charcoal while the inside was still raw and pink. Stick to 350 degrees. The rapid air circulation creates this beautiful golden-brown crust without needing a heavy cup of oil. The hot, savory smell of roasted chicken fills my tiny kitchen in minutes. I pull the basket out and the chicken is bubbling slightly. It’s so fast. You can easily cook a week’s worth of protein in three quick batches while you chop vegetables. Plus, the ceramic basket wipes clean with a wet sponge in ten seconds. You might also like: 15 Brilliant Salmon Dinner Ideas for Any Style
6. Poaching for Unbeatable Juiciness

I always thought poaching was just for fancy restaurant eggs. According to Food Network culinary expert Heath, poaching chicken in gently simmering water over low heat is the best way to achieve tender and juicy white meat. It’s often more succulent than baked chicken. This method is amazing for chicken destined for cold salads or shredded taco dishes. I simmer my chicken breasts in Swanson Chicken Broth ($2.99 at Walmart) instead of plain water for extra flavor. The gentle bubbling sound of the yellow broth on the stove is soothing. You just let it simmer for 15 to 20 minutes until the thickest part reaches an internal temperature of 165 degrees Fahrenheit. The mistake I made early on was boiling the liquid rapidly. Rapid boiling aggressively tightens the meat fibers, leaving you with tough, stringy chunks that get stuck in your teeth. You want a lazy, slow simmer. The chicken turns opaque white and cuts like butter. The rich, savory steam from the broth makes the whole house smell cozy. I pull the pale, steaming breasts out with metal tongs and let them cool on a cutting board. I even save the leftover broth to cook my rice in later.

M MCIRCO 10-Pack,22 Oz Glass Meal Prep Containers
M MCIRCO 10-Pack has been one of the most consistently praised picks in this category. 86 reviewers averaged 4.5/5.
7. Utilize the Instant Pot for Hands-Off Shredded Chicken

For totally hands-off shredded chicken, my Instant Pot Duo 7-in-1 ($99.99 on Amazon) is my best friend. I literally just toss 2 to 4 boneless, skinless chicken breasts into the heavy stainless steel insert. I add 1 cup of broth, 1 teaspoon of garlic powder, 1 teaspoon of onion powder, and a heavy pinch of smoked paprika. I lock the heavy black lid in place, wait for the electronic beep, and pressure cook on high for 10 minutes. The metallic click of the pressure valve sealing means I can walk away and fold laundry. After cooking, I allow a natural pressure release for 5 to 10 minutes. Then comes the fun part. I transfer the hot, steaming chicken to my KitchenAid Artisan stand mixer ($379.99 at Target). Using the metal paddle attachment on low speed, it shreds the meat perfectly in 15 seconds. The hot steam billows up as the paddle tears the tender meat apart. The smell of the garlic and paprika steaming in the bowl makes my mouth water. Always store the shredded chicken with a little bit of the leftover cooking liquid from the pot. That savory, spiced broth keeps the shreds moist in the fridge for days.
8. Oven Baking for Versatility and Batch Cooking

Sometimes you just need to cook three pounds of meat at once. For a versatile meal prep option, I bake seasoned chicken breasts on a massive baking sheet. I line my heavy aluminum pan with Reynolds Wrap Heavy Duty Foil ($5.49 at Target) and a sheet of brown parchment paper. The sound of the parchment paper crinkling as I press it into the corners is satisfying. The foil makes cleanup take zero seconds. You can’t expect good results from flimsy baking sheets that warp in the heat. I preheat the oven to 400 degrees Fahrenheit (205 degrees Celsius). I arrange the seasoned chicken so none of the pieces are touching. If they touch, they steam in their own juices instead of roasting. They bake for 20 to 25 minutes. The smell of roasted garlic powder and paprika gets intensely savory around the 15-minute mark. This method is ideal for batch cooking. It allows you to easily slice the chicken for salads, wraps, or grain bowls later in the week. The edges get this lovely, slightly chewy caramelized crust. I pull the hot pan out of the oven and hear the residual oil sizzling softly against the foil. It’s the most reliable way to get a lot of food prepped on a Sunday afternoon.
9. Avoid the Common Mistake of Overcooking

The most frequent error in any chicken recipe is overcooking. It results in dry, rubbery meat that takes ten minutes to chew. I refuse to eat bad chicken anymore. You must use a meat thermometer. I use a ThermoPro digital meat thermometer ($14.99 on Amazon). I poke the sharp metal probe into the absolute thickest part of the breast. You’re looking for precisely 165 degrees Fahrenheit (74 degrees Celsius) on the digital screen and not a single degree higher. Remove it from the heat immediately at this temperature. Carryover cooking is real. The residual heat trapped inside the meat will actually continue to cook the chicken and raise the internal temperature slightly after you take it off the stove. I’ve left my chicken in the pan with the heat off, thinking it was fine. The bottom of the hot pan just kept frying the meat until it was ruined. Move the chicken to a cool plate or cutting board the second it hits 165 degrees. Trust the thermometer. Don’t guess by looking at the color of the juices. Cutting into raw chicken to check the color just lets all the moisture escape onto your pan.

KOMUEE 10 Packs 30 oz Glass Meal Prep Containers
KOMUEE 10 Packs 30 oz Glass Meal Prep Containers punches above its price — 45 buyers rated it 4.5 stars. I would buy it again.
10. Rest Your Chicken for Juicier Results

This is an often-overlooked step, but letting cooked chicken rest for 5 to 10 minutes before slicing or shredding is crucial. I used to pull my chicken out of the oven and immediately hack into it with a chef’s knife. I’d watch all the hot, savory juices run out of the meat and flood my wooden cutting board. The chicken I actually ate ended up dry. Resting allows the tight muscle fibers to relax and reabsorb all those boiling juices. It keeps the meat moist and tender. I set a timer on my phone for 8 minutes. I cover the hot chicken loosely with a piece of foil to keep the heat in. The shiny foil tent traps the steam perfectly. When you finally slice into it after resting, the knife glides through. The inside looks glossy and wet, not dull and stringy. The texture is different. It requires patience, especially when you’re starving on a Sunday afternoon, but it’s the only way to guarantee a good texture for the rest of the week.
11. Portion and Store Safely in Airtight Containers

Cooked chicken breast remains safe for 3 to 4 days in the refrigerator when stored properly. You need quality airtight containers kept at or below 40 degrees Fahrenheit (4 degrees Celsius). I threw away all my cheap, stained plastic containers last year. They absorbed smells and warped in the microwave. Now, I exclusively use glass meal prep containers. I bought an 18-piece Glasslock set ($34.99 at Costco). The heavy glass feels premium. The snap of the plastic locking lids lets me know my food is sealed. For extended storage, I freeze individual portions for up to 3 months in Ziploc freezer-safe bags ($5.89 at Target). When reheating, you have to be smart to maintain texture. Ensure the chicken reaches an internal temperature of 165 degrees Fahrenheit again. Microwaving plain chicken dries it out instantly. It works best if it’s covered in a sauce. Reheating in an oven or an air fryer at 350 degrees for 5 to 7 minutes helps maintain moisture. I always add one tablespoon of Swanson broth to my glass container before microwaving. It creates steam and saves the meat.
12. The “Ingredient Prep” Approach for Chicken Breast Meal Prep

Instead of preparing full, rigid meals, I’ve started focusing heavily on “ingredient prepping.” This is a trending approach for 2026. I cook a large batch of plain or very lightly seasoned chicken breast on Sunday. This gives me so much more flexibility and combats meal fatigue. Eating the exact same chicken, broccoli, and rice container four days in a row makes me miserable. By Wednesday, I’m usually ordering expensive takeout. With ingredient prep, I keep the cooked chicken neutral. On Monday, I might toss cold slices into a massive spinach salad with Primal Kitchen Buffalo Sauce ($6.99 at Whole Foods). On Tuesday, I’ll chop it up and throw it into a hot skillet with some taco seasoning for quick wraps. The smell of the cumin and chili powder hits the hot pan and changes the boring Sunday chicken. No exaggeration. On Thursday, I mix it into a warm grain bowl loaded with colorful roasted sweet potatoes and black beans. The visual appeal of a bright, fresh bowl keeps me excited for lunch. You aren’t locked into one flavor profile. You just have the hardest part—cooking the protein—already finished and waiting in your fridge.
That’s my entire system. I’ve ruined enough dinners to know that these small steps matter. The brine, the meat thermometer, and the glass containers fixed my weekly routine. You don’t have to eat dry, sad poultry ever again. Try the apple cider vinegar marinade this Sunday and see how much better your kitchen smells. I promise you’ll notice the difference immediately. Pin this guide for your next grocery trip, and let’s make your weeknight dinners less stressful.

Vtopmart 5Pack 22oz Glass Storage Containers with Lids
If you want something that just works, Vtopmart 5Pack 22oz Glass Storage Containers with Lids is a safe bet (32 reviews, 4.5 stars).
Frequently Asked Questions
How long does meal prep chicken breast last in the fridge?
Cooked chicken breast remains safe for 3 to 4 days in the refrigerator when stored in quality airtight glass containers at or below 40 degrees Fahrenheit. For longer storage, freeze portions for up to 3 months.
How do you reheat meal prep chicken without drying it out?
Microwaving plain chicken dries it out quickly. Reheat it in an oven or air fryer at 350 degrees for 5 to 7 minutes. If you must microwave, add a tablespoon of chicken broth to the container to create steam and keep the meat moist.
Why is my meal prep chicken always rubbery?
The most common mistake is overcooking. Chicken becomes rubbery when the internal temperature exceeds 165 degrees Fahrenheit. Always use a digital meat thermometer and remove the chicken from the heat immediately at 165 degrees, as carryover cooking will continue to raise the temperature.
Should I cut chicken breast before or after cooking for meal prep?
It’s best to cook the chicken breast whole and let it rest for 5 to 10 minutes before cutting. Slicing it too soon allows the hot juices to escape, leaving the meat dry. Resting lets the muscle fibers relax and reabsorb moisture.
