What’s Inside
- Stop Buying the Fat-Free Stuff for Your Ground Chicken Meal Prep
- The Moisture Trick You’re Probably Skipping
- Season Generously and Strategically
- How to Actually Brown the Meat (Don’t Stir Constantly)
- Grind Your Own Meat for the Freshest Ground Chicken Meal Prep
- Batch Cook Plain Protein for Maximum Flexibility
- Build Firecracker and Mediterranean Bowls
- The Right Way to Store and Freeze Your Prep
- Reheating Without Ruining the Texture
Last Tuesday at Whole Foods, I stared at a sad, gray brick of poultry under the harsh lights and realized something depressing. My ground chicken meal prep history was a long string of dry, flavorless disasters. I used to cook this lean protein until it had the texture of pencil erasers. If you’re tired of choking down rubbery meat by Wednesday afternoon, I get it. I spent years getting this completely wrong. I’d dump a pound of unseasoned meat into a cold pan, stir it into a gray mush, and wonder why my lunches tasted like punishment. It’s easy to ruin lean poultry, but once you learn how to handle it, it’s the most versatile protein in your fridge. I’m going to show you exactly how I fix these common mistakes. Let’s fix your weekly routine with specific methods that actually work. I’ve ruined enough batches so you don’t have to. Here are my best strategies for keeping your chicken juicy, flavorful, and safe to eat all week long.
1. Stop Buying the Fat-Free Stuff for Your Ground Chicken Meal Prep

Most people get this wrong right out of the gate. I used to buy the 99% lean ground breast meat at Target for $6.99 a pound because I thought I was being healthy. That was a mistake. Skip the fat-free stuff. It tastes like wet cardboard and turns into dust the second it hits the microwave. You need a little bit of fat to survive the reheating process. I swear by choosing meat with a fat content of 92/8 or 97/3. This ratio gives you a balance of leanness and flavor, and it typically costs between $4.00 and $7.00 per pound depending on where you shop.
When I switched to 92/8, the texture of my lunches changed completely. The slightly higher fat content contributes to a much juicier end product. This is important because reheating cooked poultry in an office microwave will suck the moisture out of it. If you start with 99% lean meat, you’re doomed before you even turn on the stove. Last month, I accidentally bought the ultra-lean version again because the labels looked similar. I tried to make meatballs, and they were so dry they bounced off my kitchen counter. Don’t do this. Read the label carefully. Look for that 92/8 sweet spot. Your tastebuds will thank you, and your jaw won’t get a workout trying to chew through rubbery bites of regret. It’s a small shift at the grocery store that fixes the foundation of your weekly lunches.
2. The Moisture Trick You’re Probably Skipping

A common mistake is overcooking lean meat, leading to a dry texture that ruins your week. I tried this wrong for months before figuring it out. I’d just throw the raw meat into a dry non-stick pan and hope for the best. Now, I always add 1 to 2 teaspoons of olive oil to the hot skillet before the meat even touches the metal. But the real secret happens at the end of the cooking process. When the pink is just barely gone, I stir in a splash of liquid. I usually use exactly 1/4 cup of Swanson Chicken Broth (which runs about $2.49 for a carton) or just plain water per pound of meat. This creates steam and coats the protein in a savory glaze that locks in the moisture.
If you’re making patties or meatballs, the strategy changes slightly. Last Sunday night at Walmart, I grabbed ingredients for burgers and almost forgot my secret weapon. You need to incorporate 2 tablespoons of Hellmann’s Light Mayonnaise (around $5.49 a jar) or plain Greek yogurt per pound directly into the raw mixture before shaping it. I used to skip this step, and my burgers would crumble into a dry pile on my plate. The mayonnaise adds just enough fat and liquid to bind the meat and keep it juicy on the grill or in the pan. Honestly, this changed how I view poultry burgers forever. You won’t taste the mayonnaise, but you’ll notice how tender the meat stays after three days in the fridge.
3. Season Generously and Strategically

Ground poultry has a mild flavor. If you don’t season it heavily, it’s going to taste like nothing. I remember sitting in my kitchen eating a bowl of plain, unseasoned chicken and rice, feeling miserable. I learned that the hard way. You can’t just sprinkle a tiny pinch of salt and call it a day. For a versatile blend that works in almost any dish, you need exact measurements. I mix 1 teaspoon of kosher salt, 1 teaspoon of garlic powder, 1/2 teaspoon of paprika, 1/2 teaspoon of onion powder, 1/2 teaspoon of black pepper, and 1/4 teaspoon of dried thyme per pound of meat. I usually buy my spices in bulk at Kroger to save money.
If you want a surprising flavor profile, I highly recommend adding a dash of Old Bay seasoning during the cooking process. I tried this on a whim last month, and the caramel-butter smell of the celery salt and paprika hitting the hot oil was amazing. It gives the meat a smoky, savory seafood-boil vibe that pairs perfectly with roasted potatoes and green beans. Don’t be shy with your spice cabinet. The meat absorbs flavors like a sponge. If the raw mixture doesn’t smell fragrant before it hits the pan, you haven’t used enough spices. I keep a tiny glass jar of my custom spice blend pre-mixed in the pantry so I don’t have to measure out six different jars every Sunday morning. It saves me about five minutes of digging through my messy spice drawer. You might also like: 20 Beautiful High Protein Meal Prep Ideas That Are Totally Worth It

M MCIRCO 10-Pack,30 Oz Glass Meal Prep Containers 2
A dependable everyday pick — M MCIRCO 10-Pack pulls in 23 ratings at 4.5 stars. Not flashy, just solid.
4. How to Actually Brown the Meat (Don’t Stir Constantly)

This is where most people ruin the texture. When I first started cooking, I’d dump the meat into the pan and hack at it with a wooden spoon for ten minutes. I thought I was supposed to keep it moving. The result was a pan full of gray, boiled-looking mush sitting in a pool of watery liquid. To master the browning technique, you have to practice patience. Start by adding your protein to a hot skillet with 1 tablespoon of avocado oil (I buy the Trader Joe’s brand for $7.99) over medium-high heat. Drop the meat in as one giant chunk or a few large pieces. You might also like: 15 Brilliant Good Meal Prep Ideas That Changed Everything
Then, step away. Do not touch it. Let it sear undisturbed for a full 1 to 2 minutes until a dark, golden-brown crust forms on the bottom. You should hear a loud, aggressive sizzle. If you don’t hear a sizzle, your pan isn’t hot enough. Once you have that deep brown crust, flip the large chunks over and gently break them into smaller pieces. Avoid constant stirring. Overworking the meat forces all the natural juices out into the pan, leaving you with a rubbery, dry texture. You want distinct, caramelized crumbles, not a pulverized paste. Learning to leave the meat alone was the hardest habit for me to break, but it’s the only way to get that restaurant-quality sear at home. The caramelized bits on the bottom of the pan hold all the actual flavor. You might also like: 15 Clever Family Dinner Ideas for a Fresh New Look
5. Grind Your Own Meat for the Freshest Ground Chicken Meal Prep

If you want complete control over your food, making your own ground meat is the ultimate flex. I used to think this was too much work, but it’s easy and saves money. I buy bulk packs of boneless, skinless thighs at Costco for about $2.99 per pound. Store-bought ground meat can sometimes have a weird, stringy texture because you don’t know exactly what cuts they used. When you make it yourself, you know exactly what’s in the bowl.
Here is my method. Cut 1 to 2 pounds of thighs into one-inch cubes. Place them on a baking sheet lined with parchment paper and stick them in the freezer for 60 to 90 minutes. You want the edges to feel stiff and frosty, but not completely frozen solid. I once tried blending warm meat in a cheap blender, and I nearly broke the machine while creating a slimy paste. Now, I use my Cuisinart 14-Cup Food Processor (which costs around $199.95, but it’s worth every penny). Toss the semi-frozen cubes into the processor and pulse it 4 to 6 times. Do not turn it on and walk away. You want a coarse grind, not a purée. The cold temperature keeps the fat from melting and prevents the meat from turning into mush. It takes a little extra effort, but the texture of freshly ground thighs makes the best meatballs you’ll ever eat.
6. Batch Cook Plain Protein for Maximum Flexibility

I used to prep five identical containers of teriyaki chicken on Sunday, and by Wednesday, I’d rather starve than eat another bite. Food boredom is the number one reason people abandon their healthy eating goals. Instead of preparing entire finished meals, I now batch cook larger quantities of plain or lightly seasoned protein. I’ll cook 2 to 3 pounds at once and store this cooked protein separately in a large glass container in the fridge.
This approach allows for maximum flexibility. On Monday, I can scoop a cup of the plain meat into a pan with taco seasoning and salsa. On Tuesday, I can throw it cold over a massive salad with ranch dressing. On Wednesday, I can mix it into a pot of marinara sauce for a quick pasta dish. To boost the flavor of this plain batch, I highly recommend adding 1 to 2 tablespoons of Bragg Liquid Aminos (about $4.29 a bottle at Sprouts) per pound of cooked meat. It provides a savory, slightly sweet, soy-free umami kick that doesn’t overpower the meat. A surprising trick I learned is to add a tiny pinch of MSG while cooking. It boosts the savory notes without making it taste like any specific cuisine. Batch cooking plain components instead of full recipes cured my mid-week food fatigue.

8 Pack 36oz Large Glass Meal Prep Containers with lids
If you want something that just works, 8 Pack 36oz Large Glass Meal Prep Containers with lids is a safe bet (866 reviews, 4.5 stars).
7. Build Firecracker and Mediterranean Bowls

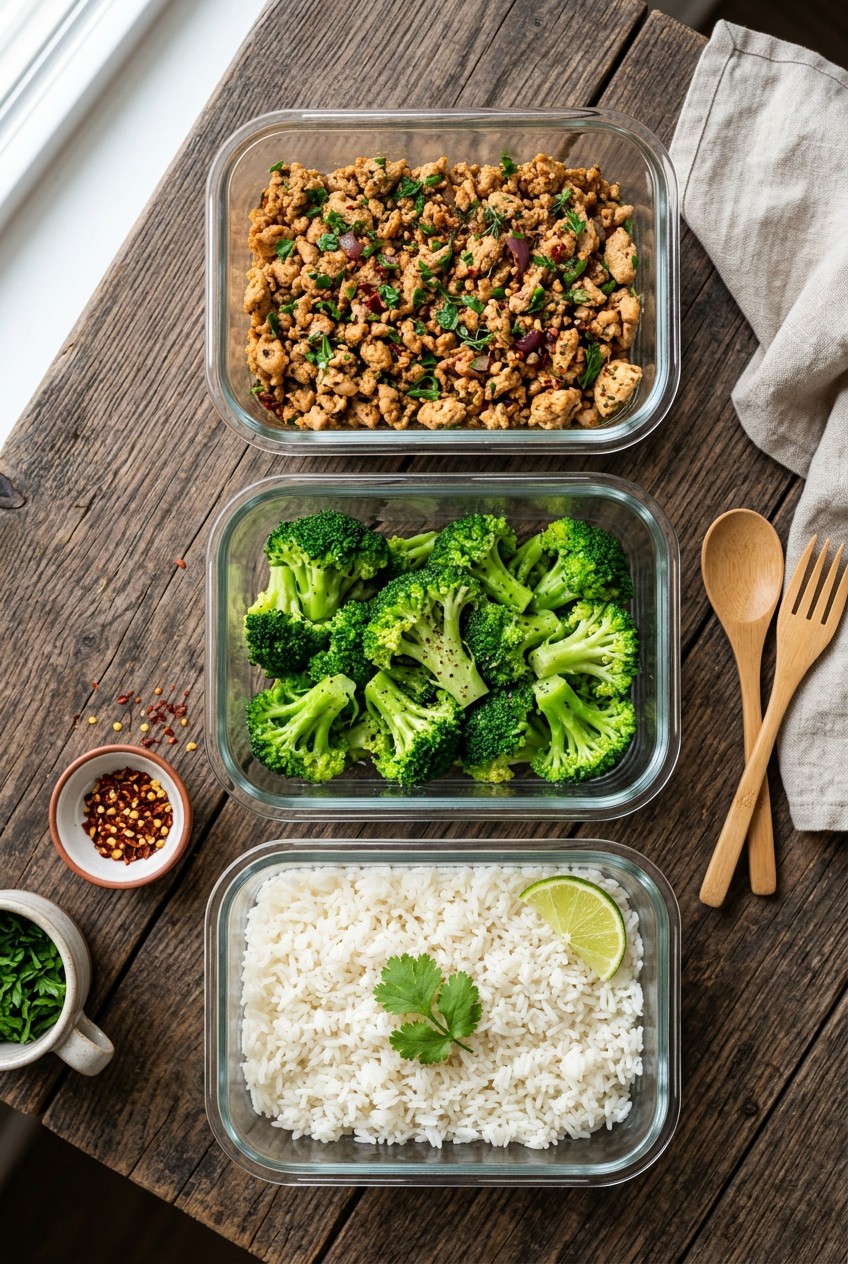
Trending meal formats for 2026 are all about versatile bowls and wraps, and I’m obsessed with them. They look beautiful in glass containers and they don’t get soggy. My current favorite is the Firecracker Bowl. You take 1 pound of cooked meat and toss it in a sticky sauce made from 1/3 cup of Frank’s RedHot sauce, 3 tablespoons of low-sodium soy sauce, and 3 tablespoons of dark brown sugar. Let it bubble in the pan until it gets thick and coats the meat perfectly. I serve this over jasmine rice with steamed broccoli. The sweet and spicy smell is unbelievable.
If I’m not in the mood for spicy food, I pivot to Mediterranean Bowls. I season the raw meat heavily with dried oregano, fresh lemon juice, and minced garlic. Once cooked, I portion it out with cooked brown rice, a fresh cucumber-tomato salad, kalamata olives, and a massive scoop of tzatziki sauce. I buy the Cava brand tzatziki at Whole Foods for about $5.99 because it has the best thick texture. I tried making my own tzatziki once, but I didn’t drain the cucumbers properly, and my entire bowl turned into a watery, milky soup by lunchtime. Stick to the store-bought stuff if you’re in a hurry. These two bowl variations keep my lunches exciting, and they require very little cooking time once the meat is browned.
8. The Right Way to Store and Freeze Your Prep

Proper refrigeration is non-negotiable. Cooked poultry should only be kept in the refrigerator for 3 to 4 days. I once pushed it to day six, and I deeply regretted that decision. Always store your food in airtight containers at or below 40 degrees Fahrenheit. I prefer using divided containers to keep wet ingredients away from dry ones. I use the Bentgo Glass lunch boxes (they run about $24.99 on Amazon or at Target). They have a tight silicone seal that prevents leaks.
One critical mistake I used to make was snapping the lid onto steaming hot food. I’d pack my hot lunches, seal them tight, and shove them in the fridge. The trapped steam created condensation, and by the next day, my food was sitting in a puddle of water. You must ensure the meat cools completely to room temperature within two hours before sealing and refrigerating. This stops bacterial growth and prevents soggy food. If you need your food to last longer than 4 days, freezing is your best friend. Properly stored, it can last up to 3 months in the freezer without a loss of quality. I portion out the cooled meat into heavy-duty Ziploc Freezer Bags (about $6.49 for a box), flatten them out so they stack easily, and label them with a black sharpie. Flattening the bags saves a ton of freezer space and helps the meat thaw twice as fast.
9. Reheating Without Ruining the Texture

You did all the hard work on Sunday, so please don’t ruin your food in the office microwave on Tuesday. Reheating is where perfectly good food goes to die. When reheating your stored meals, you must ensure it reaches an internal temperature of 165 degrees Fahrenheit for food safety. But blasting a plastic container on high for three minutes is a guaranteed way to create dry, stringy meat that smells faintly of wet dog.
To prevent it from drying out, you need to introduce moisture back into the environment. I always add exactly one tablespoon of water or chicken broth directly to the container before microwaving. Then, I drape a damp paper towel loosely over the top. This creates a mini steam room, gently heating the food while forcing moisture back into the protein fibers. I also recommend microwaving on 50% power for a slightly longer time rather than 100% power. It heats the food evenly so you aren’t left with a molten hot center and freezing cold edges. If I’m working from home, I skip the microwave. I dump the container into a small non-stick skillet over medium-low heat, add a splash of water, and cover it with a lid for about four minutes. The stovetop method restores the texture perfectly, making it taste like it was just cooked fresh that morning.
Honestly, mastering these steps changed my relationship with healthy eating. I no longer dread opening my fridge on a Wednesday. If you follow these temperatures, measurements, and storage tricks, you won’t have to suffer through dry, flavorless lunches again. I recommend starting with the batch-cooking method this weekend—it’s the easiest way to ease into the habit. If you found these tips helpful, please save or pin this article so you can reference the spice blends and cooking times during your next Sunday prep session!

Vtopmart 5Pack 22oz Glass Storage Containers with Lids
Vtopmart 5Pack 22oz Glass Storage Containers with Lids punches above its price — 32 buyers rated it 4.5 stars. I would buy it again.
Frequently Asked Questions
How long does ground chicken meal prep last in the fridge?
Cooked ground chicken safely lasts 3 to 4 days in the refrigerator. Store it in airtight glass or plastic containers at or below 40°F (4°C) to prevent bacterial growth and maintain freshness.
How do I keep ground chicken from drying out?
To prevent dryness, use a 92/8 fat ratio instead of 99% lean. Add a splash of chicken broth or water to the pan at the end of cooking, and always add a tablespoon of water before microwaving.
Can I freeze cooked ground chicken?
Yes, you can freeze it for up to 3 months. Let the meat cool completely, then store it in heavy-duty freezer bags or airtight containers. Flattening the bags helps save space and speeds up thawing.
What is the best way to brown ground chicken?
Heat a tablespoon of oil in a skillet over medium-high heat. Add the meat and let it sear completely undisturbed for 1 to 2 minutes until a dark crust forms, then gently break it apart.
