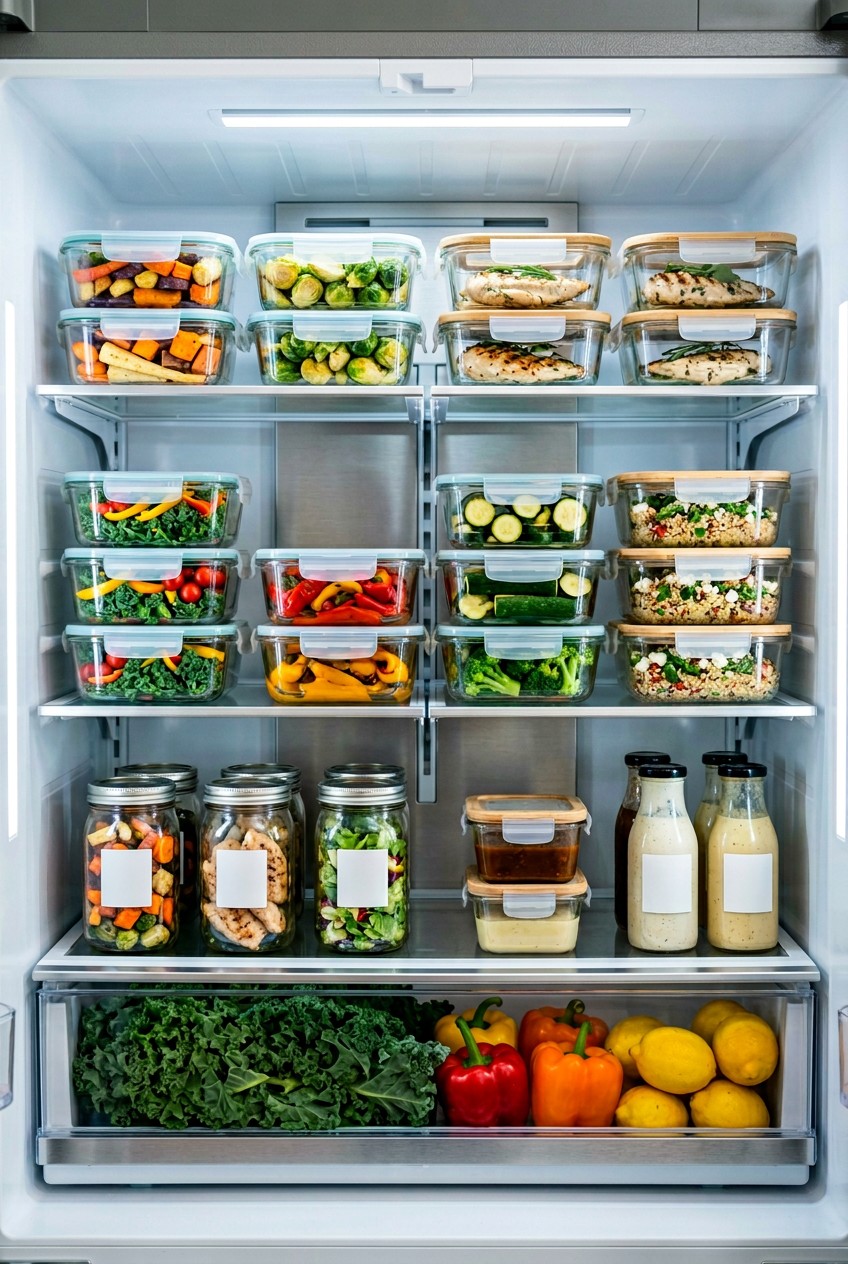
What’s Inside
- Master the Meat Shelf in Your Meal Prep Fridge
- Lock in Freshness with Heavy-Duty Glass Containers
- Strategize Your High-Protein Snack Storage
- The “Eat Me First” Bin for Your Meal Prep Fridge
- Hack Your Crisper Drawers for Crunchy Veggies
- Rapid Chilling for Big Batches of Protein
- Treat Your Fresh Herbs Like Cut Flowers
- Maximize Vertical Space for Shakes and Dressings
Last Tuesday at Whole Foods, I dropped a flimsy plastic container of chicken tikka masala right in the parking lot. The thin lid popped off instantly. Bright orange, oily sauce splattered all over my brand new white sneakers. The smell of cold curry paste baking on the hot asphalt was nauseating. That messy disaster forced me to rethink my meal prep fridge. I realized I was doing everything wrong. I used cheap containers that leaked. I shoved random proteins onto whatever shelf had open space. Half my groceries spoiled before Wednesday. It was a stressful, expensive nightmare. I’m writing this because you don’t have to live like that. A properly organized fridge changes your entire week. You save money. You actually want to eat the food you cooked. The textures stay crisp. The meats stay safe and juicy. I’ve spent the last six months testing every container, bin, and temperature hack I could find. Some failed miserably. Some fixed my Sunday routine. Let’s walk through the exact steps, products, and specific measurements I use to keep my high-protein meals fresh, safe, and satisfying all week long.
1. Master the Meat Shelf in Your Meal Prep Fridge

Most people get this wrong. I definitely did. Two years ago after a massive Target run, I shoved 4 lbs of raw chicken breast onto the top shelf. I didn’t think twice. The next morning, I opened the door to find sticky, pink chicken juice dripping down the back wall. It pooled directly onto a $2.99 head of crisp romaine lettuce sitting on the middle shelf. The smell of raw poultry slime on my fresh greens was disgusting. I had to throw the lettuce away and scrub the glass shelves for twenty minutes with bleach spray. No exaggeration. Now, I strictly use the bottom shelf for all raw meats. It’s the coldest part of the fridge and stops cross-contamination from drips. I swear by storing my raw Costco chicken inside a Rubbermaid Brilliance 9.6-cup plastic container. It costs $16.99 and has a leak-proof seal. I also learned that built-in fridge dials are total liars. My fridge said it was cold enough, but my food kept spoiling. I bought a basic Taylor appliance thermometer for $6.99 at Walmart. I clip it to the wire rack on the bottom shelf. You must keep your fridge at 40 degrees Fahrenheit or below. If your cooked chicken sits above 40 degrees for more than two hours, bacteria multiplies like crazy. I keep my dial adjusted so the thermometer always reads 37 degrees. It keeps my 6 oz portions of grilled steak tasting fresh by Thursday.
2. Lock in Freshness with Heavy-Duty Glass Containers

Skip the cheap plastic takeout tubs. I tried those flimsy black containers with clear lids for months before figuring out they were ruining my food. I prepped 6 oz of ground turkey and 1/2 cup of quinoa seasoned with turmeric and garlic powder. I microwaved it at the office on Wednesday. The plastic absorbed all the oils. It stained a hideous neon yellow. Even after scrubbing with Dawn and scalding water, the plastic smelled like rancid garlic. It made my fresh berries taste like onions the next week. Gross. Now, I use borosilicate glass for my main meals. Glass doesn’t absorb odors or colors. I bought a 5-pack of Pyrex Simply Store 3-cup rectangular containers for $22.99 at Target. They hold around 24 ounces, the perfect size for a high-protein lunch. The solid clink of the glass when you stack them feels high quality. I can pull a glass container of baked salmon from the cold fridge and pop it into the microwave without worrying about chemicals leaching into my lunch. I’ve noticed my roasted broccoli stays firmer in glass. The airtight silicone rims on the Pyrex lids lock out dry fridge air. Investing in quality materials pays off. When you microwave plastic, it warps over time. My Pyrex glass looks brand new even after hundreds of dishwasher cycles. If you’re serious about Sunday prep, upgrade to glass.
3. Strategize Your High-Protein Snack Storage

Snacks are where my diet usually falls apart. If I don’t have protein ready, I’ll eat an entire bag of tortilla chips. Last Sunday during my Trader Joe’s run, I bought two dozen eggs and a massive pack of string cheese. I boiled the eggs, peeled them, and tossed them into a thin sandwich baggie. Huge mistake. By Tuesday, my fridge smelled like sulfur. Every time I opened the door, I got hit with the scent of hard-boiled eggs. It seeped into my fresh strawberries. I had to throw the fruit away. That’s when I bought Stasher reusable silicone bags. They’re thick, durable, and airtight. A single sandwich-sized Stasher bag costs $12.99 at Whole Foods. The tight snap of the pinch-loc seal is satisfying. It traps the sulfur smell. I portion out 2 hard-boiled eggs and 1 oz of raw almonds into each bag. I line them up vertically in the door shelf. They don’t slide around. When I’m rushing out at 7 AM, I just grab a bag. I also use the smaller snack-sized Stasher bags ($9.99 each) for 2 tablespoons of hummus and a handful of baby carrots. Silicone is dishwasher safe, so cleaning them takes thirty seconds. You can even freeze marinated chicken in the larger half-gallon Stasher bags. It’s changed how I organize my quick bites. You might also like: 20 Inspiring Meal Prep Ideas for Any Style

8 Pack 36oz Large Glass Meal Prep Containers with lids
8 Pack 36oz Large Glass Meal Prep Containers with lids has been one of the most consistently praised picks in this category. 866 reviewers averaged 4.5/5.
4. The “Eat Me First” Bin for Your Meal Prep Fridge

We all have that dark, scary corner at the back of the bottom shelf. Last month, I reached into the back and pulled out a container of leftover grilled salmon. I had prepped it two weeks prior and forgot it existed. The sour, pungent smell of rotting fish hit my nose. The edges were gray and slimy. I wasted a beautiful 4 oz filet of wild-caught salmon because I lost track. Throwing away expensive protein hurts. To fix this, I implemented an “Eat Me First” bin. This changed how I manage leftovers. I bought a clear, plastic Fridge Binz organizer from The Home Edit collection. It cost $19.99 at Walmart. I keep it front and center on the middle shelf. Anything that expires in 48 hours goes straight in. I label everything. I use a roll of beige masking tape ($3.50 at Kroger) and a black Sharpie. The squeak of the marker on the tape is part of my Sunday ritual now. I write the prep date and the discard date. For example, my tape will say “Turkey Meatballs: Cooked 10/12, Use by 10/16”. No more guessing if that chicken is safe. The clear bin forces me to look at expiring food every time I open the door. I haven’t thrown away a single piece of spoiled meat since. You might also like: 20 Clever Quick Lunch Ideas You Haven’t Thought Of
5. Hack Your Crisper Drawers for Crunchy Veggies

I used to think the little sliding vents on crisper drawers were decorative. I ignored them. During a trip to Sprouts, I spent twenty dollars on crisp celery, fresh spinach, and expensive bell peppers. I tossed them into the same drawer and left the vent wide open. Three days later, the spinach was a slimy, dark green mush. The celery was limp and rubbery. It bent without snapping. The texture was awful. I learned that the hard way. Now, I use the high humidity setting (vent closed) for all my leafy greens, broccoli, and chopped carrots. It traps moisture and stops wilting. For ethylene-producing fruits like apples and pears, I use the low humidity setting (vent open) in a separate drawer. Ethylene gas makes other vegetables rot faster, so keep them separated. I also have a hack for prepped carrots. I chop 2 cups of baby carrots and submerge them entirely in 16 oz of cold tap water inside a 32 oz Ball Mason jar. The jar costs about $14.99 for a 12-pack at Kroger. I change the water every morning. On day five, when I bite into a carrot stick, the crisp crunch echoes in my kitchen. They stay firm and hydrated all week. You might also like: 15 Creative Healthy Meal Prep Ideas That Make a Real Difference
6. Rapid Chilling for Big Batches of Protein

Sunday meal prep usually means cooking in bulk. Last winter, I made an 8-quart stockpot of spicy turkey chili. I was exhausted by 8 PM, so I just slapped the lid on the steaming pot and shoved it onto the middle shelf. That was a horrible idea. The radiant heat from the pot warmed the entire fridge. It stayed warm for hours. The next morning, I poured milk into my coffee. The sour, acidic tang of spoiled milk ruined my morning. The hot chili raised the fridge temperature so much that my dairy went bad. Now, I practice rapid chilling. You’ve got to cool your food from 140 degrees down to 70 degrees within two hours to stop bacteria. I take my massive batch of Costco ground beef chili ($24.99 for a 3 lb pack) and divide it immediately. I scoop 1.5-cup portions into shallow Pyrex glass containers. Spreading the food out into shallow layers allows the heat to escape fast. I leave the lids off and let them sit on the counter for thirty minutes until the steam stops. Then, I move the containers into the fridge, leaving an inch of space between each glass bowl so air can circulate. Overpacking blocks air vents and creates dangerous warm spots. Give your containers room to breathe.

M MCIRCO 10-Pack,30 Oz Glass Meal Prep Containers 2
M MCIRCO 10-Pack has been one of the most consistently praised picks in this category. 23 reviewers averaged 4.5/5.
7. Treat Your Fresh Herbs Like Cut Flowers

Fresh herbs are the secret to making high-protein meals taste amazing. But storing them is frustrating if you don’t know the tricks. I bought a fragrant $3.49 bunch of fresh basil from Whole Foods for chicken pesto. I tossed the plastic clamshell into the coldest part of my fridge. The next afternoon, I opened the box to find a slimy, black mess. The cold temperature destroyed the delicate leaves. I had to throw the entire batch away. Basil hates the cold. Took me years to figure out. Now, I trim the stems and keep my basil in a glass of water on the counter at room temperature. For tender herbs like cilantro and parsley, the fridge is perfect if you treat them like a bouquet. I trim a half-inch off the bottom. I place the bunch upright in a 12 oz Weck glass jar ($28 for a 6-pack on Amazon). I pour an inch of cold water into the jar. Then, I loosely drape a thin produce bag over the top to trap humidity. I store the jar on the top shelf. The citrusy scent of the cilantro stays potent for three weeks. For woody herbs like rosemary, I wrap the sprigs in a damp paper towel and seal them in a plastic bag in the crisper drawer.
8. Maximize Vertical Space for Shakes and Dressings

Running out of shelf space is the most annoying part of Sunday prep. I used to stack random plastic containers until they formed a leaning tower. One morning, I bumped a tall, skinny bottle of buffalo sauce while reaching for my yogurt. The bottle tipped, fell off the shelf, and shattered on the kitchen floor. The sticky, red, vinegar-smelling mess took thirty minutes to mop up. Infuriating. I realized I wasn’t using my vertical space properly. I started using 8 oz Ball Mason jars ($11.99 for a 12-pack at Walmart) for all my liquid prep. I portion out 2 tablespoons of homemade Greek yogurt ranch dressing into the tiny jars. The tight metal click of screwing on the lid guarantees they won’t leak. To double my shelf space, I bought a metal quarter sheet pan and a wire cooling rack for $13.99 at Target. I place the wire rack over my shallow containers of chicken breast, creating a sturdy second shelf. I stack my tiny dressing jars on the wire rack. I also use a hack for the fridge door. I cut the top half off a cardboard egg carton and place the bottom half in the door shelf. I store all my condiment bottles upside down in the egg holes. They never topple over, and the thick sauces are ready to squeeze out.
Getting your fridge organized isn’t just about making it look pretty. It’s about protecting the time, money, and effort you spend on Sunday afternoons. When I open my fridge and see perfectly stacked glass containers, bright green herbs, and labeled proteins, I feel excited to eat my meals. I don’t stress about sniffing old chicken or finding fuzzy berries in the back drawer anymore. Skip the cheap plastic, buy a roll of masking tape, and start utilizing your crisper drawers correctly. You’ll notice the difference in the texture of your food immediately. If you’re tired of throwing away spoiled groceries and eating soggy vegetables, try two or three of these hacks this weekend. Pin this article to your favorite meal prep board so you have the container sizes and temperature rules saved for your next grocery run. You’ve got this.
Frequently Asked Questions
How cold should a meal prep fridge be?
Your fridge should be set to 40°F (4°C) or below. I highly recommend using a cheap appliance thermometer to verify the exact temperature, as built-in dials aren’t always accurate. This prevents rapid bacterial growth on your prepped proteins.
What are the best containers for a meal prep fridge?
Borosilicate glass containers are the absolute best choice. They won’t absorb food odors or stains like cheap plastic does. Brands like Pyrex are oven, microwave, and dishwasher safe, making reheating your high-protein meals incredibly easy and safe.
Where should raw meat go in a meal prep fridge?
Always store raw meat, poultry, and seafood in sealed, leak-proof containers on the very bottom shelf of your fridge. This is the coldest spot and prevents raw juices from dripping down and contaminating your fresh produce.
How long do prepped meals last in the fridge?
Properly stored cooked meats, like grilled chicken or ground turkey, generally last 3 to 4 days in an airtight container. I always label my containers with masking tape and a ‘use by’ date so I don’t have to guess.
