What’s Inside
- Invest in Quality Containers for Whole Food Meal Prep
- Master the 50/25/25 Rule to Keep Things Balanced
- Batch Cook Components, Not Just Full Meals
- Prioritize Protein Portions for Satiety
- Embrace Cook Once, Eat Twice With Intentional Leftovers
- Pre-Prep Produce Immediately Upon Purchase
- Utilize Your Freezer Strategically for Longevity
- Use Smart Kitchen Gadgets for Whole Food Meal Prep
I sat on my kitchen floor last Tuesday at Whole Foods, staring at a bag of slimy, brown spinach that cost me $6.99. I’m not proud of it, but crying over rotten produce is exactly why I finally figured out whole food meal prep. If you’re tired of throwing away expensive groceries by Thursday, you’re in the right place. Whole food meal prep doesn’t have to mean eating bland chicken and soggy broccoli for five days straight. I tried this wrong for months before figuring it out. I’d spend six hours on Sunday cooking elaborate recipes, only to end up with a fridge full of food I didn’t actually want to eat. It’s frustrating. Let’s fix that. Here are the exact strategies I use to keep things fresh, crunchy, and actually edible all week long. Seriously. It’s a total win.
1. Invest in Quality Containers for Whole Food Meal Prep

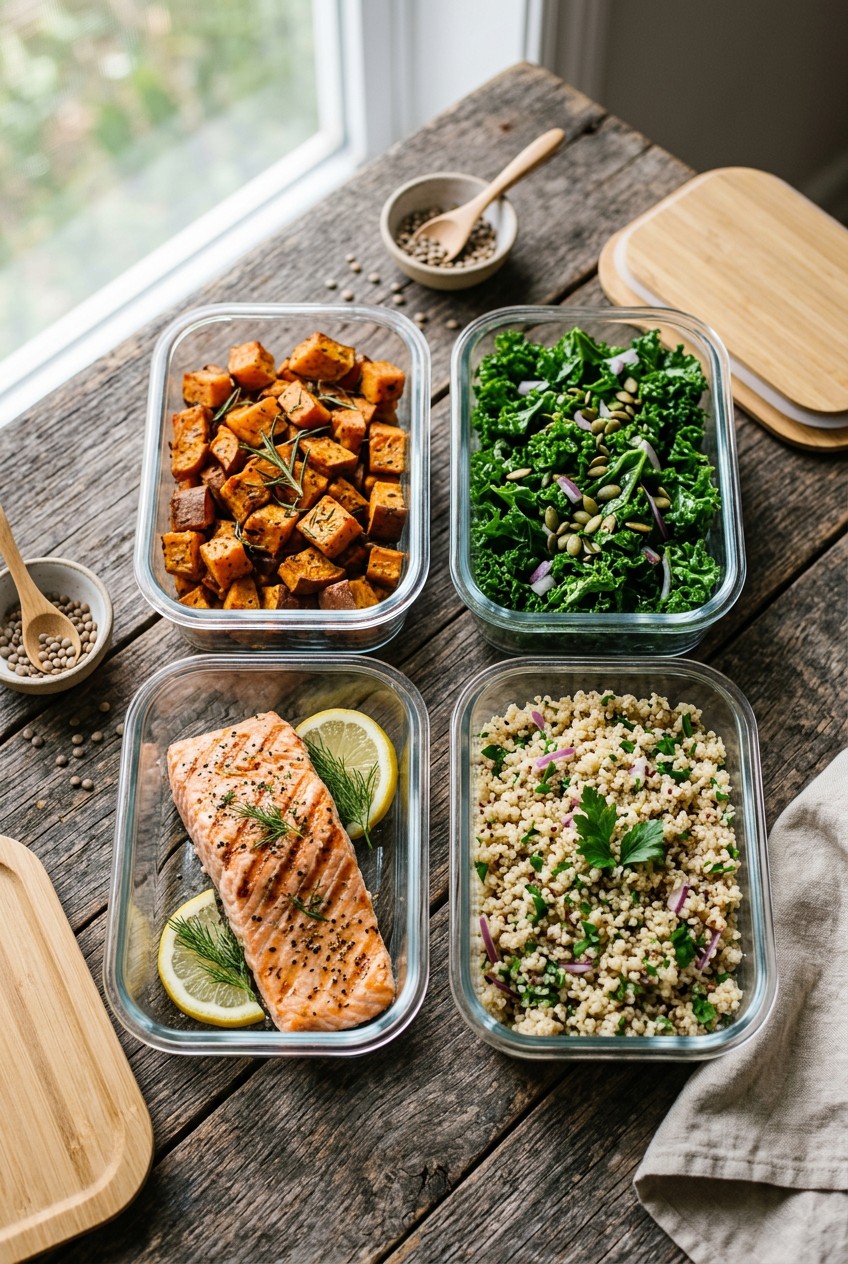
I’m going to be brutally honest about cheap plastic containers. They’re garbage. Last year, I bought a flimsy set on clearance at Target for $9.99. Two days later, my tomato basil soup leaked all over the passenger seat of my car. The sickeningly sweet smell of old garlic and stale tomatoes lingered in my upholstery for a solid month. You can’t skip investing in good storage. For whole food meal prep, you need containers that won’t warp in the microwave or stain bright orange the second they touch chili. I personally swear by the Glasslock 18-Piece Set. I paid exactly $39.99 for mine on Amazon, and they’re practically indestructible. The glass is non-reactive, meaning your roasted red peppers won’t taste like last week’s curry. When I prep my 4 oz portions of salmon, I want to know the smell won’t seep into my fridge. Glass containers solve this completely.
If you prefer plastic because it’s lighter to carry to work, the Rubbermaid Brilliance containers are incredible. A 10-piece set runs about $25 to $35. They snap shut with a satisfying click, and the thick acrylic material stays crystal clear. I’ve dropped one full of 2 cups of lentil soup onto my driveway, and the lid didn’t even pop off. If you’re freezing meals, the Pyrex Ultimate 10-Piece Set usually costs around $45 to $55. The silicone edges on the lids create an airtight seal that prevents freezer burn. Skip the flimsy plastic takeout tubs. They crack, they leak, and they make your food taste like wet cardboard. Spending fifty bucks now will save you hundreds in ruined groceries and car detailing bills. I learned that the hard way.
2. Master the 50/25/25 Rule to Keep Things Balanced

Most people get this wrong when they start cooking in bulk. I definitely did. I’d load up a massive plastic tub with 2 cups of brown rice and 6 oz of dry chicken breast, with maybe three sad florets of broccoli on the side. By 2 PM, I felt like I’d swallowed a brick. You’re going to feel terrible if you don’t balance your macros. I always follow the 50/25/25 rule dietitians talk about, and honestly this changed how I portion everything. Half your container should be colorful fruits and vegetables. A quarter goes to lean protein, and the last quarter is for whole grains or starchy vegetables.
Last Sunday at Sprouts, I bought 2 pounds of sweet potatoes for $3.49 and a massive bunch of kale for $2.99. I roasted the sweet potatoes in 2 tablespoons of olive oil and massaged the kale with a little lemon juice. When I built my lunches, I packed exactly 1/2 cup of roasted sweet potatoes, 4 oz of grilled turkey breast, and filled the entire rest of the container with the dark, leafy greens. I also like to add 1 ounce of almonds right on top of the greens for extra crunch. That’s exactly 23 almonds, which adds healthy fats to keep you satiated. The visual difference is huge. Instead of a beige, depressing meal, you get a vibrant, crunchy, satisfying plate. This ratio ensures you get enough fiber to actually digest your food properly. I won’t ever go back to the old meat-and-rice mountains. If you’re struggling to eyeball the portions, just draw an imaginary peace sign on your plate. The biggest section gets the veggies. It’s a simple trick, but it stops you from overeating heavy carbs while still keeping you full.
3. Batch Cook Components, Not Just Full Meals

I tried making five identical servings of lemon pepper chicken and asparagus for months. By Wednesday, the asparagus turned into a mushy, sulfur-smelling disaster that made my entire office kitchen reek when I microwaved it. By Thursday, I couldn’t stomach the thought of eating the exact same flavor profile again. Palate fatigue is real, and it’s the number one reason people abandon their healthy habits and order a $25 pizza instead. The secret is batch cooking versatile components instead of fully assembled recipes. You might also like: 15 Clever Family Dinner Ideas for a Fresh New Look
When I hit Costco on a Saturday morning, I grab a massive pack of raw chicken breasts for about $14.99. I’ll roast 3 pounds of chicken with just basic salt, black pepper, and 1 tablespoon of garlic powder. I keep the seasoning neutral on purpose. Then, I cook 6 cups of quinoa or brown rice. I highly recommend buying a large 32 oz bag of organic quinoa from Costco for $9.99. It lasts for weeks and provides a perfect blank canvas. Finally, I chop a mountain of raw vegetables. I’ll slice 3 bell peppers, dice 2 red onions, and cut up 1 head of broccoli. I store all these components in separate containers in the fridge. On Monday, I might take 4 oz of that plain chicken, 1/2 cup of quinoa, and the raw bell peppers, tossing them in a peanut sauce for a Thai-inspired bowl. On Tuesday, I’ll take another 4 oz of chicken, mix it with the broccoli, and heat it up with 2 tablespoons of marinara sauce. It’s the exact same base ingredients, but it tastes completely different. You aren’t locking yourself into one flavor for the entire week. This method gives you the flexibility to crave what you’re eating. Plus, raw chopped vegetables stay incredibly crisp in the fridge, whereas cooked vegetables turn into a soggy mess after three days. Trust me on this. You might also like: 15 Cozy Easy Dinner Ideas for Every Budget

8 Pack 36oz Large Glass Meal Prep Containers with lids
Honestly, 8 Pack 36oz Large Glass Meal Prep Containers with lids surprised me — sturdier than it looks in the photos, and over 866 buyers gave it 4.5 stars.
4. Prioritize Protein Portions for Satiety

If you’re constantly starving an hour after eating your carefully packed lunch, you aren’t eating enough protein. I used to pack these massive salads with 4 cups of spinach, a few cherry tomatoes, and exactly three thin slices of grilled chicken. I thought I was being so healthy. In reality, my stomach would be growling aggressively during my 2 PM meetings. You need between 20 to 40 grams of protein per meal to support muscle synthesis and actually feel full. A good visual guide is a palm-sized portion of cooked meat, which usually equates to about 3 to 4 ounces. But honestly, eyeballing it is a terrible idea when you’re first starting out. You might also like: 15 Stunning Lunch Weekly Meal Prep Ideas You Haven’t Thought Of
I personally swear by using a digital scale. I bought the Vitafit 15kg Digital Kitchen Scale on Amazon for $22.99, and it sits permanently on my kitchen counter. Weighing cold, slightly slimy chicken breasts isn’t the most glamorous part of cooking, especially when the juices get on your fingers, but it’s entirely necessary. I place my glass container on the scale, hit the tare button, and add exactly 4 oz of shredded pork or beef. It takes two seconds. Just spend the $20 on a scale. It takes the guesswork out of everything. If you prefer plant-based options, you need to measure those carefully too. I’ll measure out exactly 1 cup of cooked lentils or 3/4 cup of black beans. Don’t shy away from healthy fats either, because they work alongside protein to kill hunger. I always add 1 tablespoon of chia seeds to my morning oats or slice 1/2 of a fresh avocado over my afternoon turkey bowl. The combination of precise protein measurements and a hit of healthy fat completely eliminates that desperate afternoon sugar craving. Skip the fat-free stuff entirely. It tastes like wet cardboard and leaves you hungry.
5. Embrace Cook Once, Eat Twice With Intentional Leftovers

Cooking every single meal from scratch every day is a guaranteed way to burn out. I used to spend an hour making dinner, clean the kitchen, and then immediately pull out cutting boards again to prep my lunch for the next day. It’s exhausting. The smartest thing I’ve ever done is embrace the concept of intentional leftovers. If I’m already heating up my oven to 400 degrees, I’m absolutely going to maximize that space.
Last Thursday at Trader Joe’s, I bought two 16 oz bags of Brussels sprouts for $2.99 each. Instead of roasting just one bag for my evening meal, I chopped and roasted both bags on two separate baking sheets. I tossed them in 3 tablespoons of avocado oil and a heavy pinch of sea salt. The charred, crispy edges of those roasted sprouts are incredible fresh out of the oven, but they also hold up beautifully in the fridge. I ate half for dinner alongside a piece of steak, and immediately packed the rest into three separate containers for my weekend lunches. You’re cutting your kitchen time in half without sacrificing any flavor. This rule applies to everything. If you’re boiling water for 1 cup of pasta, boil 3 cups instead. If you’re making a vinaigrette, make a triple batch. My favorite chefs always suggest preparing all your liquid components like sauces and dressings at the very beginning of your session anyway. I’ll whisk together 1/4 cup of olive oil, 2 tablespoons of balsamic vinegar, and 1 teaspoon of Dijon mustard in a mason jar. Making the dressing first lets the flavors meld together beautifully, and it prevents that chaotic last-minute scrambling when you’re trying to pack your bag for work. Just remember to store your dressings in a separate tiny container. Pouring it over your greens on Sunday will leave you with a slimy, wilted mess by Tuesday.
6. Pre-Prep Produce Immediately Upon Purchase

The absolute worst feeling is opening your crisper drawer and finding a puddle of brown slime where your expensive organic lettuce used to be. I’ve thrown away so much money because I shoved my groceries straight into the fridge after getting home from Kroger. You can’t just toss produce in the fridge and hope for the best. You have to process it immediately. As soon as I walk through the door, I wash all my leafy greens.
I use a large 5-quart salad spinner that I picked up for $24.99 at a local home goods store. You wash the greens, spin them aggressively until they’re bone dry, and then pack them into a large container lined with dry paper towels. The paper towels absorb any lingering moisture, which is the main culprit behind rotting leaves. This one step keeps my spinach crisp for up to a full week. If you ever find your greens looking a bit sad and droopy, don’t throw them out. You can revive wilted greens by soaking them in a large bowl of ice water for 10 to 15 minutes. The cold water shocks the plant cells, bringing back that satisfying crisp snap. It’s basically magic. For heartier vegetables like carrots, celery, or peeled potatoes, I chop them up right away. I’ll cut 4 large carrots into sticks and store them completely submerged in a container of cold tap water in the fridge. You just need to change the water every day or two. This keeps them incredibly crunchy. For things like broccoli or cauliflower, I cut them into small florets and store them in a container with a slightly vented lid. Prepping produce takes an extra 20 minutes on grocery day, but it saves you hours during the week.

Skroam 10 Pack Glass Meal Prep Containers
Skroam 10 Pack Glass Meal Prep Containers has been one of the most consistently praised picks in this category. 56 reviewers averaged 4.5/5.
7. Utilize Your Freezer Strategically for Longevity

A major mistake I made early on was trying to prep food for a full seven days and leaving it all in the refrigerator. By day six, my cooked chicken smelled distinctly sour, and I ended up with a horrible case of food poisoning. It’s a hard lesson, but you should never keep cooked meat in the fridge longer than three to five days. If you’re prepping meals intended to last beyond that safe window, your freezer is your best friend. Cooked proteins, hearty stews, and thick soups can safely live in the freezer for two to three months.
I’m obsessed with using silicone freezing trays for this. I bought a set of Souper Cubes from Target for $19.99 per tray, and they’re brilliant. They have distinct compartments that hold exactly 1 cup or 1/2 cup of liquid. I’ll pour my leftover turkey chili into the compartments, freeze it solid overnight, and then pop out the frozen bricks the next morning. I transfer those perfect cubes into a large gallon-sized freezer bag. It saves so much space. When I need a quick meal, I just grab one 1-cup brick of chili and microwave it. To prevent food waste and keep track of everything, you absolutely must practice the FIFO method. It stands for First In, First Out. I keep a black sharpie and a roll of masking tape in my kitchen drawer. I label every single container with the exact meal name and the preparation date. When I stack them in the fridge or freezer, the oldest meals go right in the front. This forces me to eat the Tuesday chicken before I touch the Thursday beef. It’s a simple restaurant trick, but it stops perfectly good food from dying in the back of your freezer.
8. Use Smart Kitchen Gadgets for Whole Food Meal Prep

I used to chop onions by hand with a dull knife, crying my eyes out while my cutting board slid all over the counter. It took forever. Modern cooking doesn’t have to be a manual labor intensive chore. If you want to succeed at whole food meal prep, you need to use smart kitchen gadgets that do the heavy lifting for you. Last month at Walmart, I finally bought the Fullstar 4-in-1 Vegetable Chopper for $24.99. I was skeptical, but it’s incredible. You place a quarter of a raw onion on the stainless steel grate, press down firmly, and you instantly get perfectly uniform diced onions in the catch tray below. I can dice 3 whole bell peppers, 2 onions, and 4 zucchini in under five minutes. It drastically reduces your prep time.
Another essential is a smart multi-function cooker. I use a standard 6-quart Instant Pot that cost me about $89. It handles pressure cooking, slow cooking, and sautéing all in one single pot. I’ll toss in 2 pounds of tough beef chuck roast, 1 cup of beef broth, and a handful of spices, and in 45 minutes I pull out incredibly tender shredded beef that would normally take four hours in an oven. I also won’t hesitate to rely on healthy convenience foods when I’m exhausted. While I prefer fresh ingredients, keeping a few bags of frozen vegetables in the freezer is a lifesaver. Flash-frozen green beans are often more nutrient-dense than the fresh ones that have been sitting on a truck for a week. I also buy bags of pre-riced cauliflower for $2.49 and cans of black beans for 89 cents. Just make sure you rinse canned beans thoroughly under cold water to wash away the excess sodium. Combining fresh produce with smart gadgets and frozen staples makes the whole process effortless.
Whole food meal prep doesn’t require a culinary degree or sacrificing your entire Sunday. It just requires a bit of strategy and the right tools. I’ve ruined enough expensive groceries to know that tossing hot food into cheap plastic or leaving wet spinach in a bag is a recipe for disaster. Once you get your hands on some solid glass containers, a kitchen scale, and a vegetable chopper, everything clicks into place. Start small this week. Try roasting one extra pan of vegetables or freezing a few cubes of leftover soup. You’ll be amazed at how much time and money you save when you aren’t panic-ordering takeout on a Wednesday night. No exaggeration.
I highly recommend pinning this guide or saving it to your favorite recipe board so you can reference these exact measurements and temperatures later. Happy prepping, and please, don’t forget to dry your leafy greens!
Frequently Asked Questions
How long do whole food meal prep containers last in the fridge?
Keep cooked meats and chopped veggies in the fridge for 3 to 5 days. Anything past that window needs to go in the freezer to prevent food poisoning.
What are the best containers for whole food meal prep?
I highly suggest glass options like the Pyrex Ultimate or Glasslock sets. They don’t absorb smells or stains. For plastic, Rubbermaid Brilliance is a fantastic, leak-proof alternative.
Do I need to cook full meals for meal prep?
Not at all. Batch cooking individual components like plain brown rice, roasted chicken, and raw chopped peppers prevents palate fatigue and lets you mix flavors daily.
How do I keep greens fresh during meal prep?
Wash them immediately in a salad spinner, dry them completely, and store them in a container lined with paper towels. You can also revive wilted greens in an ice bath.
