What’s Inside
- Stop Buying Dumb Manual Cookers
- The Freezer-to-Slow Cooker Bag Method Saved My Sanity
- You’re Probably Drowning Your Food
- Layering Matters for Slow Cooker Meal Prep
- Thaw Your Meat First, Seriously
- Searing Before Cooking Isn’t Optional
- Stop Lifting the Lid Every Hour
- Silicone Dividers Are the Ultimate Slow Cooker Meal Prep Hack
- Add Dairy and Herbs at the Very End
- Never Lock the Lid While Cooking
- Storing Your Batch Like a Pro
I stared at the grayish, rubbery chicken swimming in a pool of watery broth last Tuesday at the Whole Foods checkout. My cart was full of expensive ingredients I was about to ruin. Slow cooker meal prep used to be my biggest kitchen failure. I’m embarrassed to admit how many times I’ve choked down mushy carrots because I thought it just meant dumping raw food into a pot and praying. It doesn’t work like that. I tried this wrong for months before figuring it out. You can’t just toss random groceries into a ceramic bowl and expect a miracle. If your vegetables aren’t tender and your meat tastes like wet cardboard, you need a real strategy. Let’s fix your Sunday routine right now.
1. Stop Buying Dumb Manual Cookers

I used a cheap, manual slow cooker I found at a garage sale for my first year of prepping. I’d leave for work at 8 AM, and by the time I got home at 6 PM, my 2 lbs of chicken breasts were completely obliterated. They tasted like dry, stringy chalk. If you’re serious about this, buy a programmable model with an automatic warm function. I personally swear by the Hamilton Beach Set & Forget 6-Quart Programmable Slow Cooker. It’s usually $74.99 at Target. You set the exact cooking time, and once it hits that mark, it automatically drops to a safe holding temperature. No more overcooked mush. For basic batch cooking, a 6 to 8-quart size is exactly what you need. Anything smaller, and you can’t fit enough food for a full week of lunches. Anything larger, and you’re just wasting counter space. I learned this the hard way when I tried to cram 4 lbs of beef stew into a tiny 3-quart pot. The liquid bubbled over the sides, crusted onto the heating element, and smelled like burning tires for three days. Trust me. Skip the cheap manual dials. Spending the extra forty bucks on a digital timer will save you hundreds of dollars in ruined groceries.
2. The Freezer-to-Slow Cooker Bag Method Saved My Sanity

Let’s talk about mornings. I used to wake up at 6 AM, frantically chopping onions and raw meat while half asleep. I’d inevitably spill sticky chicken juice all over my clean counters. Honestly, this changed how I approach my entire week. It’s called the freezer-to-slow cooker bag method. You prep all your raw ingredients, minus the heavy liquids, and freeze them flat in a gallon bag. I exclusively use GLAD Snap Lock Reseal Bags. A box of 35 gallon bags is exactly $5.49 at Kroger. You just write the cooking instructions on the outside with a permanent marker. “Cook 8 hours on low, add 1 cup broth.” I do all of this on Sunday afternoon. I chop 3 cups of broccoli, dice 1 whole yellow onion, and cube 2 lbs of pork shoulder. I toss it all into the bag with my spices and freeze it flat. The night before I want to cook it, I move the bag to the fridge to thaw. In the morning, I just dump the thawed contents into the pot, add my liquid, and press start. It takes thirty seconds. Most people get this wrong by trying to freeze potatoes in these bags. Don’t do it. Potatoes turn black and get a weird, spongy texture. Stick to hearty vegetables like carrots or peppers.
3. You’re Probably Drowning Your Food

You’re probably drowning your food in liquid. I see this mistake constantly. Traditional stovetop recipes rely on evaporation to thicken sauces and concentrate flavors. Slow cookers do the exact opposite. The heavy lid traps all the moisture inside. As your meat and vegetables cook, they release their own juices into the pot. If you pour in 4 cups of broth like a regular soup recipe calls for, you’ll end up with a watery, flavorless disaster. I’ve ruined so many batches of chili this way. I’d open the lid expecting a thick, rich stew, only to find a pale red soup that tasted like dishwater. The golden rule is to reduce the liquid from standard recipes by one-third to one-half. You only need enough liquid to cover about three-quarters of your meat. I usually use Swanson Low Sodium Chicken Broth. A 32 oz carton is $2.89 at Walmart, and I rarely use more than 1 or 2 cups for a standard recipe. If you’re cooking a fatty piece of meat like a 3 lb chuck roast, you need even less liquid because the fat will melt down. This was a hard lesson to learn. I thought more liquid meant juicier meat. It doesn’t. It just boils the meat instead of braising it. Trust the process. Let the natural juices do the heavy lifting. You might also like: 15 Cozy Easy Dinner Ideas for Every Budget

8 Pack 36oz Large Glass Meal Prep Containers with lids
A dependable everyday pick — 8 Pack 36oz Large Glass Meal Prep Containers with lids pulls in 866 ratings at 4.5 stars. Not flashy, just solid.
4. Layering Matters for Slow Cooker Meal Prep

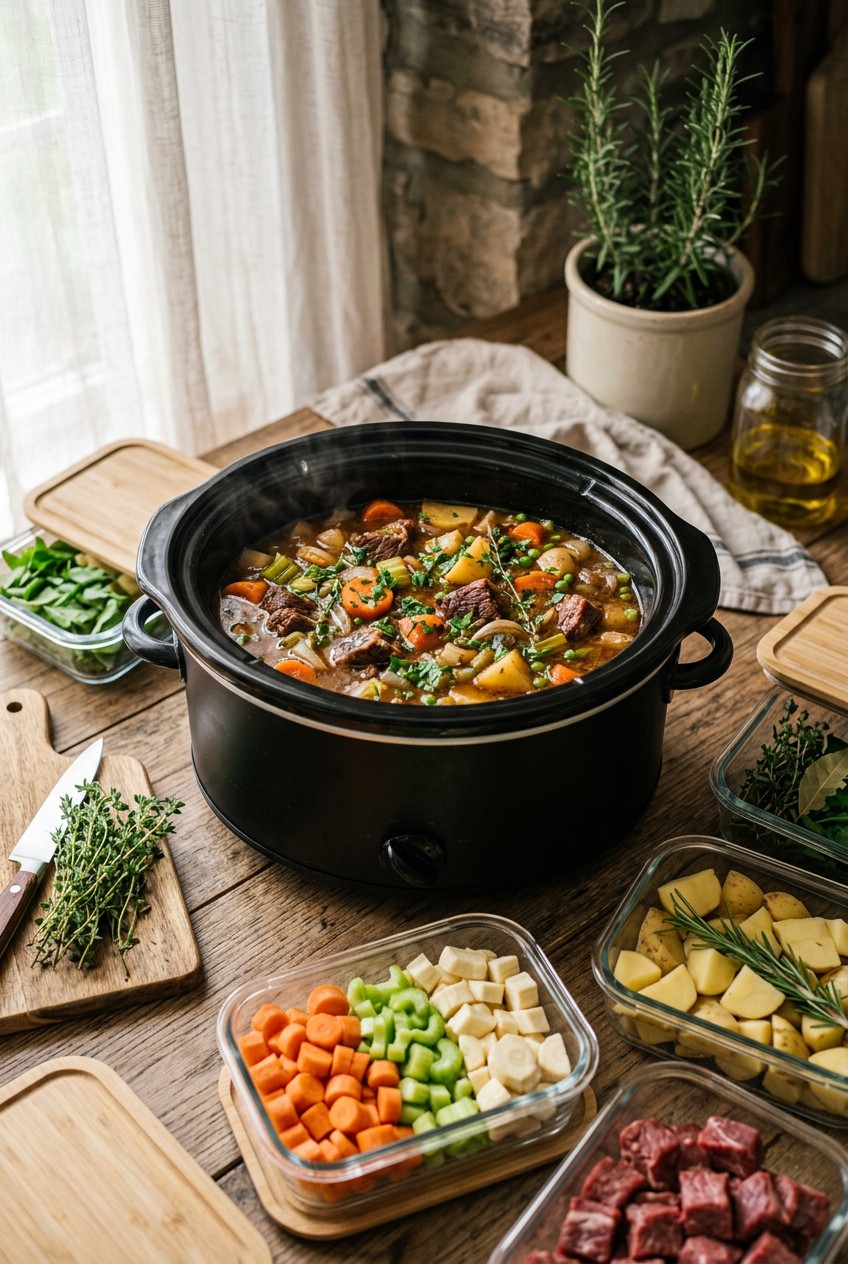
Throwing everything into the pot randomly is a massive rookie mistake. I used to just dump my grocery bags straight into the ceramic insert. I’d put 2 lbs of chicken breasts on the bottom, cover them with 3 cups of diced potatoes, and wonder why my chicken was tough and my potatoes were raw and crunchy after eight hours. Heat in these machines comes from the bottom and the sides. The bottom is the absolute hottest zone. You must layer your ingredients strategically for even cooking. Dense, slow-cooking root vegetables always go in first. I buy the 1 lb bags of Trader Joe’s Organic Carrots for $0.99. I chop them into 1-inch thick chunks and scatter them across the very bottom of the pot. Next, I add my diced russet potatoes or sweet potatoes right on top of the carrots. Your meat goes in third, resting on the bed of root vegetables. Finally, you pour your liquid over the top. Quick-cooking vegetables like bell peppers or zucchini should sit at the very top, or just be left out until the last hour of cooking. When I finally started layering my beef stew this way, the difference was shocking. The carrots were perfectly tender, soaking up the beef drippings, and the meat was fall-apart soft. It’s a tiny adjustment that completely fixes uneven textures. You might also like: 20 Inspiring Sunday Dinner Ideas You Need to See
5. Thaw Your Meat First, Seriously

I’m going to save you from food poisoning right now. You can’t put frozen meat directly into a slow cooker. I know people do it. I know your aunt probably does it and claims she’s fine. But it’s dangerous and it ruins the texture of your food. These appliances heat up very gradually. If you drop a frozen solid 3 lb block of meat into the pot, it spends hours sitting in the bacterial danger zone between 40 and 140 degrees Fahrenheit. Bacteria multiply like crazy at those temperatures. Beyond the safety issue, frozen meat releases a massive amount of cold water as it slowly thaws. This completely waters down your sauce and leaves your meat boiling in a bland puddle. Always thaw your meat completely before cooking. I buy the big packs of Kirkland Signature Chicken Breasts for $14.99 at Costco. When I prep my meals on Sunday, I take out exactly 2 lbs of chicken and let it thaw safely in the refrigerator overnight. If I forget, I use the cold water method in my sink, changing the water every thirty minutes. I once tried to rush a frozen pork shoulder because I was running late for work. I came home to a lukewarm pot of grey, rubbery meat that smelled sour. I had to throw the entire $15 roast in the trash. Just thaw it. You might also like: 20 Clever School Lunch Ideas You Can Try Today
6. Searing Before Cooking Isn’t Optional

Skip the fat-free stuff and skip the raw meat dump. Honestly, dumping raw, unseared beef into a pot is why so many people think meal prep tastes like wet cardboard. You miss out on the Maillard reaction, which is that beautiful, caramelized crust you get from searing meat in a hot cast iron pan. That crust builds a deep, savory foundation for your stews and roasts. I tried doing this wrong for months. I’d just toss raw chuck roast into the pot. The result was always a sad, grey lump of meat. Now, I refuse to skip the searing step. If you hate washing an extra skillet, look into the new multi-cooker models. I recently upgraded to the Ninja 12-in-1 PossibleCooker PLUS. It’s usually $129.99 at Target or Best Buy. This machine lets you sear your meat directly in the main cooking pot before you switch it over to the slow cook setting. I heat 1 tablespoon of olive oil, drop in my 2 lbs of cubed stew meat, and let it get a dark brown crust on all sides. It takes maybe five minutes. Then I toss in my 1/2 cup of diced onions, pour in my broth, and hit the slow cook button. The flavor difference is absolute night and day. It tastes like it came from a high-end restaurant instead of a sad plastic container.

KOMUEE 10 Packs 30 oz Glass Meal Prep Containers
If you want something that just works, KOMUEE 10 Packs 30 oz Glass Meal Prep Containers is a safe bet (45 reviews, 4.5 stars).
7. Stop Lifting the Lid Every Hour

Let’s talk about patience. I’m incredibly impatient. When I first started cooking this way, I would walk into the kitchen every hour, lift the heavy glass lid, and stir my chili. I loved smelling the spices. I thought I was helping the flavors meld. I wasn’t. I was actually ruining my dinner. Every single time you lift the lid, a massive cloud of trapped steam escapes into your kitchen. You instantly lose a significant amount of heat. It takes the machine roughly twenty minutes to build that heat back up to the proper cooking temperature. If you check your food three times, you’ve just added an entire hour to your cooking time. I learned this the hard way. I kept opening the lid to check the tenderness. By the time guests arrived, the 4 lb pork shoulder was still tough and rubbery. Now, I follow a strict set it and forget it rule. I measure out exactly 1/2 cup of water using my Pyrex Glass Measuring Cup. It costs $7.99 at Sprouts. I pour it in, place the lid on top, and I don’t touch it again until the timer goes off. If you’re worried about things burning or sticking, you’re either cooking on too high of a heat setting or you didn’t add enough liquid. Leave the lid alone.
8. Silicone Dividers Are the Ultimate Slow Cooker Meal Prep Hack

Most people get this wrong when they want variety in their weekly lunches. They think they must run their machine every single day to get different flavors. You don’t. You just need the right accessories. I recently discovered silicone dividers, and they are brilliant. They aren’t just a gimmick. They are essentially thick, heat-safe silicone bowls that fit inside your ceramic insert, splitting it into two separate cooking zones. I use the Mrs. V’s Kitchen Silicone Liners. You can grab a two-pack for $15.99 on Amazon or at Walmart. Last Sunday, I put 1 lb of chicken with 1/2 cup of salsa in the left divider for tacos, and 1 lb of chicken with 1/4 cup of teriyaki sauce in the right divider for rice bowls. They cooked perfectly at the exact same time without the flavors mixing at all. It’s incredibly efficient. Plus, the cleanup is amazing. I despise scrubbing baked-on chili out of a heavy, slippery ceramic pot in my small sink. With the silicone liners, you just lift them out by the handles, rinse them off, and throw them straight into the dishwasher. I used to use those flimsy, disposable plastic liners. I’d accidentally poke holes in them with my serving spoon, and the hot liquid would leak everywhere anyway. The reusable silicone ones are thicker, safer, and save me at least twenty minutes of scrubbing every week.
9. Add Dairy and Herbs at the Very End

I’ve ruined so many creamy soups by adding the dairy too early. I love a rich, creamy potato soup. The first time I tried making one, I poured 1 cup of heavy cream into the pot right at the beginning, along with my potatoes and broth. I set it to cook for six hours on low. When I came back, the kitchen smelled vaguely like sour milk. I opened the lid and found a horrifying, separated mess. The cream had completely curdled, leaving gross, grainy white chunks floating in a greasy yellow liquid. It’s completely inedible when that happens. Dairy products like milk, cream, cream cheese, and sour cream simply can’t handle hours of sustained heat. They break down and curdle. The same goes for delicate fresh herbs like cilantro, parsley, or basil. If you cook fresh basil for six hours, it turns black and loses all its flavor. You must add these fragile ingredients at the very end. I buy the Whole Foods 365 Heavy Cream. A 1-pint carton is $3.49. I wait until my soup is completely finished cooking. I turn off the heat, stir in 1/2 cup of the heavy cream, and let the residual heat warm it through for about five minutes. I’ll toss in 2 tablespoons of chopped fresh cilantro right before I portion the meals into containers. The soup stays perfectly smooth, and the herbs taste bright and fresh.
![[8-Pack,30 oz]Glass Meal Prep Containers](https://m.media-amazon.com/images/I/713Zfdsgi4L._AC_UL320_.jpg)
[8-Pack,30 oz]Glass Meal Prep Containers
A dependable everyday pick — [8-Pack pulls in 7 ratings at 4.5 stars. Not flashy, just solid.
10. Never Lock the Lid While Cooking

This is a huge safety issue that nobody talks about. If your machine has those metal clamps on the sides of the lid, never lock them while you’re cooking. I repeat, do not clamp the lid down. Those locks are designed strictly for traveling. If you’re taking a batch of meatballs to a potluck in your car, you lock the lid so the sauce doesn’t splash onto your car seats. I didn’t know this. I bought a Crock-Pot 8-Quart Programmable Slow Cooker for $89.99 at Target. It came with locking latches. I naturally assumed I was supposed to lock them down tight while cooking to trap the heat. About four hours into cooking a massive batch of chili, I heard a terrifying hissing sound. The pressure inside the pot had built up so much that boiling liquid was forcing its way out through the rubber gasket. This machine is not a pressure cooker. It needs to vent tiny amounts of steam naturally around the rim of the glass lid. If you lock it, the steam has nowhere to go. It can cause uneven cooking, force liquid to bubble over violently, or in extreme cases, actually shatter the glass lid. Also, never fill your pot more than two-thirds full. If you fill it to the brim, it won’t heat evenly and it will absolutely boil over and ruin your countertops.
11. Storing Your Batch Like a Pro

Once your food is perfectly cooked, you must store it properly or your entire effort is wasted. I used to spoon boiling hot chicken straight from the pot into cheap plastic containers. The plastic would warp, and the steam would create massive amounts of condensation inside the lid. By Tuesday, my food was soggy and tasted like a wet sponge. Now, I let the entire batch cool in the ceramic insert for about thirty minutes before I even touch it. You want the steam to dissipate. For storage, you absolutely need glass. I use the Prep Naturals Glass Meal Prep Containers. A 5-pack is usually around $29.99 at Walmart. They have airtight, snapping lids that actually keep the food fresh. I portion out exactly 1 cup of shredded BBQ chicken and 1/2 cup of roasted sweet potatoes into each container. Glass doesn’t absorb smells. I can store a spicy curry in them on Monday, wash them, and use them for a mild chicken soup the next week without any lingering odors. These meals will stay perfectly fresh in the fridge for up to four days. If I prep a massive batch of pulled pork, I’ll freeze half of it. Shredded meats freeze beautifully. Just remember to leave about a half-inch of space at the top of your container because the food will expand slightly as it freezes.
I’m telling you, fixing these small mistakes makes a massive difference. Slow cooker meal prep doesn’t have to result in sad, mushy bowls of regret. Once I dialed in my liquid ratios and stopped lifting the lid, my weekday lunches actually started tasting good. You won’t regret taking the extra five minutes to sear your beef or layer your carrots properly. If you’re planning your grocery list for this weekend, save this guide. Pin it to your favorite recipe board so you don’t forget the liquid rule. Your future self will thank you when you’re eating perfectly tender pulled pork on a stressed-out Tuesday instead of hitting the drive-thru.
Frequently Asked Questions
Can I put frozen meat directly into my slow cooker for meal prep?
No, you absolutely shouldn’t. Placing frozen meat in a slow cooker keeps it in the bacterial danger zone for too long. It also releases excess water as it thaws, ruining your sauce. Always thaw meat completely in the fridge first.
Why is my slow cooker meal prep always so watery and bland?
You’re likely using too much liquid. Slow cookers trap moisture inside, unlike stovetop pots that allow evaporation. You need to reduce the liquid from standard recipes by one-third to one-half to prevent your meals from turning into flavorless soup.
How long do slow cooker meal prep bowls last in the fridge?
If you store them properly in airtight glass containers, your cooked meals will stay fresh in the refrigerator for up to four days. For longer storage, shredded meats and hearty stews freeze beautifully for up to three months.
Should I lock the lid on my slow cooker while making meal prep?
Never lock the lid while the machine is actively cooking. Those metal side latches are designed exclusively for safe travel in your car. Locking them during cooking traps dangerous steam pressure and can actually shatter the glass lid.
