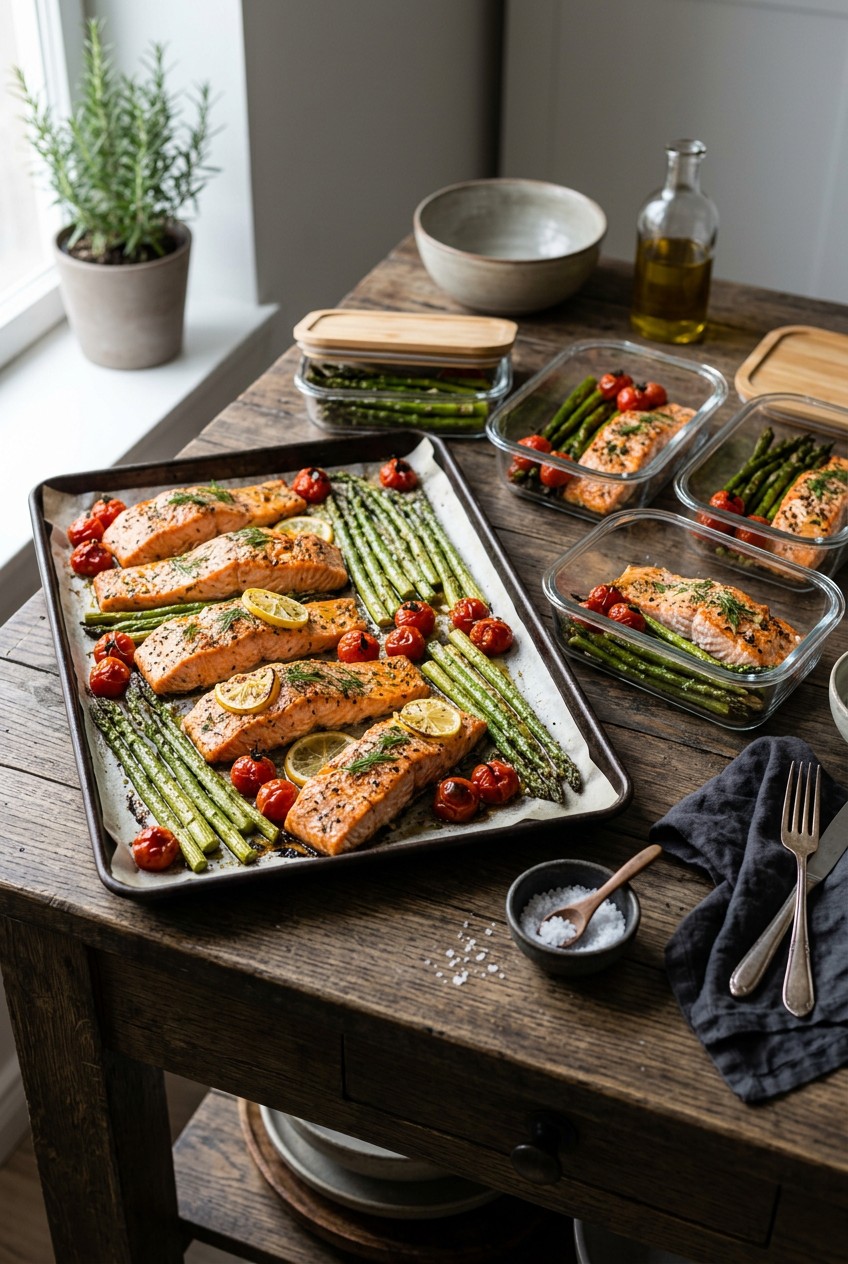
What’s Inside
- Invest in Quality Half-Sheet Pans
- Preheat Your Pan for Optimal Crispness
- Avoid Overcrowding at All Costs
- Master the Art of Consistent Cuts
- Strategically Pair Ingredients by Cook Time
- Use Oil Judiciously for the Best Texture
- Utilize Wire Racks and the Right Liners
- Rely On Ready-to-Use Seasoning Blends
- Batch Cook Versatile Components
- Embrace Glass Storage Containers for Longevity
Last Tuesday in my cramped apartment kitchen, I stood over the trash can scraping a charred, soggy mess of wet chicken and burnt sweet potatoes off a warped baking tray. That disaster is why I had to rethink my entire approach to sheet pan meal prep. The smoke alarm was blaring loud enough to wake the neighbors, and my poor dog was hiding under the sofa. I’m telling you this because I’ve ruined so many dinners trying to take lazy shortcuts. When you’re exhausted after a long shift at work, throwing a mountain of random, unseasoned ingredients onto a single metal tray sounds like a foolproof plan. It isn’t. I tried this wrong for months before finally figuring it out. Ignore the basics, and you end up with broccoli that tastes like wet cardboard and chicken breast so dry it hurts your jaw to chew. But once you nail the technique, it’s actual magic. You get crispy edges, juicy proteins, and almost no dishes to wash. Let’s fix your weeknight dinners right now with the rules I swear by.
1. Invest in Quality Half-Sheet Pans

I can’t stress this enough. Ditch the flimsy, scratched bakeware you bought for five bucks in college. I used to roast my Sunday vegetables on a paper-thin cookie sheet, and it would twist in the oven with a loud, terrifying pop. The vegetables would slide to one side, swimming in a sad puddle of steam and juices. You’re never going to get restaurant-quality food on cheap metal. Learned that the hard way. Last month at Walmart, I finally grabbed the Nordic Ware Naturals Half Sheet Pan for $19.50. It’s made of uncoated, heavy-gauge aluminum. It measures 18×13 inches with a 1-inch reinforced galvanized steel rim. The weight difference is obvious the second you pick it up. Heavy pans give you superior heat distribution. They withstand extreme oven temperatures without buckling. When I put 2 pounds of diced russet potatoes on this pan, the heat transfers perfectly to every piece. The bottoms get that gorgeous, golden-brown crust you usually only get from deep-frying. The 1-inch rim is crucial because it stops olive oil and meat juices from dripping into your oven and starting a fire. If you’re serious about your meal prep, you need at least two of these pans. I’ve wasted so much money replacing cheap, warped trays. Buy the right tool once. It’s a non-negotiable baseline for good roasting.
2. Preheat Your Pan for Optimal Crispness

Most people get this wrong. I certainly did for years. I’d throw ice-cold vegetables onto a freezing pan and shove it into a cold oven while it preheated. The result is always a mushy, steamed nightmare. If you want vegetables that are beautifully seared, you have to preheat your empty sheet pan first. I leave the bare aluminum pan in the oven while it comes up to 400 degrees. When you pull that screaming hot pan out, be extremely careful. I use my heavy-duty OXO Good Grips Silicone Oven Mitts ($16.99 at Target) because the heat radiating off the metal is intense. To keep things from sticking, I quickly drop down a sheet of Reynolds Kitchens Unbleached Parchment Paper ($5.49 for 45 square feet). The paper handles the heat perfectly. The moment your oiled vegetables hit that hot surface, you should hear a loud, aggressive sizzle. That sound means the cooking process is jump-starting. It sears the exterior immediately, locking in the moisture. You won’t believe the texture difference. Your broccoli florets get those crispy, charred little tips that taste incredible.
3. Avoid Overcrowding at All Costs

This is my biggest pet peeve when watching friends cook. I used to pile 3 pounds of chicken, bell peppers, and onions onto one tray because I didn’t want to wash two pans. The ingredients were stacked three layers deep. When you do this, the moisture evaporating from the food gets trapped. You aren’t roasting; you’re steaming. Steamed bell peppers are slimy, pale, and sad to eat. You need to ensure your ingredients are spread in a single, flat, even layer. You want at least 1/2 inch of empty metal space between each piece. They need room to breathe so the hot oven air can circulate. If your pan looks like a crowded subway car, split the batch. I keep a Chicago Metallic Commercial II pan (around $22 on Amazon) as my backup for this reason. Yes, it means washing a second pan. But it’s worth the extra two minutes of scrubbing. When I prepped my spicy fajita bowls last Sunday, I put 1 pound of sliced bell peppers on one pan and 1.5 pounds of diced chicken on the other. Everything charred perfectly. Don’t sabotage your expensive groceries by piling them up. You might also like: 15 Clever Family Dinner Ideas for a Fresh New Look

M MCIRCO 10-Pack,30 Oz Glass Meal Prep Containers 2
If you want something that just works, M MCIRCO 10-Pack is a safe bet (23 reviews, 4.5 stars).
4. Master the Art of Consistent Cuts

You can’t chop a potato in half, dice a carrot into tiny specks, and expect them to cook in the same amount of time. I learned this the hard way at a dinner party two years ago. Half my guests were crunching on raw sweet potatoes while the red onions were burnt to ash. You need the Goldilocks approach. Cut denser root vegetables into smaller, uniform pieces. I aim for 1-inch cubes for things like potatoes, beets, or butternut squash. Quicker-cooking items like bell peppers can be cut into larger 2-inch chunks so they don’t disintegrate. To get this right, you need a sharp, reliable knife. I use my Victorinox Fibrox Pro 8-inch Chef’s Knife ($39.95 online). It slices through stubborn vegetables like butter. Last week at Whole Foods, I bought 2 pounds of organic sweet potatoes ($1.99 per pound). I spent five minutes at my cutting board making sure every cube was identical. When I pulled the pan out 35 minutes later, every piece was fork-tender on the inside and crispy on the outside. Consistency in your prep work always equals consistency in your cooking. You might also like: 15 Stunning Aesthetic Batch Cooking You Need to See
5. Strategically Pair Ingredients by Cook Time

Throwing every ingredient onto the pan at the same time is a rookie mistake. Different foods have different rules. If you put delicate asparagus and thick potato wedges in the oven together for 40 minutes, the asparagus will turn to mush. Group your proteins and vegetables that have similar cooking durations. Diced chicken breasts generally cook in 20 to 30 minutes. They pair beautifully with broccoli florets or green beans. Root vegetables like carrots need 30 to 40 minutes. If I’m cooking chicken and potatoes together, I give the potatoes a 15-minute head start. I pull the hot pan out, push the potatoes to one side, and add the raw meat. I buy Trader Joe’s Organic Boneless Skinless Chicken Breasts ($6.99 per pound) for my weekly prep. I always use paper towels to pat the chicken dry before seasoning, then I slice them into 1-inch strips so they cook evenly. Think about the timing like a puzzle. Once you memorize the basic cook times for your staple ingredients, coordinating the pan becomes second nature. You might also like: 15 Cozy Freezer Meals Ideas to Transform Your Space
6. Use Oil Judiciously for the Best Texture

Fat is essential for flavor, browning, and heat conduction. But drowning your food in cheap oil leads to a greasy, unappetizing mess by Wednesday. On the flip side, skip the fat-free stuff. It tastes like wet cardboard and leaves you hungry. You need balance. I start with 1 tablespoon of oil per pound of raw ingredients. You want everything lightly coated, not swimming in a puddle. Use an oil that handles high heat. Extra virgin olive oil will smoke and turn bitter at 400 degrees. I use avocado oil because it has a smoke point of 520 degrees. I buy the Chosen Foods 100% Pure Avocado Oil at Costco ($12.98 for a 1-liter bottle). I pour the measured oil over my 2 pounds of chopped vegetables in a large glass mixing bowl, not directly on the sheet pan. I toss them with my bare hands to ensure every piece gets an even layer of fat. This guarantees a perfect roast. Pouring oil directly onto the pan just creates oily puddles and burnt spots.

Skroam 10 Pack Glass Meal Prep Containers
Honestly, Skroam 10 Pack Glass Meal Prep Containers surprised me — sturdier than it looks in the photos, and over 56 buyers gave it 4.5 stars.
7. Utilize Wire Racks and the Right Liners

Cleanup is the worst part of cooking. I line my pans to prevent food from cementing itself to the metal. Parchment paper is my go-to for standard roasting at 400 degrees. But if you’re using the broiler setting, you can’t use parchment. It will catch fire. I use Reynolds Wrap Heavy Duty Aluminum Foil ($4.98 for 50 square feet) when I blast the heat. For proteins like breaded chicken tenders, I use a different trick. I place a wire cooling rack on top of the foil-lined sheet pan. I use the Checkered Chef Cooling Rack ($14.95 online) because it fits my half-sheet perfectly. Elevating the food allows the hot oven air to circulate around the bottom of the protein. It prevents that soggy bottom texture. The excess grease drips onto the foil, leaving the meat crispy on all sides. It’s a tiny extra step that changes the texture of your prepped proteins. When I’m done, I just soak the rack in soapy water.
8. Rely On Ready-to-Use Seasoning Blends

Measuring out twelve different spices on a Sunday afternoon is exhausting. I used to pull out every jar I owned just to make a marinade. Now, I lean on pre-made seasoning mixes to save my sanity. It’s not cheating; it’s efficient. My current obsession is the Simply Organic Sheet Pan Seasoning packets. I buy the Umami Ginger and Zesty Ranch blends at Sprouts for $2.69 per packet. The ginger blend is salty, sweet, and spicy. One packet coats 1.5 pounds of protein and 2 pounds of vegetables. I also keep Mrs. Dash salt-free blends in the cupboard to control the sodium myself. Here is a surprising tip. If a recipe calls for multiple cooking stages, don’t clean the pan between steps. If I roast cherry tomatoes and onions first, then remove them to cook grains, I deliberately leave the brown bits on the metal. That sticky fond infuses rich flavor into whatever hits the pan next. Don’t wash away your hard-earned flavor.
9. Batch Cook Versatile Components

Prepping five identical meals leads to meal fatigue. By Wednesday, I’m usually staring at my container with resentment. The trend is batch cooking individual components instead of composed meals. I roast a massive pan of mixed vegetables at 400 degrees for 35 minutes. Then I cook a large batch of grains. I love the Kroger Private Selection Quinoa ($4.49 for 16 ounces). I also prep 2 pounds of a neutral, seasoned protein. I store them in separate containers. On Monday, I might make a wrap. On Tuesday, I build a grain bowl. It gives you daily flexibility. I also try to practice root-to-frond cooking to save money. When I roast a butternut squash, I clean the pulp off the seeds, toss them with 1 teaspoon of olive oil and sea salt, and roast them on the empty corner of the pan for a snack. I even chop up broccoli stalks and toss them right in with the florets. If you’re having a chaotic week, outsource it. Companies like Project LeanNation (around $140 for 10 meals) are great for pre-made, nutritionally balanced options when life gets overwhelming.

M MCIRCO 10-Pack,22 Oz Glass Meal Prep Containers
M MCIRCO 10-Pack punches above its price — 86 buyers rated it 4.5 stars. I would buy it again.
10. Embrace Glass Storage Containers for Longevity

You spent an hour making beautiful, crispy food. Don’t shove it into a stained, warped plastic tub. Plastic containers hold onto weird fridge smells. They stain a horrific orange the second they touch paprika or tomato sauce. Worst of all, they can leach chemicals into your food in the microwave. I threw all my plastic away three years ago. Glass containers are non-porous. They resist stains and odors. They are safe for the oven, microwave, freezer, and dishwasher. I swear by the Razab 24-Piece Glass Storage Set ($29.99 online). They are made of thick borosilicate glass with silicone-sealed locking lids. Yes, they cost more upfront, but they last ten times longer. The snap locks keep everything airtight, so my roasted bell peppers are fresh on Thursday afternoon. When I pull my glass container out of the fridge at work, it looks like a respected meal, not sad leftovers. Presentation matters, even when you’re just feeding yourself at your desk. No exaggeration.
I hope these tips save you from the soggy, burnt disasters I used to eat. Sheet pan meal prep doesn’t have to be complicated, but you have to respect the process. Give your food space, control your oven heat, and invest in a decent aluminum pan. I’d love to hear how your next Sunday prep session goes. Pin this guide right now so you have it ready on your phone before your next grocery run!
Frequently Asked Questions
Why are my sheet pan meals always soggy?
You’re likely overcrowding the pan. When ingredients are piled on top of each other, they trap moisture and steam instead of roasting. Ensure everything is spread in a single layer with at least half an inch of space between pieces.
What is the best oil for high-heat roasting?
I highly recommend avocado oil for sheet pan meal prep. It has a massive smoke point of 520 degrees Fahrenheit, meaning it won’t burn, smoke, or turn bitter in a 400-degree oven like extra virgin olive oil often does.
Can I put parchment paper under the broiler?
No, you absolutely can’t. Parchment paper will catch fire under the direct, intense heat of a broiler. If you plan to broil your meal for a crispy finish, line your pan with heavy-duty aluminum foil instead.
How long do glass meal prep containers last?
High-quality borosilicate glass containers can easily last five to ten years if treated well. Unlike plastic, they won’t warp, stain, or absorb food odors, making them a much better long-term investment for your weekly routine.
