What’s Inside
- Master the Protein-Packed Chia Pudding for Healthy Meal Prep Snacks
- Craft Custom Energy Balls for Sustained Fuel
- Pre-Portion Edamame for a Quick Protein Hit
- Strategize Fruit and Nut Pairings for Targeted Benefits
- Perfect Crispy Roasted Chickpeas
- Assemble High-Fiber Cracker and Dip Packs
- Embrace Fibermaxxing with Dates and Pistachios
- DIY Dehydrated Fruit Crisps for Shelf-Stable Goodness
- Keep Healthy Meal Prep Snacks Simple With Clean Protein Bars
I sat in my car last Tuesday at Whole Foods, staring at a tiny plastic box of cheese and grapes that just cost me $8.99. It was a pathetic sight. Sweaty cheddar cubes. Squishy, bruised grapes. I realized my failure to plan was draining my wallet and leaving me starving an hour later. That afternoon, I decided to get serious about healthy meal prep snacks. If you’re relying on overpriced grab-and-go boxes from the grocery store deli, you’re throwing money away. Let’s fix that. Preparing healthy snacks takes maybe an hour on a Sunday, but it saves your sanity all week long.
I’ve made every mistake in the book. I’ve prepped soggy crackers that fell apart in my hands. I’ve made chia pudding that tasted like wet cardboard. I’ve ruined expensive ingredients by storing them in the wrong containers. Now, I’m sharing the formulas that actually work. I’m giving you my grocery lists, brand recommendations, and the prices you should expect to pay. Skip the fat-free stuff. Buy the good containers. Follow these measurements. Here are nine high-protein options that’ll keep you full, save you money, and actually taste amazing on a Thursday afternoon. Learned that the hard way.
1. Master the Protein-Packed Chia Pudding for Healthy Meal Prep Snacks

I usually hit up Target on Sunday mornings for supplies. Last week, I grabbed a tub of Orgain Organic Protein Powder for $22.99 and a carton of 365 Almond Milk for $2.49. I’m always looking to stretch my budget. This combo brings the cost down to roughly $1.50 to $2.50 per serving. That beats a seven-dollar coffee shop pastry any day. I tried making this wrong for months before figuring it out. Skip the fat-free milk stuff. It tastes like wet cardboard. You need a base with some richness to hold the seeds together.
The prep’s simple if you follow the ratios. Mix 3 tablespoons of chia seeds with 3/4 cup of your preferred milk. I drop 1 scoop of protein powder into small 4-ounce glass mason jars. The sensory experience of mixing this is satisfying. The powder dissolves into the cold milk, and the tiny black seeds start to swell. You have to stir it vigorously. Wait five minutes. Then stir it again. If you skip that second stir, you end up with a massive, gelatinous clump of dry seeds stuck to the bottom of your jar.
Storage is where most people ruin their hard work. I screw the metal lids onto the jars and line them up in the fridge. By Tuesday morning, the texture is a thick, creamy pudding that coats the back of a spoon. It smells faintly of sweet vanilla and almonds. My biggest mistake used to be leaving the jars uncovered. The pudding absorbs every odor in your refrigerator. Nobody wants chia pudding that tastes like leftover chopped onions. Keep them sealed tight, and you’re golden for up to five days.
2. Craft Custom Energy Balls for Sustained Fuel

There’s nothing worse than the 3 PM hunger crash. I used to buy those expensive protein bites until I realized I could make them better at home. I grab my ingredients at Kroger. You need 1.5 cups of Bob’s Red Mill Gluten-Free Old Fashioned Rolled Oats, which run about $7.69 for a 32-ounce bag. I pair that with 1 cup of Crazy Richard’s natural peanut butter. It costs $4.19 a jar. Look for brands with just peanuts and salt. If it has added oils, your energy balls will turn into a greasy, melting mess on your desk.
You also need 1/4 cup of ground flaxseed and 1/4 cup of honey. The mixing process is messy but fun. The thick honey smells sweet as you pour it over the oats. I use a wooden spoon until it gets too stiff, then I use my bare hands. Your fingers will get coated in sticky, peanut-buttery oats. Roll the mixture into 1.5-tablespoon portions. I use a small metal cookie scoop to keep them uniform. This recipe yields 20 to 24 balls. The cost breaks down to a ridiculous $0.30 to $0.50 per ball.
Here’s my warning. You must chill the dough. I tried rolling these immediately after mixing once. It was a disaster. The dough stuck to my palms, and I ended up with misshapen lumps that fell apart. Chill the bowl in the fridge for 1 to 2 hours until firm. Once they’re cold, they roll into perfect, smooth spheres. I store them in a glass Pyrex container in the fridge. When you bite into one on a Wednesday afternoon, it has a dense, chewy texture and a deep roasted peanut flavor that kills your sugar cravings. Trust me.
3. Pre-Portion Edamame for a Quick Protein Hit

I’m a fan of salty snacks. Potato chips used to be my downfall until I discovered frozen edamame. I buy the 365 Whole Foods Market Organic Shelled Edamame. It costs about $3.49 for a 12-ounce bag. You can find it in the frozen vegetable aisle. A standard 1-cup (160g) serving provides 18 grams of plant-based protein. It’s rich in fiber and vitamins. At roughly $3 to $5 per bag, it’s one of the cheapest, most effective low-calorie snacks you can prep.
The prep takes three minutes. I dump the frozen beans into a glass bowl with a splash of water and microwave them. The smell of steaming edamame is earthy and fresh. I drain the excess water immediately. You have to hit them with coarse sea salt while they’re piping hot so the salt sticks to the wet surface. The visual is beautiful. They turn a vibrant, bright green. When you bite into them, they have a firm, satisfying pop. It’s the perfect texture for mindless snacking. You might also like: 15 Clever Family Dinner Ideas for a Fresh New Look
I used to make a mistake with these. I’d put frozen edamame directly into a plastic Ziploc bag and let them thaw in my work tote. By noon, the condensation created a pool of warm water. The beans turned slimy and smelled like a damp basement. Don’t do this. Cook them properly at home, let them cool on a paper towel, and pack them in a breathable container. I use silicone Stasher bags now. They stay firm, salty, and perfectly chewy all day. You might also like: 15 Lovely Kids School Lunch Ideas That Changed Everything

KOMUEE 10 Packs 30 oz Glass Meal Prep Containers
KOMUEE 10 Packs 30 oz Glass Meal Prep Containers punches above its price — 45 buyers rated it 4.5 stars. I would buy it again.
4. Strategize Fruit and Nut Pairings for Targeted Benefits

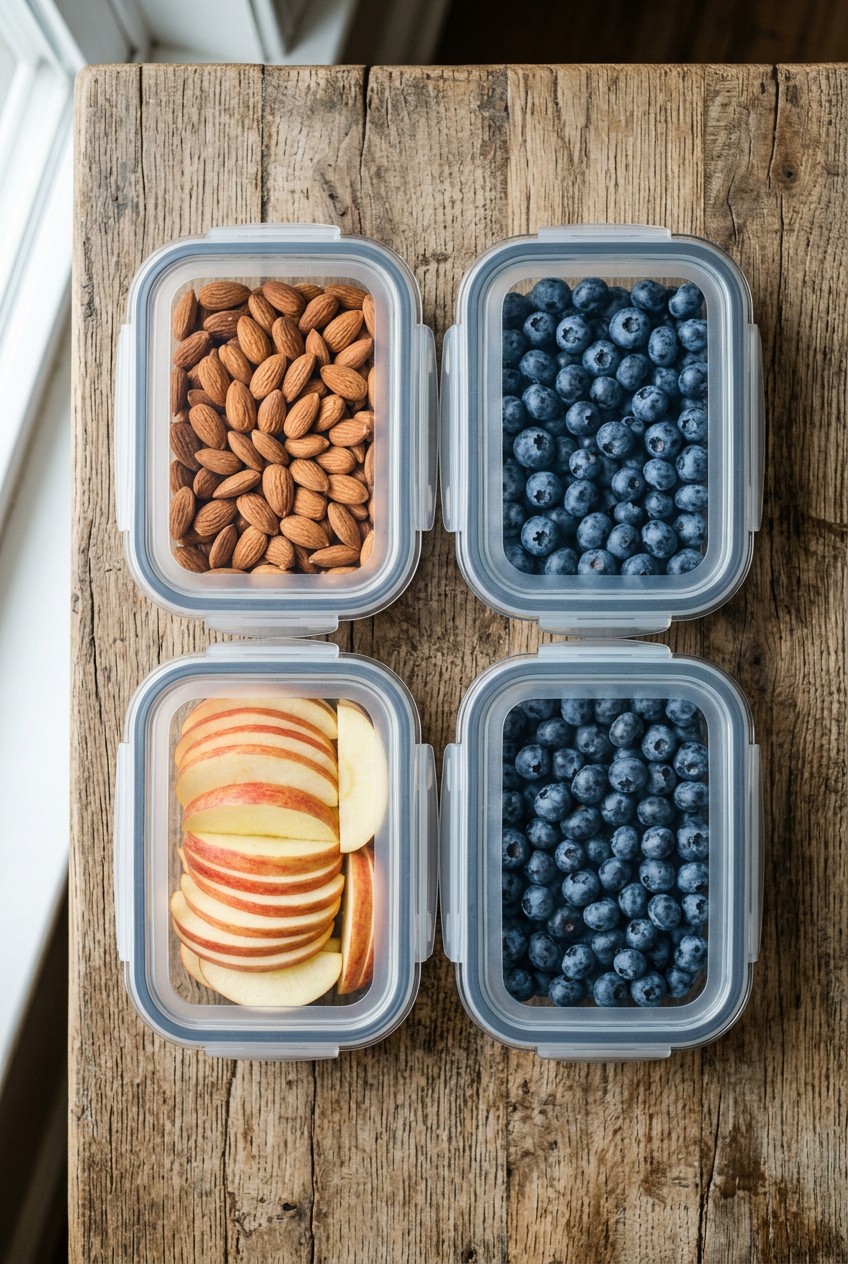
Throwing random nuts into a bag is amateur hour. You need to strategize your pairings to get nutritional benefits. I do my nut and dried fruit shopping at Trader Joe’s because their prices are unbeatable. I grab a bag of Raw Almonds for $4.99 and their Dried Blenheim Apricots for $5.99. For sustained energy, I pair 1/4 cup of almonds with 1/4 cup of dried apricots. To support cognitive function, I combine 1/4 cup of raw walnuts with 1/4 cup of dried blueberries. A single portion typically costs $1 to $2. You might also like: 15 Stunning Easy Lunch Ideas You Need to See
The sensory contrast is why this works. The dried apricots are tart, sticky, and chewy. They pair perfectly with the hard, dry crunch of a raw almond. The dried blueberries are sweet and wrinkly, balancing the slightly bitter, earthy flavor of the walnuts. Measuring these takes five minutes on a Sunday. I line up tiny half-cup plastic containers on my counter and assembly-line the process. It looks like a colorful mosaic of orange, blue, and brown when you’re done.
I learned a hard lesson about mixing these. I once bought salted, roasted almonds and mixed them with sweet dried cherries. I sealed them for three days. The salt from the nuts migrated onto the sticky surface of the cherries. The nuts got soft from the fruit’s moisture, and the cherries tasted like a salt lick. It was disgusting. Always buy raw, unsalted nuts when pairing with dried fruit. Store them in a cool pantry, never the fridge, to keep the nuts crisp.
5. Perfect Crispy Roasted Chickpeas

If you miss the loud, aggressive crunch of corn chips, roasted chickpeas will save your life. I buy my canned chickpeas at Walmart. I usually grab Goya or Bush’s Best for about $1.29 a can. This recipe makes several servings for under $2. You need 1.5 cups of drained and rinsed chickpeas. The process of rinsing them is annoying but necessary. The liquid in the can smells metallic. You have to wash all of that off under cold running water until the water runs clear.
Here’s the critical step. You must dry them. I spread the chickpeas on a thick layer of paper towels and aggressively rub them dry. If they go into the oven wet, they’ll steam instead of roast, and you’ll end up with mushy beans. Toss them with a drizzle of olive oil, coarse sea salt, and smoked paprika. Roast them at 425 degrees Fahrenheit for 20 to 30 minutes. The smell of smoky paprika roasting in hot oil fills the kitchen. They turn a gorgeous, deep golden brown.
Storage is the enemy of the crispy chickpea. I used to pack these in airtight plastic Tupperware for work. I’d snap the lid shut. The next day, I’d open the box expecting a crunch, and I’d get a soft, mealy bite of mush. The residual moisture ruins them overnight. You have to store these in a loosely-covered container at room temperature. I put them in a glass bowl and just drape a paper towel over the top. They stay loud and crunchy for two days. Eating these in a quiet office will definitely turn heads.
6. Assemble High-Fiber Cracker and Dip Packs

Sometimes you crave cheese and crackers, but the deli versions are full of refined flour and garbage. I build my own packs using ingredients from Sprouts. Dietitians always recommend crackers with at least 3 grams of fiber. I swear by Triscuit Original Crackers, which cost $3.99 a box. If you’re gluten-free, Mary’s Gone Crackers Super Seed Classic are amazing, though pricier at $5.49. I portion out 6 crackers. I pair them with 2 tablespoons of hummus. Sabra Classic hummus runs $3.99 for a tub. Crackers cost $3 to $5 per box, and the dip portions are $1 to $2.
The texture combination is elite. Triscuits have that rough, salty, woven wheat crunch that holds up to a heavy dip. The hummus is smooth, cold, and heavy on the garlic. I also love using single-serving guacamole cups if I want healthy fats. Scooping cold, creamy green guacamole onto a dense, seed-filled cracker is satisfying. I use small 2-ounce stainless steel condiment containers for the dip. They have leak-proof silicone lids that actually work.
Please learn from my mistakes. Do not pre-dip the crackers. Do not put the crackers in the same unsealed compartment as the hummus. I once packed Triscuits in a plastic box right next to a dollop of hummus. The moisture from the dip traveled through the air. By lunchtime, my crackers were bendy, soggy, and ruined. You must keep the dry ingredients separated from the wet ingredients. I use a hard-sided Bento box. The crackers stay dry, and the dip stays contained.
![[8-Pack,30 oz]Glass Meal Prep Containers](https://m.media-amazon.com/images/I/713Zfdsgi4L._AC_UL320_.jpg)
[8-Pack,30 oz]Glass Meal Prep Containers
If you want something that just works, [8-Pack is a safe bet (7 reviews, 4.5 stars).
7. Embrace Fibermaxxing with Dates and Pistachios

There’s a 2026 trend called fibermaxxing, and I’m obsessed with it. It’s all about packing as much natural fiber into small meals as possible. I go to Costco for this prep. I buy a 16-ounce tub of whole Medjool dates for $6.99. I also grab a bag of Wonderful Pistachios for $6.49. A serving is 2 to 3 dates paired with 1/4 cup of shelled pistachios. This combination offers quick energy from the fruit and sustained satiety from the nuts.
The sensory experience is wild. Medjool dates are naturally sweet, but their texture is special. They feel sticky and soft, almost like a dense caramel candy. When you bite into one, it yields easily. The pistachios provide a salty, earthy, bright green crunch that cuts through the sweetness. I like to slice the dates open with a paring knife and stuff the pistachios directly inside. It looks like a fancy hors d’oeuvre but takes ten seconds to make.
I have to warn you about the pits. Medjool dates usually come with the hard, wooden pits inside. Last month, I was rushing out the door and popped a whole date into my mouth. I bit down hard and nearly cracked my back molar on the pit. The sound in my head was terrifying. It was a painful mistake. Always, always slice your dates open and manually remove the pits during your Sunday prep. Store the stuffed dates in an airtight glass container in the fridge so they stay firm.
8. DIY Dehydrated Fruit Crisps for Shelf-Stable Goodness

Store-bought apple chips are expensive and usually coated in unnecessary sugars. I started making my own fruit crisps at home, and it changed my snack game. I buy fresh Honeycrisp apples at Target for $2.99 a pound. You can also use firm pears. Making your own saves money and helps you hit your daily fruit intake with a shelf-stable option. The prep requires patience, but the result is a high-fiber snack that tastes like a cozy fall dessert.
You have to slice the apples thin. I arrange the slices flat on a large metal baking sheet lined with parchment paper. I sprinkle them lightly with cinnamon. The baking process is slow. You bake them at 200 degrees Fahrenheit for 2 to 3 hours until they’re crispy. As they bake, the heat draws out the moisture. The smell of warm cinnamon and baking apples will fill your entire house. When you pull them out and let them cool, they develop a papery, crisp snap that shatters when you bite into them.
I failed at this three times before I bought the right tool. I tried slicing apples with a regular chef’s knife. I couldn’t get them thin enough. I ended up with thick, rubbery, warm slices that bent instead of snapping. They were gross and went bad in two days. You must use a mandoline slicer to get paper-thin, uniform cuts. Watch your fingers. Once they’re baked and cooled, store them in a large glass jar with a tight-sealing lid. Keep them away from humidity, or they’ll lose their crunch instantly.
9. Keep Healthy Meal Prep Snacks Simple With Clean Protein Bars

Let’s be honest. Some Sundays, you just don’t have the energy to roast chickpeas or stuff dates. On those weeks, healthy snacks can just mean buying the right packaged items. You have to choose smart protein bars with clean labels. I rely heavily on RXBARs. I buy the Chocolate Sea Salt flavor at Target. They run $8.99 for a 4-pack. They clearly list their ingredients on the wrapper. Egg whites, dates, and nuts. No weird chemical fillers. No fake sugars that wreck your stomach.
The texture of an RXBAR is distinct. Because they use dates as a binder, the bar is dense and chewy. It takes real effort to bite through it. The chocolate flavor is rich and dark, but the best part is the large, visible flakes of coarse sea salt on top. When a salt flake hits your tongue right before the sweet chocolate kicks in, it’s heaven. I just toss two of these into my work bag on Monday morning, and my emergency snacks are handled for the week.
I do have one major negative. Do not leave these in a hot environment. I tossed an RXBAR into the center console of my car last July. I forgot about it until Wednesday. I peeled the wrapper back, and the bar had melted into a sticky, molten, date-syrup disaster. It got all over my hands and ruined my car upholstery. The natural ingredients mean they don’t hold up to heat. Keep them in a cool, dark pantry at home, and only pack them in temperature-controlled bags. No exaggeration.
Prepping healthy meal prep snacks doesn’t have to be a chore. You just need the right ingredients, proper storage containers, and a little bit of foresight. Try picking just two of these recipes this Sunday. I promise you’ll feel different by Wednesday afternoon when the hunger hits. If you found these measurements and prices helpful, I’d love it if you saved this post or pinned it for your next grocery trip. Your future self will thank you.

M MCIRCO 10-Pack,22 Oz Glass Meal Prep Containers
Honestly, M MCIRCO 10-Pack surprised me — sturdier than it looks in the photos, and over 86 buyers gave it 4.5 stars.
Frequently Asked Questions
How long do healthy meal prep snacks last in the fridge?
Most healthy meal prep snacks, like chia pudding and energy balls, will last 4 to 5 days in the fridge if stored in airtight glass containers. Always check for excess moisture, which causes spoilage faster.
What is the cheapest high-protein snack to prep?
Frozen shelled edamame and homemade roasted chickpeas are the most budget-friendly options. They typically cost between $1.50 and $3.00 per batch and provide a massive amount of plant-based protein.
Why do my roasted chickpeas get soggy overnight?
Storing roasted chickpeas in a sealed plastic container traps residual moisture, turning them to mush. You must store them in a loosely covered bowl at room temperature to maintain their crispy texture.
Can I freeze homemade energy balls?
Yes, you absolutely can. Place the rolled oat and peanut butter energy balls in a freezer-safe bag. They will last for up to three months and take only ten minutes to thaw at room temperature.
