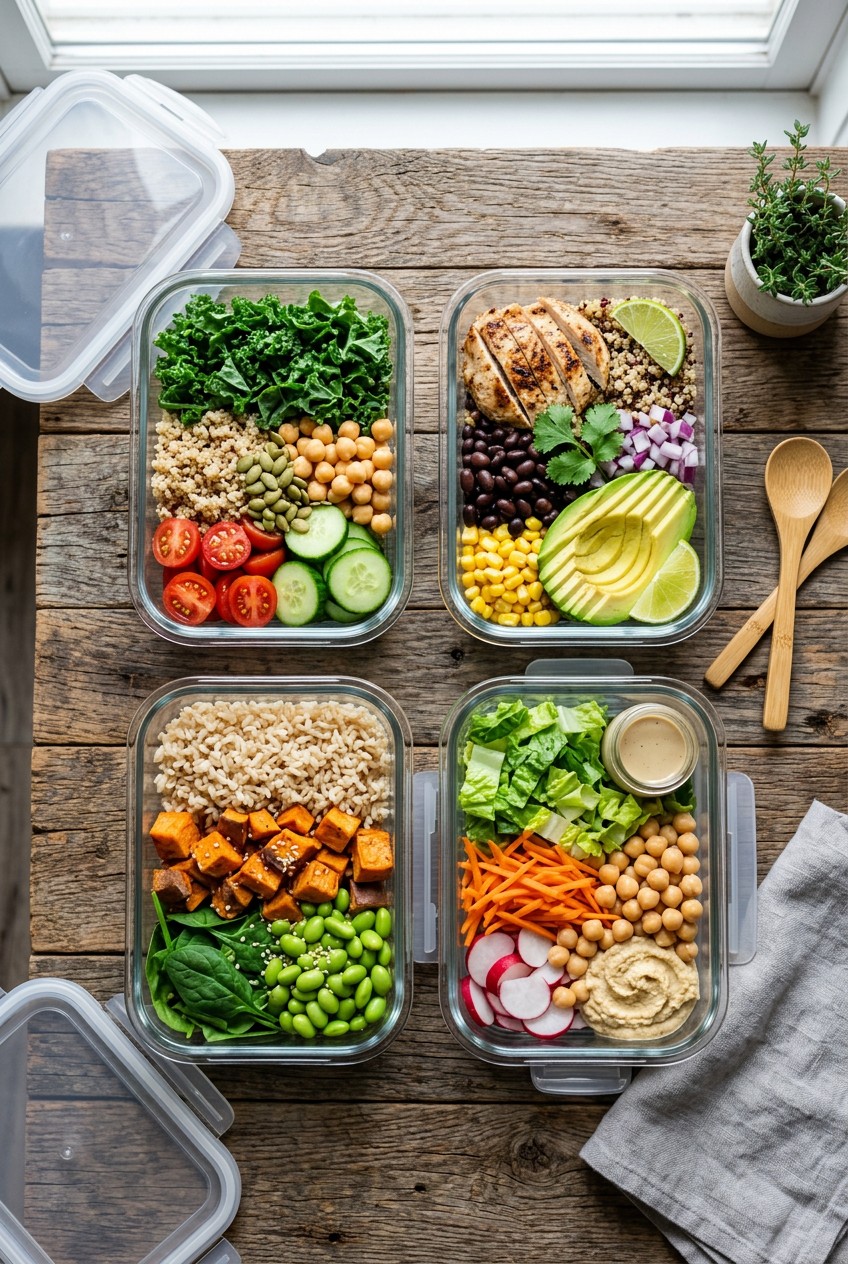
What’s Inside
- Master the Mason Jar Salad for Crisp Greens
- Invest in Heavy-Duty Glass for Cold Lunch Meal Prep
- Adopt the 333 Method for Simplified Planning
- Bento Boxes for Snack-Style Lunches
- Embrace Plant-Based Proteins for Extended Shelf Life
- Rethink Cold Noodle Bowls for Cold Lunch Meal Prep
- The Mayonnaise Myth and Pasta Salads
- Double Up on Insulation and Ice Packs
I’ll never forget the horrific smell of three-day-old tuna salad leaking through a flimsy plastic container onto my car’s passenger seat. That disgusting disaster last February is exactly why I finally took cold lunch meal prep seriously. I spent three hours scrubbing that sour, fishy scent out of the upholstery with a 32 oz bottle of Nature’s Miracle ($14.99 at Target), literally sobbing over wasted food and a ruined morning. If you’re tired of tragic spills and soggy sandwiches, I’ve got you covered. Cold lunch meal prep doesn’t have to mean eating sad, limp lettuce at your desk. It’s about building vibrant, crunchy, and satisfying meals that actually survive the commute.
I tried this wrong for months before figuring it out. I’d throw hot chicken directly into a plastic tub, seal it up, and wonder why my spinach looked like wet tissue paper by noon. I didn’t understand temperature control, I bought the cheapest containers I could find, and I completely ignored how ingredients interact over time. Skip the fat-free dressings and the paper-thin plastic baggies. They taste like wet cardboard and lead to total lunchbox failures. Let’s fix your lunch routine with some hard-earned lessons, specific gear that actually works, and flavor combinations that taste better on day three than they do on day one. Trust me on this.
1. Master the Mason Jar Salad for Crisp Greens

I honestly used to think mason jar salads were just a stupid Pinterest trend for people with too much free time. I was so wrong. Last summer, I bought a 12-pack of Ball 32 oz Wide Mouth Mason Jars for $14.99 at Target, and it completely changed my produce game. The secret isn’t just the glass. It’s the strict architecture of the layers. If you mess up the order, you’re eating mush.
Always start with your dressing at the very bottom. I pour exactly 2 tablespoons of a sharp balsamic vinaigrette into the base. Next, you need a barrier layer of hard, non-absorbent vegetables. I drop in 1/2 cup of whole cherry tomatoes and 1/2 cup of thick cucumber slices. These act like a shield. They sit in the dressing and actually marinate, getting more flavorful without breaking down. After the barrier, I pack in the heavy stuff. I’ll add 1/2 cup of cooked quinoa and 3 ounces of cold grilled chicken breast. Finally, you stuff the delicate greens right at the top, far away from the liquid. I usually jam in 2 handfuls of fresh baby spinach.
When lunchtime hits, you just shake the jar aggressively or dump it into a bowl. The greens stay unbelievably crisp. One major mistake I made early on was using chopped tomatoes instead of whole cherry tomatoes. The chopped ones leaked juice into the quinoa, turning the whole middle layer into a soggy, fermented-tasting nightmare. Stick to whole, firm veggies for that bottom barrier. It’s the only way to guarantee your greens survive until Thursday.
2. Invest in Heavy-Duty Glass for Cold Lunch Meal Prep

Plastic containers are the enemy of a fresh cold lunch meal prep routine. I used to buy those flimsy 50-cent plastic tubs from Walmart, and within two weeks, they were hopelessly stained yellow from turmeric and warped from the dishwasher. Even worse, they never sealed right. Now, I strictly use Rubbermaid Brilliance Glass Food Storage Containers. A 10-piece set usually runs about $29.99 on Amazon, and they are worth every single penny. If you’re on a tighter budget, the Prep Naturals Glass Food Storage Containers are a solid backup at $24.99 for a 5-pack.
Glass is heavier, yes. Hauling it to the office requires a sturdy bag. But glass is chemical-free, doesn’t absorb weird fridge smells, and keeps food noticeably colder and fresher. The Rubbermaid ones have these amazing four-sided locking lids with thick silicone gaskets. I’ve literally dropped a container of Mediterranean pasta salad down a flight of concrete stairs, and the lid didn’t pop off.
There’s also a massive food safety component here. When you cook a big batch of food, you need to cool it rapidly. Bacteria multiply extremely fast in the danger zone between 40°F and 140°F. I used to dump 3 pounds of hot rice into one massive, deep plastic tub. The center stayed warm for hours, which is incredibly dangerous. Now, I divide my hot ingredients into shallow glass containers. Glass transfers heat better, allowing the food to cool quickly and evenly. Always get your food into the fridge within two hours of cooking. Don’t mess around with food poisoning.
3. Adopt the 333 Method for Simplified Planning

Decision fatigue is real, especially on a Sunday afternoon when you’re staring at an empty fridge. I used to try making five completely different, complex recipes for the week. I’d spend six hours in the kitchen, destroy every pot I owned, and end up hating the entire process. Now, I swear by the 333 Meal Prep Method. It’s incredibly straightforward. You choose 3 proteins, 3 carbs, and 3 vegetables to batch cook and rotate. You might also like: 20 Clever School Lunch Ideas You Can Try Today
Last Sunday, I bought my staples at Costco. For my 3 proteins, I prepped 2.5 pounds of baked chicken breast, boiled a dozen large eggs, and drained two 15-ounce cans of garbanzo beans. For my 3 carbs, I cooked 2 cups of dry tricolor quinoa, baked 4 medium sweet potatoes, and boiled 16 ounces of whole wheat penne pasta. For my 3 vegetables, I chopped and roasted 4 cups of broccoli florets, sliced 3 large red bell peppers, and washed a massive 16-ounce tub of organic spinach. You might also like: 15 Clever Family Dinner Ideas for a Fresh New Look
Instead of building strict, identical meals, I just store these components in separate glass containers. On Monday, I might grab a handful of spinach, 1/2 cup of quinoa, 3 ounces of chicken, and a scoop of roasted broccoli. On Tuesday, I’ll mix the garbanzo beans with the whole wheat pasta, bell peppers, and a heavy drizzle of olive oil. To save even more time, I heavily rely on shortcuts like Spice World Minced Garlic ($4.99 for an 8 oz jar at Kroger) or pre-cooked Minute Rice ($4.98 for a 14 oz box). Batch cooking individual components prevents that horrible mid-week meal fatigue where you can’t stomach the thought of eating the exact same chicken and rice for the fourth day in a row. You might also like: 20 Gorgeous Meal Planning Ideas for Any Style

KOMUEE 10 Packs 30 oz Glass Meal Prep Containers
KOMUEE 10 Packs 30 oz Glass Meal Prep Containers punches above its price — 45 buyers rated it 4.5 stars. I would buy it again.
4. Bento Boxes for Snack-Style Lunches

Sometimes you just don’t want a heavy salad or a dense grain bowl. On weeks when I’m feeling lazy, I pivot to adult Lunchables. This is where bento-style containers absolutely shine. I use the Bentgo Fresh Bento Box, which costs $29.99 at Target. It has three distinct, leak-proof compartments that keep wet and dry ingredients completely isolated. If you let a wet pickle touch a dry cracker, the cracker turns into a miserable paste. Separation is mandatory.
My go-to snack box consists of 2 ounces of sharp cheddar cheese slices, 1/4 cup of raw almonds, 3 ounces of Applegate Naturals Oven Roasted Turkey Breast ($6.49 for 7 oz at Whole Foods), and a handful of Mary’s Gone Crackers ($4.99 for a 6.5 oz box). I’ll fill the smallest compartment with 1/4 cup of hummus or a few Kalamata olives.
If you’re dead set on packing sandwiches or wraps in your bento box, you have to pre-toast your bread. I learned this the hard way. I packed a turkey and cucumber wrap on a raw flour tortilla on Sunday. By Wednesday, the moisture from the cucumber had turned the tortilla into a slimy, translucent skin. It was revolting. Now, I lightly toast my bread or tortillas in a dry skillet for exactly 60 seconds before assembling. It creates a slightly crisp barrier that repels moisture. Even with the toasting trick, I won’t assemble sandwiches more than two days in advance. For later in the week, I pack the moist ingredients separately and build the sandwich at my desk.
5. Embrace Plant-Based Proteins for Extended Shelf Life

I love chicken, but cooked meat gets incredibly funky after day three in the fridge. It develops this weird, warmed-over flavor, even when you’re eating it cold. If you want meals that genuinely taste fresh on Thursday and Friday, you need to pivot to plant-based proteins. Beans, lentils, and tofu easily survive up to five days in the fridge without degrading in texture or flavor. Hard-boiled eggs are also champions, lasting up to a full week if you leave the shells on.
My absolute favorite late-week lifesaver is a dense lentil salad. I buy Westbrae Natural Organic Lentils ($3.29 for a 15 oz can at Sprouts). I rinse them aggressively in cold water until the water runs clear. Then, I mix 1 cup of those cooked lentils with 1/2 cup of finely diced red onion, 1/2 cup of crumbled Athenos Feta Cheese ($4.99 for 6 oz), and a heavy pour of lemon juice. The acid in the lemon juice actually breaks down the tough exterior of the lentils over a few days, making the salad creamier and more flavorful as the week goes on.
Chickpeas are another staple. I’ll drain a 15-ounce can of Bush’s Garbanzo Beans ($1.49 at Walmart) and mash them with a fork, mixing in 2 tablespoons of tahini, 1 tablespoon of Dijon mustard, and 1/4 cup of diced celery. It mimics the texture of tuna salad but won’t ruin your car upholstery if it spills. Plus, relying on canned beans slashes your Sunday prep time in half since there’s zero raw meat to handle or cook.
6. Rethink Cold Noodle Bowls for Cold Lunch Meal Prep

Most people think pasta is only good when it’s steaming hot and covered in marinara. You’re missing out if you aren’t prepping cold Asian-inspired noodle bowls. Rice noodles and soba noodles actually have a better, chewier texture when eaten cold. Last week, I made a massive batch of cold sesame noodles that held up perfectly for four days.
I use Lotus Foods Organic Millet & Brown Rice Ramen ($9.99 for a 10-pack at Costco). I boil exactly two blocks of the noodles for 4 minutes, drain them, and immediately shock them in an ice bath. The ice bath stops the cooking process instantly so they don’t turn to mush. Then, I toss the cold noodles with 1 teaspoon of toasted sesame oil to prevent them from clumping into a giant, unmanageable brick.
The sauce is everything. I whisk together 3 tablespoons of Jif Creamy Peanut Butter ($3.49 for 16 oz at Kroger), 2 tablespoons of Kikkoman Low Sodium Soy Sauce, 1 tablespoon of rice vinegar, and a squirt of Sriracha. Here’s the critical rule. Do not mix the sauce into the noodles on Sunday. The noodles will drink up all the moisture, leaving you with a dry, sticky mess by Wednesday. I store the peanut sauce in tiny 2-ounce OXO Good Grips Leakproof Condiment Containers ($11.99 for a 3-pack at Target). I pack the oiled noodles in my glass container along with 1/2 cup of shredded carrots and 1/2 cup of edamame. Right before eating, I pour the sauce over the top and aggressively mix it in. It tastes incredibly fresh.
![[8-Pack,30 oz]Glass Meal Prep Containers](https://m.media-amazon.com/images/I/713Zfdsgi4L._AC_UL320_.jpg)
[8-Pack,30 oz]Glass Meal Prep Containers
If you want something that just works, [8-Pack is a safe bet (7 reviews, 4.5 stars).
7. The Mayonnaise Myth and Pasta Salads

I used to be terrified of packing anything with mayonnaise for a cold lunch. We’ve all heard the horror stories about mayo-based potato salads causing food poisoning at summer picnics. But I recently learned from food scientists that mayonnaise is actually highly acidic. Commercial mayo, like Hellmann’s Real Mayonnaise ($5.49 for 30 oz at Kroger), contains vinegar and lemon juice, which actively slows down bacterial growth. The real culprits in those picnic disasters are usually the low-acid ingredients like boiled potatoes, eggs, or chicken that were left sitting in the sun.
Once I realized mayo wasn’t the enemy, I started making creamy pasta salads again. My current obsession is a classic macaroni salad. I boil 8 ounces of Barilla Elbow Macaroni ($1.99 for 16 oz). The trick is to cook the pasta exactly one minute past al dente. If you cook it perfectly al dente, it hardens in the fridge and feels like chewing on rubber bands. Slightly overcooking it ensures it stays soft when chilled.
I mix the chilled pasta with 3 tablespoons of mayo, 1 tablespoon of apple cider vinegar, 1/4 cup of finely diced red onion, and 1/2 cup of chopped celery. It’s crucial to keep your fridge temperature at or below 40°F (4°C) to maintain food safety. Don’t crowd your fridge shelves with too many containers, either. I used to pack my fridge so tight that the cold air couldn’t circulate, leaving the items in the back freezing while the stuff in the front stayed dangerously warm. Give your glass containers room to breathe.
8. Double Up on Insulation and Ice Packs

You can prep the most beautiful, balanced meal in the world, but if it sits in a warm office all morning, it’s going to be gross by noon. Never rely on the office fridge. It’s always packed, someone will inevitably steal your fancy dressing, and the temperature fluctuates wildly every time someone opens the door to grab creamer. You need to control your own climate.
I invested in a Hydro Flask Insulated Lunch Box ($44.95 at Target). It has rigid walls so my soft fruits don’t get crushed on the subway, and the insulation is incredibly thick. But a good bag isn’t enough. You need multiple cold sources. I place one thin, rigid ice pack flat against the bottom of the bag. Then, I put my glass meal container on top. Finally, I place a second cold source directly on top of the food container.
Here’s my favorite trick. Instead of buying a second ice pack, I freeze a juice box or a small plastic water bottle. I buy an 8-pack of Minute Maid Apple Juice boxes for $3.99 at Trader Joe’s and keep them in the freezer. I throw a frozen juice box on top of my lunch in the morning. It acts as an ice pack for the first four hours, keeping the ambient temperature inside the bag freezing cold. By the time I eat lunch at 1:00 PM, the juice is perfectly thawed and slushy, giving me a freezing cold drink to enjoy with my meal. Always sandwich your perishables between two cold sources. Heat rises, so a bottom ice pack alone won’t keep the top of your salad cold.
I’ve ruined enough lunches to know that a little bit of strategy goes a long way. Stop settling for sad, wilted salads and start treating your midday meal with some respect. Grab some heavy-duty glass containers, memorize the 333 method, and don’t be afraid of the mayo. If you found these tips helpful, please pin this article for your next Sunday prep session!
Frequently Asked Questions
How long do cold lunch meal prep salads last?
If properly layered in a mason jar with the dressing at the bottom and greens at the top, they can stay crisp for up to 4-5 days in the fridge. Keep them stored upright.
What are the best containers for cold lunches?
Heavy-duty glass containers with locking silicone lids, like Rubbermaid Brilliance, are ideal. They don’t absorb odors, keep food colder, and prevent messy leaks in your bag.
How do I stop my sandwiches from getting soggy?
Lightly toast your bread or tortilla before assembling to create a moisture barrier. For the best results, pack wet ingredients like tomatoes separately and assemble right before eating.
Is it safe to pack mayonnaise in a cold lunch?
Yes, commercial mayonnaise is highly acidic and actually resists bacterial growth. Just ensure you use insulated bags with ice packs to keep low-acid ingredients like eggs and meat safely chilled.
