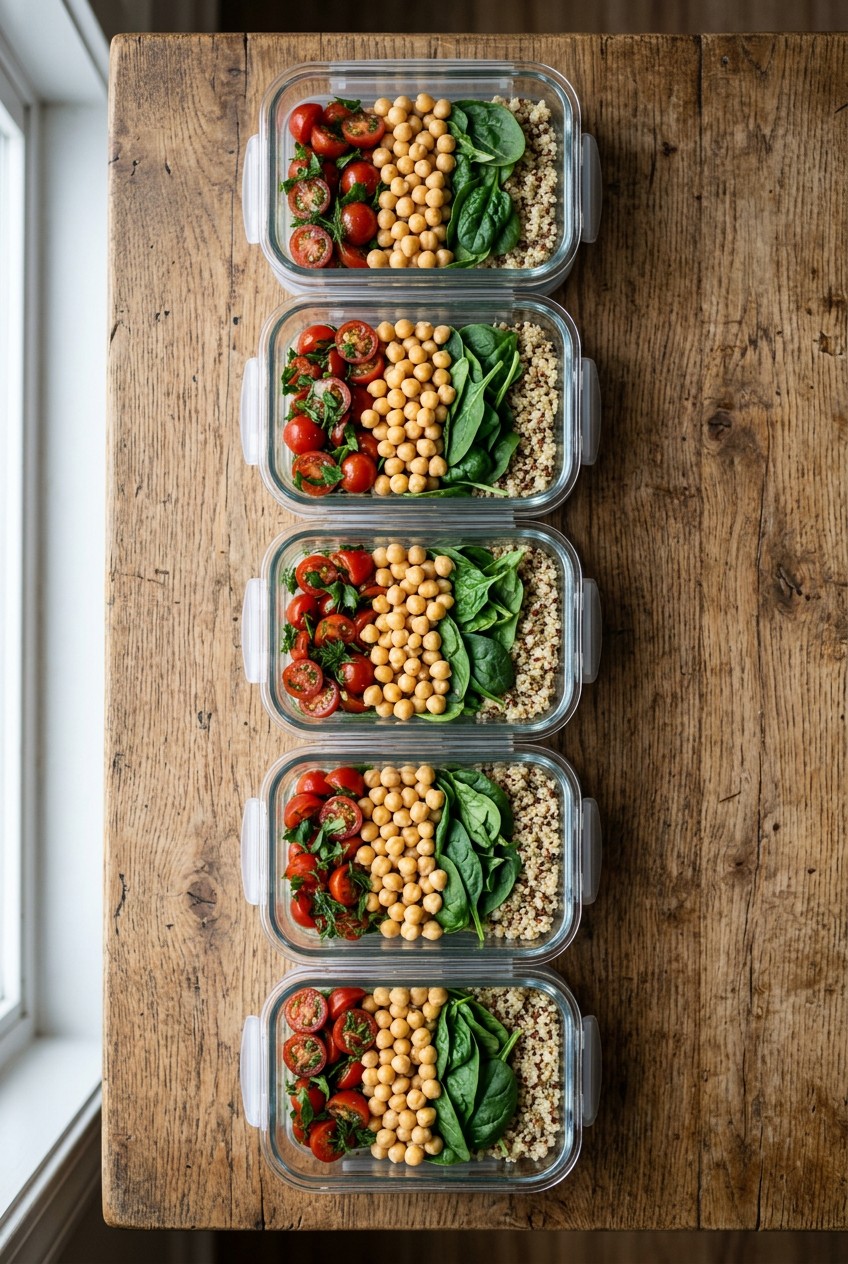
What’s Inside
- Master the Mason Jar Layering Technique for Meal Prep Salads For The Week
- Invest in High-Quality, Airtight Containers
- Prioritize Hearty Greens to Withstand the Week
- Thoroughly Dry All Produce to Combat Soggy Salads
- Cool Cooked Ingredients Completely Before Assembly
- Embrace the Dense Bean Salad Trend for Protein-Packed Meals
- Store Dressings Separately for Better Meal Prep Salads For The Week
- Incorporate Fermented Foods for Gut Health and Flavor
- Vary Toppings and Proteins to Avoid Boredom
Last Tuesday at Whole Foods, I dropped my lunch bag in the parking lot and watched in horror as a cheap plastic container exploded across the asphalt. That disaster forced me to rethink my meal prep salads for the week. I’m telling you, nobody wants to eat sad, wilted spinach that tastes like wet cardboard. I spent years forcing myself to swallow soggy greens at my desk because I thought that was just the price of eating healthy. It’s not. Figuring out how to properly make meal prep salads for the week actually saved my sanity and my grocery budget.
When you’re rushing out the door at 7:30 AM, you don’t have time to chop vegetables or mix vinaigrettes. You just want to grab a container that looks vibrant, smells fresh, and tastes good by Wednesday. I’ve made every mistake you can possibly make in the kitchen. I’ve packed hot chicken on top of cold lettuce. I’ve drowned my greens in dressing on a Sunday and cried over the mushy results on a Tuesday. I’ve wasted so much money throwing away spoiled produce. Let’s fix that. I’m going to walk you through exactly how I build my lunches, step by step, with the exact products and measurements I use to keep things crisp, crunchy, and delicious.
1. Master the Mason Jar Layering Technique for Meal Prep Salads For The Week

I swear by the mason jar method when I’m prepping individual lunches. It’s visually stunning, and it serves a specific scientific purpose. You’re creating a barrier between the wet ingredients and the delicate greens. I pick up wide-mouth quart-sized Ball Mason Jars. You can usually find a 12-pack for about $16.99 at Target. The wide mouth is non-negotiable. If you buy the regular mouth jars, you won’t be able to get your fork in there, and you’ll end up shaking the jar so hard that dressing flies onto your kitchen ceiling. I learned that the hard way.
Here is the layering formula. Start by pouring 2 to 4 tablespoons of your favorite dressing right at the bottom of the glass. Next, drop in your hard, non-absorbent vegetables. I usually chop up half a cup of raw carrots, cucumbers, or whole cherry tomatoes. These vegetables can sit in the dressing for days and they just marinate. After that, add your heavy grains or beans. I like using 1/2 cup of cooked quinoa or 1/4 cup of rinsed chickpeas. Then comes your protein. I usually measure out 3 to 4 oz of cooked chicken breast or baked tofu. Finally, pack your leafy greens to the top. When you’re ready to eat, just dump the whole jar upside down into a bowl. The dressing falls right over the greens. It’s brilliant.
2. Invest in High-Quality, Airtight Containers

If you aren’t using the mason jar method, you must upgrade your flat storage containers. I tried this wrong for months. I used to buy those flimsy plastic tubs from the dollar store. They warp in the dishwasher, hold onto the smell of old onions, and the lids never snap on tight. Last year, I found my work tote soaked in olive oil because a cheap plastic lid popped off during my commute. It took me three days to scrub the smell of garlic out of my canvas bag. No exaggeration.
You need heavy-duty glass containers with locking lids. I highly recommend the OXO Smart Seal Glass Container Sets. A good starter set runs about $34.99 at most home goods stores. If you prefer a lighter option that still seals perfectly, the Rubbermaid Brilliance 10-piece set is fantastic. I buy those for about $28.49 at Walmart. You want the 4-cup size for a proper adult lunch. Glass doesn’t stain, it doesn’t hold odors, and the silicone gaskets on these brands create a true airtight seal. This stops oxygen from getting in and wilting your lettuce. When you press the lid down, you’ll hear a satisfying snap. That sound means your lunch is protected. Don’t cheap out on your containers. It’s the foundation of keeping your food fresh.
3. Prioritize Hearty Greens to Withstand the Week

Skip the delicate spring mix. Just walk right past it. Spring mix and baby spinach are wonderful if you’re eating them immediately, but they’re terrible for meal prep. After two days in a container, they turn into a slimy, dark green sludge that smells like a swamp. I can’t tell you how many half-eaten boxes of baby spinach I’ve had to throw into the compost bin. It’s a massive waste of money. You might also like: 15 Brilliant Simple Meal Prep Ideas for a Fresh New Look
Instead, build your base with structural greens. I’m talking about curly kale, crisp romaine lettuce, classic iceberg, or shredded red cabbage. These greens have thick cell walls that hold up to storage. I usually grab a 6 oz bag of pre-chopped kale from Trader Joe’s for $2.29. If I’m using kale, I always massage it first. I put the dry leaves in a bowl, add a tiny drop of olive oil, and rub the leaves with my hands for about two minutes. The volume shrinks by half, the color turns a vibrant emerald green, and the tough texture softens beautifully. Romaine is my second favorite. It gives you that loud, watery crunch that makes a salad satisfying. When I mix chopped romaine with shredded cabbage, the texture contrast is incredible. Stick to the tough greens, and your Thursday lunch will taste just as fresh as your Monday lunch. You might also like: 15 Cozy Freezer Meals Ideas to Transform Your Space
![[8-Pack,30 oz]Glass Meal Prep Containers](https://m.media-amazon.com/images/I/713Zfdsgi4L._AC_UL320_.jpg)
[8-Pack,30 oz]Glass Meal Prep Containers
[8-Pack has been one of the most consistently praised picks in this category. 7 reviewers averaged 4.5/5.
4. Thoroughly Dry All Produce to Combat Soggy Salads

Water is the enemy of meal prep. If you wash your lettuce and just shake it off over the sink, you’re setting yourself up for failure. That residual tap water pools at the bottom of your container and accelerates the rotting process. I used to think a salad spinner was a useless kitchen gadget. I was wrong. It’s a necessity. You might also like: 20 Beautiful High Protein Meal Prep Ideas That Are Totally Worth It
I finally bought the OXO Good Grips Salad Spinner for $27.99 at Target, and it changed everything. After washing my greens, I spin them aggressively. Then, I take it a step further. I dump the spun greens onto a clean, dry kitchen towel and gently pat them to remove any microscopic drops of moisture. Here is a pro tip. Even after you dry the greens, moisture will release from the cut vegetables over the week. To fix this, fold a single dry paper towel and place it right on top of the greens before you snap the lid shut. The paper towel acts like a sponge, absorbing all that ambient condensation inside the glass container. When you open it three days later, the paper towel will be slightly damp, but your greens will be bone dry and perfectly crisp.
5. Cool Cooked Ingredients Completely Before Assembly

This is a mistake I made constantly. I’d roast a big batch of chicken breasts and sweet potatoes on Sunday afternoon. I’d pull the hot baking sheet out of the oven, chop everything up, and immediately portion the steaming hot food into my glass containers right on top of my cold lettuce. Then I’d snap the airtight lid on and shove it in the fridge. By Monday morning, the inside of the glass was fogged over with condensation, and my beautiful crisp romaine was effectively steamed into a limp, warm mess.
You must let your cooked ingredients drop to room temperature before they get anywhere near your fresh vegetables. If I’m cooking 4 oz of chicken or 1/2 cup of brown rice, I spread it out on a large plate and leave it on the counter for at least thirty minutes. I want it completely cool to the touch. If you’re in a massive rush, put the cooked food in a separate uncovered container in the fridge for twenty minutes to rapidly drop the temperature. Only when the heat is gone should you add it to your main prep bowl. Steam creates water, and water creates slime. Keep the heat away from your greens.
6. Embrace the Dense Bean Salad Trend for Protein-Packed Meals

If you hate leafy greens, you need to jump on the dense bean salad trend. This went viral in 2025 and it’s still dominating my feeds. A dense bean salad skips the lettuce. Instead, the base is made of legumes and finely diced crunchy vegetables. Because there are no fragile leaves to wilt, these salads actually taste better on day four than they do on day one. The beans soak up the dressing like little sponges.
I usually hit up Kroger on Sunday morning for this. I buy 1 can (15 oz) of chickpeas for about $1.19, and 1 can (15 oz) of cannellini beans for the same price. I dump them into a colander and rinse them under cold water until all the cloudy liquid is gone. Then, I dice up a red bell pepper, half a red onion, and a large English cucumber. I toss all of that into a massive mixing bowl. The magic happens with the dressing. You want a sharp, acidic vinaigrette. I use red wine vinegar, olive oil, dried oregano, and a heavy pinch of salt. Pour the dressing directly over the bean mixture and portion it out. It yields a massive amount of fiber and protein. It’s filling, and you can’t mess it up. It won’t get soggy.

M MCIRCO 10-Pack,22 Oz Glass Meal Prep Containers
Honestly, M MCIRCO 10-Pack surprised me — sturdier than it looks in the photos, and over 86 buyers gave it 4.5 stars.
7. Store Dressings Separately for Better Meal Prep Salads For The Week

Unless you’re using the mason jar method or making a dense bean salad, you can’t pre-dress your greens. You just can’t. The oils and vinegars in salad dressing are acidic. The moment they touch a delicate leaf, they start breaking down the cell walls. If you pour ranch over your spinach on Sunday, it will be a tragic, inedible soup by Tuesday. I used to pack my dressing in tiny plastic baggies, which always leaked and created a disgusting oily mess inside my lunch tote. It took me years to figure out that wasn’t the way.
You need dedicated, leak-proof condiment cups. I bought the VITEVER Leakproof Condiment Containers on Amazon. You get a set of 6 for $12.99. They are small stainless steel cups with thick silicone lids that press down tightly. I measure exactly 2 tablespoons of my homemade balsamic vinaigrette into each cup. I nestle the cup right inside the larger glass container, resting on top of the dry ingredients. When I sit down at my desk at noon, I pop the silicone lid off, drizzle the dressing over the dry ingredients, put the main lid back on, and shake the whole thing. You get perfectly coated, crunchy greens every single time. It takes an extra thirty seconds during your Sunday prep, but it changes the quality of your lunch.
8. Incorporate Fermented Foods for Gut Health and Flavor

One of my favorite ways to add flavor without relying on calorie-dense dressings is by mixing in fermented foods. This is a huge trend right now, but I do it because it tastes incredible. Fermented ingredients bring a sharp, salty, sour tang that cuts through rich proteins and heavy grains. Plus, they are already preserved in liquid, so they hold up perfectly in the fridge all week.
I usually go to Sprouts and grab a 16 oz jar of Cleveland Kraut. It costs about $5.99 and lasts me several weeks. I also love buying spicy vegan kimchi from the Asian market down the street. When I’m assembling my bowls, I add exactly 1 to 2 tablespoons of sauerkraut or kimchi right next to my protein. The bright acidity of the cabbage acts almost like a secondary dressing. When you mix it all together, the spicy kimchi juice coats the quinoa and the chicken, giving you an incredible burst of flavor in every bite. If you’re tired of plain grilled chicken and raw broccoli, adding a scoop of crunchy, fizzy fermented cabbage will wake up your palate. Just keep the fermented stuff slightly separated from your dry lettuce until you mix it.
9. Vary Toppings and Proteins to Avoid Boredom

The fastest way to fail at meal prep is to eat the exact same grilled chicken and romaine combination for fourteen days straight. I did this in my twenties. I prepped plain chicken breasts, plain spinach, and plain almonds. By Wednesday, I was so bored and depressed by my lunch that I ordered a $20 burrito on DoorDash and threw my prepped food in the trash. You have to create texture and flavor variety if you want this habit to stick.
I love wandering the bulk bins at Whole Foods to find weird, crunchy toppings. I’ll buy 1/4 cup of slivered almonds for about $4.49, or a scoop of roasted pumpkin seeds. I keep these dry toppings in a tiny separate baggie so they don’t get soft in the fridge. For proteins, I constantly rotate. One week I’ll use 3 oz of baked tofu marinated in soy sauce. The next week I’ll use shredded rotisserie chicken from Costco. Sometimes I’ll hard-boil a dozen eggs and slice two of them over my greens. Don’t be afraid to add sweet elements, either. A handful of dried cranberries or fresh diced crisp apples changes the flavor profile. Treat your lunch like a high-end restaurant dish. Add crunch, add sweetness, add salt, and you’ll actually look forward to opening that container.
I really hope these routines help you stop eating sad, wilted desk lunches. I’ve spent years tweaking these measurements and containers to finally get it right. If you follow the mason jar rules and keep that dressing separated, you’re going to have an amazing week of eating. Don’t forget to save this guide and pin it to your favorite recipe board so you can check the measurements before your next grocery run!

Skroam 10 Pack Glass Meal Prep Containers
Skroam 10 Pack Glass Meal Prep Containers has been one of the most consistently praised picks in this category. 56 reviewers averaged 4.5/5.
Frequently Asked Questions
How do I keep my meal prep salads for the week from getting soggy?
Always store your dressing in a separate leak-proof container, thoroughly dry your greens with a salad spinner, and place a folded paper towel inside the glass container to absorb excess condensation.
What are the best greens for meal prep salads?
Sturdy greens like curly kale, romaine, iceberg, and shredded red cabbage hold up best. Avoid delicate greens like spring mix or baby spinach, as they turn slimy quickly in storage.
Can I put hot chicken on my meal prep salads?
No. You absolutely must let all cooked proteins and grains cool completely to room temperature before adding them to your containers. Hot ingredients create steam, which wilts the greens instantly.
What is the correct order for a mason jar salad?
Start with 2-4 tablespoons of dressing at the bottom, add hard vegetables like carrots, followed by grains or beans, then your cooled protein, and finally pack the dry leafy greens tightly at the top.
