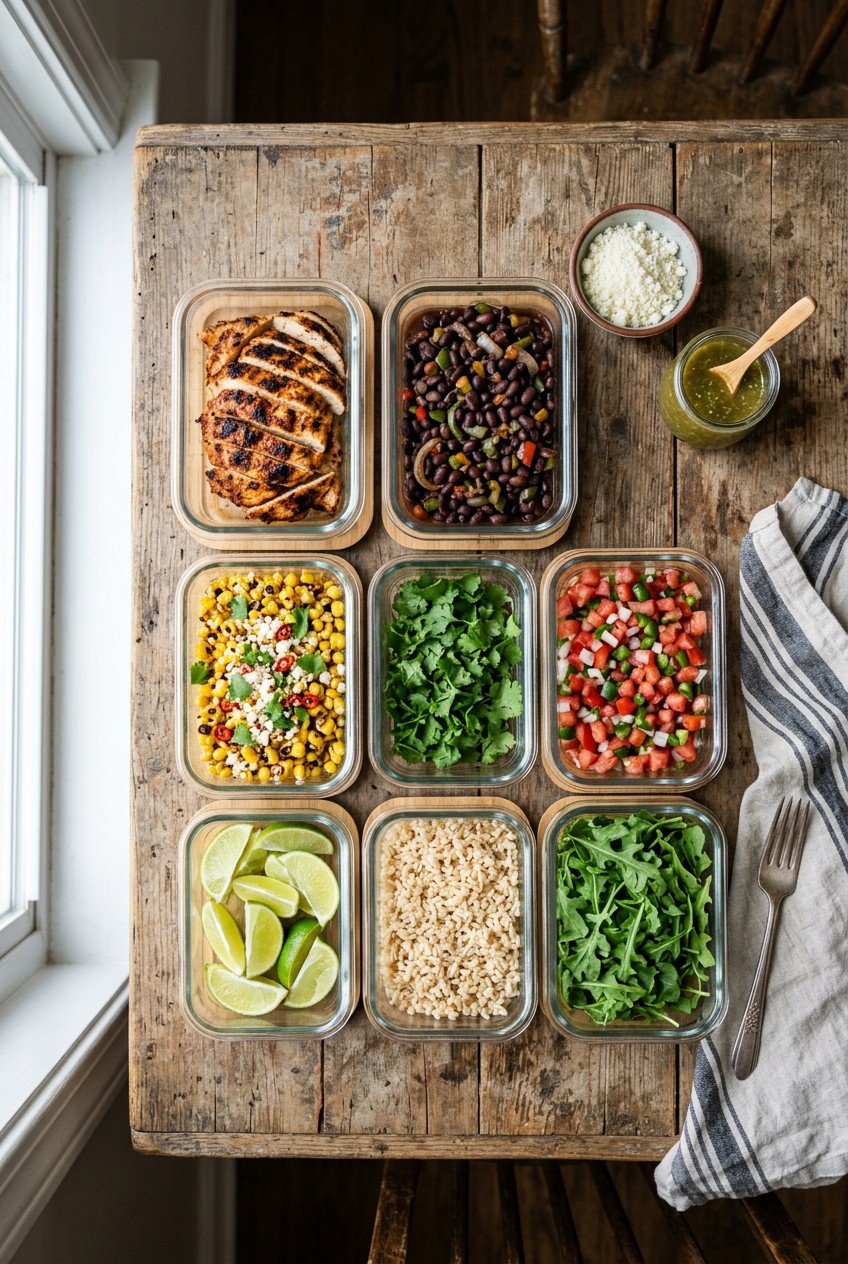
What’s Inside
- The Secret to Crispy Mexican Meal Prep Carnitas
- Skip Soggy Rice With This Mexican Meal Prep Hack
- Black Bean Bowls That Don’t Taste Like Dirt
- The Only Fajita Veggies You Should Make
- Stop Ruining Your Guacamole
- Spicy Shredded Chicken For Easy Tacos
- A Better Way To Do Breakfast Burritos
- Mexican Meal Prep Sauces You Actually Need
I stood in the breakroom last Tuesday, staring at a puddle of orange grease leaking from my cracked glass Tupperware. My attempt at Mexican meal prep was a total disaster of soggy tortillas and sad, gray ground beef that smelled faintly of wet dog. I wanted to cry. I’m not exaggerating when I say I threw the whole thing in the trash and bought a sad twelve-dollar salad from the cafe downstairs. I’ve ruined so many lunches trying to figure out how to make food that survives past day two in the fridge. Most people get this wrong because they treat meal prep like immediate dinner. You can’t just cook a massive batch of tacos, throw them in a plastic tub, and expect them to taste good on Thursday. It doesn’t work that way. The tortillas turn to mush. The meat dries out until it needs a gallon of water to swallow. The salsa makes everything taste like a swamp. I tried this wrong for months before figuring it out. You need specific strategies to keep textures crisp and flavors bright. Skip the fat-free stuff. It tastes like wet cardboard. Let’s fix your lunch routine with real ingredients, proper cooling, and actual flavor. I’m going to show you exactly how I fill my fridge every single Sunday without losing my mind. You’ll never have to scrape a solid block of cold rice into the garbage again.
1. The Secret to Crispy Mexican Meal Prep Carnitas

I swear by pork shoulder for the best lunches. I buy the Kirkland Signature Boneless Pork Shoulder at Costco. It’s usually around $14.99 for a massive 6-pound pack. You can’t beat that price for the amount of food you get. I used to throw the whole chunk of meat into a slow cooker with a jar of salsa and call it a day. That was a huge mistake. The meat would come out stringy and sit in a pool of watery grease. It was gross. To get that authentic carnitas texture, cut the pork into smaller 2-inch cubes before cooking. I rub the cubes with 2 tablespoons of dried oregano, 1 tablespoon of cumin, and a heavy pinch of kosher salt. Then I braise it low and slow. The real magic happens after it cooks. Take 4 oz of the shredded pork and spread it on a baking sheet. Broil it on high for exactly five minutes until the edges sizzle and turn a deep caramelized brown. The smell of the roasting pork fat and toasted cumin will fill your kitchen. It’s intoxicating. When you pack this, keep the crispy pork in a separate compartment from your wet ingredients. If you mix it with beans or salsa right away, you’ll lose all that beautiful crunch. I learned this the hard way after eating soggy pork for a week straight. Trust me on the broiling step. It makes a massive difference when you reheat it in the office microwave on a Wednesday.
2. Skip Soggy Rice With This Mexican Meal Prep Hack

Rice is the backbone of almost every bowl I make. I always grab the Trader Joe’s Jasmine Rice. It costs $3.49 for a 3-pound bag. It has a beautiful floral aroma that works surprisingly well with savory spices. For years, my rice was a sticky, clumpy disaster. I’d follow the package instructions perfectly, but it would still turn into a dense brick in the fridge. The texture was awful. I tried this wrong for months before figuring it out. The secret is rinsing your rice until the water runs completely clear. You need to wash away that excess surface starch. I measure exactly 1 cup of rice and rinse it in a fine-mesh strainer under cold water for two full minutes. Then, instead of water, I cook it in 1.5 cups of chicken bone broth. I add 1 tablespoon of butter and a pinch of salt. The fat coats the grains and keeps them separate during the chilling process. Once the rice is done, don’t leave it in the pot to cool. That’s a massive mistake. The residual heat will overcook it into mush. Spread the hot rice out on a large baking sheet in a thin layer. Let the steam escape quickly. Once it’s completely cool, toss it with 1/4 cup of finely chopped fresh cilantro and 2 tablespoons of fresh lime juice. The bright green cilantro leaves look gorgeous against the white grains. The sharp citrus scent cuts right through the rich broth flavor. When you pack it, the grains will stay light and fluffy all week long. You won’t ever have to chip away at a solid block of rice again.
3. Black Bean Bowls That Don’t Taste Like Dirt

I absolutely hate plain canned beans. They taste metallic and have the texture of gritty mud. Skip the fat-free stuff and definitely skip the low-sodium cans if you want actual flavor. I buy S&W Premium Black Beans at Walmart. They’re $1.28 for a 15 oz can. They hold their shape incredibly well during reheating. Most people get this wrong by just draining the can and dumping the raw beans straight into their meal prep containers. Please don’t do that. You’re missing a huge opportunity to build flavor. I always take ten extra minutes to doctor them up. I heat 1 tablespoon of olive oil in a small saucepan over medium heat. I toss in 1/2 cup of diced white onions and cook them until they’re soft and translucent. The sound of onions sizzling in hot oil instantly makes me hungry. Then I add 2 cloves of minced garlic and let it cook for exactly thirty seconds. You’ll smell that sharp, pungent garlic aroma immediately. Pour the entire can of beans into the pot. Don’t drain the liquid. That starchy bean water is liquid gold. It thickens up and creates a rich, savory sauce. I add 1 teaspoon of smoked paprika and let the whole thing simmer for ten minutes until the liquid reduces by half. The broth becomes thick and glossy, coating the back of a spoon. When I portion these out, I make sure to let the beans cool in the pot first. If you seal them in a plastic container while they’re still boiling hot, the condensation ruins the thick sauce we just spent time building. You end up with a watery mess by Wednesday. I divide exactly 1/2 cup of these savory black beans into the corner of each glass prep container, keeping them slightly separated from the rice until it’s time to eat. You might also like: 15 Brilliant Batch Cooking Ideas That Actually Work
![[8-Pack,30 oz]Glass Meal Prep Containers](https://m.media-amazon.com/images/I/713Zfdsgi4L._AC_UL320_.jpg)
[8-Pack,30 oz]Glass Meal Prep Containers
Honestly, [8-Pack surprised me — sturdier than it looks in the photos, and over 7 buyers gave it 4.5 stars.
4. The Only Fajita Veggies You Should Make

Vegetables are usually the first thing to get slimy in a prep container. I can’t stand biting into a bell pepper that feels like a wet slug. I buy the Sprouts Organic Bell Peppers. They’re usually $4.99 for a 3-pack of red, yellow, and orange peppers. They’re incredibly crisp and sweet. The biggest mistake you can make with fajita veggies is overcrowding your pan. I used to chop up three peppers and two onions, dump them all into a small skillet, and wonder why they turned into a watery, gray mess. They were steaming in their own juices instead of searing. You want a hard, aggressive sear. I slice the peppers into thick 1/2-inch strips. I heat a large cast-iron skillet until it’s literally smoking hot. I add 1 tablespoon of avocado oil because it has a high smoke point. Then I drop in the peppers in a single layer. Don’t touch them. Let them sit there for two full minutes. You want to hear a loud, angry sizzle. When you finally flip them, you should see dark, almost black blistered spots on the brightly colored skins. That char gives you a deep, smoky flavor that mimics a real restaurant grill. I toss them with 1/2 teaspoon of kosher salt and a squeeze of fresh lime juice right at the end. The sweet caramelized edges of the peppers mixed with the sharp acidity of the lime is perfect. When you pack these, make sure they’re completely cool first. If you put the lid on while they’re hot, the trapped condensation will ruin that beautiful charred texture you just worked so hard to build. You might also like: 20 Clever School Lunch Ideas You Can Try Today
5. Stop Ruining Your Guacamole

Avocados are notoriously difficult to meal prep. I’ve opened my lunchbox so many times to find a container of brown, oxidized sludge that looks like literal dirt. It’s depressing. I buy Kroger Hass Avocados. They’re usually $5.49 for a 4-count bag. I look for ones that yield slightly to gentle pressure but aren’t totally squishy. If you want guacamole to last more than twenty-four hours, you need to follow a strict set of rules. First, skip the tomatoes. I know people love tomatoes in their guac, but they release way too much water as they sit. They turn your creamy dip into a watery soup. It’s disgusting. I mash three avocados in a glass bowl with a fork. I like to leave it a little chunky. The texture should be thick and creamy, not pureed like baby food. I add 1/4 cup of finely diced red onion, 2 tablespoons of chopped cilantro, and 1 minced jalapeño. Here’s the trick that actually works. I add 2 full tablespoons of fresh lime juice. The ascorbic acid in the lime is your best defense against browning. Once it’s mixed, I transfer the guacamole to a very specific storage container. I press the mixture down flat with the back of a spoon to remove any air pockets. Then I pour a thin layer of cold water over the top. Yes, water. It sounds crazy, but the water creates an airtight seal. When you’re ready to eat your lunch on Thursday, you just pour the water off the top and give it a quick stir. The guacamole underneath will be perfectly bright green. I’ve saved so much money doing this instead of throwing away rotten avocados every week. You might also like: 15 Inspiring Chicken Meal Prep Ideas You Haven’t Thought Of
6. Spicy Shredded Chicken For Easy Tacos

I used to hate meal prepping chicken breasts. They always came out tasting like dry erasers. I’d chew and chew, and it felt like swallowing sawdust. I buy the Good & Gather Boneless Skinless Chicken Breasts from Target. They cost $9.99 for a 32 oz package. To fix the dry chicken problem, I stopped baking them and started poaching them in a highly seasoned liquid. I place 1.5 pounds of chicken breasts in a deep skillet. I pour in one 10 oz can of red enchilada sauce and 1 cup of chicken broth. The liquid needs to completely cover the meat. I bring it to a gentle simmer, cover the pan, and let it cook for exactly twenty minutes. The smell of the bubbling red chili sauce, garlic, and cumin is incredible. It smells like a busy taqueria. Once the chicken is cooked through, I remove it to a cutting board. I take two forks and pull the meat apart. It should shred effortlessly, the tender white fibers separating with barely any pressure. I return the shredded chicken to the skillet and let it soak up all that reduced, thickened red sauce. The meat acts like a sponge, absorbing all the moisture and spicy flavor. I also love adding 1/2 cup of frozen corn to the skillet during the last five minutes of simmering. The sweet yellow kernels pop against the spicy red sauce and add a great crunchy texture. When you portion this out for the week, use a slotted spoon to transfer the meat, then drizzle exactly one extra spoonful of the remaining pan sauce over the top. It acts as a protective barrier against the dry fridge air. You’ll be shocked at how juicy it stays.

KOMUEE 10 Packs 30 oz Glass Meal Prep Containers
A dependable everyday pick — KOMUEE 10 Packs 30 oz Glass Meal Prep Containers pulls in 45 ratings at 4.5 stars. Not flashy, just solid.
7. A Better Way To Do Breakfast Burritos

Breakfast burritos are the ultimate grab-and-go meal, but they’re so easy to mess up. I’ve ruined dozens of them. I’d wrap them up on a Sunday night, freeze them, and reheat them on Tuesday only to bite into a gummy, soggy tortilla filled with rubbery eggs. It was a textural nightmare. I exclusively use the 365 Everyday Value Flour Tortillas from Whole Foods. They’re $3.29 for a pack of 6 large tortillas. They have a great stretch to them and don’t tear when you roll them tight. The biggest mistake you can make is wrapping your burritos while the filling is still hot. The steam gets trapped inside the foil and turns the flour tortilla into a wet sponge. You must let your scrambled eggs, sausage, and roasted potatoes cool completely to room temperature. I spread my cooked fillings out on a large baking sheet so they cool faster. I use 2 large eggs and 1/4 cup of sharp cheddar cheese per burrito. I sprinkle the cheese directly onto the room-temperature eggs. Once everything is cold, I roll the burritos as tightly as possible. I wrap each one tightly in parchment paper, and then in a layer of aluminum foil. If you’re making a massive batch to freeze for the whole month, the process is exactly the same. Just place the foil-wrapped burritos in a large heavy-duty freezer bag and squeeze all the air out. The parchment paper acts as a moisture barrier to prevent freezer burn. I’ve eaten these a month later and they still taste incredible. Just remember to move one to the fridge the night before so it thaws slightly before you hit it with the microwave in the morning. Toast it in a dry skillet for two minutes per side for the best crispy crust.
8. Mexican Meal Prep Sauces You Actually Need

A good sauce is the only thing standing between you and a miserably boring lunch. I refuse to eat a dry bowl of rice and beans. I need a punch of acidity and heat to wake up my palate. I always keep a jar of Herdez Salsa Verde in my pantry. I buy it at Walmart for $2.49 for a 16 oz jar. It has a tangy, bright tomatillo bite that cuts right through rich meats and heavy beans. But you can’t just rely on store-bought salsa. You need a creamy element. I used to buy fat-free sour cream to save calories. Skip the fat-free stuff. It tastes like wet cardboard and has a bizarre, chalky texture. Instead, I make a quick cilantro lime crema that I literally want to drink with a straw. I blend 1/2 cup of full-fat Greek yogurt with 1/4 cup of fresh cilantro, 1 tablespoon of olive oil, 1 minced garlic clove, and 2 tablespoons of lime juice. The blender turns it into a gorgeous pale green sauce. It’s smooth, cool, and incredibly refreshing. I store it in a small glass mason jar in the fridge. When I’m ready to eat, I drizzle two tablespoons of this cold crema over my hot chicken and rice. The contrast of temperatures is amazing. The cool, tangy yogurt balances the spicy heat of the salsa perfectly. Never pour your sauce over your food before storing it in the fridge. Keep your wet sauces in tiny separate condiment containers. If you dress your bowls on Sunday, everything will be a soggy, unappetizing mess by Wednesday. Pour it on right before you take your first bite.
I really hope these tips save you from eating another sad, soggy lunch at your desk. I’ve spent years making every mistake possible so you don’t have to. Once you start broiling your carnitas and washing your rice, your lunches are going to taste better than takeout. It’s honestly completely changed my Sunday routine. If you found this helpful, please save this post or pin it to your favorite Pinterest board for later. Let’s make this week’s meals actually worth looking forward to!
Frequently Asked Questions
How long does mexican meal prep last in the fridge?
When stored properly in airtight glass containers, most cooked meats, rice, and beans will stay fresh for up to four days. Always wait for your food to cool completely before sealing to prevent condensation.
How do I keep my meal prep tortillas from getting soggy?
Store your tortillas separately from your wet ingredients like salsa or beans. Wrap them in a dry paper towel and keep them in a ziplock bag, then assemble your tacos or burritos right before eating.
Can I freeze mexican meal prep bowls?
Yes, but you need to leave out fresh ingredients like lettuce, avocado, and sour cream. Cooked rice, beans, and meats freeze beautifully. Thaw them in the fridge overnight before reheating.
What is the best meat for mexican meal prep?
Pork shoulder and chicken thighs are fantastic because they have enough fat to stay juicy after reheating. If you use chicken breasts, poach them in a sauce to prevent them from drying out in the fridge.
