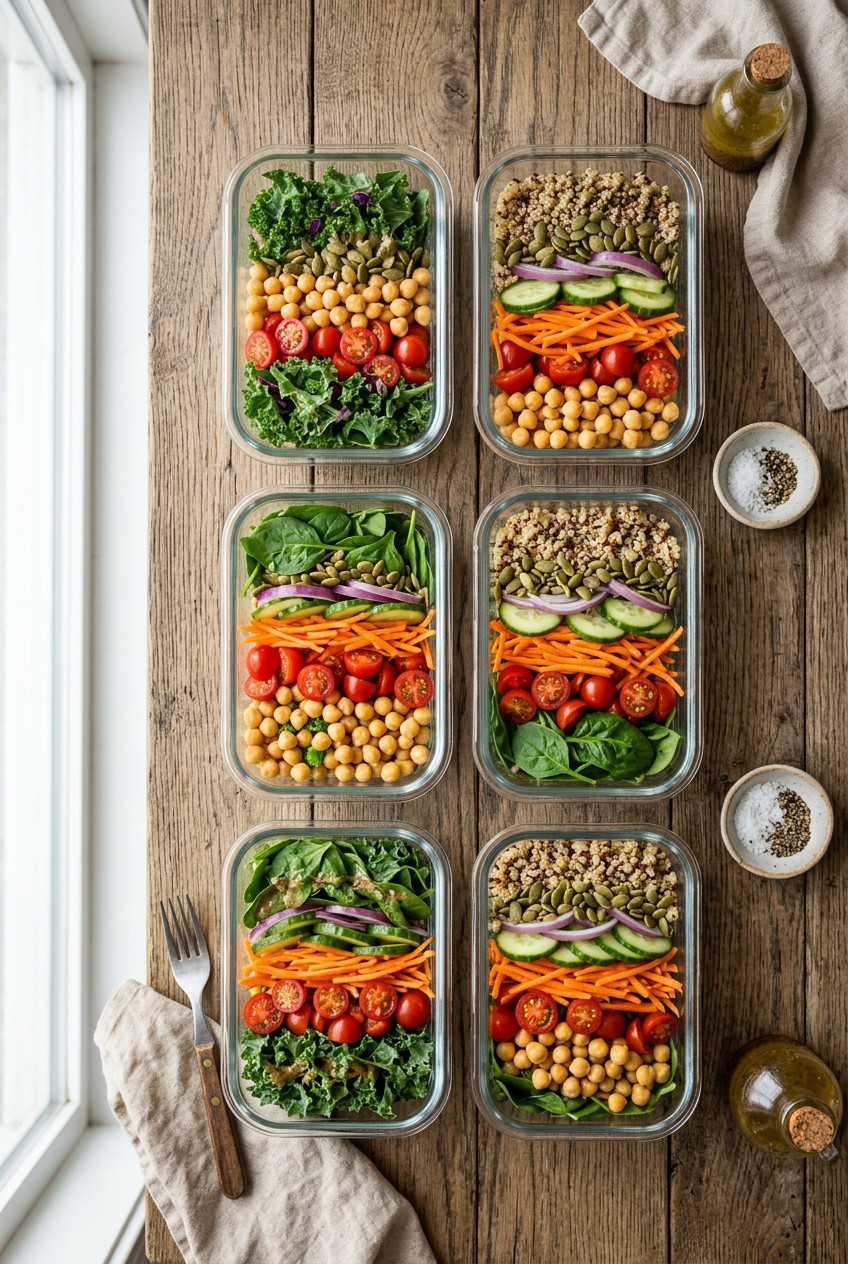
What’s Inside
- The Container Situation For Meal Prep Salads
- The Mason Jar Upside-Down Magic
- Ditch The Spring Mix For Sturdy Greens
- Washing With Vinegar For Longer Life
- Keeping Wet Ingredients Far, Far Away
- Smart Protein Prep For Meal Prep Salads
- Dressings That Actually Last
- Grains And Undercooked Veggies
- The Dairy-Free Cheese Hack
- Crunchy Toppings And Unexpected Flavors
It happened last Tuesday at my office desk in the middle of a chaotic afternoon. I snapped open my flimsy plastic container, totally ready for lunch, and was hit with the unmistakable swampy smell of rotting spinach. Making meal prep salads shouldn’t end in tragedy, but there I was, staring at a slimy green puddle that used to be my beautiful Sunday creation. I’m telling you, I’ve cried over soggy lettuce more times than I care to admit. It’s frustrating to spend your entire Sunday afternoon chopping expensive vegetables just to throw them away by Wednesday morning. I did this wrong for months before figuring it out. I used to dump everything into one giant bowl, drench it in dressing, and wonder why my Wednesday lunch tasted like a damp sponge. Most people get this wrong because they treat a prepped salad like a regular restaurant meal. You can’t just toss things in a bowl and hope for the best. You need a strategy for moisture control, ingredient separation, and proper layering. Skip the fat-free stuff, too. It tastes like wet cardboard. Let’s fix your lunch routine so you aren’t eating garbage by the end of the week.
1. The Container Situation For Meal Prep Salads

If you’re still using old takeout boxes, we need to talk. The foundation of good meal prep salads comes down to your gear. I swear by quality, segmented containers. For the longest time, I used cheap plastic bins from the dollar store. My dressing always leaked onto my laptop bag, and my croutons turned into absolute mush. I learned that the hard way. Now, I use Rubbermaid Brilliance BPA Free Food Storage Containers. You can grab a 12-piece set for $49.99 at Target, and it’s worth every penny. The leak-proof seals are tight. You can shake them upside down and nothing drips out. If you want something specifically designed for this, the Bentgo All-in-One Salad Containers run about $19.99 on Amazon. They have a brilliant top tray with tiny compartments for your cheese and nuts, keeping them dry away from the wet greens. I’ve also noticed a huge trend for 2026 called ingredient prep. Instead of building five identical salads, you wash and chop your components and store them separately. You just grab a handful of greens, a scoop of protein, and your veggies each morning. It prevents flavor fatigue. It’s so much better than eating the same thing five days in a row. You aren’t stuck with one dressing choice all week. You can mix and match. Just make sure whatever container you buy has a heavy-duty rubber gasket. Flimsy lids won’t protect your greens from the humid air inside your fridge.
2. The Mason Jar Upside-Down Magic

If you don’t want to spend fifty bucks on plastic containers, I get it. For a budget-friendly option, you can’t beat heavy glass. I buy the Ball Mason Jars in the 32 oz wide-mouth size. You can get a 12-pack for $16.48 at Walmart. The wide mouth is non-negotiable. If you buy the narrow ones, you won’t be able to get your fork in there, and dumping it out becomes a messy, frustrating nightmare. The secret to making mason jars work is the upside-down layering technique. Follow this exactly. Always start with 2 to 3 tablespoons of your favorite dressing at the very bottom. Next, drop in your hard, non-absorbent vegetables. I’m talking about chopped carrots, bell peppers, or whole cherry tomatoes. These sit in the dressing and marinate, which makes them taste rich by day four. After the hard veggies, add your cooked grains or heavy proteins. Then add softer fruits or vegetables. Finally, pack your leafy greens at the very top, as far away from the dressing as possible. This method keeps delicate greens dry until you’re ready to eat. When you dump the jar onto a plate, the dressing pours over the top perfectly. Honestly, this changed how I view packed lunches. My greens stay crisp for five full days. Just make sure you screw the metal bands on tightly so the fridge air stays out.
3. Ditch The Spring Mix For Sturdy Greens

Stop buying those giant plastic clamshells of spring mix. I know they look pretty in the store. But delicate greens like spring mix or butter lettuce will wilt into a slimy mess by Tuesday afternoon. They can’t handle sitting in a cold fridge for four days. Instead, choose sturdy greens for extended freshness. I’m obsessed with using chopped romaine lettuce, curly kale, shredded green cabbage, or spicy arugula. Last week I bought a bag of shredded broccoli stems from Trader Joe’s for $2.99, and the crunch was phenomenal. These heartier greens have a thicker cell structure. They won’t collapse when they get cold. But here is the most important part. You must dry your greens thoroughly. This is non-negotiable. Excess moisture is the enemy of fresh salads. After washing, I use my OXO Good Grips Salad Spinner. It costs $29.99 at Whole Foods, and it spins out so much hidden water. Even after spinning, I take an extra precaution. I line my storage containers with a double layer of Bounty paper towels. A 4-pack of Bounty costs $12.99 at Target. I place one towel at the bottom and one on top of the greens. The paper towel absorbs all the residual condensation that builds up in the fridge overnight. I’ve pulled out perfectly crisp romaine on day five using this exact trick. It’s basically magic for your lunchbox. You might also like: 15 Stunning Aesthetic Batch Cooking You Need to See

8 Pack 36oz Large Glass Meal Prep Containers with lids
If you want something that just works, 8 Pack 36oz Large Glass Meal Prep Containers with lids is a safe bet (866 reviews, 4.5 stars).
4. Washing With Vinegar For Longer Life

Most people just run their vegetables under cold tap water for three seconds and call it a day. I used to do that too. Then I wondered why my cucumbers were getting fuzzy so fast. If you want your produce to last from Sunday to Friday, you need to consider a vinegar wash. This is a lesser-known tip that altered my Sunday routine. I buy the giant 1-gallon jug of Heinz Distilled White Vinegar for $5.99 at Costco. When I get home from the grocery store, I fill my clean kitchen sink with cold water and add the vinegar. The ratio I use is 1 part vinegar to 3 parts water. I dump all my uncut tomatoes, cucumbers, and peppers into the bath and let them soak for ten solid minutes. The mild acid helps kill surface bacteria and mold spores that cause produce to spoil prematurely. Now, I must admit a mistake I made early on. I tried this wrong for months. I didn’t rinse the vegetables after the vinegar bath. I just dried them. My entire Monday lunch tasted like a weird, unintended pickle. You absolutely must rinse your produce with fresh cold water after the soak. Once rinsed, dry them completely with a clean cotton dish towel before chopping anything. This extra ten minutes on Sunday afternoon means I’m never throwing away fuzzy bell peppers on Thursday morning. You might also like: 20 Inspiring Carnivore Meal Prep Ideas That Are Totally Worth It
5. Keeping Wet Ingredients Far, Far Away

Even if you layer everything perfectly, some ingredients are just naturally watery and will ruin your life. Tomatoes and cucumbers are the biggest offenders. If you chop a regular slicing tomato on Sunday, it’s going to bleed acidic juice all over your container by Monday morning. My quinoa used to soak up the tomato juice and turn into pink mush. To fix this, you have to opt for whole or larger cuts of watery vegetables. Instead of dicing large tomatoes, I exclusively buy Trader Joe’s Sugar Plum Grape Tomatoes. They cost $3.49 for a 10 oz container. Because the skin remains intact, they won’t release a single drop of liquid into your bowl. You just pop them in whole. For cucumbers, I stop dicing them into tiny cubes. I keep them in thick, chunky slices. The less surface area you expose to the air, the less water they weep. If I’m using very juicy fruits like sliced strawberries or mandarin oranges, I refuse to put them in the main container. I put them in tiny separate containers. I found these little Sistema To Go Mini Bites containers at Kroger for $5.49 for a 3-pack. I keep the wet stuff locked away in those until the moment I’m ready to eat. You have to separate wet ingredients to maintain that beautiful crisp texture. Don’t let a chopped tomato ruin your hard work. Keep them whole or keep them separated. You might also like: 20 Clever Quick Lunch Ideas You Haven’t Thought Of
6. Smart Protein Prep For Meal Prep Salads

Adding protein turns a side dish into an actual meal that keeps you full until dinner. But you have to prep proteins smartly. Last month, I was rushing through my Sunday prep. I pulled hot chicken breasts straight off the stove, chopped them up, and immediately sealed them in my plastic containers with my cold lettuce. I basically created a hot steam room inside my Tupperware. By the next day, the greens were black and wilted from the trapped heat. It was a disaster. You must ensure all cooked ingredients are completely cooled before they ever touch your storage containers. I usually buy Sprouts Boneless Skinless Chicken Breasts for $5.99 a pound. I grill about 1.5 cups of chicken breast per serving, which is roughly 6 to 8 oz. After cooking, I let the meat rest on a cutting board for at least thirty minutes. I shred it with two forks and then put the shredded meat in the fridge on an uncovered plate for another twenty minutes. Only when it’s cold to the touch do I add it to my prep bowls. This prevents condensation from building up on the lid and dripping down onto your crisp vegetables. This rule applies to hard-boiled eggs and roasted chickpeas too. If it’s warm, it can’t go in the box. Don’t rush the cooling process, or you’re just throwing your money into the trash can.

Skroam 10 Pack Glass Meal Prep Containers
A dependable everyday pick — Skroam 10 Pack Glass Meal Prep Containers pulls in 56 ratings at 4.5 stars. Not flashy, just solid.
7. Dressings That Actually Last

My opinion on salad dressing is strong. Skip the fat-free bottled stuff from the middle aisles. It tastes like wet cardboard and is usually packed with weird gums and artificial sugar. Making your own dressing takes two minutes and tastes better. But when you’re making meal prep salads, you have to choose the right type of dressing. Creamy dressings made with Greek yogurt, mayonnaise, or buttermilk are delicious, but they only last 5 to 7 days in the fridge before they start smelling funky. Homemade vinaigrettes offer a much longer shelf life. Because they rely on acid and oil, they can easily last 1 to 2 weeks. Sometimes they last up to 3 or 4 weeks if they contain only oil, vinegar, and dried spices. I make a huge batch every Sunday in a glass jar. My go-to formula is 1 part balsamic vinegar to 3 parts olive oil. I use Pompeian Extra Virgin Olive Oil. A 16 oz bottle is $8.49 at Kroger. I add a giant scoop of Maille Dijon Mustard, which is $4.29 for a 7.5 oz jar. The mustard acts as an emulsifier so the oil and vinegar don’t separate instantly. I throw in some dried oregano, a heavy pinch of salt, and cracked black pepper. I just shake it vigorously before pouring it into my little travel containers. It doesn’t spoil quickly, and it makes plain spinach taste like a gourmet meal.
8. Grains And Undercooked Veggies

Eating a bowl of plain leaves for lunch is depressing. You’ll be starving by 2 PM. You need to embrace grains and legumes for filling salads. I always add cooked grains like quinoa, farro, or brown rice to my prep. I use Bob’s Red Mill Organic Quinoa. A 13 oz bag is $7.39 at Whole Foods. I measure out exactly 1/2 cup of cooked quinoa and 1/2 cup of rinsed canned chickpeas per serving. These add massive amounts of plant-based protein and fiber. The best part is that grains and beans hold up exceptionally well in the fridge for several days. They actually taste better on day three because they absorb the flavors of your dressing. Now, if you like roasted vegetables in your bowls, I’ve got a secret. You need to undercook hearty vegetables slightly for better texture. When I roast broccoli florets or green beans, I take them out of the oven about four minutes early. I pull them while they are still slightly tough and bright green. As they sit in the fridge, the natural moisture softens them. If you cook them until they are soft on Sunday, they will be mush by Wednesday. I learned this when I packed overly roasted zucchini, and it turned into literal baby food in my container. Pull your veggies early. They will finish softening beautifully as they sit in your fridge.
9. The Dairy-Free Cheese Hack

I love cheese. I could eat a pound of feta in one sitting. But dairy is tricky when it comes to meal prep. Real dairy contains moisture and bacteria that can cause your surrounding vegetables to spoil much faster. I noticed that whenever I made a watermelon and cucumber salad with real feta cheese, the whole container would smell sour by Thursday. The cheese would get slimy and coat the crisp cucumbers in a weird white film. If your recipe calls for crumbled cheese, I highly recommend you use a dairy-free feta alternative. This was a hard swap for me at first, but it changed how I pack my lunches. It took me years to figure out. I buy the Violife Just Like Feta block. It’s 8.1 oz and costs $5.79 at Target. Because it’s plant-based and made mostly from coconut oil, it doesn’t break down and spoil the way dairy does. It stays firm and crumbly all week long. It extends the shelf life of your entire container. You just chop it into cubes and toss it in. If you absolutely refuse to give up real dairy cheese, you have to store it separately. Buy those tiny plastic ramekins and keep your real cheddar or feta isolated until you sit down to eat. But seriously, give the dairy-free feta a try. It solves so many moisture issues and tastes surprisingly close to the real thing.
![[8-Pack,30 oz]Glass Meal Prep Containers](https://m.media-amazon.com/images/I/713Zfdsgi4L._AC_UL320_.jpg)
[8-Pack,30 oz]Glass Meal Prep Containers
If you want something that just works, [8-Pack is a safe bet (7 reviews, 4.5 stars).
10. Crunchy Toppings And Unexpected Flavors

Texture is everything. If your lunch doesn’t have a loud crunch, it’s boring. But you must keep crunchy toppings separate until serving. If you throw croutons, tortilla strips, or crispy fried onions into your main container on Sunday, they will absorb the humidity of the fridge and turn into sad, chewy sponges. I keep a box of Ziploc Snack Bags in my pantry. They are $4.99 for a box of 90 at Walmart. I portion out my crunchy items into these tiny bags and tuck them into my lunchbox next to my main container. Right before I eat, I rip open the bag and dump them on top. Beyond the crunch, you need to incorporate unexpected flavor boosters. Eating the same carrots and cucumbers gets old fast. I like to add 1/4 cup of shelled pistachios for a rich, nutty flavor. I buy Wonderful Pistachios No Shells for $6.49 (5.5 oz bag) at Trader Joe’s. Another incredible trick is using fresh herbs instead of just lettuce. I chop up 2 tablespoons of fresh mint and toss it into my quinoa bases. It provides a surprising burst of flavor that makes the whole dish taste bright and expensive. I also love adding slightly undercooked roasted sweet potatoes for a pop of sweetness. Don’t be afraid to throw weird things into your bowls. A handful of pumpkin seeds or a sprinkle of fresh dill can change the vibe of your lunch.
Prepping your lunches doesn’t have to end in soggy disappointment. If you follow these steps, invest in the right segmented containers, and keep your wet ingredients far away from your dry greens, you’re going to have crisp, delicious lunches all week long. I’m so glad I stopped throwing away rotten spinach and finally figured out how to do this right. You won’t believe how much money and time you save when you aren’t running to the deli across the street every single day at noon. I’d love to hear what flavor combinations you come up with. If you found these tips helpful, please pin this post to your favorite Pinterest board so you can find it next Sunday when you’re getting ready to chop your veggies. Let’s make this the week you finally conquer your fridge!
Frequently Asked Questions
How long do meal prep salads last in the fridge?
When stored properly in airtight containers with moisture-absorbing paper towels, they can last 4 to 5 days. Keep dressings and wet ingredients separated to maximize their shelf life.
What are the best greens for meal prep salads?
Skip delicate spring mix and opt for sturdy greens. Chopped romaine, curly kale, shredded green cabbage, and arugula hold up best against cold temperatures and fridge humidity.
Should I put dressing on my meal prep salads?
Never dress your greens in advance unless you’re using the upside-down mason jar method. Always store your vinaigrettes in small, separate containers and toss just before eating.
How do I keep chicken fresh in meal prep salads?
Ensure your cooked chicken is completely cooled before sealing it in your containers. Packing warm protein creates condensation, which rapidly wilts your greens and causes premature spoilage.
