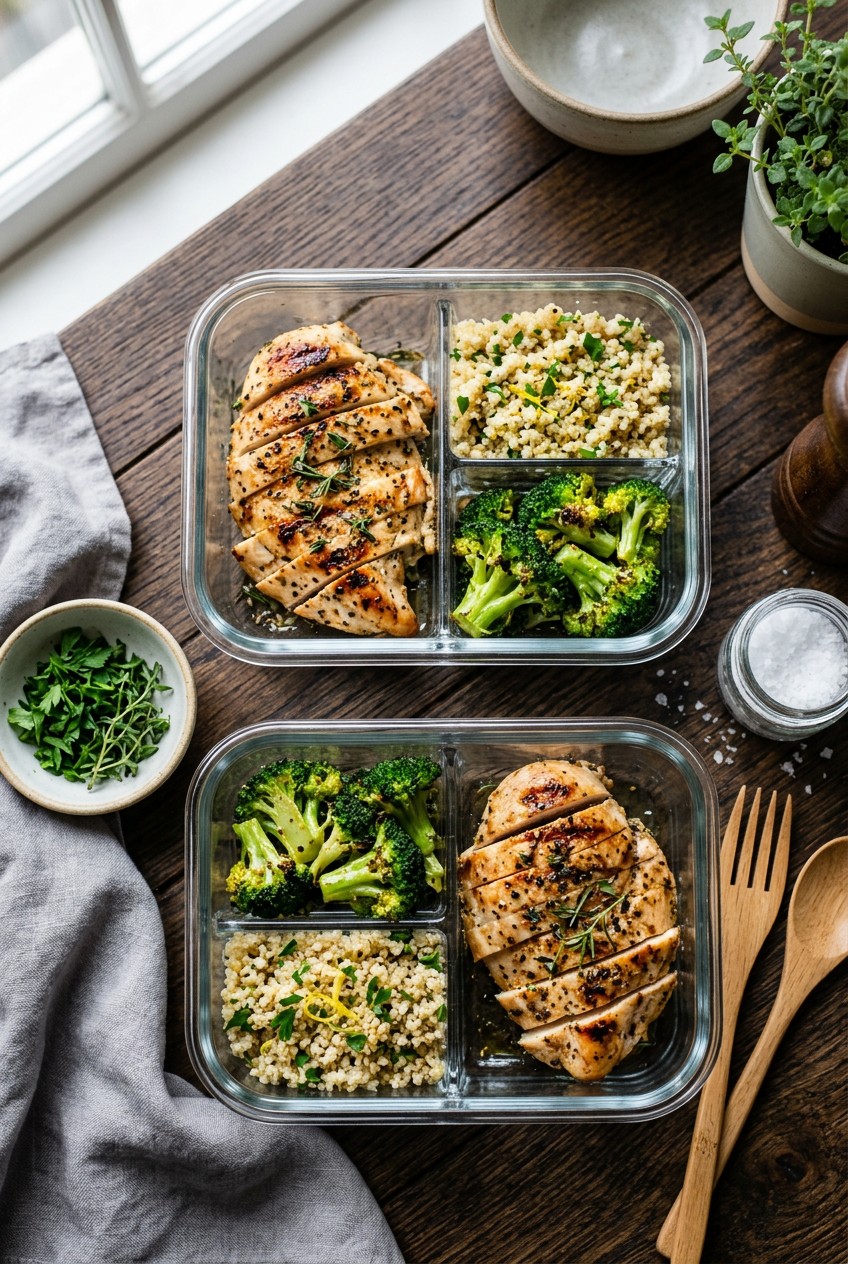
What’s Inside
- Bulk Buy at Costco for Massive Savings
- Master the Marinade for Meal Prep Chicken Breast
- Precision Cook with Sous Vide for Unmatched Juiciness
- Utilize the Air Fryer for Quick, Even Cooking
- Poach Chicken for Surprisingly Tender Results
- Always Use a Meat Thermometer to Prevent Overcooking
- Crucial Cooling and Proper Storage Guidelines
- Pound Chicken Breasts to Even Thickness
- Flash Freeze Your Meal Prep Chicken Breast
Last Tuesday at Whole Foods, I stood in the prepared foods aisle at 6:30 PM, wiped out from a long workday. I stared at a tiny, 8-ounce plastic container of sad-looking gray poultry priced at a ridiculous $12.99. I picked it up, pressed my thumb against the film, and the meat felt like a dense rubber eraser. I put it right back on the cold shelf. I realized I was wasting money on terrible convenience food just because I hated cooking meat at home. I decided right then to master meal prep chicken breast. If you’re struggling to make chicken that actually tastes good by Wednesday, I’ve got you covered. I’ve spent the last three years testing temperatures, marinades, and storage because eating dry, chalky meat is a miserable way to spend your lunch hour. I’m going to share what works, what fails, and the specific items you need to buy. I’ve ruined enough dinners so you don’t have to. Let’s fix your Sunday cooking routine, starting with the basics of buying and preparing your ingredients.
1. Bulk Buy at Costco for Massive Savings

I’m picky about where I buy meat. Buying small, 1-pound packages at a standard store is the fastest way to drain your budget. I exclusively buy boneless, skinless chicken breasts from warehouse clubs. I grab the Kirkland Signature chicken at Costco, which averages around $3.69 per pound. If you have a Sam’s Club membership, their Member’s Mark brand can drop as low as $1.72 per pound. Buying in bulk cuts your per-pound cost, making meal prep much cheaper.
I learned that the hard way last month. I was lugging a 10-pound pack of Kirkland chicken up the stairs to my apartment. The flimsy plastic bag ripped open at the bottom. It leaked cold, sticky raw chicken juice all over my favorite white canvas sneakers. It was gross. Now, I immediately transfer the meat into heavy-duty 1-gallon Ziploc freezer bags ($13.49 for a 60-count box at Target) as soon as I get home. I portion out exactly 2 pounds per bag. I refuse to pay standard store prices of $6.99 per pound for the same quality. It’s just bad math. When you buy in bulk, you’re setting yourself up for a month of successful lunches without the financial guilt.
2. Master the Marinade for Meal Prep Chicken Breast

Plain, unseasoned poultry is depressing. You need to marinate your meat for at least 2 hours, ideally up to 12, before cooking to infuse flavor and tenderize the muscle fibers. A good rule of thumb is to use exactly 1 tablespoon of seasoning blend per pound of meat. Skip the bottled, fat-free marinades. They taste like wet cardboard and are packed with weird gums that burn in the pan.
I swear by a homemade lemon-herb marinade that keeps the meat juicy. In a small glass bowl, I whisk together 1/4 cup Trader Joe’s organic extra virgin olive oil ($7.99 for 16.9 oz), 1/4 cup Bragg apple cider vinegar ($6.49 for 16 oz), 1 tablespoon fresh squeezed lemon juice, 1 tablespoon Nature Nate’s raw honey ($8.49 for 16 oz), 1 tablespoon Grey Poupon Dijon mustard ($3.99 for 8 oz), 2 teaspoons McCormick Italian seasoning, 2 teaspoons garlic powder, 1 teaspoon Morton kosher salt, 1 teaspoon onion powder, and 1/2 teaspoon coarse black pepper. This ratio perfectly coats 1.5 to 2 pounds of meat. The sharp smell of vinegar mixing with the sweet honey is amazing. The acid breaks down the proteins, ensuring your Wednesday lunch isn’t a chewy disaster.
3. Precision Cook with Sous Vide for Unmatched Juiciness

The sous vide method is popular for 2026, and for good reason. It produces tender, melt-in-your-mouth results every time. You cook the meat in a vacuum-sealed bag submerged in a precisely temperature-controlled water bath. I use the Anova Culinary Precision Cooker ($129.00), clamped to the side of a large metal stockpot. I set the water to exactly 145°F (63°C) and let it cook for 2.5 hours.
I tried this wrong for months. I was terrified of undercooking, so I set the water to 165°F. I basically boiled the meat. It came out like a rubbery shoe sole. You have to trust the 145°F temperature for the extended time. The water bath hums quietly on your counter while it works. When you pull the bag out, the meat looks pale and unappetizing. You must take it out, pat it dry with paper towels, and sear it in a screaming hot cast-iron skillet for exactly 1 minute per side. I use 1 tablespoon of Kerrygold butter ($4.49 for 8 oz) for a crispy golden-brown crust. It’s the juiciest bite you’ll ever eat. You might also like: 15 Clever Family Dinner Ideas for a Fresh New Look

KOMUEE 10 Packs 30 oz Glass Meal Prep Containers
If you want something that just works, KOMUEE 10 Packs 30 oz Glass Meal Prep Containers is a safe bet (45 reviews, 4.5 stars).
4. Utilize the Air Fryer for Quick, Even Cooking

When I’m short on time on a Sunday afternoon, the air fryer is my backup plan. It’s fast, efficient, and needs almost zero babysitting. I preheat my Ninja 4-Quart Air Fryer ($89.99) to 375°F (190°C). I cook the marinated pieces for 15 to 17 minutes, flipping them halfway through with silicone tongs. The circulating air creates a crispy exterior while locking in moisture. You might also like: 20 Clever School Lunch Ideas You Can Try Today
You must spray the basket to prevent sticking. Last Friday, I made a mistake. I used a cheap, generic olive oil spray from the back of my pantry. The smoke point was way too low. Within five minutes, my kitchen filled with thick, gray smoke that smelled like burnt tires. My alarm screamed for ten minutes while I fanned the air with a towel. Now, I strictly use Chosen Foods Avocado Oil Spray ($6.98 for 4.7 oz at Walmart). Avocado oil has a high smoke point and won’t set off your alarms. It’s a mandatory upgrade. You might also like: 20 Lovely Work Lunch Ideas to Inspire Your Next Project
5. Poach Chicken for Surprisingly Tender Results

Poaching sounds boring. I thought it was bland diet food until I tried it correctly. Culinary experts suggest poaching meat in simmering liquid yields tender, juicy results. It’s the best method if you’re planning to shred the meat for salads, wraps, or tacos. The moist environment ensures the proteins don’t tighten up and dry out.
I place 1 pound of meat into a medium saucepan. I add 4 cups of cold water, 1 tablespoon of kosher salt, and 2 whole Sprouts organic bay leaves ($4.99 for 0.15 oz). I bring it to a gentle boil, then drop the heat to low, cover, and simmer for 10 to 12 minutes. The biggest mistake people make is boiling the water too hard. The first time, the water was violently bubbling. The meat seized up into a tight, dry knot. You want tiny, gentle bubbles. The earthy smell of bay leaves is comforting. As a bonus, I strain the leftover poaching liquid into a 32-ounce Ball mason jar ($14.99 for a 12-pack) and store it to use as a quick broth for rice later.
6. Always Use a Meat Thermometer to Prevent Overcooking

The most common mistake home cooks make is overcooking poultry. Even five extra minutes in the pan will ruin the texture, leaving you with dry, stringy bites. You must use a digital meat thermometer to ensure your food reaches a safe internal temperature of 165°F (74°C) without going a single degree over.
I used to guess by cutting it open in the pan. All the flavorful juices would flood out onto my cutting board. The meat was ruined and chalky. I stopped doing that immediately. Now, I use the Meater Plus wireless smart thermometer ($99.95). I slide the probe into the thickest part of the meat before it hits the pan. The Bluetooth app pings my phone the second the temp hits 165°F. It’s foolproof. Pulling the meat off at the right second is the best way to guarantee a juicy lunch.

M MCIRCO 10-Pack,30 Oz Glass Meal Prep Containers 2
M MCIRCO 10-Pack punches above its price — 23 buyers rated it 4.5 stars. I would buy it again.
7. Crucial Cooling and Proper Storage Guidelines

Food safety isn’t glamorous, but it’s vital. To prevent bacterial growth, you must cool your food and refrigerate it within 2 hours. If it’s the middle of summer and your kitchen exceeds 90°F (32°C), that window shrinks to 1 hour. The USDA recommends storing cooked poultry for a maximum of 3 to 4 days at 40°F (4°C) or below.
I divide my Sunday batches into shallow containers to help them cool faster. I urge you to stop using cheap, stained plastic. I had an old, warped Tupperware box that smelled like raw garlic and dish soap. It ruined the flavor of my food. Now, I exclusively use Pyrex 3-cup rectangular glass containers ($24.99 for a 4-pack at Target). Glass is heavier, but it doesn’t hold weird odors or stain orange. The heavy clack of the glass lid snapping shut gives me peace of mind that my food is actually sealed.
8. Pound Chicken Breasts to Even Thickness

Poultry has a thick, bulbous end and a thin, tapered end. If you throw it into a hot pan as-is, the thin tail will burn while the center remains raw. For uniform cooking, you must pound the meat to an even 1/2-inch thickness. This ensures all parts cook at the same rate.
I use a heavy metal OXO Good Grips Meat Tenderizer ($17.99 from Kroger). I once scared my cat, Barnaby, on a Sunday morning. I was whacking a 2-inch piece of meat on my granite counter. The rhythmic thuds made him scramble under the sofa. Pro tip: always place the raw meat inside a 1-gallon Ziploc bag, pressing the air out, before hitting it. If you don’t use the plastic, raw poultry juice will splatter all over your backsplash, clothes, and face. It’s a health hazard. Pounding the meat breaks down the fibers for perfectly flat portions.
9. Flash Freeze Your Meal Prep Chicken Breast

If you cook a 10-pound batch, you won’t eat it all within the 4-day freshness window. You need the freezer. However, you can’t just toss warm meat into a bag. To prevent pieces from freezing into one giant clump, you need to flash freeze them first.
I learned this when I dumped four cooked breasts into a single bag. Three weeks later, I needed a hammer to break them apart. They were a frozen, impenetrable boulder. Now, I spread the cooled pieces in a single layer on a Nordic Ware half sheet pan ($15.99). I place the uncovered pan in the freezer for 20 minutes until the exterior is firm. Then, I transfer the pieces into my FoodSaver Vacuum Sealer bags ($149.99 for the machine). The machine sucks the air out with a loud whir. This prevents freezer burn and preserves the meat for up to 6 months.
Mastering these techniques changed my relationship with weekday lunches. I’m no longer staring at rubbery, unseasoned meat at my desk. By bulk buying at Costco, using a thermometer, and ditching plastic for glass, you’re setting yourself up for success. The homemade lemon herb marinade alone will save you from dry food. I recommend spending one hour this Sunday testing the air fryer or sous vide method. You won’t regret it. If you found these tips helpful, please pin this article to your favorite recipe board so you can easily reference the measurements next time you’re in the kitchen!
![[8-Pack,30 oz]Glass Meal Prep Containers](https://m.media-amazon.com/images/I/713Zfdsgi4L._AC_UL320_.jpg)
[8-Pack,30 oz]Glass Meal Prep Containers
[8-Pack punches above its price — 7 buyers rated it 4.5 stars. I would buy it again.
Frequently Asked Questions
How long does meal prep chicken breast last in the fridge?
Cooked chicken breast safely lasts 3 to 4 days in the refrigerator when stored in an airtight glass container at 40°F or below. Never push it past 4 days to avoid bacterial growth.
How do you reheat chicken breast without drying it out?
I sprinkle 1 tablespoon of water or chicken broth over the sliced meat, cover the glass container loosely with a damp paper towel, and microwave on 50% power for 60 to 90 seconds. The steam keeps it incredibly moist.
Can I freeze cooked meal prep chicken breast?
Yes. Flash freeze the cooked pieces flat on a metal baking sheet for 20 minutes first, then transfer them to a vacuum-sealed bag. It stays perfectly fresh without freezer burn for up to 6 months.
Why is my meal prep chicken always rubbery?
You’re likely overcooking it or slicing it way too soon. Always use a reliable digital meat thermometer to pull it off the heat exactly at 165°F, and let it rest on a cutting board for 10 minutes before slicing.
