What’s Inside
- Sourcing the Best Birds for Rotisserie Chicken Meal Prep
- Break It Down While It’s Hot
- The Stand Mixer Hack for Fast Shredding
- Proper Storage to Avoid Spoiled Meat
- Freezing Portions for Future Meals
- Investing in the Right Meal Prep Containers
- Portion Control for Balanced Nutrition
- Mitigating the High Sodium Problem
- Strategic Reheating to Prevent Dryness
- Changing Up the Flavor Profiles
Last Tuesday at Target, I dropped a plastic container of hot chicken right in the middle of the aisle. My whole rotisserie chicken meal prep plan was falling apart before I even got home, with greasy, yellow broth splattering all over my favorite white sneakers. The heavy, roasted-fat smell was embarrassing. I used to spend my entire Sunday chained to the stove, boiling plain breasts until they were tough and flavorless. I’ve ruined so many dinners by letting that meat dry out in the fridge until it tasted like wet cardboard. You’re probably making the same mistakes I did when you try to prep for the week. Let’s fix that right now.
1. Sourcing the Best Birds for Rotisserie Chicken Meal Prep

I used to just grab whatever bird was closest to the checkout line. Big mistake. The quality difference between grocery stores is wild. I’m completely obsessed with the Costco Kirkland Signature Rotisserie Chicken. It’s priced at exactly $4.99 and consistently weighs over 3 pounds. That’s a massive amount of meat for the price. The savory smell hits you the second you walk past the electronics section. But honestly, fighting the Costco parking lot on a Sunday afternoon gives me hives—I learned that the hard way.
If you’re watching your sodium, skip the bulk stores. I bought a Sam’s Club chicken once and felt bloated for two days. Now, if I have the budget, I go to Whole Foods. They sell an organic, free-range rotisserie chicken for $13.99. It usually weighs around 2.5 pounds. The sodium content is way lower, usually 70 to 120mg per 3-oz serving. The meat actually tastes like real, roasted chicken. The skin is usually perfectly golden and crispy.
Kroger sometimes runs a 2 for $10 deal on their 2-pound Simple Truth chickens. I stock up when they do. I tried buying their lemon pepper flavor last month, but the skin was so slimy and wet I had to throw it away. Stick to the plain flavors. You can always add your own spices later. It’s much easier to control the flavor profile when you start with a blank slate. You won’t end up with weird, artificial lemon aftertastes in your tacos.
2. Break It Down While It’s Hot

Don’t shove that hot plastic bag straight into the fridge. I did this for months. I’d pull out a cold, gelatinous blob of a bird three days later and try to hack at it with a butter knife. It’s disgusting. The cold fat congeals into this thick, white paste that sticks to your fingers.
You have to break the chicken down the second you get home. While the meat is still warm, it practically slides off the bone. The heat melts the connective tissue. I grab a pair of OXO Good Grips Kitchen Shears (they cost $17.99 at Target) and get to work immediately. I separate the 16 oz of white breast meat from the dark thighs and drumsticks. The white meat goes into one pile for salads. The dark meat goes into another pile for soups because it has more fat and a richer flavor.
Be careful with the tiny rib bones. I bit into a sharp little bone during a work lunch last month. It hurt my tooth so badly I couldn’t finish my meal. Take your time feeling through the shredded pieces with your bare fingers. Toss the skin and bones into a separate 1-gallon Ziploc bag. You can boil them later for a rich, golden stock. Just don’t let the meat cool down before you shred it. Cold chicken is stubborn chicken.
3. The Stand Mixer Hack for Fast Shredding

I’m not exaggerating when I say this trick saved my sanity. Hand-shredding 3 pounds of chicken takes forever. My fingers would cramp up, and grease would get under my fingernails. Then I saw a video about using a stand mixer. I was super skeptical. I figured it would turn the meat into a weird, mushy paste.
I grabbed my 5-quart KitchenAid Artisan Stand Mixer (the one that costs $449.99 at Williams Sonoma). I tossed in 4 cups of warm, deboned chicken chunks. I attached the heavy metal flat paddle attachment and turned it on speed 2. In exactly 15 seconds, the chicken was perfectly shredded. It sounded a bit clunky at first, but the results were amazing. No more greasy fingers.
If you don’t own a fancy mixer, there’s a cheaper way. I tried this at my sister’s house when she didn’t have her kitchen unpacked. We put the cooled, deboned chicken into a Hefty Slider 1-Gallon Storage Bag (a box of 30 costs $5.49 at Walmart). We sealed it tight, pushing out all the air. Then we just gently smashed it with the bottom of a heavy ceramic coffee mug. The meat falls apart inside the bag. Just make sure the bag is totally sealed. I popped a bag once and shot chicken juice across the kitchen counters. You might also like: 20 Gorgeous Meal Planning Ideas for Any Style

M MCIRCO 10-Pack,30 Oz Glass Meal Prep Containers 2
If you want something that just works, M MCIRCO 10-Pack is a safe bet (23 reviews, 4.5 stars).
4. Proper Storage to Avoid Spoiled Meat

Leaving your chicken in that original store packaging is a massive mistake. Those thin plastic domes trap moisture. They make the chicken go slimy so fast. I used to just shove the whole Trader Joe’s container into my fridge. Three days later, it smelled like dirty gym socks. You might also like: 15 Creative Cold Lunch Ideas to Transform Your Space
The USDA says you need to get your chicken cooled and into the fridge within two hours of buying it. I set a loud timer on my phone now. Once I’ve shredded the meat, I transfer it into proper containers. You have a maximum of 3 to 4 days to eat it safely. Don’t push it to day five. I ate five-day-old chicken once and spent the entire night hugging my toilet. It’s simply not worth the risk. Trust me on this. You might also like: 20 Cozy High Protein Lunch Ideas for Any Style
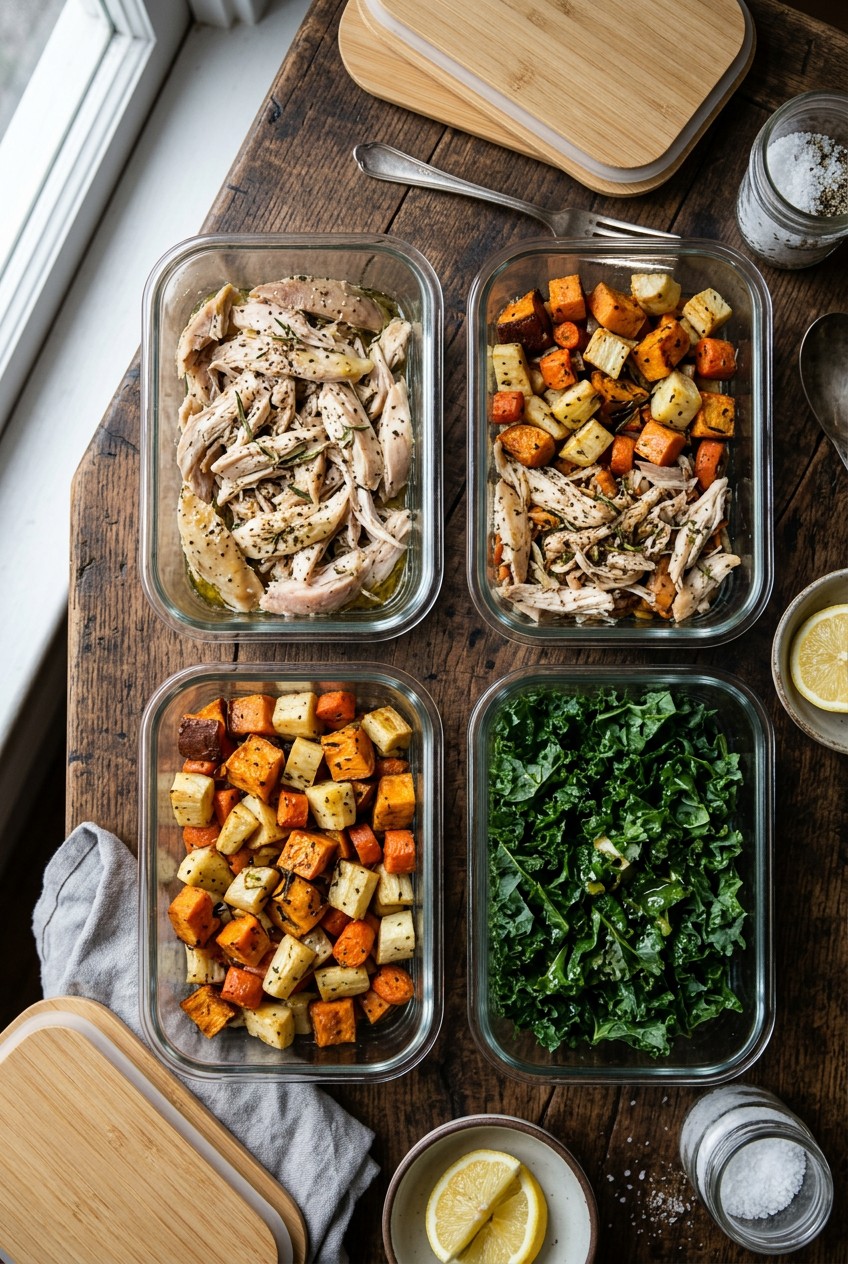
I portion out exactly 1/2 cup of shredded chicken into my glass containers. I make sure the lids snap on perfectly tight. If air gets in, the meat dries out and turns into hard jerky. You want to lock in whatever moisture is left. I also write the date on a piece of masking tape and stick it to the lid. Scotch Blue Painter’s Tape (a 60-yard roll is $4.98 at Home Depot) works perfectly. It peels off easily in the dishwasher without leaving a sticky, gross residue on my dishes.
5. Freezing Portions for Future Meals

Sometimes I get too ambitious. I’ll buy three chickens at Costco and realize I can’t eat 9 pounds of meat in four days. That’s when the freezer becomes your best friend. Rotisserie chicken freezes beautifully if you do it right. You can keep it frozen for up to 3 to 4 months without it losing its texture.
The biggest trick is portion control before freezing. Don’t freeze a giant 4-pound block of meat. You’ll never be able to thaw just a little bit for one lunch. I weigh out 4 oz portions using my Ozeri Pronto Digital Food Scale (it’s $14.99 on Amazon). I put each 4 oz portion into a quart-sized Ziploc Freezer Bag. A box of 54 bags costs $6.89 at Target.
I press the plastic bags completely flat on my counter. I squeeze out every single bubble of air. Then I stack them in my freezer like little chicken pancakes. They take up zero space. When I need one for a quick lunch, I just pull a flat bag out. It thaws in a bowl of cold tap water in about 20 minutes. I tried freezing a big round clump once. It took two whole days to thaw in the fridge, and the center was still icy and hard. Always freeze them flat.
6. Investing in the Right Meal Prep Containers

You can’t do meal prep with flimsy, stained plastic tubs from takeout restaurants. I tried doing that. The lids pop off in your work bag. Your car ends up smelling like garlic and stale chicken. It’s a complete disaster. You need durable, airtight, leak-proof containers.
I’m completely loyal to Rubbermaid Brilliance containers. They are absolute perfection. I bought a 3.2-cup individual glass container for $22.00 at Target. Yes, it’s pricey for one dish. But the thick plastic latches are incredibly secure. They are 100 percent leak-proof. I’ve dropped a full container of chicken soup on my concrete driveway, and the lid didn’t even budge. They are microwave, dishwasher, and freezer safe.
If you want a full set, look into Pyrex Simply Store Glass Rectangular Containers. A 6-piece set costs around $24.99 at Walmart. The heavy glass doesn’t hold onto weird smells like cheap plastic does. I used to use cheap plastic containers, and no matter how much I scrubbed them with Dawn dish soap, they always smelled like old taco seasoning. Glass is completely neutral. Just be careful not to take a freezing cold glass container and put it straight into a hot microwave. I shattered a Pyrex dish doing that last year. Let it sit on the counter for 10 minutes first.
![[8-Pack,30 oz]Glass Meal Prep Containers](https://m.media-amazon.com/images/I/713Zfdsgi4L._AC_UL320_.jpg)
[8-Pack,30 oz]Glass Meal Prep Containers
[8-Pack punches above its price — 7 buyers rated it 4.5 stars. I would buy it again.
7. Portion Control for Balanced Nutrition

It’s really easy to overeat when you have a massive glass bowl of shredded chicken staring at you. I used to just grab greasy handfuls while I was cooking. By the time I actually sat down to eat my dinner, I had probably consumed a whole breast without realizing it.
You need to measure your food if you want your meal prep to actually work. A standard serving of rotisserie chicken is 3 to 4 ounces (that’s about 85 to 112 grams). This gives you approximately 22 to 24 grams of lean protein. I usually stick to exactly 4 oz per meal. It keeps me full until dinner without making me feel bloated or sluggish.
Registered Dietitians often suggest this 3 to 4 oz range because it digests well. I use a 1/2 cup stainless steel measuring scoop from my KitchenAid set ($9.99 at Target) to quickly scoop the meat. It equals roughly 3 ounces. If you pack too much meat, you won’t have room in your container for your vegetables and carbs. I made this mistake for a long time. I’d pack a huge pile of chicken and just a tiny spoonful of rice. I’d be starving for sugar by 3 PM. Balance is everything.
8. Mitigating the High Sodium Problem

Here is the dirty little secret about grocery store chickens. They are injected with a ton of salt water to keep them plump under those hot heat lamps. I bought a chicken from Sam’s Club once, and I swear my rings didn’t fit the next morning. Those birds can pack up to 550mg of sodium in just a 3-oz serving. That’s insane.
You have to balance that out. I never add extra table salt to my shredded chicken. Instead, I pair the meat with completely unseasoned, fresh sides. I’ll roast 2 cups of fresh broccoli florets with just a tiny drizzle of olive oil. No salt. The crunch of the broccoli is perfect next to the soft chicken.
I also rely heavily on whole grains to soak up the salty flavor. I make a huge batch of Bob’s Red Mill Organic Quinoa (a 24 oz bag is $9.39 at Sprouts). I use exactly 1 cup of cooked quinoa as the base for my chicken bowls. The plain, earthy quinoa balances out the salty chicken perfectly. I also love baking plain sweet potatoes. The natural sweetness cuts right through the heavy sodium of the meat. If you’re using store-bought sauces on top of the chicken, check those labels too. I ruined a perfectly good prep by drowning salty chicken in salty teriyaki sauce.
9. Strategic Reheating to Prevent Dryness

Nothing is worse than biting into a piece of leftover chicken and having it squeak against your teeth. It’s a horrible, dry texture. Microwaving shredded breast meat on high power is a guaranteed way to ruin your lunch. I used to blast my Tupperware for two minutes straight. The meat would turn into rubbery little erasers.
You have to reheat it slowly. I turn my microwave power down to 50 percent. Before I hit start, I add a splash of moisture. I pour exactly 1 tablespoon of Swanson 100% Natural Chicken Broth (a 32 oz carton is $2.89 at Kroger) right over the shredded meat. If I don’t have broth, I just use 1 tablespoon of cold tap water.
I cover the container loosely with a damp paper towel. I microwave it for 45 seconds on medium power. Then I stir it. Then I do another 45 seconds. The hot steam from the damp paper towel and the broth keeps the meat incredibly juicy. It tastes like it just came off the roasting spit. I tried skipping the damp paper towel once at work, and the edges of the chicken got hard and crunchy. Take the extra 30 seconds to do it right.

KOMUEE 10 Packs 30 oz Glass Meal Prep Containers
A dependable everyday pick — KOMUEE 10 Packs 30 oz Glass Meal Prep Containers pulls in 45 ratings at 4.5 stars. Not flashy, just solid.
10. Changing Up the Flavor Profiles

Eating plain chicken and rice for four days straight is miserable. I tried doing that when I first started prepping. By Wednesday, I was so incredibly bored I threw my lunch away and bought a $15 salad from a cafe. You have to mix up the flavors if you want to stick to your plan.
I keep a rotation of strong sauces in my fridge. On Monday, I’ll toss 4 oz of shredded chicken with 2 tablespoons of Primal Kitchen Buffalo Sauce (an 8.5 oz bottle is $6.99 at Whole Foods). It gives it a huge, spicy kick without adding any sugar. I wrap it in a flour tortilla with some crunchy romaine lettuce.
On Tuesday, I’ll take another 4 oz of plain chicken and mix it with 1 tablespoon of Trader Joe’s Vegan Kale, Cashew & Basil Pesto ($3.99 for an 8 oz tub). It completely changes the meat. It smells incredibly fresh and garlicky. Don’t mix the sauce into your entire batch of chicken on Sunday. Keep the meat plain in your main container. Add the sauces to your individual daily portions. I made the mistake of mixing BBQ sauce into three pounds of meat once. I was so sick of BBQ flavor by Thursday that I couldn’t even look at it.
I honestly can’t imagine my Sunday routine without a rotisserie bird sitting on my kitchen counter. It saves me hours of cooking raw meat, and my kitchen doesn’t smell like a greasy diner. You deserve to eat lunches that actually taste good. If you follow these steps, you won’t have to choke down dry, rubbery chicken ever again. Skip the fat-free stuff and the plain boiled breasts. Go grab a hot, juicy bird from the deli and get to work. Pin this guide for your next grocery run, and let me know which shredding hack you end up loving the most!
Frequently Asked Questions
How long does rotisserie chicken meal prep last in the fridge?
You should eat your shredded chicken within 3 to 4 days. Store it in an airtight glass or plastic container to prevent it from drying out or absorbing strange fridge odors.
Can I freeze shredded rotisserie chicken?
Yes, you can freeze it for up to 3 to 4 months. Portion the meat into 4-ounce servings in freezer bags, squeeze out all the air, and freeze them flat to save space.
How do you reheat meal prep chicken without drying it out?
Reheat your chicken on 50 percent power in the microwave. Add a tablespoon of chicken broth or water, and cover the container loosely with a damp paper towel to trap the steam.
Is grocery store rotisserie chicken high in sodium?
Yes, some store-bought birds can have up to 550mg of sodium per serving because they are injected with saltwater. Balance this by pairing the meat with unseasoned vegetables and plain whole grains.
