What’s Inside
- Master the Meat Blend for Better Meatball Meal Prep
- Perfect Your Binders and Ditch the Food Processor
- The Microwave Test Patty Trick
- Scoop and Cook Before Freezing
- Flash Freeze for the Ultimate Meatball Meal Prep
- Upgrade Your Storage Containers Immediately
- Plant-Based Swaps That Actually Taste Good
- Smart Reheating: Air Fryer, Sous Vide, and Sauce Rules
Last Tuesday at Whole Foods, I dropped a glass container of marinara sauce and a pound of raw ground turkey right in the middle of aisle four. Red sauce and raw poultry splattered across my favorite sneakers. That humiliating disaster forced me to completely rethink my meatball meal prep routine. I used to spend hours rolling sticky, dense spheres of sadness that tasted like wet cardboard. My hands would be covered in raw egg, my kitchen smelled like a greasy diner, and the final product was always dry. I tried fixing this for months before figuring it out. Meatball meal prep doesn’t have to be a messy, all-day affair. I remember standing in my tiny apartment kitchen three years ago, staring at a giant bowl of unseasoned ground beef. I had no idea what I was doing. I just dumped a cup of dry breadcrumbs in there and hoped for the best. The resulting meatballs were so tough, I’m pretty sure they could bounce off the floor. Honestly, most people get this wrong because they treat ground meat like a blank canvas that can handle any abuse. It can’t. You need specific ratios, proper chilling times, and the right cooking methods. I’m going to walk you through exactly what I do now. Grab a cup of coffee. Let’s get into the messy, garlicky, wonderful details of making a week’s worth of food without losing your mind.
1. Master the Meat Blend for Better Meatball Meal Prep

I’ve made the mistake of buying ultra-lean meat to save calories. Skip the fat-free stuff. It tastes like wet cardboard. I spent an entire year chewing through dry, rubbery 96% lean ground beef meatballs before I finally learned my lesson. For the most flavorful and juicy results, you need fat. I personally swear by a blend of 80/20 ground beef and ground pork. The pork adds a soft texture and rich flavor that beef just can’t achieve on its own. Plus, it’s a smart financial move. Ground beef prices hit about $6.70 per pound in March 2026, and they’re projected to climb to $10 per pound by Q3 2026. Combining it with cheaper ground pork saves me a ton of cash at the checkout counter. Last week at Walmart, I grabbed a 16 oz package of Smithfield Ground Pork for just $3.98, which perfectly balanced out the cost of my beef. When you grab that 80/20 ground beef, look for the bright red color, not the dull gray stuff hiding at the back of the meat case. I usually grab a 1-pound package of Kroger brand 80/20 beef for $6.49. If you’re dead set on poultry, don’t buy the 99% lean turkey. It’s a guaranteed disaster. A 93% lean ground turkey is a good balance for poultry-based meatballs, offering sufficient moisture without turning into a greasy puddle. You want the meat to feel slightly tacky but soft when you mix it. When I mix the beef and pork together, I can literally feel the difference in my hands. The fat from the pork coats the beef, ensuring every single bite stays tender during the reheating process later in the week.
2. Perfect Your Binders and Ditch the Food Processor

Most people get this wrong by dumping handfuls of breadcrumbs into a bowl without measuring. A general rule of thumb is one large egg per pound of meat to act as a binder. For dry binders, you need exactly 1/2 cup of panko breadcrumbs or almond flour per pound of meat. I buy Kikkoman Panko Breadcrumbs for $2.39 (an 8 oz box) at Target. They have an airy texture that keeps the meat from getting dense. If you need a gluten-free option, almond flour works, but it alters the smell slightly, giving off a nutty aroma when baking. I highly recommend the Blue Diamond Finely Sifted Almond Flour ($6.98 for a 16 oz bag at Walmart). It blends invisibly into the meat without leaving weird, gritty chunks. If you’re out of breadcrumbs, crushed crackers are a surprisingly effective binder. I crush about 1/2 cup of Premium Saltines per pound of meat. Their starch and gluten help hold everything together and absorb moisture perfectly. Now, let’s talk about the mixing process. I tried this wrong for months before figuring it out. I used to throw everything into my food processor because I hated getting my hands dirty. Big mistake. Overmixing the meatball mixture leads to a dense, rubbery texture. You have to mix ingredients gently with your hands until just combined. Yes, it feels gross and cold and slimy. But the food processor will quickly overwork the meat, destroying the fat pockets. If you have an egg allergy, plain yogurt is a suitable substitute. Just use 2 tablespoons of Chobani Plain Greek Yogurt ($1.29 for a 5.3 oz cup) per pound of meat. It adds a slight tang but keeps the moisture locked in tight.
3. The Microwave Test Patty Trick

Don’t be shy with seasonings. For Italian-style meatballs, use at least 1 teaspoon of Morton Kosher Salt per pound of meat. I also add 1 teaspoon of garlic powder, 1/2 teaspoon of onion powder, 1 teaspoon of dried oregano, and 2 tablespoons of fresh chopped parsley. The smell of fresh parsley mixed with raw garlic is incredible. I also highly recommend adding a pinch of red pepper flakes if you like a little heat. I use the McCormick Crushed Red Pepper ($3.12 at Kroger). Just a tiny sprinkle wakes up the rich fat of the pork and beef. But here’s the real secret. I used to guess if my seasoning was right, bake an entire batch, and realize they were completely bland. Serving bland meatballs to friends is deeply embarrassing. I did this at a dinner party in 2024 and watched everyone politely chew in silence. Never again. Now, I use an expert tip: cook a small test patty (about a teaspoon of the mixture) in the microwave for 30 seconds to check and adjust the seasoning before forming all the meatballs. Yes, a microwaved meatball smells a little weird and looks gray, but it tells you exactly what you need to know about the salt level. If it tastes flat, add another 1/4 teaspoon of salt to the main bowl. I usually buy my spices at Trader Joe’s because their 2.1 oz jar of Organic Garlic Powder is only $2.49. Once you taste that tiny microwaved patty and realize the flavor is perfect, you can confidently roll out the rest of the batch knowing you won’t be eating sad, flavorless food all week. You might also like: 15 Cozy Freezer Meals Ideas to Transform Your Space

Skroam 10 Pack Glass Meal Prep Containers
Skroam 10 Pack Glass Meal Prep Containers has been one of the most consistently praised picks in this category. 56 reviewers averaged 4.5/5.
4. Scoop and Cook Before Freezing

I used to roll meatballs by hand, trying to guess the size. Some were massive, some were tiny. The small ones burned into crispy black rocks, while the large ones stayed raw and pink in the middle. It was a food safety nightmare. If you try to roll them by hand, the heat from your palms actually starts to melt the fat in the meat before it even hits the oven. This leads to a dense, greasy final product. For even cooking and consistent portion sizes, you must use a cookie scoop. I rely on my OXO Good Grips Medium Cookie Scoop, which costs $16.99 at Target. A 1.5-inch scoop typically yields meatballs that cook uniformly and fit perfectly into meal prep containers. It also keeps your hands slightly cleaner. I line my baking sheet with Reynolds Wrap Heavy Duty Aluminum Foil ($5.49 at Target) for easy cleanup. While you can freeze meatballs raw, cooking them first significantly reduces reheating time on busy weeknights. Cooked meatballs only need to be reheated until hot, whereas raw frozen meatballs require full cooking. I bake mine on a large aluminum sheet pan at 400 degrees Fahrenheit for about 20 minutes. The sound of the fat sizzling on the hot metal is pure magic, and the garlic aroma fills the entire house. Plus, cooking them first means the fat renders out onto the baking sheet, not into your freezer bags. I once froze 40 raw meatballs in a giant bag. When I tried to cook them weeks later, they released so much water and grease into my skillet that they basically boiled in their own gross juices. Always bake them first. You might also like: 15 Inspiring Chicken Meal Prep Ideas You Haven’t Thought Of
5. Flash Freeze for the Ultimate Meatball Meal Prep

This is the step that completely changed my life. After baking, allow the meatballs to cool completely. Arrange them in a single layer on a parchment-lined baking sheet and flash freeze them for 1 to 2 hours until solid. This prevents them from sticking together. I learned this the hard way. Two years ago, I tossed 30 warm, freshly baked meatballs straight into a bag and threw it in the freezer. Three days later, I pulled out a single, 5-pound frozen meatball boulder. I had to smash it against my kitchen counter just to break off a portion for lunch. It was ridiculous. Once they’re rock solid from the flash freeze, transfer them to freezer-safe bags. I use Ziploc Gallon Freezer Bags, which I grab in a 152-count box for $17.89 at Costco. They’ll stay fresh in there for up to 3 to 4 months. When you open the freezer bag, you shouldn’t see massive ice crystals if you cooled them properly first. I usually write the date and the type of meat on the bag with a black Sharpie. There’s nothing worse than reaching for what you think is a spicy Italian pork meatball and biting into a mild turkey one. The flash freezing method means you can reach into the bag, grab exactly four meatballs for your lunch, and zip it right back up without fighting a solid block of ice. You might also like: 20 Inspiring Carnivore Meal Prep Ideas That Are Totally Worth It
6. Upgrade Your Storage Containers Immediately

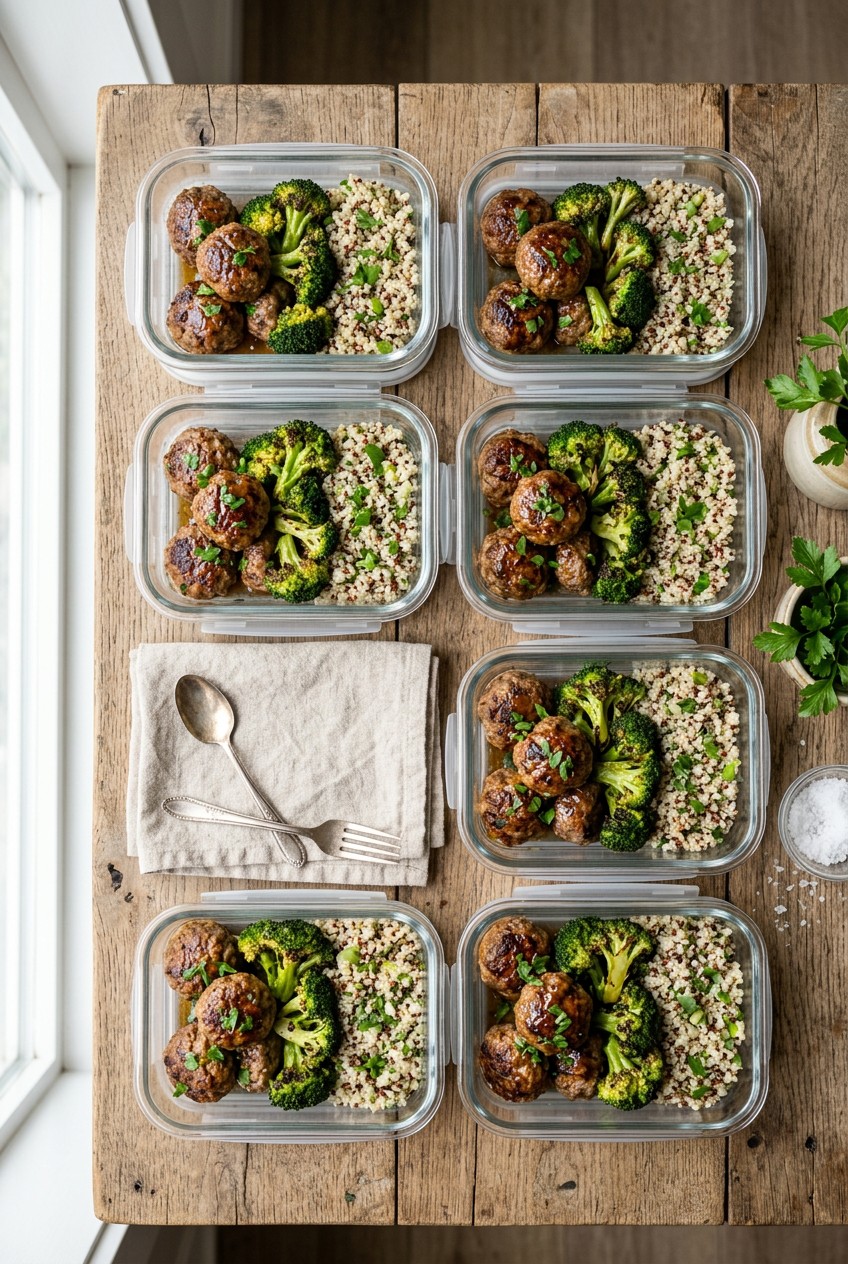
If you’re still using flimsy, stained plastic tubs from takeout restaurants, we need to talk. I ruined so many lunches by storing acidic tomato sauce and meatballs in cheap plastic. The plastic absorbs the red color, holds onto the garlic smell forever, and eventually warps in the microwave. Durable, leak-proof containers are essential. Brands like Pyrex (glass with BPA-free lids) and Prep Naturals are excellent for freezer-to-microwave use. I bought a 6-piece Pyrex glass storage set for $17.99 at Kroger, and it’s survived countless drops and dishwasher cycles. Glass containers also stack beautifully in the fridge. Seeing a neat, organized row of identical Pyrex dishes filled with rich red sauce and perfectly round meatballs triggers a deep sense of calm in my brain. It’s the ultimate visual proof that I’m prepared for the week ahead. For individual portions, Souper Cubes are absolute magic. I use the 2-cup size, which is incredibly versatile. I bought a 2-cup silicone freezing tray for $19.99 at Sprouts. You can freeze a portion of marinara sauce with exactly three meatballs submerged inside. Once frozen into a perfect rectangular brick, you pop it out and store the bricks in a bag. When you’re ready to eat, you just drop a frozen brick into a bowl and microwave it. The glass containers feel heavy and substantial in your hands, and they don’t leach weird chemical flavors into your food. I’ve noticed my lunches actually taste fresher on Thursday when they’ve been sitting in glass rather than cheap plastic. It’s a small upfront investment that saves you from eating plastic-flavored marinara.

M MCIRCO 10-Pack,30 Oz Glass Meal Prep Containers 2
A dependable everyday pick — M MCIRCO 10-Pack pulls in 23 ratings at 4.5 stars. Not flashy, just solid.
7. Plant-Based Swaps That Actually Taste Good

I used to roll my eyes at vegan meat alternatives. I thought they all tasted like salty dirt. But I was wrong. Incorporating plant-based meatballs is a great way to add dietary variety or reduce your meat consumption. The texture of modern alternatives is shockingly close to the real thing. I recently tried the Impossible Foods Homestyle Meatballs. They pack 12 grams of protein per serving and cost around $6.48 for 14 1-ounce meatballs at Whole Foods. When they sizzle in the pan, they smell exactly like savory beef. Beyond Meat Italian-Style Plant-Based Meatballs are another fantastic option, boasting 19 grams of protein while being completely soy-free and gluten-free. If you want something totally different, Jack & Annie’s makes a jackfruit-based meatball that has a fascinating, shreddy texture that mimics slow-cooked pork. I buy a 10.6 oz box of Jack & Annie’s for $5.99 at Target. When cooking plant-based options, be careful not to overcook them. They don’t have the same fat structure as animal meat, so they dry out much faster. I usually just simmer them in a rich tomato sauce for 10 minutes until they’re heated through. They absorb the garlic and basil flavors beautifully. Even my stubborn, meat-loving brother ate a plate of the Impossible meatballs last month and couldn’t tell the difference until I showed him the empty bag. It’s definitely worth keeping a bag in the freezer for when you want a lighter meal prep option.
8. Smart Reheating: Air Fryer, Sous Vide, and Sauce Rules

Once your meatballs are cooked and added to sauce, avoid simmering them for extended periods. Over-simmering can make them tough or cause them to absorb too much liquid and become soggy. Cooked meatballs only need about 10 to 15 minutes in simmering sauce to heat through. If you want a crispy exterior, the air fryer is your best friend. I toss cold, pre-cooked meatballs into my Ninja Air Fryer at 375 degrees Fahrenheit for 12 to 15 minutes, flipping halfway. They come out with a gorgeous, crunchy brown crust. For incredibly tender and perfectly cooked results, try the sous vide method. Freeze formed raw meatballs first, then vacuum-seal them. I use my Anova Sous Vide Precision Cooker ($129.00 at Target). Cook beef meatballs at 145 degrees Fahrenheit for 1 to 2 hours, or turkey at 150 degrees Fahrenheit for 1 to 2 hours. Sear them briefly in a hot cast-iron skillet afterward for browning. The sous vide method locks in every drop of moisture. I tried it last weekend, and slicing into the meatball revealed a perfectly pink, incredibly juicy center that you just can’t get from an oven. It takes a bit more equipment, but if you’re serious about texture, it’s worth the extra step. Just remember, whether you air fry, microwave, or sous vide, don’t drown them in boiling sauce for an hour. Treat them gently.
I’ve spent years messing up my Sunday cooking sessions so you don’t have to. From dropping raw turkey on the grocery store floor to chiseling frozen meatball blocks on my kitchen counter, I’ve seen it all. But once you lock in these techniques, your weeknight dinners become incredibly easy. You’ll actually look forward to opening your fridge on a Wednesday night. I highly recommend starting with the 80/20 beef and pork blend and grabbing that OXO cookie scoop. Those two changes alone will fix 90 percent of your texture issues. Don’t let the fear of a messy kitchen keep you from trying this. Yes, your hands will get a little sticky, and your house will smell like an Italian restaurant for a few hours. But that’s part of the charm. Cooking your own food gives you complete control over the ingredients, the sodium levels, and the portion sizes. Plus, there’s nothing quite like the satisfaction of bypassing the drive-thru on a stressful Thursday evening because you know you have a perfect, homemade meal waiting in the fridge. If you found this helpful, please pin this post to your favorite recipe board and save it for your next grocery run. Let’s make this week’s lunches the best you’ve ever had.
Frequently Asked Questions
Can I freeze raw meatballs for my meatball meal prep?
Yes, but I highly recommend baking them first. Cooking them beforehand renders out the excess fat and drastically cuts down your reheating time on busy weeknights.
Why do my prepped meatballs taste so dry and tough?
You’re likely using ultra-lean meat or overmixing the bowl. Stick to an 80/20 beef and pork blend, and mix gently with your hands instead of a food processor.
How long do cooked meatballs last in the fridge?
Stored in high-quality airtight glass containers, cooked meatballs will stay fresh in the fridge for up to four days. If you won’t eat them by then, flash freeze them instead.
What is the best binder if I’m out of breadcrumbs?
Crushed saltine crackers work perfectly. Use about half a cup per pound of meat. If you’re out of eggs, a couple of tablespoons of plain Greek yogurt locks in moisture beautifully.
