What’s Inside
- Choose Sturdy Shapes For Pasta Salad Meal Prep
- Cook Your Noodles Just Beyond Al Dente For Pasta Salad Meal Prep
- Salt Your Boiling Water Generously
- Cool The Pasta Smartly (Don’t Rinse It)
- Use Vinaigrettes And Dress While Warm
- Layer Mason Jars Strategically
- Pick Sturdy Vegetables That Won’t Turn To Mush
- Boost Your Protein With Legumes Or Cured Meats
- Integrate Your Cheese Very Thoughtfully
- Add Juicy Flavor Boosters And Brine
- Let The Flavors Meld In The Fridge
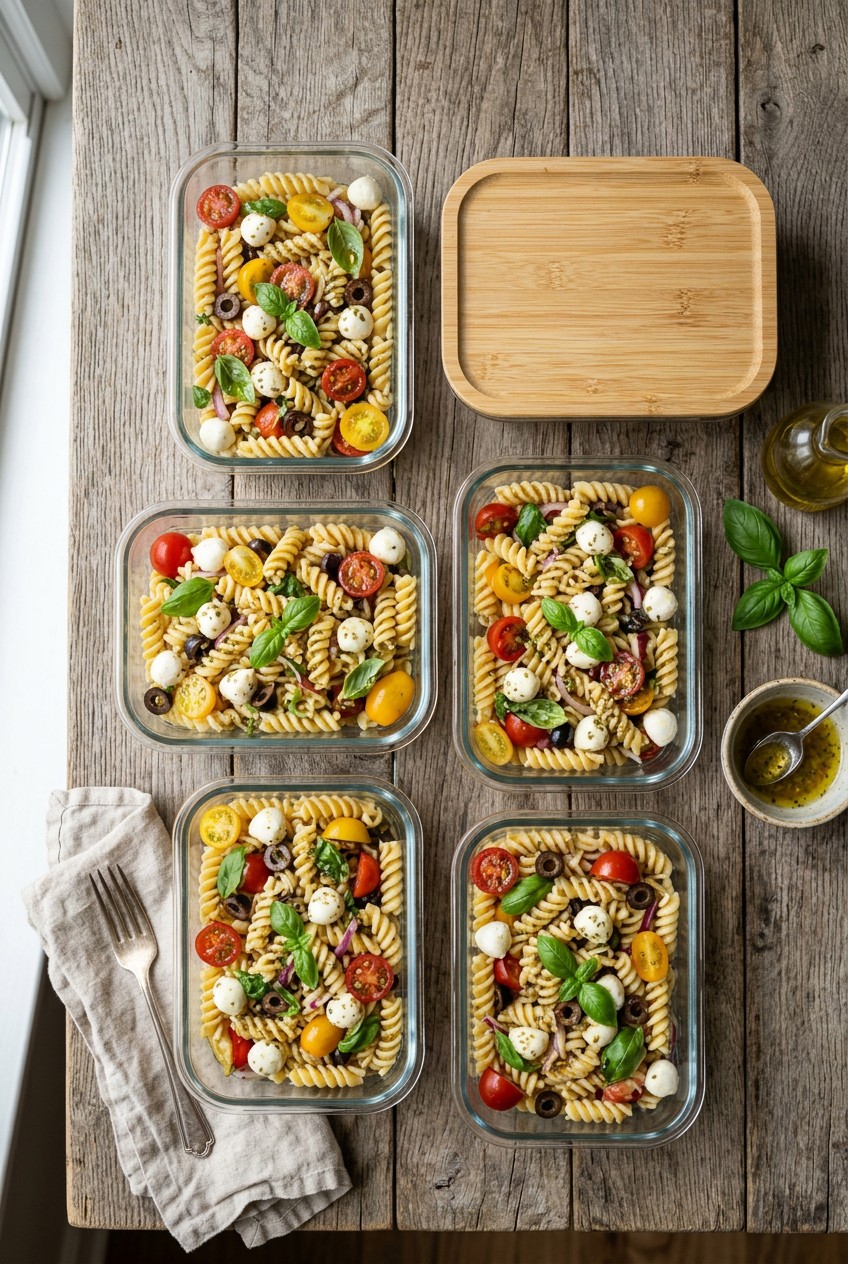
Last Tuesday at Whole Foods, I dropped a flimsy plastic container of four-day-old macaroni right in the parking lot. My entire pasta salad meal prep for the week hit the pavement. The lid popped off immediately. Sad, pale noodles scattered across the wet asphalt smelling faintly of spoiled mayonnaise. I stared at that mess and realized my strategy was a complete disaster. I’ve spent years eating soggy, flavorless noodles out of pure desperation. Skip the fat-free stuff. It tastes like wet cardboard. Let’s fix this mess together. I’m sharing the exact methods I use now to keep my lunches tasting fresh, crunchy, and heavily seasoned all week long.
1. Choose Sturdy Shapes For Pasta Salad Meal Prep

I tried using standard spaghetti for my lunches last month. Bad idea. By Wednesday, it turned into a solid, impenetrable brick of starch that I had to stab with my fork. It felt like I was eating wet paper towels. You’re going to want short, sturdy pasta shapes with plenty of nooks and crannies to trap the dressing. Think fusilli, rotini, farfalle, penne, or orzo. I personally swear by Barilla Rotini. A 16 oz box runs about $1.79 at Target. The tight spirals hold onto oil and vinegar perfectly. Don’t buy the ultra-thin angel hair or delicate linguine for meal prep. They can’t handle sitting in liquid for four days. Those long noodles clump up and turn mushy. I learned that the hard way when I tried to pack a delicate capellini salad for a picnic at the park. It looked like a sad bowl of worms. Stick to the chunky shapes. If you’re shopping at Kroger, grab their store-brand bowtie pasta for $1.25. It works just as well. The key is surface area. You want maximum texture to hold up against acidic dressings and heavy vegetables. Trust me on this one. Your future self will thank you when you open your lunchbox on Thursday. It’s completely changed my routine.
2. Cook Your Noodles Just Beyond Al Dente For Pasta Salad Meal Prep

Most people get this wrong. I certainly did. For years, I strictly followed the package instructions for al dente pasta. I’d pull my noodles off the stove, cool them down, and pack them away. Then I’d bite into my lunch the next day and nearly chip a tooth. The pasta was incredibly hard and chewy. It turns out that when pasta cools in the fridge, it goes through a process called retrogradation. The starches crystallize and harden. Chef Lorenzo Boni from Barilla actually recommends cooking pasta one minute less for hot dishes. For cold pasta salad meal prep, you need to do the exact opposite. Cook your pasta 1 to 2 minutes longer than the package directions for al dente. I buy De Cecco Penne Rigate for $2.99 at Sprouts. The box says 11 minutes for al dente. I boil it for exactly 13 minutes. It feels a little too soft when you taste it hot right out of the pot. Don’t panic. Once it cools down in your fridge, it firms up perfectly. I ruined so many batches of expensive gluten-free pasta by undercooking it. The chickpea pasta literally shattered into chalky fragments in my mouth. Just set your timer for two extra minutes. It makes a massive difference in the final texture. It’s a mistake I see people make constantly.
3. Salt Your Boiling Water Generously

Cold dishes have muted flavors. If you don’t season the pasta itself during the cooking process, your entire meal prep will taste terribly bland. You can’t just pour extra dressing on top later and hope for the best. The flavor needs to be inside the noodle. You need to season your pasta water until it tastes as salty as the sea. I use about 2 tablespoons of Morton Coarse Kosher Salt (usually $3.49 for a 3 lb box at Walmart) per gallon of boiling water. Yes, it looks like a shocking amount of salt when you pour it in. I used to be terrified of over-salting my food. I’d just sprinkle a tiny pinch into the pot. My lunches tasted like absolutely nothing. It tasted like eating wet cardboard mixed with plain tap water. The truth is, the pasta only absorbs a small fraction of that salt while it boils. I was prepping meals for a road trip last summer and completely forgot to salt the water. I had to throw away four days worth of lunches because they were completely inedible. Don’t skip this step. Dump that salt into the rolling boil before you add your noodles. It creates a deeply flavorful base that stands up to refrigeration. It’s the foundation of a good recipe. You might also like: 15 Inspiring Chicken Meal Prep Ideas You Haven’t Thought Of

8 Pack 36oz Large Glass Meal Prep Containers with lids
8 Pack 36oz Large Glass Meal Prep Containers with lids punches above its price — 866 buyers rated it 4.5 stars. I would buy it again.
4. Cool The Pasta Smartly (Don’t Rinse It)

Here’s a highly debated topic in the meal prep community. Do you rinse your pasta? I say absolutely not. Rinsing washes away all the beautiful, sticky surface starches that help the dressing cling to the noodles. If you rinse your pasta under cold water, your dressing will just slide right off and pool sadly at the bottom of your container. Instead, I drain my pasta and immediately spread it out in an even layer on a large Nordic Ware aluminum baking sheet (about $15.99 at Target). Then, I toss the hot noodles with a light drizzle of olive oil. I use exactly 2 teaspoons of California Olive Ranch Extra Virgin Olive Oil (around $11.49 for 16.9 oz at Whole Foods) for every 8 oz of pasta. The steam rises off the baking sheet and the kitchen smells amazing. This prevents the noodles from sticking together while they cool down to room temperature. I tried the quick-rinse method for months before figuring it out. My salads were always watery and separated. The oil-toss method takes a little more counter space, but the texture is incredibly superior. The dressing actually hugs the pasta. It’s a small extra step that completely changes the quality of your lunches. It’s worth the extra five minutes of effort. You might also like: 15 Brilliant Good Meal Prep Ideas That Changed Everything
5. Use Vinaigrettes And Dress While Warm

Mayonnaise-based dressings are a nightmare for weekly meal prep. They spoil quickly, separate strangely in the fridge, and get incredibly clumpy. I packed a creamy macaroni salad for work last July. By Wednesday, it smelled sour and the mayo had broken into gross oily puddles. It smelled like old gym socks and sour milk. I had to toss it out. Skip the mayo entirely. You’re much better off choosing oil-and-vinegar-based dressings for longevity and food safety. Vinaigrettes penetrate the pasta better and actually preserve the vegetables slightly. I highly recommend Olive Garden Light Italian Dressing. You can grab a 16 oz bottle for $3.78 at Walmart. It has the perfect acidic bite. Here’s my biggest secret. Toss your pasta with about two-thirds of your dressing while the noodles are still slightly warm. Warm pasta is porous. It drinks up the vinaigrette like a sponge. If you wait until the pasta is ice cold, the dressing just coats the outside. I pour exactly 1/2 cup of dressing over my warm noodles and stir vigorously. I save the remaining dressing to splash on right before eating. This guarantees every single bite is packed with tangy, zesty flavor. It’s a massive improvement. You might also like: 15 Brilliant Batch Cooking Ideas That Actually Work
6. Layer Mason Jars Strategically

If you’re using individual glass containers, you need a solid layering strategy. I’m obsessed with using Ball Wide Mouth Mason Jars for my lunches. A 12-pack of the 32 oz jars costs about $14.99 at Target. They are completely leak-proof and don’t hold onto weird smells like cheap plastic containers do. When you build your jar, you must put the wettest ingredients at the very bottom. Pour 2 tablespoons of extra dressing right into the base. Next, add your hardier vegetables that can handle marinating. Think cherry tomatoes, cucumbers, and bell peppers. Then, pack in your cooked and cooled pasta. Finally, stuff your delicate greens like spinach or arugula at the very top, far away from the liquid. I made the mistake of putting my spinach at the bottom once. By Tuesday, it had dissolved into a slimy, dark green sludge that ruined the whole jar. It was disgusting. Keep the greens dry at the top. When you’re ready to eat, just shake the jar vigorously or dump it into a bowl. The sound of the glass clinking as you shake it is so satisfying. The dressing flows down and coats everything perfectly right at the last second. It’s visually beautiful and practically functional.

Skroam 10 Pack Glass Meal Prep Containers
Skroam 10 Pack Glass Meal Prep Containers has been one of the most consistently praised picks in this category. 56 reviewers averaged 4.5/5.
7. Pick Sturdy Vegetables That Won’t Turn To Mush

Not all vegetables belong in a meal prep container. You have to be ruthless about what you include. Soft, watery vegetables will betray you by day three. I once added diced zucchini and fresh avocado to a batch of Sunday prep. Huge mistake. By Wednesday, the avocado was brown and tasting metallic. The zucchini had released so much water that my pasta was swimming in a murky broth. It was a squishy, unappetizing mess. You need sturdy, crunchy vegetables that hold up well. I always use red, yellow, or orange bell peppers. I buy the Sunset brand 3-pack of peppers for $4.99 at Trader Joe’s. Seeded cucumbers are great too, but you must scoop out the watery seeds first. Halved cherry tomatoes, thinly sliced red onions, and marinated artichoke hearts are also fantastic. Cut all your vegetables into bite-sized pieces that are roughly the same size as your pasta shape. You want a balanced bite every time you use your fork. Nobody wants to chew on a massive, raw onion chunk. I use exactly 1 cup of chopped peppers and 1/2 cup of halved tomatoes per batch. It keeps the crunch factor high all week. It’s the only way to keep things fresh.
8. Boost Your Protein With Legumes Or Cured Meats

A bowl of plain pasta and vegetables won’t keep you full until dinner. You’ll be starving by 2 PM. I used to pack basic veggie pasta salads and I’d end up buying a greasy pastry from the office cafeteria every single afternoon. The hunger pangs were awful. You have to incorporate heavy protein sources. Canned chickpeas are incredibly cheap and durable. I buy Bush’s Garbanzo Beans for $1.18 a can at Walmart. Just make sure you drain and rinse them thoroughly. If you want to double up on protein, try using a legume-based pasta. Banza Chickpea Pasta costs about $3.99 at Whole Foods and packs up to 20 grams of protein per serving. It’s a bit more fragile than wheat pasta, so watch your boiling time closely. If you prefer meat, diced Hormel Original Pepperoni (about $4.29 for 6 oz at Kroger) or shredded rotisserie chicken are excellent additions. I usually chop up 4 oz of grilled chicken breast per container. The cured meats add a ton of salty, smoky flavor to the oil dressing. Just avoid delicate seafood like cooked shrimp. It gets incredibly rubbery and smells terrible when sitting in a fridge for four days. It’s satisfying and keeps my energy levels up.
9. Integrate Your Cheese Very Thoughtfully

Cheese makes everything better, but you have to choose the right type for cold storage. Soft, melty cheeses like brie or goat cheese turn into a weird, cloudy paste when mixed with vinaigrette. I tried goat cheese in a lemon pasta last spring. It completely disintegrated and made the dressing look like dirty dishwater. It coated the roof of my mouth in a greasy film. It tasted fine, but visually, it’s highly unappetizing. You need cheeses that hold their distinct shape. Crumbled feta is my absolute favorite. Athenos Traditional Feta Cheese Crumbles cost around $4.99 for a 6 oz tub at Target. The briny, salty flavor cuts right through the heavy carbs. Mini mozzarella balls, also known as fresh mozzarella pearls, are another brilliant option. I get the BelGioioso brand for $5.49 at Sprouts. They stay perfectly chewy and don’t bleed into the dressing. If you really want to use a hard cheese like Parmesan or Pecorino, don’t just throw in big chunks. You need to finely grate or shred them so they distribute evenly throughout the salad. I use exactly 1/4 cup of feta per serving. It provides that necessary creamy, salty hit without ruining the texture of the dish. It’s a small detail that matters immensely.

M MCIRCO 10-Pack,22 Oz Glass Meal Prep Containers
M MCIRCO 10-Pack punches above its price — 86 buyers rated it 4.5 stars. I would buy it again.
10. Add Juicy Flavor Boosters And Brine

Your pasta salad needs aggressive flavor punches. Cold noodles absorb seasoning quickly, leaving the overall dish tasting flat if you aren’t careful. You need ingredients that contribute intense moisture and sharp flavor without making the pasta soggy. This is where pickled and brined items become your best friend. I always include Kalamata olives, capers, and sun-dried tomatoes. The pop of the capers adds such a great texture. My secret weapon is Mezzetta Sliced Golden Greek Peperoncini. A 16 oz jar is about $3.19 at Kroger. I chop up exactly 2 tablespoons of the peppers and toss them in. But here’s the real trick. I take 1 tablespoon of the actual pepperoncini brine from the jar and whisk it directly into my dressing. The sting of the brine adds a complex, spicy acidity that plain vinegar just can’t match. I used to rely solely on fresh herbs for flavor. I’d chop up expensive fresh basil on Sunday. By Tuesday, the basil leaves were completely black and slimy from the fridge cold. It was a huge waste of money. Stick to the brined items for your meal prep. They are shelf-stable, punchy, and they actually taste better the longer they sit in the container. It’s my favorite part of the recipe.
11. Let The Flavors Meld In The Fridge

Patience is the hardest part of meal prep. When you finally finish chopping, boiling, and mixing, you just want to eat it immediately. Don’t do it. Freshly mixed pasta salad actually tastes pretty disjointed. The oil tastes oily, the vinegar tastes sharp, and the noodles taste plain. You have to let it rest. After I assemble my containers, I seal them up tightly with Pyrex Snapware lids. A 10-piece glass set runs about $29.99 at Costco. I love the feel of the cold glass when I pull them out. Shove them straight into the fridge. You need to refrigerate the salad for at least 30 minutes, but ideally several hours or overnight. This resting period allows the flavors to truly meld and deepen. The noodles absorb the dressing, the onions soften slightly in the vinegar, and the cheese infuses the oil. I made a huge batch for a family barbecue last summer and served it immediately while it was still slightly warm. It’s incredibly underwhelming when served fresh. The leftovers I ate the next day, however, were absolutely mind-blowing. The difference is real. Assemble your lunches on Sunday afternoon. By Monday morning, the flavors will be perfectly married and ready to eat. It’s the secret to restaurant-quality taste.
I’ve ruined enough lunches to know exactly what works and what doesn’t. You don’t have to suffer through bland, mushy noodles ever again. Grab your sturdy pasta, load up on the briny peppers, and drench it all in a warm vinaigrette. I promise you’ll actually look forward to opening your lunchbox. If you found these tips helpful, pin this article to your favorite recipe board so you don’t lose it before your next grocery run.
Frequently Asked Questions
How long does pasta salad meal prep last in the fridge?
Generally, a vinaigrette-based pasta salad will last 4 to 5 days in an airtight container. Avoid mayonnaise-based dressings if you want it to last longer, as they spoil faster and separate.
Why does my pasta salad get hard in the fridge?
Pasta goes through a process called retrogradation when cooled, causing starches to crystallize and harden. To prevent this, cook your noodles 1 to 2 minutes past the al dente package instructions.
Should I rinse my pasta with cold water for meal prep?
No, you shouldn’t rinse it. Rinsing washes away the surface starches that help the dressing cling to the noodles. Instead, toss the warm, drained pasta with a little olive oil to prevent sticking.
What are the best vegetables to use in a cold pasta salad?
Stick to sturdy, crunchy vegetables that won’t release too much water. Bell peppers, seeded cucumbers, cherry tomatoes, and red onions are excellent choices. Avoid soft vegetables like avocado or zucchini, which turn mushy.
