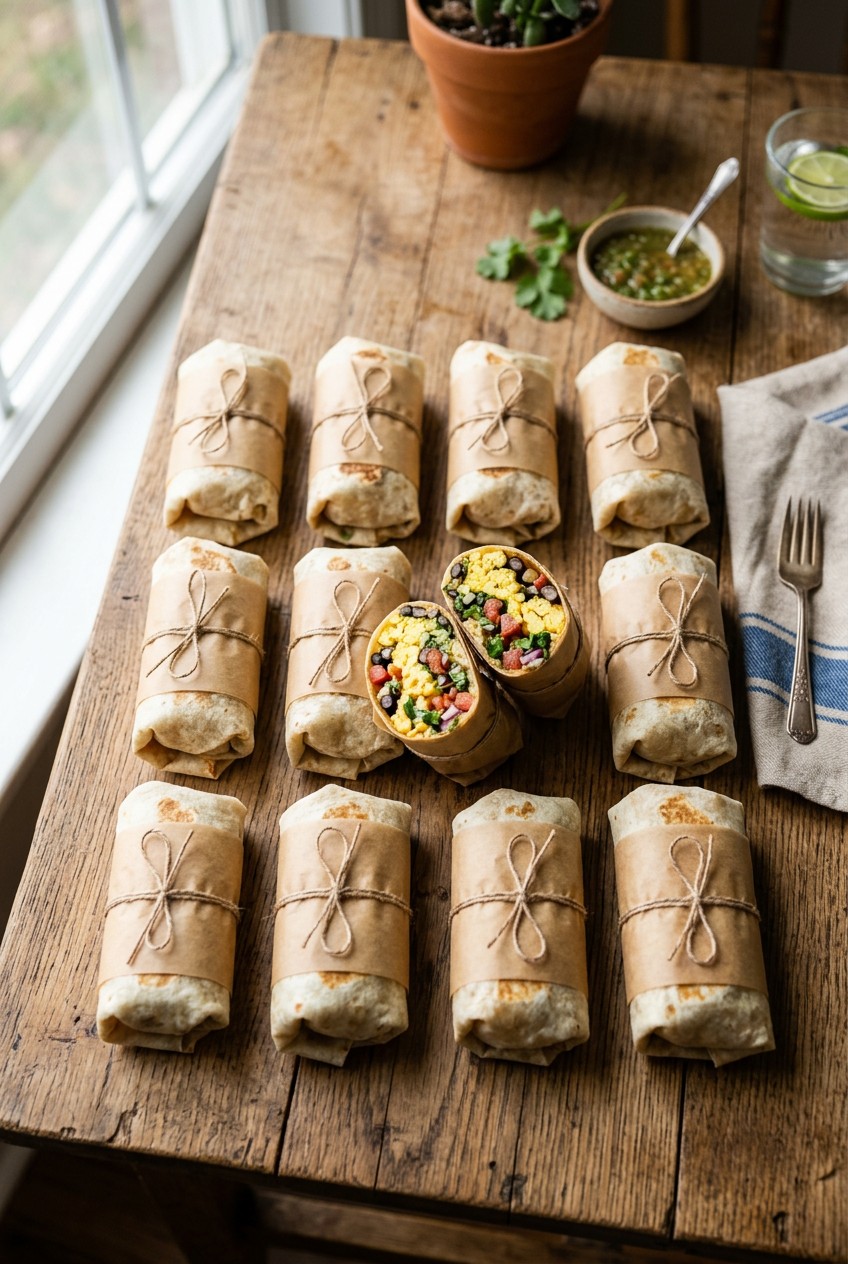
What’s Inside
- Choose the Right Tortilla for Durability
- Prioritize Cost-Effectiveness Over Convenience
- Cool All Fillings Completely Before Assembly
- Layer Cheese as a Moisture Barrier
- Cook Eggs Just Until Set for Breakfast Burrito Meal Prep
- Avoid Watery Ingredients for Freezing
- Consider Leaner Protein Options
- Optimize Vegetable Prep with Oven Roasting
- Flash Freeze and Reheat for Breakfast Burrito Meal Prep
Last Tuesday at Whole Foods, I dropped my phone trying to wipe cold bean juice off my steering wheel from a tragically soggy wrap. That absolute disaster is exactly why my breakfast burrito meal prep routine is now a rigid, non-negotiable Sunday habit. I remember sitting in the parking lot, staring at a split tortilla bleeding lukewarm salsa onto my jeans. I’d spent hours on Sunday making what I thought were perfect meals. The smell of stale cumin and wet flour lingered in my car for days. I’m telling you right now, winging it won’t work. You can’t just throw hot eggs into a wrap and toss it in the freezer. If you skip the critical cooling steps or buy the wrong tortillas, you’re going to end up with a lap full of wet eggs. I’ve ruined dozens of batches over the years. I tried this wrong for months before figuring it out. Took me years to figure out. Now, my freezer is stocked with tightly rolled, perfectly crisp burritos that taste better than the local cafe. Let’s fix your morning routine with these exact steps.
1. Choose the Right Tortilla for Durability

I’m begging you to skip the cheap, tiny tortillas. I’ve tried stuffing a massive amount of eggs into an 8-inch wrap, and it’s a guaranteed blowout. You need large, 10 to 12-inch flour tortillas. They aren’t just for show. They’re sturdy enough to hold ample fillings without tearing during assembly or after freezing. I personally swear by the Kroger Carb Master Tortillas. They cost exactly $4.99 for an 8-count pack at Kroger. They’re lower in calories and high in protein, but more importantly, they stretch without ripping. If you buy stiff, dry tortillas, you’re setting yourself up for failure. The texture of a good flour tortilla should feel soft and slightly elastic in your hands. I tried using corn tortillas once for a gluten-free phase. Don’t do this. They shattered into a million dry, crumbly pieces the second I tried to fold them. Stick to the large flour variety. When you’re standing in the bread aisle, gently squeeze the bag. If the tortillas feel stiff like cardboard, put them back. You want them pliable. A good tortilla acts like a warm blanket for your fillings. It needs to seal tightly to keep the frost out. I’ve noticed that cheaper brands tend to dry out in the freezer much faster, leading to cracked edges when you try to reheat them. I’d rather pay $4.99 for a reliable pack than save two dollars on a bag that ruins my entire batch.
2. Prioritize Cost-Effectiveness Over Convenience

Meal prepping breakfast burritos can significantly cut costs if you do it right. Homemade burritos typically cost between $1.18 and $1.41 each. This stands in stark contrast to store-bought options that range from $6 to $8.99 per serving. I’m always shocked when I see people dropping ten dollars on a mediocre, greasy wrap at a drive-thru. Last month, I bought a massive pack of Kirkland Signature Bacon for $18.99 (4 lbs) at Costco. By using that bacon sparingly and loading up on cheaper staples like eggs and potatoes, I managed to make 24 large burritos for approximately $21. That averages out to under $1 per burrito. You can’t beat that kind of math. I’ve seen a lot of beginners buy pre-cooked, pre-diced ingredients to save time. I tried this wrong for months before figuring it out. Buying pre-chopped onions and peppers at the store costs three times as much as chopping them yourself. The smell of fresh onions hitting a hot pan is infinitely better than the sad, slimy pre-cut ones anyway. Put on a podcast and spend the ten minutes chopping. Your wallet will thank you. I’d rather spend my money on high-quality cheese or pasture-raised eggs than pay someone else to dice a bell pepper. It’s just basic economics. Plus, when you control the ingredients, you control the portion sizes. A massive Costco haul easily sets you up for an entire month of breakfasts. I’ve found that bulk buying is the only way to make this sustainable long-term.
3. Cool All Fillings Completely Before Assembly

Most people get this wrong. Cooling all your fillings completely before assembly is a critical step to prevent soggy burritos. You must ensure all cooked ingredients are at room temperature before wrapping. Steam from warm fillings creates condensation. That condensation turns into ice crystals in the freezer, leading to a mushy tortilla upon thawing and reheating. I used to rush this step constantly. I’d scoop steaming hot eggs and potatoes straight onto the tortilla, wrap it up, and toss it in the freezer. The result was a catastrophic, wet mess that tasted like wet cardboard. Honestly, this changed how I prep entirely. Now, I spread my cooked ingredients out on large baking sheets to cool down faster. I buy the Good & Gather Hash Brown Patties from Target for $3.29 a 10-pack. I bake them until they’re incredibly crispy, chop them up, and let them sit for at least thirty minutes. The crispiness of the potato is completely lost if you wrap it while it’s still emitting steam. The sound of a perfectly crisp hash brown crunching inside a freshly reheated burrito is pure heaven. You won’t get that if you rush the cooling process. Patience is absolutely required here. I usually use this cooling time to clean up my kitchen or prep my wrapping station. I’ve learned that letting the ingredients sit also helps the flavors meld a bit. Don’t skip this step. It’s the difference between a sad, soggy wrap and a perfectly textured morning meal. You might also like: 15 Stunning Easy Lunch Ideas You Need to See

Skroam 10 Pack Glass Meal Prep Containers
Skroam 10 Pack Glass Meal Prep Containers has been one of the most consistently praised picks in this category. 56 reviewers averaged 4.5/5.
4. Layer Cheese as a Moisture Barrier

This is my absolute favorite trick. You need to place a layer of shredded cheese directly onto the tortilla before adding any other fillings. This creates a protective barrier, helping to prevent moisture from the eggs and salsa from making the tortilla soggy. I personally swear by Trader Joe’s Unexpected Cheddar Shredded cheese. It costs $3.99 for an 8 oz bag at Trader Joe’s, and it melts beautifully. The sharp, slightly salty flavor cuts right through the richness of the eggs. I use exactly 2 tablespoons of this cheese as my base layer. When the burrito is reheated, this cheese layer melts into the tortilla, creating a waterproof seal. I’ve ruined so many batches by putting the wet eggs directly on the flour wrap. By the time I reheated them, the bottom of the tortilla had dissolved into a paste. It’s a disgusting texture. The cheese barrier stops this completely. Plus, the visual of pulling apart a hot burrito and seeing that perfectly melted layer of cheddar clinging to the tortilla is just incredible. Skip the fat-free stuff. It tastes like wet cardboard and won’t melt properly. You need the natural oils in real cheese to create that essential moisture barrier. Sometimes I mix in a little Pepper Jack for a spicy kick. The fat content in the cheese is what actually protects the delicate flour wrap from the steam of the reheated eggs. I’ve tested this method extensively, and it’s foolproof. You might also like: 15 Stunning Lunch Weekly Meal Prep Ideas You Haven’t Thought Of
5. Cook Eggs Just Until Set for Breakfast Burrito Meal Prep

You have to scramble your eggs until they’re mostly set but still slightly moist. Overcooked eggs become rubbery and completely inedible when reheated. I buy Vital Farms Pasture-Raised Eggs at Sprouts for $6.99 a dozen. Yes, they’re expensive, but the bright orange yolks and rich flavor make a huge difference. Using 8 to 12 large eggs for 8 burritos provides a good ratio. That comes out to approximately 1 to 1.5 eggs per burrito. I used to cook my eggs until they were dry and browned in the pan. I thought this would prevent a soggy burrito. I was so wrong. When I microwaved them later, they squeaked against my teeth like rubber pencil erasers. It’s awful. Now, I pull the pan off the heat while the eggs still look a little wet and glossy. The residual heat finishes cooking them as they cool on the baking sheet. I also add a splash of milk and a pinch of salt to the raw eggs before scrambling. The sound of the whisk hitting the glass bowl is my favorite Sunday morning noise. Keep the heat on medium-low. If you blast the eggs with high heat, they’ll dry out instantly, and you won’t be able to save them. I’ve found that adding a tiny bit of butter to the pan instead of oil gives the eggs a velvety texture that holds up perfectly in the freezer. It’s a small detail, but it makes the reheating process so much more forgiving. You might also like: 15 Creative Cold Lunch Ideas to Transform Your Space
6. Avoid Watery Ingredients for Freezing

Refrain from adding fresh salsa, guacamole, sour cream, or raw tomatoes before freezing. These ingredients become incredibly watery and will lead to a soggy texture upon thawing. I learned this the hard way during a summer picnic. I prepped a batch of beautiful wraps loaded with fresh pico de gallo. When we reheated them, the tomatoes had turned to mush and completely flooded the tortillas. It was a disaster. Instead, I keep a jar of Pace Picante Sauce on hand. I buy the 16 oz jar at Walmart for exactly $2.48. I wait until I’ve fully reheated the burrito, then I dip each bite into the cold salsa. The contrast between the hot, crispy burrito and the cold, sharp salsa is amazing. You can’t replicate that if you freeze the salsa inside the wrap. The same goes for sour cream. Freezing dairy like sour cream causes it to separate and curdle. It looks gross and tastes worse. If you really want that creamy texture inside the burrito, stick to the shredded cheese barrier I mentioned earlier. Save the wet ingredients for serving time. I’ve found that keeping small portion cups of guacamole in my fridge is the best way to handle this. I’d highly recommend chopping some fresh cilantro and keeping it in a damp paper towel in the fridge. Sprinkling that over your hot burrito with a dollop of sour cream makes a frozen meal prep taste like it just came out of a restaurant kitchen.
![[8-Pack,30 oz]Glass Meal Prep Containers](https://m.media-amazon.com/images/I/713Zfdsgi4L._AC_UL320_.jpg)
[8-Pack,30 oz]Glass Meal Prep Containers
[8-Pack punches above its price — 7 buyers rated it 4.5 stars. I would buy it again.
7. Consider Leaner Protein Options

For a healthier approach, use ground turkey or chicken sausage instead of traditional pork sausage. I absolutely love Delia’s Chicken Sausage. I grab the 12 oz roll at Whole Foods for $5.49. It has all the savory, sage-heavy flavor of regular breakfast meat without the massive pool of grease. I used to use the cheapest tube of pork sausage I could find. When I froze those burritos, the excess pork fat would congeal into thick, white, unappetizing clumps. Reheating them turned the inside of the wrap into an oil slick. It’s a terrible texture. Switching to a leaner protein fixed this issue instantly. The chicken sausage browns up beautifully in a hot skillet. The smell of the spices blooming in the pan is incredible. If you’re looking for vegetarian options, plant-based grounds or black beans work perfectly. I usually drain and rinse a can of black beans, mashing some of them so they hold together better inside the wrap. The mashed beans add a creamy texture and a huge boost of fiber. You won’t even miss the meat. Just make sure you season the lean meats heavily, as they don’t have as much natural fat to carry the flavor. I’ve also experimented with adding a pinch of smoked paprika to the chicken sausage while it browns. It gives it a slightly smoky flavor that mimics bacon without the added grease. It’s a tiny adjustment that completely changes the flavor profile of the meal.
8. Optimize Vegetable Prep with Oven Roasting

Instead of standing over the stove sautéing vegetables for twenty minutes, you have to try oven-roasting your diced bell peppers and onions. I buy the Kroger Tri-Color Bell Peppers for $3.99 a 3-pack. I chop them up, toss them with a little olive oil, salt, and pepper, and spread them on a single sheet pan. I roast them at 400 degrees for about 20 minutes until the edges are dark and caramelized. This method is completely hands-off and saves me so much time and dirty dishes. I used to crowd a tiny frying pan with raw onions and peppers. They would just steam in their own juices and turn into gray mush. The texture was awful. Roasting them concentrates their natural sugars and gives them a slight char that tastes amazing inside a burrito. If I’m feeling indulgent, I’ll toss the raw veggies in a tablespoon of reserved bacon fat before roasting. The savory depth it adds is unbelievable. The smell of roasting peppers fills my entire apartment on Sunday afternoons. It’s my favorite part of the prep routine. Once they’re done, I let them cool completely on the pan before adding them to my assembly station. I’ve found that cutting the vegetables into uniform, half-inch pieces ensures they roast evenly. If you chop them too large, they won’t cook through, and biting into a massive chunk of raw onion in a frozen burrito is a highly unpleasant experience.
11. Flash Freeze and Reheat for Breakfast Burrito Meal Prep

After wrapping each burrito individually, you have to flash freeze them. I place them on a baking sheet in a single layer and freeze them for 15 to 20 minutes until solid. I line the pan with Trader Joe’s Parchment Paper, which costs $3.99 a roll, so they don’t stick. This prevents them from freezing together in one massive clump before I transfer them to a freezer bag. Always label your bags with the date. I’ve played freezer meal roulette on busy mornings, and biting into a three-month-old, freezer-burnt wrap is awful. They stay good for 1 to 3 months. When it’s time to eat, reheating correctly is vital. For the best texture, I leave them in the foil and bake at 400 degrees for 20 to 30 minutes from frozen. Then I unwrap them and bake for another 20 minutes until golden. If I’m in a rush, the air fryer is my best friend. I toss them in at 380 degrees for 8 to 12 minutes, flipping halfway. The exterior gets incredibly crispy, and the inside stays piping hot. Microwaving wrapped in a damp paper towel for 2 to 4 minutes is the fastest method, but it leaves the tortilla a bit soft. I’d suggest experimenting with the skillet method on weekends. Thaw the burrito overnight, then crisp it up in a pan with a tiny bit of oil. The golden brown crust you get from a hot skillet is unbeatable, even if it takes a few extra minutes of active cooking time.
I’m so glad I finally nailed this routine. Having a freezer full of perfectly prepped breakfasts has completely changed my mornings. I don’t skip breakfast anymore, and I don’t waste money at the drive-thru. I’d highly recommend taking two hours this Sunday to try this out. Grab the right tortillas, cool your fillings, and wrap them tight. Save this post or pin it to your meal prep boards so you can reference the exact baking temperatures later. You won’t regret waking up to a hot, crispy meal that’s already completely finished!
Frequently Asked Questions
How long do meal prep breakfast burritos last in the freezer?
They stay fresh for up to three months when wrapped tightly in foil and stored in an airtight freezer bag. Label them clearly with the date to keep track.
How do you keep breakfast burritos from getting soggy when frozen?
Cool all fillings to room temperature before assembling to prevent steam condensation. Layering cheese directly on the tortilla also creates a moisture barrier against the eggs.
What is the best way to reheat frozen breakfast burritos?
For the crispiest texture, bake them in foil at 400°F for 20-30 minutes, then unwrap and bake for 20 more. An air fryer at 380°F for 8-12 minutes also works perfectly.
Can I put fresh avocado or salsa in a freezer burrito?
Skip the fresh avocado, guacamole, and salsa before freezing, as they become watery and mushy when thawed. Add these wet ingredients fresh after reheating your meal.
